My Weather Station setup
Monday, January 26. 2015
As you already know, I love all kinds of gadgets. When it comes to weather, simply having a reading of outside temperature isn't nearly enough for me. I've had a weather station running for a while, but now that I connected into the on-line world, its time to publish my setup.
The unit I'm running is a WS2357 from La Crosse Technology. They say its a "Pro family" product, but still is very affordable. I paid 150,- € for mine. On the link there's all the tech specs, but it is your basic unit having temperature, pressure, humidity measurements indoors and outdoors. Also for outdoors, there is a wind direction and speed meters and a rain gauge. It is mainly battery powered and data from outside to inside can be transmitted either wirelessly (that's how I do it) or with a wire. Apparently the max. length for the wire would be 20 meters, which exceeds my setup. But for a wireless transmission, the limit is 100 meters. It works well trough house walls.
This is what the outdoors temp, humidity, pressure unit looks like:
This is the "central unit" of outdoors. The size is surprisingly small, but it still holds 2 AA-sized batteries and RJ-11 connectors for wind, rain and indoors. When installed outdoors, it comes with a rain cover which also should insulate it from direct sunlight. This small box is battery powered, but as I never want to climb to my roof to change the batteries, I drilled a small hole for an electric cord, which I soldered into the battery contacts. On the other end of the cord I have a 3,3 VDC transformer acting a battery.
I'm not happy with the temperature measurement, it reacts too fast when sun starts to shine on it. A properly ventilated cover would do better job. In my previous unit this wasn't an issue.
The rain gauge looks like this:
How this operates is very simple. At the bottom of the funnel, there is a small seesaw. When there is enough weight (in form of water) at the seesaw, it will tilt. This empties a cup on the other end and makes the seesaw tilt to the other direction. As it is known exactly how much weight is needed for the action to take place and the area of the unit's intake, it is possible to calculate the amount of water that has rained on that particular area and extrapolate that into WMO specs. On the minus side of the rain gauge, it had zero installation brackets. I ended up gluing it into a metal T-bar connected to my setup.
With this one I have no complaints. It is very sensitive and seems to give accurate enough readings. Once when weather turned from +2 into -4 it froze for a couple of days. As there was very little wind, the wind direction didn't change at all. Normally wind direction is a scattercloud, but in this instance wind direction was fixed. The problem was solved when wind picked up. So, it wasn't that bad.
This is how my entire setup looks like as installed:
The temperature gauge could be couple of meters higher just to make sure, it wouldn't pick up any extra heat from the roofing on sunny days. I did do some measurements and that could give a boost to my outside temp readings if there is no wind at all.
To get the unit connected into on-line world, I created an account at Weather Underground. I'll transmit the readings from the unit there. To hook the unit up into my Linux-box, I had to a lengthy cable between the indoors unit and my computer. I lucked out with the protocol, as it is RS-232. I simply cut the cable at the D-9 -connector, and soldered an extension cord of 17 meters. The pin ordering is as follows:
The rule-of-thumb max. length for 2400 bps data rate is 60 meters (according to this table), so my cabling worked out perfectly.
For the software at Linux-end I went for Open2300. It is an open-source set of tools to extract necessary information from my station and publish them to The Net. I'm using a simple cron-job for it:
# Weather Underground update
*/10 * * * * ~/Open2300/wu2300 ~/Open2300/lacrosse.conf
On the Wunderground-end I had major issues. First it didn't receive any of my transmissions. It kept insisting "INVALIDPASSWORDID|Password and/or id are incorrect", which wasn't true. I knew exactly what the password was. After couple of hours, it started working. I'm guessing their data receiving front-end gets the new accounts in a batches, and they are nowhere near real-time.
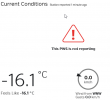
When my data started flowing, the web-front said:
... which was more than funny. If it wasn't getting any readings, why it says that the most recent one was received a minute ago. ![]()
After solving all these minor glitches I was real happy with this setup. Now my station participates in a community of 60k stations all over the world. Also I can check what's the weather like while still keeping my eyes on my precious computer. ![]()
HOWTO: Build a Proper LAN with Copper Ethernet Cabling
Wednesday, January 21. 2015
Having a reliable LAN is an essential part of your Internet connection. Going for a wireless solution is fast to build (pretty much plug and use), but as everybody is running one nowadays, the 2,4 GHz band is getting crowded. It is possible to go 5 GHz which is less crowded, has more capacity and is less prone to be blocked by your household microwave oven sending noise to 2 GHz band.
The only real option is to use the wireless toys for mobile devices and tablets, but use old fashioned wired connections for real computers. The catch is, that it is pretty difficult to build and costs more than your average Wi-Fi access point.
Part 1: Planning
What is needed for LAN-build:
- Cabling:
- Lots of it! I rolled over 130 meters of siamese copper cable into my project.
- With siamese cable I get two Ethernet connections on a one cable.
- Patch panel:
- This is the other end of the line. Typically placed into server room or rack.
- Here is the one I got.
- RJ-45 wall sockets:
- This is where you connect your equipment into. I used twin-sockets for twin-cabling.
- The recommendaton I had was to go for LexCom 250 (apparently same as Actassi here). I couldn't use them in my project as they had very long delivery time. They were bit more expensive too, but I've gladly paid for them if only I had gotten any.
- I went for ABB FOT6208 which were easily available. I later learned, that they are not so handy to install as LexCom would be.
- Ethernet switch:
- That will distribute your LAN into every wall socket.
- Any gigabit ethenrnet switch will do, even the cheapest ones.
- I got a HP 1910-24G. It has management via web in it and a fan. When running, the fan makes noise, but I'm placing it in a dedicated room inside a rack, so I need it to function at all temperatures.
- (optional) 19" Rack:
- This is handy for the patch panel and switch. A small 4-5 U telco-sized rack will do.
- This is the one I got.
- Cable routing plan:
- An idea where you can route the cables and where to place the wall sockets.
- Lastly:
- Basic cabling skills and lot of enthusiasm.
- Typical environments will require drilling holes, cutting cables and combing the twisted pairs ouf of them.
- To hide the cables in rooms, I used plastic cord cover. On tight corners I drilled hole into it and used a screw. The cover I used is self-sticking, but I know from experience, that the glue won't stand the test of time. Ethernet cable is quite heavy for any sticker to carry.
All that should cost less than 1k €.
Part 2: Implementation
I started by drilling couple of holes for the cable. Then I attached the wall sockets into drywall:
This is what my siamese cabling look like:
That's your basic 4 twisted pairs in a cable. In the middle of the cable there is a plus-shaped plastic filler. It makes the cable flex a little bit better. Ethernet cabling shouldn't have too tight corners anyway, but its different story to lure the cable through ceiling or wall if it doesn't give way at all.
My sockets and RJ-45 connectors are ABB FOT6208 toolless:

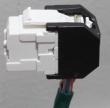
It is quite easy to hook one up:![]()

I used T568A pin-to-pair assignment. You can notice that from the connector pic. The colour coding of cables match the upper row at the connector.
My siamese cabling had text on one of them. It was possible to identify the other pair when connecting. See how it contains the amount of meters rolled out:![]()
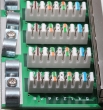
At the patch panel I have Krone connectors:
A specific tool is required to make the cabling stick:
Even though a single cable is quite thin, the connection is robust. This is how the patch panel will look like when all the pairs have been connected:
I always tested every connection before proceeding:![]()

When confirmation was made, that the connection would work ok, it was time to put the wall socket together:

That was it. It was just about repeating the same thing for every cable and wall socket.
Part 3: Wrap-up
Was it worth it? Absolutely!
Now I have properly functioning gigabit Ethernet in every room at the house. It works so much better at high speeds than any Wi-Fi I've ever tested.
A collegue really loved my home LAN. He said, that not all businesses have installation of that scale:
"The most overkill home LAN installation"
- Thomas C.


