Bare Bones Software - BBEdit - Indent with tab
Saturday, October 28. 2023
As a software developer I've pretty much used all text editors there is. Bold statement. Fact remains there aren't that many of them commonly used.
On Linux, I definitely use Vim, rarely Emacs, almost never Nano (any editor requiring Ctrl-s over SSH is crap!).
On Windows, mostly Notepad++ rarely Windows' own Notepad. Both use Ctrl-s, but won't work over SSH-session.
On Mac, mostly BBEdit.
Then there is the long list of IDEs available on many platforms I've used or am still using to work with multiple programming languages and file formats. Short list with typical ones would be: IntelliJ and Visual Studio.
Note: VScode is utter crap! People who designed VScode were high on drugs or plain old-fashioned idiots. They have no clue what a developer needs. That vastly overrated waste-of-disc-space a last resort editor for me.
BBEdit 14 homepage states:
It doesn’t suck.®
Oh, but it does! It can be made less sucky, though.
Here is an example:
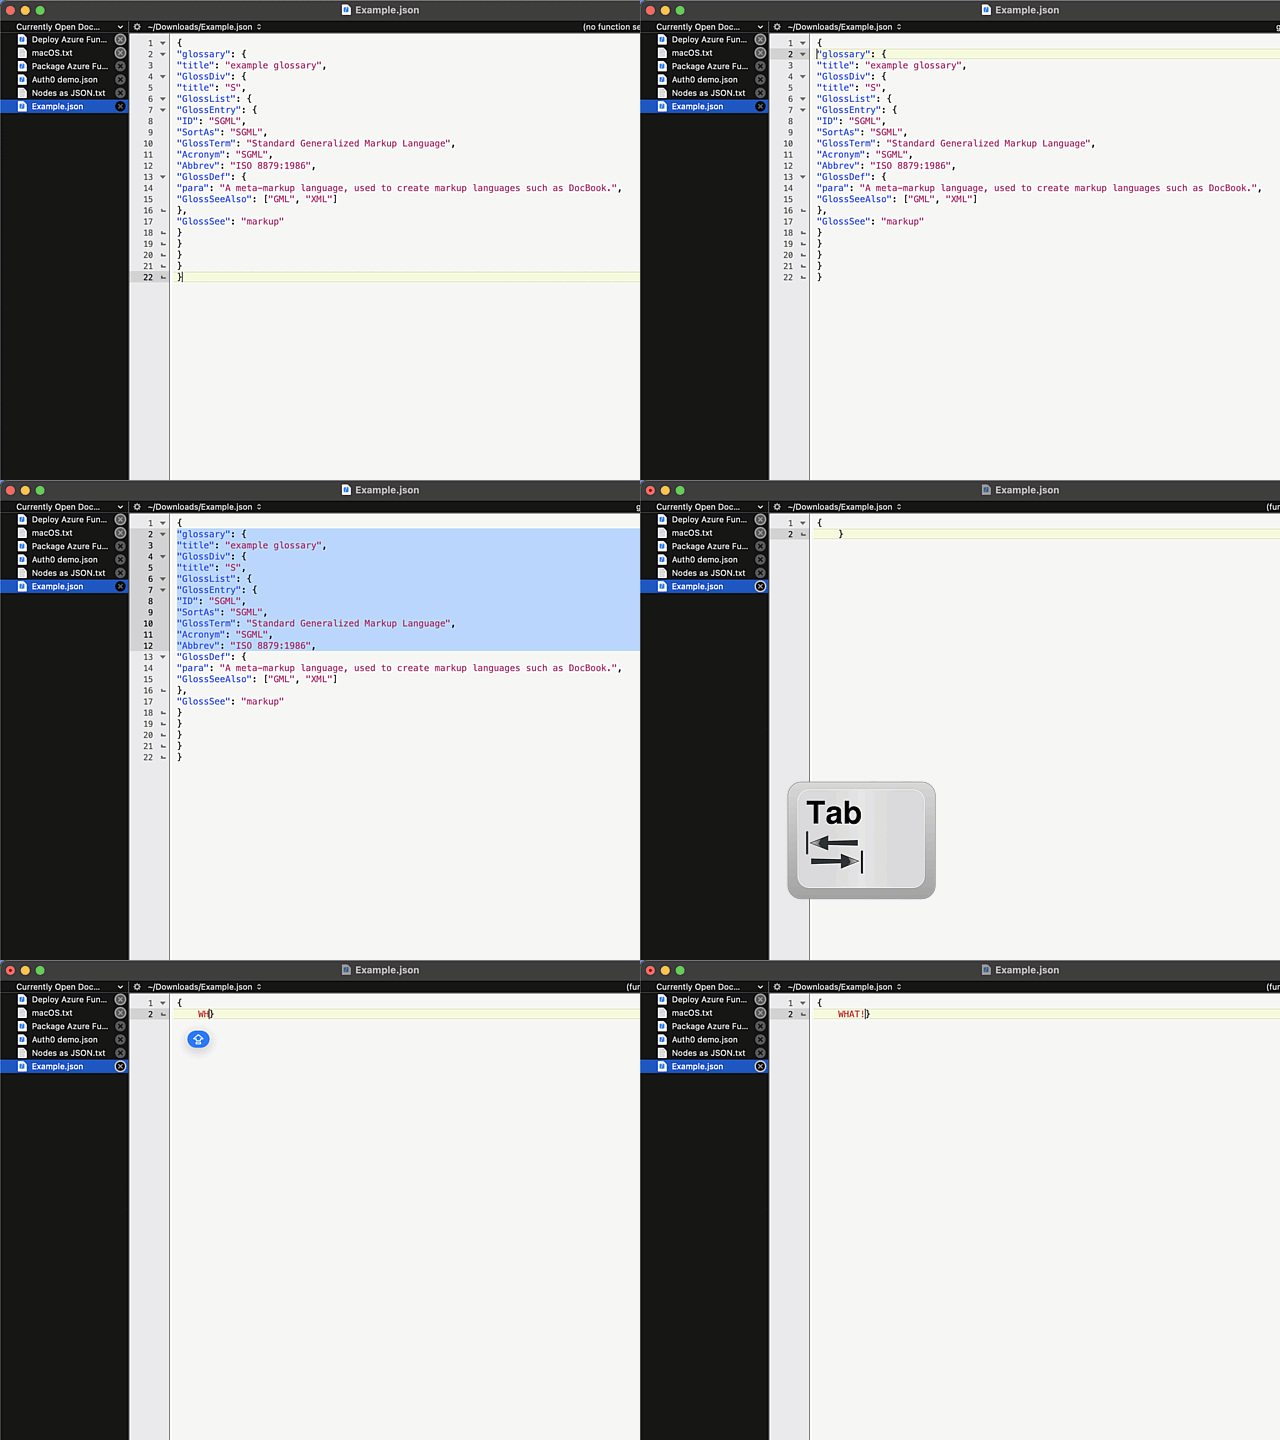
In above example, I'm editing a JSON-file. It happens to be in a rather unreadable state and sprinkling bit of indent on top of it should make the content easily readable.
Remember, earlier I mentioned a long list of editors. Virtually every single one of those has functionality to highlight a section of text and indent selection by pressing Tab. Not BBEdit! It simply replaces entire selection with a tab-character. Insanity!
Remember the statement on not sucking? There is a well-hidden option:
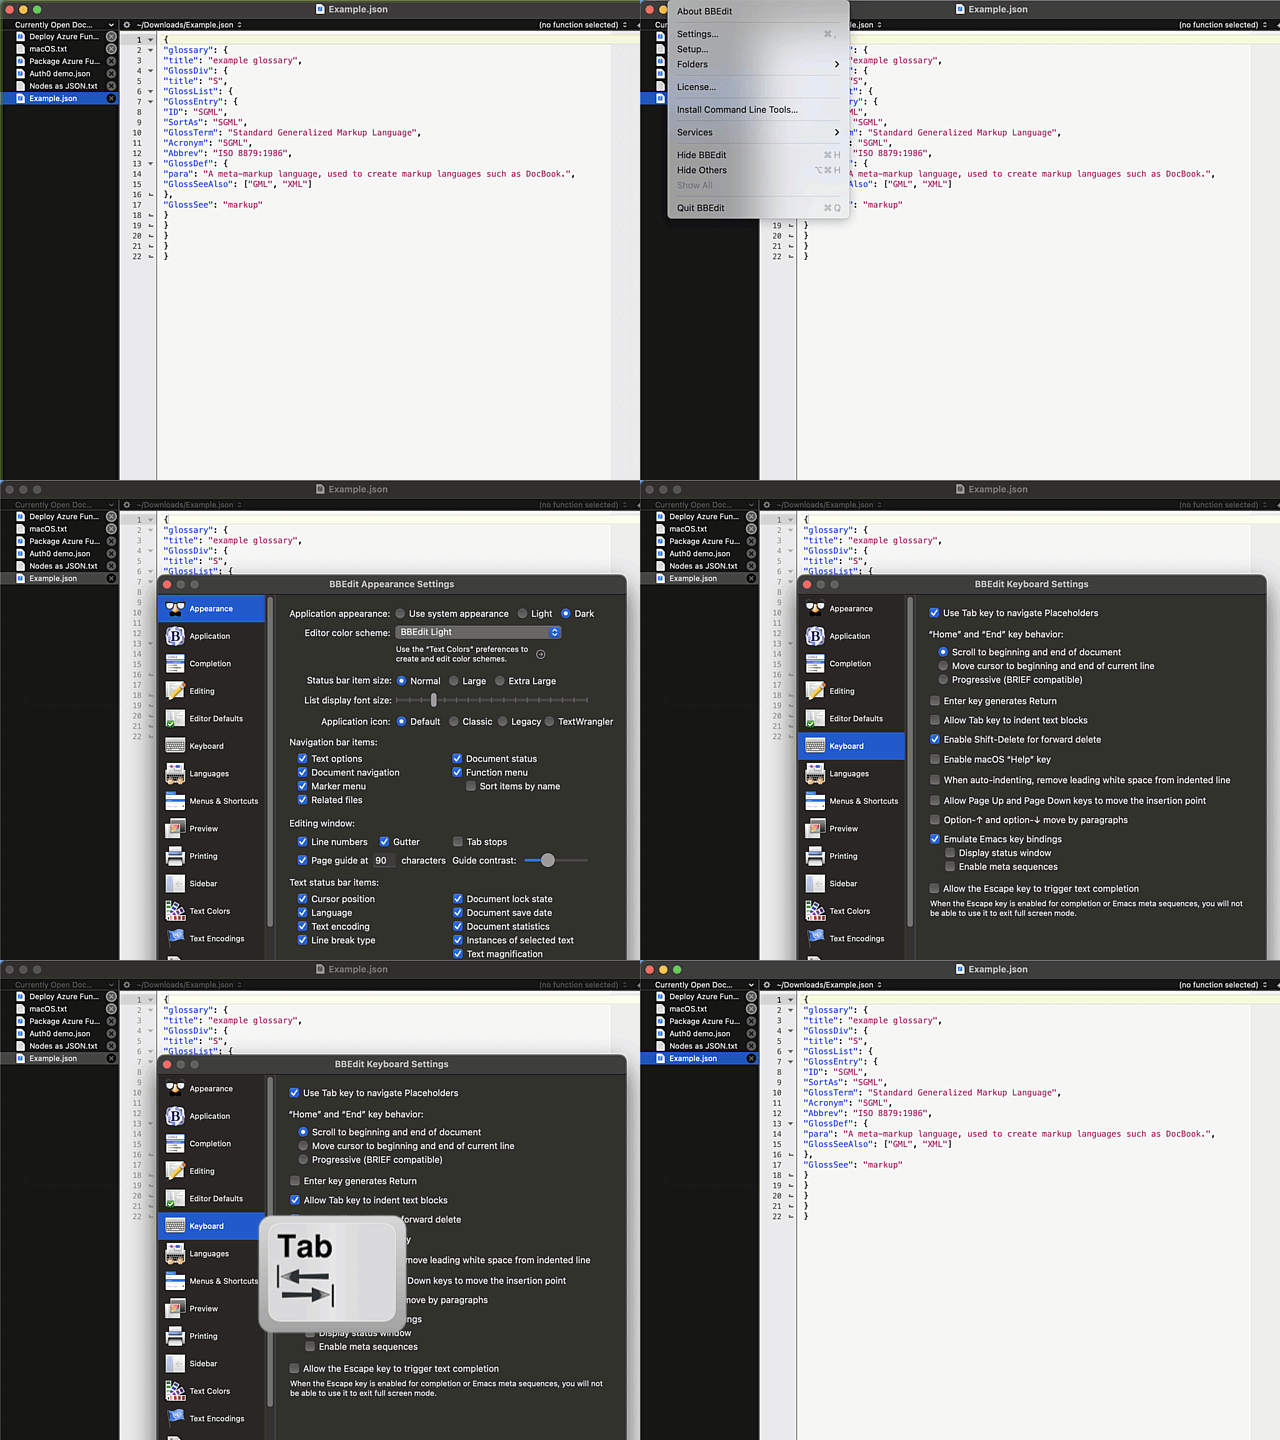
The secret option is called Allow Tab key to indent text blocks and it was introduced in version 13.1.2. Why this isn't default ... correction: Why this wasn't default behaviour from get-go is a mystery.
Now the indention works as expected:
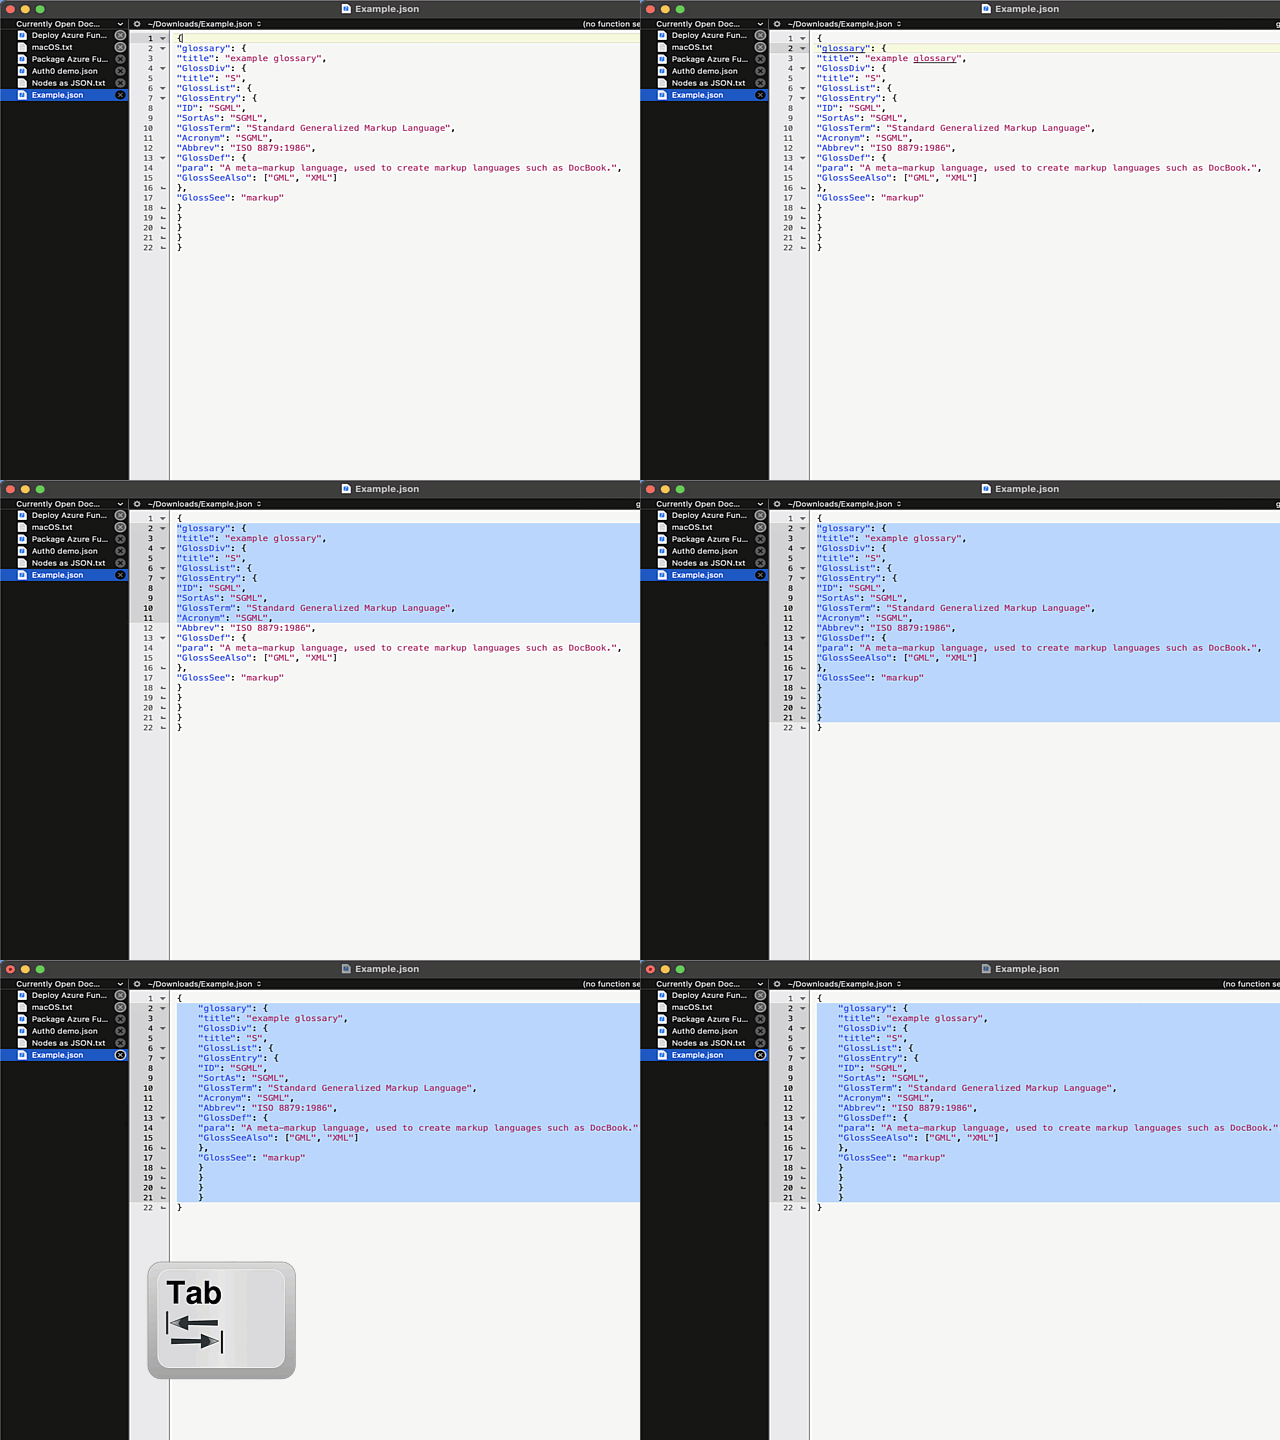
What puzzles me is the difficulty of finding the option for indenting with a Tab. I googled wide & far. No avail. Those technical writers @ Barebones really should put some effort on making this option better known.
macOS Monterey upgrade
Monday, November 1. 2021
macOS 12, that one I had been waiting. Reason in my case was WebAuthN. More about that is in my article about iOS 15.
The process is as you can expect. Simple.
Download is big-ish, over 12 gigabytes:

After the wait, an install will launch. At this point I'll typically quit to create the USB-stick. This way I'll avoid downloading the same thing into all of my Macs.
To create the installer, I'll erase an inserted stick with typical command of:
diskutil partitionDisk /dev/disk2 1 GPT jhfs+ "macOS Monterey" 0b
Then change into /Applications/Install macOS Monterey.app/Contents/Resources and run command:
./createinstallmedia \

  --volume /Volumes/macOS\ Monterey/ \

  --nointeraction
It will output the customary erasing, making bootable, copying and done as all other macOSes before this:
Erasing disk: 0%... 10%... 20%... 30%... 100%

Making disk bootable...

Copying to disk: 0%... 10%... 20%... 30%... 40%... 50%... 60%... 70%... 80%... 90%... 100%

Install media now available at "/Volumes/Install macOS Monterey"
Now stick is ready. Either boot from it, or re-run the Monterey installed from App Store.
When all the I's have been dotted and T's have been crossed, you'll be able to log into your newly upgraded macOS and verify the result:
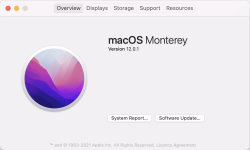
At this point disappointment hit me. The feature I was looking for, WebAuthN or Syncing Platform Authenticator as Apple calls it wasn't available in Safari. To get it working, follow instructions in Apple Developer article Supporting Passkeys. First enable Developer-menu for your Safari (if you haven't already) and secondly, in it:
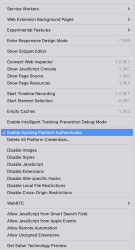
Tick the box on Enable Syncing Platform Authenticator. Done! Ready to go.
Now I went to https://webauthn.io/, registered and account with the Mac's Safari, logged in with WebAuthN to confirm it works on the Mac's Safari. Then I took my development iPhone with iOS 15.2 beta and with iOS Safari went to the same site and logged in using the same username. Not using a password! Nice. ![]()
Maybe in near future WebAuthN will be enabled by default for all of us. Now unfortunate tinkering is required. Anyway, this is a really good demo how authentication should work, cross-platform, without using any of the insecure passwords.
macOS Big Sur 11.1 update fail
Monday, August 30. 2021
Big Sur was riddled with problems from getgo. It bricked some models, started installing when there was not enough disc space available and all kinds of weirness. Quite few of the minor versions had issues.
I was stuck with version 11.0.1 for over half a year. Of course my mac was hit by one of the problems, I tried navigating around the problem, contacted Apple Care (yay! finally got something ouf of that extra money) and they said a full install will be required. When doing the full install didn't work I lost motivation and just ignored any updates for months.
Going for the typical path, macOS of receving a notification about update or via App Store, they are pretty much the same thing, difference being if I actively seeked for updates or was reminded about it. Result:
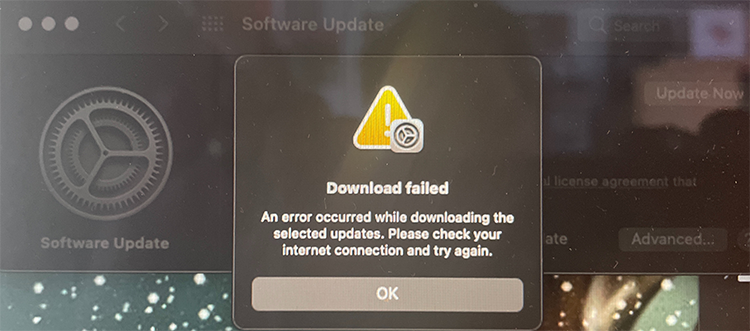
Ok. Doesn't seem to work. I triied downloading on Wi-Fi, on Ethernet with couple of adapters, then I gave up and went for my favorite way of doing updates, USB-stick. Preparing the stick, booting from it, quite soon I was informed about "A software update is required to use this startup disk".
Clicking Update resulted an instant error:
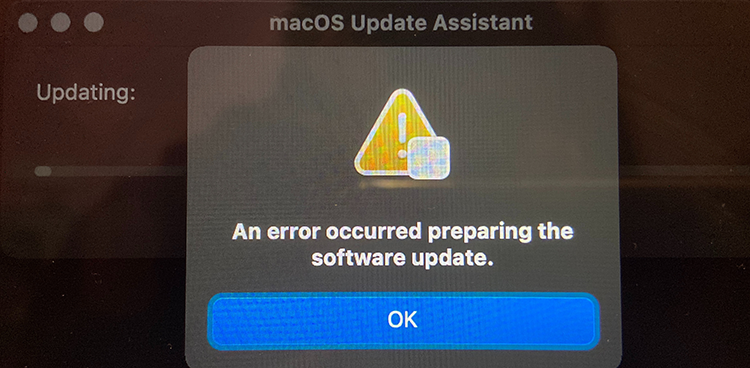
Preparing something to do something didn't go as planned. Error message of "An error occurred preparing the software update" was emitted. Trying again wouldn't help. Booting into Internet recovery wasn't helpful either, error -2003F indicating failure to access resources over Internet. All avenues were explored, everything I knew was done. I totally lost motivation to attempt anything. All that time the Apple Care chat message "just do a clean reinstall" demotivated me more. I WAS TRYING TO DO A CLEAN REINSTALL!! It just didn't work.
I wasn't alone. Many many many users had exactly the same symptoms.
Months passed.
Macs are funny that way. Apple does "support" their old macOSes for security, but old hardware has a cap on what macOS will be the the last one for that particular hardware. At the same time you absolutely positively need to fall forward into latest macOS versions to have support for all nice software. My Mac wasn't capped by obsoleted hardware, it was capped by Apple's own QA failing and allowing a deploy on an OS version that wouldn't work properly. In this case, I needed to update Xcode, the must-have Mac / iOS developer tool. The version I had runing worked, but didn't support the new and shiny things I needed. I wasn't allowed to upgrade as my Big Sur version was too old.
You Maniacs! You blew it up! Ah, damn you! God damn you all to hell!
(For movie-ignorant readers, that quote is from -68 Planet of the Apes)
Need for a recent Xcode sparked my motivation. I went back to the grinding stone and trying to force my thing to update. I re-did everything I had already done before. No avail. Nothing works. Every single thing I attempted resulted in a miserable failure. To expand my understanding about the problem I read everything I could find about the subject and got hints what to try next. Apparently the problem was with the T2-chip.
For the umphteenth time I did a recovery boot and realized something I didn't recall anybody else mentioning:
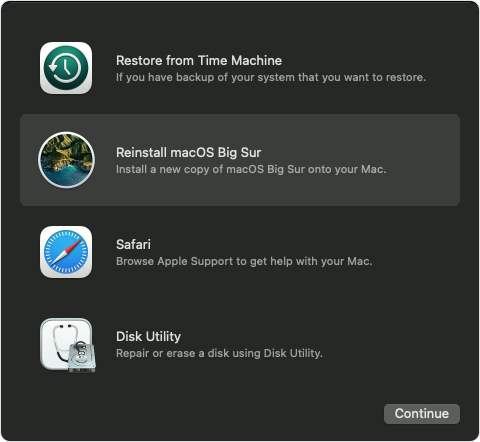
Among numerous options to install or upgrade macOS I knew about, there is one additional approach in the recovery menu. And IT WORKED!
To possibly help out others still suffering from this, I left my mark into StackExchange https://apple.stackexchange.com/a/426520/251842.
Now I'm banging my head to a brick wall. Why didn't I realize that sooner! ![]()
Anyway, the Mac is updated, newer software is running. Until similar thing happens for the next time, that is.
HyperDrive PRO 8-in-2 firmware upgrade
Tuesday, May 26. 2020
As mentioned in my USB-C article, I'm describing how I managed to upgrade my 8-in-2 firmware WITHOUT installing Boot Camp into my macOS.
Hyper has a support article Screen flickering with Pro? Please check this out. What they ultimately suggest, and what I instantly rejected is:
- Install Boot Camp
- Boot the Mac into Windows 10
- Run the app to do the Hyper 8-in-2 firmware upgrade
- Enjoy flicker-free life!
My mind was targeted to jump directly into step 3 and 4. I attempted a number of things and kept failing. So, I dug out my humility-hat and went to step 2. That one was a great success! For step 1 I would have never gone. That's for sure. I'm not going to taint this precious Mac with a dual-boot.
Constraints
This is the list of restrictions I painfully figured out:
- HyperDrive 8-in-2 has dual USB-C -connector, making it impossible to physically attach to anything else than a MacBook Pro.
- USB-C extension cords do exist. Purchase one (you don't need two) and lift the physical connectivity limitation.
- Provided application,
VmmUpdater.exeis a 32-bit Windows PE executable, more information can be found @ Hybrid Analysis - Firmware upgrade won't work on a random PC having USB-C -port.
VmmUpdater.exewon't detect the Synaptics chip without Apple AMD-drivers.- The driver won't install if your hardware doesn't have a suitable GPU.
- A Mac won't boot from an USB, unless allowed to do so
- A Mac will boot only to a 64-bit operating system, a 32-bit Windows 10 won't work
- A 64-bit Windows 10 installer doesn't have WoW64 in it to emulate a 32-bit Windows
- To actually upgrade the Synaptics chip's firmware, it needs to be in use
- Windows needs to understand the existence of the video-chip
- Windows needs to actually use the video-chip via HDMI to produce output. Any output will do. No picture --> no upgrade.
- Apple keyboard and touchpad will not work in a default Windows 10 installation
- Some of the Windows drivers used by a MBP can be downloaded from Internet automatically, IF you manage to get an internet connection into a Windows 10 running on a Mac.
- Some of the Windows drivers are not available
- macOS cannot write to a NTFS-partition, it can read the data ok
Requirements
- Hardware:
- A HyperDrive 8-in-2 (to state the obvious)
- A MacBook Pro (to state the nearly obvious), I used 2019 model
- A Windows 10 running in a PC (to state the not-so-obvious)
- USB-stick with at least 8 GiB of storage, capable of booting (I think all of them can)
- USB-keyboard, during tinkering your Mac's keyboard won't work at all times. Any USB-keyboard will do.
- HDMI-cable connected to an external monitor.
- Software:
- Synaptics tool and EEPROM-file provided by Hyper.
- Rufus
- Ability to:
- Download files from The Internet
- Execute Rufus on a platform of your choice to write into the USB-stick. I did this on a Windows 10 PC.
- Run Boot Camp Assistant on a macOS, I used macOS 10.15 Catalina.
- Write files into NTFS-formatted USB-stick. Any Windows 10 can do this.
Steps
1. Save a Windows 10 ISO-image into USB-stick as Windows to Go
Option: You can do this as a second thing.
Windows to Go, that's something not many have used nor ever heard. It's already obsoleted by Microsoft, but seems to work ok. The general idea is to create an USB-bootable Windows you can run at any computer.
That's definitely something I'd love to use for this kind of upgrade!
The easiest way of injecting a Windows 10 ISO-image into USB in a suitable format is Rufus. Go to https://rufus.ie/ and get it. It's free (as speech)!
GPT-partition table is a critical one make sure to choose it. These are the options I had:
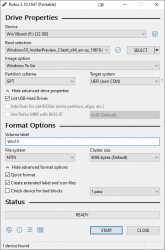
Warning: The process is slow. Writing image with Rufus will take a long time. Much longer than simply copying the bytes to USB.
2. Download Boot Camp support files
Option: You can do this first.
Recent macOS have limited Boot Camp Assistant features. Older ones could do much more, but modern versions can only Download Windows Support Software (it's in the Action-menu). Wait for the 1+ GiB download to complete.
3. Transfer files to USB-stick
Warning: The stick is formatted as NTFS. A Mac won't write into it. You need to first transfer the files into a Windows, and use the Windows to write the files into the USB.
Transfer the WindowsSupport\ folder downloaded by Boot Camp Assistant to the USB-stick prepared earlier. Subdirectory or not doesn't make a difference, I simply copied the directory into root of the USB-drive.
Also transfer the files from Hyper support article https://hypershop.zendesk.com/hc/en-us/articles/360038378871-Screen-flickering-with-Pro-Please-check-this-out-.
Note: Only the .exe and .eeprom are needed, I skipped the .docx as they're not needed during the upgrade.
After successful transfer, you won't need a Windows PC anymore. All the next steps are on a Mac.
4. Enable Mac USB-booting
Study Apple support article HT208198 About Startup Security Utility.
You need to shutdown your Mac. Then plant your fingers onto Command and r keys, put the power on and then wait. Apple logo will appear, then a white progress bar will appear. You can release the Command-r at that point. If you'll be using an encrypted hard drive like I, you'll need to know a valid user on that Mac and enter that user's password to be allowed into Startup Security Utility.
The choices you need to have are:
- Secure boot: No security
- External boot: Allow booting from external or removable media is enabled
This is how Parallels would depict the settings in their KB-article 124579 How to allow Mac to boot from external media:
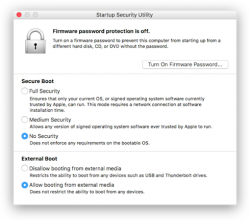
(Thanks Parallels for the pic!)
Note:
After you're done upgrading Synaptics firmware, you can go back to recovery, Startup Security Utility and put the settings back to higher security. For the one-shot upgrade the settings need to be at max. insecure settings.
5. Boot Windows 10 from USB
When you reboot a Mac, plant your finger on Option (some keyboards state Alt) key and wait. Pretty soon a boot menu will appear.
If you had the USB-stick already inserted, it will be displayed. If you didn't, this is your que to insert your Hyper 8-in-2. The Windows 10 USB can be inserted into the HyperDrive, your Mac will boot from there ok.
Your choice is to go for EFI Boot and wait for Windows 10 logo to appear.
Congrats! Now you're heading towards a Windows that won't respond to your keyboard nor touchpad.
6. Establish Windows to Go functionality
Make sure you have an USB keyboard available. This entire process can be done without Mac's own keyboard, it's just your own preference how you want to approach this. Getting the keyboard to work requires a keyboard, success is measured only on results. Make smart choices there!
If you can get the Windows 10 to connect to internet, that will solve some problems with missing drivers as they can be downloaded from a Microsoft driver repository. For Internet access, I used an USB-dongle to establish a Wi-Fi connection. Doing that requires selecting the correct Access Point and entering its password. On a machine without keyboard or mouse that WILL be difficult! Ultimately both the Apple keyboard and touchpad should start working and external keyboard won't be needed.
Note: The drivers for both are in WindowsSupport downloaded by Boot Camp Assistant. If you can point Windows Device Manager to load driver upgrades from there.
Warning!
Your Windows to Go will create a massive hiberfil.sys to enable hibernation. This can be a problem as typically the hibernate-file will be sized 75% of your RAM. This particular Mac has lots of RAM and the USB-stick would never be able to store such a file. So, eventually you're likely to run out of storage space. That is harmful, but can be easily remediated.
To fix, run command:
powercfg /hibernate off
Now the massive file is gone. Next, establish proper video. Your Windows Device Manager will look something like this:
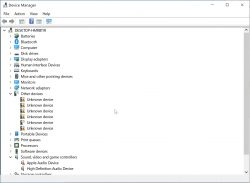
There are bunch of device drivers missing. The most critical one is for GPU. I tried running WindowsSupport\setup.exe, but it never progressed and I simply didn't do that at all. Instead, I executed WindowsSupport\BootCamp\Drivers\AMD\AMDGraphics\setup.exe which enabled proper video to be displayed.
7. Go upgrade Synaptics firmware
All the hard work only for this! Make sure your Hyper 8-in-2 has HDMI-cable connected and monitor will display Windows 10 in it. If you don't have that, when executing the VmmUpdater.exe an error will display:
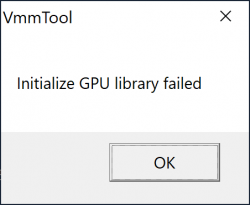
VmmTool: Initialize GPU library failed.
Also different VmmTool error variants can occur. If your Windows will detect the monitor and display video, then you're set!
When VmmTool will display current firmware information, you're golden!
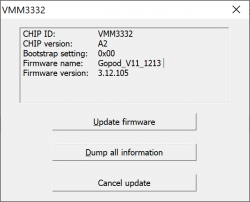
Initially my 8-in-2 had firmware version 3.12.105.
Select the .eeprom file and a progress bar will indicate:

Running the upgrade won't take long. Something like 30 seconds or so. When upgrade is done, it will be indicated:

At this point, yank the 8-in-2 out of Mac and make sure you don't have USB-C power connected to it. The general idea is to power-cycle the recently updated Synaptics chip. When done, put everything back and run VmmUpdater.exe again.
This time it will indicate the new firmware version:
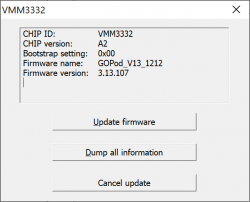
The version 3.12.105 got bumped into 3.13.107. Nice! Hopefully it will do the trick.
8. Boot into macOS and test
This is it. Will it work?
In my case it did. When my Mac wakes up, a single blink will happen in the external display, but no flickering or other types of annoyances.
Done! Mission accomplished!
(phew. that was a lot of work for a simple upgrade)
USB-C Video adapters for MacBook Pro
Monday, May 25. 2020
In professional life, I stopped being a Windows-guy and went back being a Mac-man. The tool-of-trade provided by me is a MacBook Pro 2019. Those new Macs are notorius for having not-so-many ports. My Mac has two (2). Both are USB-C. In my previous MBP (that was a 2014 model), there were ports all over the left side and a bonus USB on right side.
The problem remains: How to hook up my external monitor to increase my productivity by the macigal 30%? Actually, I believe any developer will benefit even more by having a lot of display real estate on his/hers desk.
So, new Mac, new toys needed for it. I had one USB-C to DVI -converter before, but for this Mac, I went on-line shopping to get the good stuff:
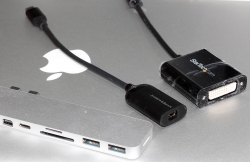
From left to right:
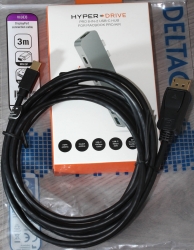
- HyperDrive PRO 8-in-2: A pricey alternative offering a lot of connectivity, disappointing initial quality.
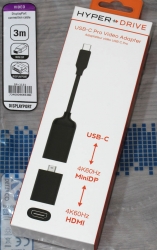
- HyperDrive USB-C Pro Video: An already obsoleted product. Small and does the job. This is my recommendation!
- No-name StarTech.Com CDP2DVI: Cheap thing working perfectly on a Lenovo PC. Unusable with a Mac!
Obsoleted HyperDrive shop screenshot:
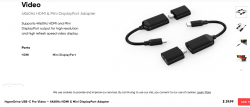
The pricey alternative looks like this (on top of a complimentary leather pouch):

Cheap no-name one won't even blink in a MBP. The simple HyperDrive works like a charm! Mac sees it and monitor auto-detects the signal. The expensive one blinks when connected to a Mac. It blinks a lot. All the other ports work perfectly, but HDMI and mini-DP not-so-much. Hyper has a support article about 8-in-2- flickering. Lots of discussion in StackExchange about Apple being picky about cables and converters, examples: Dual monitor flickering: the secondary monitor does the flicker and External monitor flicker / signal loss. With the HyperDrive fix, I'll write an another post about the suggested firmware upgrade, it's complicated enough to deserve an own topic.
For me, the expensive HyperDrive works as a tiny docking-station. I have the USB-C charger connected to it among monitor cable. When I want to roam free of cables, all I have to do is detach the dual-USB-C dongle and that's it! Done. Mobility solved.
Final words:
With a Mac, do a lot of research beforehand and choose carefully, or alternatively make sure you'll get a full refund for your doesn't-work-in-my-Mac adapter.
macOS Catalina upgrade from USB-stick
Saturday, November 2. 2019
macOS 10.15 Catalina is a controversial one. It caused lot of commotion already before launch.
Changes in 10.15 from previous versions
64-bit Only
For those using legacy 32-bit apps Catalina brought bad news, no more 32-bit. Me, personally, didn't find any problems with that. I like my software fresh and updated. Some noisy persons in The Net found this problematic.
Breaking hardware
For some, the installation simply bricked their hardware, see Limited reports of Catalina installation bricking some Macs via EFI firmware for more details. This is bad. When UEFI upgrade does this kind of damage, that's obviously bad. The broken macs can be salvaged, but it's very tricky as they won't boot.
Installer size
For that past many years, I've had my OS X / macOS USB-stick. I own couple of macs, so you'll never know when OS installer will be needed. For catalina:
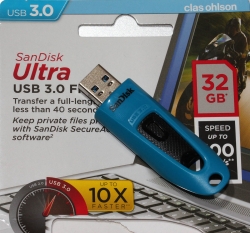
8 GiB wasn't enough! Whaaaaat? How big the installer has gone. So, I had to get a new one. Maybe it was about time. At the USB-stick shop I realized, that minimum size of a stick is 32 GiB. You can go to 128 or 256, but for example 8 isn't an option anymore.
Stupid alerts
The worst part in Catalina is the increased level of nagging:
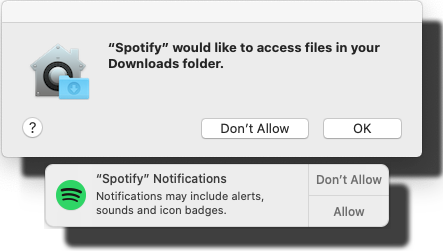
Every single app is asking me permission to do something. As usual, the questions are obscure at best. This same phenomenon is happening in Windows and Android. You're presented a question as a response to your action and the question has almost no relevance to anything you're trying to do. Yet the people designing these operating systems think it will vastly improve security to present user a Yes/No question without proper basis.
An example: For the above Spotify-question I chose to respond No. I have no idea why or for what reson Spotify needs to access any of the files in my Downloads-folder. That's so weird. Playing music doesn't mean you get to access my stuff. ![]()
Get macOS Catalina installer
The process has not changed. Go to App Store of your mac and choose macOS Catalina. It will take a while to download all of 8 GiB of it.
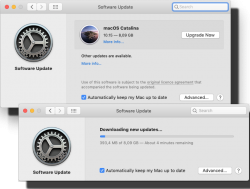
When the installer has downloaded and automatically starts, you need to quit the installer.
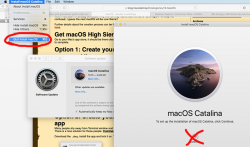
If you'd continue, the installer would upgrade your mac and at the final phase of upgrade, it would delete the precious macOS files. You need to create the USB-stick before upgrading. This is how couple past macOS versions save your disc space.
Create your USB-stick from command line
For reason I don't fully understand, DiskMaker X version 9 failed to create the stick for me. It did process the files and seemed to do something, but ultimately my USB-stick was empty, so I chose to do this the old fashioned way. Maybe there is a bug in the DiskMaker X and a new version has thata one fixed. Check it yourself @ https://diskmakerx.com.
Insert the USB-stick into the mac and from a command prompt, see what the physical USB-drive is:
diskutil list
My mac has the USB-stick as:
/dev/disk3 (external, physical)
The other drives are flagged either 'internal, physical', 'synthesized' or 'disk image'. None of them are suitable targets for creating Catalina installer stick.
Note:
Most of the commands below need root-access. So, either su - to a root-shell or prefix the commands with sudo.
Format the USB-stick. The obvious word of caution is: This will erase any data on the stick. Formatting doesn't wipe the sectors, but given a completely empty filesystem, your bits are quite lost there alone. Command is:
# diskutil partitionDisk /dev/disk3 1 GPT jhfs+ "macOS Catalina" 0b
The output is as follows:
Started partitioning on disk3

Unmounting disk

Creating the partition map

Waiting for partitions to activate

Formatting disk3s2 as Mac OS Extended (Journaled) with name macOS Catalina

Initialized /dev/rdisk3s2 as a 28 GB case-insensitive HFS Plus volume with a 8192k journal

Mounting disk

Finished partitioning on disk3

/dev/disk3 (external, physical):

   #:                    TYPE NAME                 SIZE       IDENTIFIER

   0:   GUID_partition_scheme                     *30.8 GB    disk3

   1:                     EFI EFI                  209.7 MB   disk3s1

   2:               Apple_HFS macOS Catalina       30.4 GB    disk3s2
Now your stick is ready, go transfer the macOS installer files to the stick. The newly formatted stick is already mounted (run command mount):
/dev/disk3s2 on /Volumes/macOS Catalina (hfs, local, nodev, nosuid, journaled, noowners)
Installer files are located at /Applications/Install\ macOS\ Catalina.app/Contents/Resources/:
cd /Applications/Install\ macOS\ Catalina.app/Contents/Resources/

./createinstallmedia \

  --volume /Volumes/macOS\ Catalina/ \

  --nointeraction
Output is as follows:
Erasing disk: 0%... 10%... 20%... 30%... 100%

Copying to disk: 0%... 10%... 20%... 30%... 40%... 50%... 60%... 70%... 80%... 90%... 100%

Making disk bootable...

Copying boot files...

Install media now available at "/Volumes/Install macOS Catalina"
Now your bootable USB-media is ready!
Upgrade
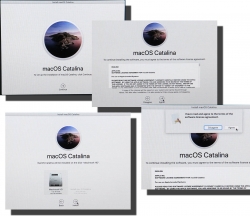
Boot your mac, press and hold your option-key pressed to access the boot-menu:
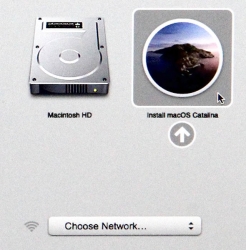
A menu will appear, select Install macOS to upgrade:
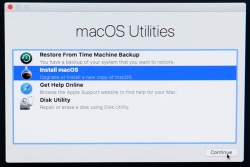
Only after those yes, I agree -clicks your upgrade kicks in. This is the part you can go grab a large cup of coffee, no user interaction is required for 30 to 60 minutes:
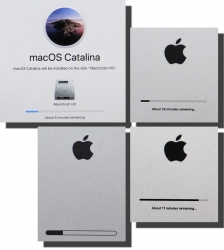
During the upgrade, there will be couple of reboots. My thinking is, that first the upgrade will do any hardware upgrades, then the actual macOS upgrade.
When you see the login-screen, your upgrade is done:
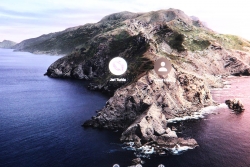
That's it! You're done. Enjoy your upgraded mac operating system.
macOS High Sierra upgrade from USB-stick
Sunday, October 15. 2017
Somebody at Apple really knows how to confuse users. I'm looking at Wikipedia article List of Apple operating systems:
- OS X Yosemite - 10.10
- OS X El Capitan - 10.11
- macOS Sierra - 10.12
- macOS High Sierra (Not to be confused with Sierra) - 10.13
Well ... too late! I'm already confused. Why the hell they had to use the same name again. To keep me confused, I guess the next macOS will be Low Sierra?
Further details about the creation process can be found from my previous blog post about macOS Sierra, here.
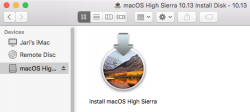
Get macOS High Sierra installer
Go to your Mac's app store, it should be there clearly visible. Start the installation and wait for the download to complete.
Option 1: Create your USB-stick from command line
You can always create your USB-stick from Terminal, as I've descibed in my previous posts:
Prepare USB-stick:
$ sudo diskutil partitionDisk /dev/disk9 1 GPT jhfs+ "macOS High Sierra" 0b

...

/dev/disk9 (external, physical):

  #:                  TYPE NAME               SIZE     IDENTIFIER

  0: GUID_partition_scheme                   *30.8 GB  disk9

  1:                   EFI EFI                209.7 MB disk9s1

  2:             Apple_HFS macOS High Sierra  30.4 GB  disk9s2
Create installation media:
$ cd /Applications/Install\ macOS\ High\ Sierra.app/Contents/Resources/

$ sudo ./createinstallmedia \

  --volume /Volumes/macOS\ High\ Sierra/ \

  --applicationpath /Applications/Install\ macOS\ High\ Sierra.app/ \

  --nointeraction
Option 2: Create your USB-stick with GUI app
Many people shy away from Terminal window and think the above (simple) commands are too complex. There is a nice solution for those people: DiskMaker X 7.
Download the .dmg, install the app and kick it on. You should see something like this:
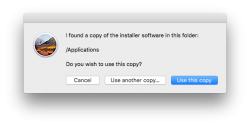
Next question is about type of disk to create (choose USB) and which USB to use:
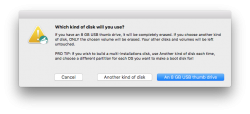
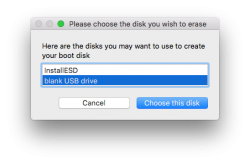
Then get past couple of warnings. Yes, you are about to destroy all data on the USB-stick:
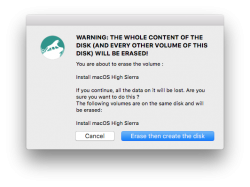
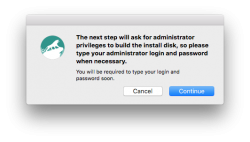
The actual process will take a while and during the creation, plenty of notifications will flash on your sccreen:

After the long wait is over, your USB-stick is ready to go!
Go upgrade your macs
With your fresh USB-stick, you can continue the installation to any of your Macs.
Meanwhile, check What's new in High Sierra @ Apple.
Troubleshooting
I lost the High Sierra installation files, where can I get them?
Yup, that happened to me too. I had my Macs upgraded, but was requested to do a favor. Obviously my USB-stick was already overwritten with a Linux-image and I had to re-do the process. But whattahell!? The image files were gone! Only old OS X files were remaining. So, looks like after a successful upgrade, this one cleans up its own mess.
To re-load the installation, go to app store, search for "macos high sierra":

After the lenghty (re-)download, the installed will kick on:
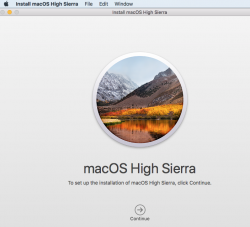
Like always, that's your que to quit the installer:
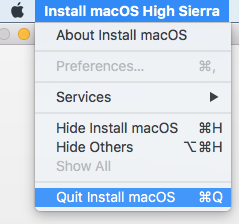
Done!
Finally
As the pre-released information from Apple indicated, the "upgrade" is kind of letdown. It really doesn't provide much important stuff. The most critical update is the new APFS filesystem. This is a no-brainer, as HFS+ is nearing its 20 year mark. Like ext2 filesystem on Linux (ext3, ext4), HFS+ had its upgrades, but now its simply time to break free into something completely different.
After upgrade, I took a look at the partitions.
MacBook Pro, SSD, encrypted:
$ diskutil list

/dev/disk0 (internal, physical):

   #:                  TYPE NAME             SIZE       IDENTIFIER

   0: GUID_partition_scheme                 *251.0 GB   disk0

   1:                   EFI EFI              209.7 MB   disk0s1

   2:            Apple_APFS Container disk1  250.1 GB   disk0s2


/dev/disk1 (synthesized):

   #:                  TYPE NAME             SIZE       IDENTIFIER

   0: APFS Container Scheme -               +250.1 GB   disk1

                            Physical Store disk0s2

   1:           APFS Volume Macintosh HD     156.0 GB   disk1s1

   2:           APFS Volume Preboot          20.6 MB    disk1s2

   3:           APFS Volume Recovery         520.0 MB   disk1s3

   4:           APFS Volume VM               2.1 GB     disk1s4
On the pysical disk note the APFS container. On the synthesized disk, note how all macOS partitions have APFS type in them.
iMac, fusion drive, no encryption:
$ diskutil list

/dev/disk0 (internal, physical):

 #:                  TYPE NAME          SIZE     IDENTIFIER

 0: GUID_partition_scheme              *121.3 GB disk0

 1:                   EFI EFI           209.7 MB disk0s1

 2:     Apple_CoreStorage Macintosh HD  121.0 GB disk0s2

 3:            Apple_Boot Boot OS X     134.2 MB disk0s3


/dev/disk1 (internal, physical):

 #:                  TYPE NAME          SIZE     IDENTIFIER

 0: GUID_partition_scheme              *1.0 TB   disk1

 1:                   EFI EFI           209.7 MB disk1s1

 2:     Apple_CoreStorage Macintosh HD  999.3 GB disk1s2

 3:            Apple_Boot Recovery HD   650.1 MB disk1s3


/dev/disk2 (internal, virtual):

 #:                  TYPE NAME          SIZE     IDENTIFIER

 0:             Apple_HFS Macintosh HD +1.1 TB   disk2

                          Logical Volume on disk0s2, disk1s2

                               Unencrypted Fusion Drive
As announced, fusion drives won't have APFS yet. In the partition info, SSD and spinning platter are nicely displayed separately, forming a virtual drive.
Worthless update or not, now its done. Like a true apple-biter, I have my gadgets running the latest stuff! ![]()
macOS Sierra upgrade from USB-stick
Friday, October 14. 2016
This is the abridged version as most steps are exactly like in OS X El Capitan. See my article about that.
Step 1: Go download
As any upgrade, go to App Store, it should look like this:
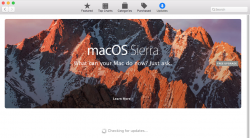
Beware, it is quite a chunk (almost 5 GiB to be exact). If your Internet connection isn't too fast, be prepared to wait a while:
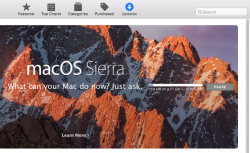
When the download is done, the installer will start automatically. It will look like this:
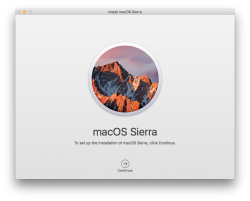
That's your cue. Do not proceed with the installation, but quit the installer instead:
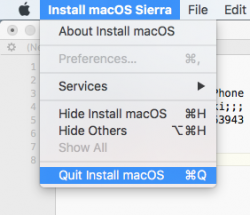
Now all the necessary files are on your machine.
Step 2: Go USB
The recipe is classic, insert an USB-stick of suitable size, unmount it, prepare it for install, copy installation files to it and you're done!
Unmount (your volume name will differ, unless the stick had an Arch Linux installation in it):
sudo diskutil umount /Volumes/ARCH_201607/
Pay attention to the output, it will give a clue about the device identifier of your USB-stick on your machine it can and will vary. My output was:
Volume ARCH_201607 on disk3s1 unmounted
Now that we know which disk it was, partition and format the stick as JHFS+:
sudo diskutil partitionDisk /dev/disk3 1 GPT jhfs+ "MacOS Sierra" 0b
It will take a while and during operation it will say something like this:
Started partitioning on disk3

Unmounting disk

Creating the partition map

Waiting for the disks to reappear

Formatting disk3s2 as Mac OS Extended (Journaled) with name MacOS Sierra

Initialized /dev/rdisk3s2 as a 7 GB case-insensitive HFS Plus volume with a 8192k journal

Mounting disk

Finished partitioning on disk3

/dev/disk3 (external, physical):

#:                  TYPE NAME        SIZE    IDENTIFIER

0: GUID_partition_scheme             *8.0 GB disk3

1:                   EFI EFI        209.7 MB disk3s1

2:             Apple_HFS MacOS Sierra 7.7 GB disk3s2
Now the stick is good to go, transfer the installation image into it:
cd /Applications/Install\ macOS\ Sierra.app/Contents/Resources/


sudo ./createinstallmedia \

   --volume /Volumes/MacOS\ Sierra/ \

   --applicationpath /Applications/Install\ macOS\ Sierra.app/ \

   --nointeraction
Again, that will take a while and output something like:
Erasing Disk: 0%... 10%... 20%... 30%...100%...

Copying installer files to disk...

Copy complete.

Making disk bootable...

Copying boot files...

Copy complete.

Done.
That's it. The stick is ready.
Step 3: Go update
This is the part, that you'll be repeating on each newly upgraded/installed machine.
Follow the installation procedure and boot to the newly installed macOS. If this doesn't make any sense to you, see my previous article about that.
Step 4: Finishing touches
After boot, you'll end up in a classic login-screen. Login and upgrade will continue there.
My choices for those new questions are:
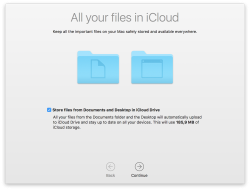
- no, absolutely not I won't be storing my data into iCloud, I have the freebie 5 GiB of space there and with my files I'd run out pretty soon
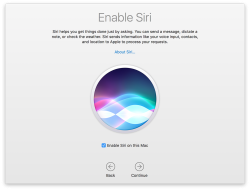
- no, absolutely not I won't be enabling Siri (aka. spy-machine)
Step 5: Done!
That's it, enjoy your upgraded operating system.
Couple of glitches here and there, but the most important one was that my SSH didn't do agent forwarding anymore. I'm not alone with that, other people reported same issue:
ssh -A stopped working in macOS Sierra and keychain is not unlocked at login
The second thing is, that MD5 signed root certificates aren't accepted anymore as default. Unless you're doing some weird shit like I, you won't notice this change. This is fully documented and know before. In optimal world we wouldn't have any MD5 signed root certificates anymore.
Other than those two, I continued using my macs as usual.
OS X El Capitan upgrade - Afterwork with Verisign certificates
Monday, October 26. 2015
I previously wrote about upgrading OS X El Capitan. After doing couple of boxes I ran into a SNAFU.

If you don't see anything in that page, that's correct! There is nothing there. It would be a safe assumption, that something had gone wrong. ![]()
Here is what web browser console says:

Error was: "Failed to load resource: The certificate for this server is invalid." As the errors were emitting from Amazon CloudFront, it didn't make any sense at all. Either Amazon had some sort of security fault happening, or I did. Unfortunately in such situations, the odds are always against me. I had upgraded couple of Macs already and had no problems with them, this box must have had something wrong with it.
My next move was to get a list of trusted root certificates shipping with an OS X. The list is available in Apple knowledgebase article HT205204. Here is what I got:

Another error: 'Safari can't verify the identity of the website "support.apple.com"'. Right. First Amazon was failing on me, then Apple. At this point I whipped up an already upgraded Mac and went for the page, this time it looked ok:

That was the proof, that something was badly off on that Mac.
For fact gathering I went trough the certificate chain of support.apple.com:


As the certificate wasn't trusted, the page looked horrible and there was no lock-icon on the address bar. The important fact here was, that the root certificate of VeriSign Class 3 Public Primary Certification Authority - G5 had version number 3 and serial number of 25 0C E8 E0 30 61 2E 9F 2B 89 F7 05 4D 7C F8 FD. On the working Mac same certificate:

A completely different serial number of 18 DA D1 98 26 7D E8 BB 4A 21 58 CD CC 6B 2B 4A.
Then the relevant question was: Why do they differ? The facts are at OS X certificate store. It so happens, that all certificates can be viewed and altered via Keychain Access -tool. I went to see the System Roots -keychain:

But that didn't solve my problem! VeriSign Class 3 Public Primary Certification Authority - G5 was there and had the proven correct serial number of 18 DA D1 98 26 7D E8 BB 4A 21 58 CD CC 6B 2B 4A. More poking around, and this is what I found:

A set of Verisign certificates on login-keychain. Weird. One of them was:

There was the 25 0C E8 E0 30 61 2E 9F 2B 89 F7 05 4D 7C F8 FD! The only appropriate action was:
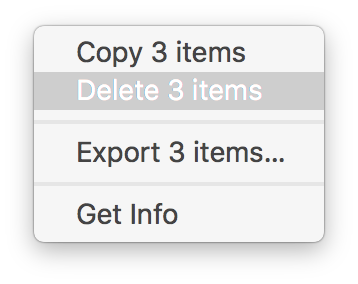 And that solved it! Simply letting the weird ones go made all my websites work again.
But where did those certs come from? By googling I found Why is Symantec/Verisign CA appearing as an invalid authority? [closed] and Invalid certificate after Security Update 2015-004 in Mavericks. They both were pointing a finger to April 2015 security update. The release notes About the security content of OS X Yosemite v10.10.3 and Security Update 2015-004 say:
Certificate Trust Policy
Impact: Update to the certificate trust policy
Description: The certificate trust policy was updated. View the complete list of certificates.
I just happened to update the Mac too early and got a flawed upgrade. It is also possible, that on April, when I got bad certs, I may have gone to Verisign and manually loaded the proper root certificates in to fix my problem at the time. However, it just blew up on my face on OS X 11 upg.
If you never encountered any of this: good. I honestly don't think this issue is touching a wide audience. However, I disclosed this information for archive purposes. If something like this happens in the future, you have a clue what to look for.
OS X El Capitan upgrade from USB-stick
Monday, October 12. 2015
Now that OS X El Capitan or version 11 is out, I'll do a refresh for the USB installation instructions.
The thing is ... the upgrade free, but it's big. The amount of downloading needed is easily 6+ GiB. I have 3 Macs to update and I don't want to download the huge package on all of them. So, let's figure out something smarter.
Step 0: Prerequisites
You'll need a bootable USB-stick with capacity of 8 GiB or more. All sticks should boot, but I have encountered some that didn't manage that.
USB-booting a Mac is trickier than a PC. The knowledge base article HT1948 states:
Intel-based Macs support starting from an external USB storage device's volume that:
- Has been formatted with a GUID partition type
- Contains an installation of Mac OS X 10.4.5 or later, or Mac OS X 10.5 or later, which is compatible with (or shipped with) the Mac that the USB device is connected to. Note: You should not use a version of Mac OS X that is earlier ("older") than the version your Mac shipped with.
So, if you just bought an USB-stick, the chances are, that it is MBR-partitioned FAT32. That's my experience of getting new ones. They are incompatible at their current state for USB-booting a Mac. Not to worry, that can be fixed!
If you happen to have a ready-made stick for any previous OS X version, that obviously can be loaded with new installer. You can even skip couple of things during the process as you don't have to reformat the stick.
Step 1: Go download
In your Apple menu (the top left apple-shaped thing at every program's menu), go for Software Update. An alternate is to click the App Store link:
Both options land you on the App Store main screen showing you something like this:

Click the image saying Free Upgrade (free as in beer):

Your Apple ID credentials are required for this free package. They'll keep track of who downloaded and what.
This is the part you'll wait for the download to complete:
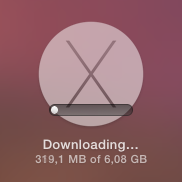
When it's all on your machine, the installer will automatically kick in.
Step 2: Go USB
Now that you have the thing in your drive, don't proceed with the upgrade.
do not proceed! You can quit the installer, if you want:
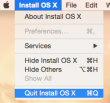
It won't delete the files from your drive. It is also possible to continue installing on that Mac, but don't do it yet. Take a copy of the files first.
Take at least a 8 GiB USB-storage. 4 won't do it, but any larger will. In my case, the USB-stick appeared as /dev/disk3. That may vary on your system. Also it is possible to use some GUI-tools on OS X to format your drives, but as a Linux-nerd I don't know about them.
It is very likely, that the disk is mounted and will display an icon on your desktop, and will appear on your Finder. The diskutil will unmount it automatically on partition, but I wanted to make sure and did:
# sudo diskutil umount /Volumes/MyUSBdrive
Next step is to make sure, the stick is in a Mac-format (this needs to be run as root, that's what the sudo is for). This will partition and format the entire stick into Mac-use:
# sudo /bin/bash

root# diskutil partitionDisk /dev/disk3 1 GPT jhfs+ "OS X El Capitan" 0b
It will say something like this as a result:
Started partitioning on disk3

Unmounting disk

Creating the partition map

Waiting for the disks to reappear

Formatting disk3s2 as Mac OS Extended (Journaled) with name OS X El Capitan

Initialized /dev/rdisk3s2 as a 7 GB case-insensitive HFS Plus volume with a 8192k journal

Mounting disk

Finished partitioning on disk3

/dev/disk3

#: TYPE NAME SIZE IDENTIFIER

0: GUID_partition_scheme *8.0 GB disk3

1: EFI EFI 209.7 MB disk3s1

2: Apple_HFS OS X El Capitan 7.7 GB disk3s2
Next thing is to confirm, that the volume with given name will be mounted:
root# ls -l /Volumes/

total 40

lrwxr-xr-x 1 root admin 1 Aug 29 12:24 Macintosh HD -> /

drwxrwxr-x 7 root wheel 306 Oct 10 12:41 OS X El Capitan
If it does, you're ready to go. Copy the thing into it:
root# cd /Applications/Install\ OS\ X\ El\ Capitan.app/Contents/Resources/

root# ./createinstallmedia --volume /Volumes/OS\ X\ El\ Capitan/ \

--applicationpath /Applications/Install\ OS\ X\ El\ Capitan.app/ \

--nointeraction
It will result in a lengthy process saying:
Erasing Disk: 0%... 10%... 20%... 30%...100%...

Copying installer files to disk...

Copy complete.

Making disk bootable...

Copying boot files...

Copy complete.

Done.
Step 3: Go update
Your stick is ready. This is the part you will be replicating to any of your Macs you want to upgrade.
Reboot the Mac and make sure to boot from the USB. This can be achieved by pressing down option-key during boot:


The official Apple instruction at knowlegebase article HT1948 states:
To start from a USB storage device that meets the above requirements:
- connect the device
- restart
- immediately press and hold the Option key to access Startup Manager
If you successfully followed the steps, you will end up in Mac boot manager:
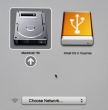
In that, you pretty much select the drive you want to boot from. In this particular case, making a choice for the recently prepared USB-stick will be a good one. Click the orange "Install OS X El Capitan". Both the gray HD and the network selection are there to confuse you. Ignore them and double click the USB-drive.
Most steps in this upgrade will include lot of waiting. Make sure that you have reserved couple of hours for the upgrade. Screens like this will become familiar to you:

Most time estimates are wild guesses. A 9 minute wait in reality is something like 45 minutes. Eventually the USB-stick finishes booting, and you will end up in a screen saying "To set up the installation of OS X, click Continue". Most screens will refer your upgrade as an install. It is nerve-wrecking thing, because you don't know if it is going to wipe your settings and data, or do a nice upgrade what you'd be expecting. My experience is, that it will upgrade nicely, but it won't say it properly.
Then there is a license screen which you must agree to continue. Then land on OS X Utilities. One thing you can do with a bootable stick is to upgrade or install an OS X:

When you select to go for upgrade or install, there is a welcome to OS X El Capitan screen. Click Continue. Yet another license screen appears. Click Agree and for the confirmation dialog: I have read and agree to the terms of the software license agreement, Agree. Select the install/upgrade destination as the one having a hard drive icon Macintosh HD (typical installations have that), then click Install. As the first thing, the installer/upgrader will prepare for the operation and then go for the real thing:
This is the most time-consuming part. After a minute or so, there will be an not-so-accurate estimate of time remaining for the preparation. When it has run its course, the actual installer will start. So if the screen says 1 minute left, do not believe it for a second. In my iMac, one cup of coffee doesn't do it. You can easily cook and eat a meal and then have the coffee while the installer/upgrader runs. Especially the final phase saying "About a second remaining" will take ages. My hardware isn't especially old or slow, but ... the process is.
Step 4: Finishing touches
After you've done your waiting. A reboot will result. At this point you'll need to login into your precious upgraded Mac with your local user account.

On successful login, you will end up in the OOBE (or out-of-box experience). Apple makes an effort to not allow stolen hardware to be used and they pretty much require you to login to Apple ID during install:

Since I have a 2-factor authentication enabled for my Apple ID, a 2FA-screen will appear during the process:

There are steps about sending your usage data to Apple. Then yet another license screen which you have to agree twice. First on the bottom screen and then on the pop-up that will appear. So if you want to complain later, they'll just say "but you did agree to our terms and conditions". It will look like this:

The last question you'll need to answer is about setting up iCloud Keychain. I choose not to share my passwords into any cloud services, but at this point you'll have the option to enable Keychain:

Little bit of setting up ... this one won't take long. And then you're pretty much done. Finally your upgrade is ready!

Step 5: Done!
One of the first things I did, was eject my USB-stick (there were couple other Macs to be updated, too):

At this point, you can continue using your precious Mac.
Aftermath
I updated anyway, as a nerd I like the latest stuff running on my computers. I should yield less problems and there needs to be some progress. I find myself stating the same thing in couple of my blog posts, "it wasn't worth it, but I did it anyway". With computers, it never will result any good to stand still and ignore future.
OS X Yosemite upgrade from USB-stick
Saturday, October 18. 2014
Latest OS X version Yosemite or 10 is out. Funny thing, the operating system 10 has a version 10 released. ![]()
The thing is ... it's free, but it's big. The amount of downloading needed is easily 5+ GiB. When I downloaded mine, it said 6 hours of load time. On my 250 Mbit/s fiber! Argh. It downloaded a hour or so and choked completely. Argh, argh! When I resumed, it picked a better server and I got rest of the file in 10 minutes or so. Anyway, I absolutely, positively don't want to do that on all of my Macs. So, let's figure out something smarter on that.
The sources of my information are:
- How to Burn OS X Yosemite to a USB Flash Drive
- DISKUTIL(8) - BSD System Manager's Manual
- Disk Management From the Command-Line, Part 2
- Starting from an external USB storage device (Intel-based Macs)
Step 0: Prerequisites
USB-booting a Mac is trickier than a PC. The knowledge base article HT1948 states:
Intel-based Macs support starting from an external USB storage device's volume that:
- Has been formatted with a GUID partition type
- Contains an installation of Mac OS X 10.4.5 or later, or Mac OS X 10.5 or later, which is compatible with (or shipped with) the Mac that the USB device is connected to. Note: You should not use a version of Mac OS X that is earlier ("older") than the version your Mac shipped with.
So, if you just bought an USB-stick, the chances are, that it is MBR-partitioned FAT32. That's my experience of getting new ones. They are incompatible at their current state for USB-booting a Mac. Not to worry, that can be fixed!
Step 1: Go download
In your Apple menu (the top left apple-shaped thing at every program's menu), go for Software Update. Yosemite should be there as a free download from App Store. Select it and wait ... wait forever! ![]()
In the classic Commodore 64 game Impossible Mission the phrase was "Another visitor! Stay a while; stay forever!". [Actually the mission was possible. As the game was pretty good, I completed it a number of times.]
Step 2: Go USB
Now that you have the thing in your drive, don't proceed with the upgrade.
do not proceed! You can actually quit the installer, it won't delete the files from your drive.
Take at least a 8 GiB USB-storage. 4 won't do it, but any larger will. In my case, the USB-stick appeared as /dev/disk3. That may vary on your system. Also it is possible to use some GUI-tools on OS X to format your drives, but as a Linux-nerd I don't know about them.
To make sure, the stick is in a Mac-format (this needs to be run as root, that's what the sudo is for). This will partition and format the entire stick into Mac-use:
# sudo /bin/bash
root# diskutil partitionDisk /dev/disk3 1 GPT jhfs+ "OS X Yosemite" 0b
It will say something like this as a result:
Started partitioning on disk3
Unmounting disk
Creating the partition map
Waiting for the disks to reappear
Formatting disk3s2 as Mac OS Extended (Journaled) with name OS X Yosemite
Initialized /dev/rdisk3s2 as a 7 GB case-insensitive HFS Plus volume with a 8192k journal
Mounting disk
Finished partitioning on disk3
/dev/disk3
#: TYPE NAME SIZE IDENTIFIER
0: GUID_partition_scheme *8.0 GB disk3
1: EFI EFI 209.7 MB disk3s1
2: Apple_HFS OS X Yosemite 7.7 GB disk3s2
Next thing is to confirm, that the volume with given name will be mounted:
root# ls -l /Volumes/
total 40
lrwxr-xr-x 1 root admin 1 Oct 17 13:27 Macintosh HD -> /
drwxrwxr-x 7 root wheel 306 Oct 18 13:12 OS X Yosemite
If it does, you're ready to go. Copy the thing into it:
root# cd "/Applications/Install OS X Yosemite.app/Contents/Resources"
root# ./createinstallmedia --volume /Volumes/OS\ X\ Yosemite/ \
--applicationpath /Applications/Install\ OS\ X\ Yosemite.app \
--nointeraction
It will result in a lengthy process saying:
Erasing Disk: 0%... 10%... 20%... 30%...100%...
Copying installer files to disk...
Copy complete.
Making disk bootable...
Copying boot files...
Copy complete.
Done.
Step 3: Go update
Your stick is ready. This is the part you will be replicating to any of your Macs you want to upgrade.
Reboot the Mac and make sure to boot from the USB. This can be achieved by pressing down option-key during boot:

The official Apple instruction at knowlegebase article HT1948 states:
To start from a USB storage device that meets the above requirements:
- connect the device
- restart
- immediately press and hold the Option key to access Startup Manager
If you successfully followed the steps, you will end up in Mac boot manager:
In that, you pretty much select the drive you want to boot from. In this particular case, making a choice for the recently prepared USB-stick will be a good one. The network selection is there to confuse you. Ignore it and double click the USB-drive.
Most steps in this upgrade will include lot of waiting. Make sure that you have reserved couple of hours for the upgrade. Screens like this will become familiar to you:
Most time estimates are wild guesses. A 9 minute wait in reality is something like 45 minutes. Eventually the USB-stick finishes booting, and you will end up in a screen saying "To set up the installation of OS X, click Continue". Most screens will refer your upgrade as an install. It is nerve-wrecking thing, because you don't know if it is going to wipe your settings and data, or do a nice upgrade what you'd be expecting. My experience is, that it will upgrade nicely, but it won't say it properly.
Then there is a license screen which you must agree to continue. Then land on OS X Utilities. One thing you can do with a bootable stick is to install/upgrade an OS X:
This is the most time-consuming part. A cup of coffee doesn't do it. You can easily cook and eat a meal with the coffee during this. My hardware isn't especially old or slow, but ... the upgrade is.
After a reboot, you will end up in the OOBE (or out-of-box experience). This will start with Apple ID login. Apple makes an effort to not allow stolen hardware to be used and they pretty much require you to login during install:
Since I have a 2-factor authentication enabled for my Apple ID, a 2FA-screen will appear during the process:
There are steps about sending your usage data to Apple, then yet another license screen:
Then you need to make the choice of upgrading iCloud into iCloud Drive, the new thing that came with iOS 8 and OS X Yosemite:
Then you're pretty much done. Finally your upgrade is ready!
Step 4: Done!
One of the first things I did, was eject my USB-stick (there were couple other Macs to be updated, too):
At this point, you can continue using your precious Mac.
Aftermath
Was it worth it? Not really, the change is mainly cosmetic. iCloud Drive isn't a reason for me to upgrade. Apple-menu doesn't have System Update anymore, they changed it into App Store. That's like running iOS.
I updated anyway, as a nerd I like the latest stuff running on my computers. I should yield less problems and there needs to be some progress. I find myself stating the same thing in couple of my blog posts, "it wasn't worth it, but I did it anyway". With computers, it never will result any good to stand still and ignore future.
Mac OS X Dolby Digital 5.1 with Mac Mini [solved]
Monday, December 30. 2013
This is my 2nd attempt of trying to clarify how to get Dolby Digital 5.1 output via HDMI. The previous attempt can be found here. All the information I can find on this subject shows that for some people multi-channel audio works fine, nothing special is required, but then again for some of us this is a pain and its almost impossible to get this working.
Here is my setup: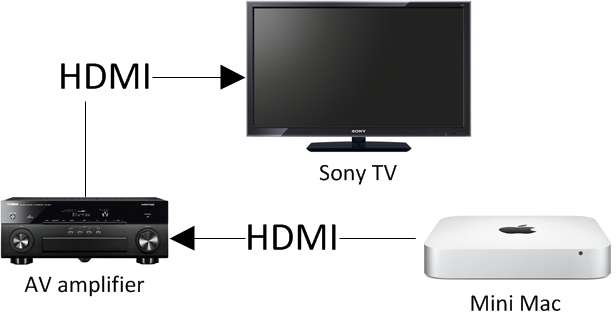
The problem, like presented earlier is depicted here:
The Audio MIDI setup clearly displays as Sony TV being the HDMI output device. The problem is, that it actually isn't. Here is another screen capture of Audio MIDI setup from my brother's computer:
Whoa! His Mac Mini displays his A/V amp as the HDMI destination. Totally different from what my Mac displays. The only explanation for this is, that my Yamaha takes the TV's spec from the HDMI and proxies it to the Mac and his Onkyo doesn't take anything, it simply presents itself as the destination. If you'd ask me, Onkyo's solution is much better than Yamaha's. Anyway, the amp has to pick up the audio signal to be sent to loudspeakers and do a stereo mixdown of a multi-channel signal to be sent for the TV. So there will be a lot of processing at the amp, why not declare itself as the destination for the Mac. It seems to be confusing.
The Solution
Here is what I did to get proper 5.1 channel sound working from my Mac Mini. The problem is, that I cannot get it back to the broken mode again, it simply stays fully functional no matter what I do. There must be something going on at the amp end and something else going on at the Mac end. For some reason they don't match or they do match and there is very little I can do to control it. But anyway, here are my steps with Audio MIDI Setup utility:
- In the Mac, set HDMI to Use this device for sound output and Play alerts and sound effects trough this device
- Confirm that the speaker setup is correct and click the speakers to confirm that test tone does not output as expected
- In the amp, make sure that the input HDMI is decoding multi-channel audio as expected
- Auto-detect or stereo won't work
- Previously my instructions stopped here
- In the Mac, at the HDMI, in Format set it as Encoded Digital Audio, the Hz setting is irrelevant

- This will effectively unset HDMI as output device and set Built-in Output as the output device. It also pretty much makes all sounds in the system non-functional.
- Again at the HDMI, in Format select 8ch-24bit Integer, it will reset the HDMI to Use this device for sound output and Play alerts and sound effects trough this device
- Re-confirm that speaker setup is correct. At this point the test tone should work from the speaker correctly.
- You're done!

This fix and pretty much everything about Mac Mini's HDMI audio output is bit fuzzy. Any real solution should be reproducible somehow. This isn't. But I can assure you, that now my multi-channel audio really works as expected.
Any feedback about this solution is welcome!
Update 1st Jan 2014:
The number of channels configured into Audio Setup does not reflect the actual number of speakers you have. That is done in Configure Speakers. I have 8ch (or 8 speakers) configured in the Audio Setup, but this is a screenshot of my speaker setup: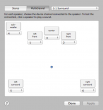
They have different number of speakers! It still works. That's how it is supposed to be.
OS X Time Machine waking up from sleep to do a backup
Tuesday, November 26. 2013
 I was pretty amazed to notice that my Mac actually wakes up for the sole
purpose of running a scheduled backup and goes back to sleep. Oh, but
why?
Going to web with the issue helped, I found Apple support community discussion with topic "time machine wake up unwanted". I don't think my pre 10.9 did that. Anyway I can confirm that 10.9 does this rather stupid thing.
Luckily the discussion thread also offers the fix: "Time Machine won't wake up a Mac, unless another Mac is backing-up to a shared drive on it via your network, and the Wake for network access box is checked in System Preferences > Energy Saver". Definitely something for me to try.
It helped! I can confirm, that there are no backups for the time my Mac was asleep. Pretty soon I woke it up, it started a TM-backup and completed it.
Thanks Pondini in Florida, USA!
Mac OS X 10.9 Mavericks .ISO image
Wednesday, October 23. 2013
Since Apple made a decision not to publish their operating systems as ISO-images on OS X 10.8, everybody has to create their own excitement (the phrase used to mock Gentoo Linux).
With Google, I found a very nice recipe for creating an image at the point where App Store has downloaded your free 10.9 upgrade, but it is not running yet. See it at Apple Insider forums with topic HOWTO: Create bootable Mavericks ISO. I followed the recipe with a simple copy / paste attitude and it did the trick. No funny stuff, no weird things you needed to know, it just did the trick and ended up with the thing I need.
I'll copy / paste the excellent writing of Mr./Mrs./Ms. CrEOF here:
# Mount the installer image
hdiutil attach /Applications/Install\ OS\ X\ Mavericks.app/Contents/SharedSupport/InstallESD.dmg \
-noverify -nobrowse -mountpoint /Volumes/install_app
# Convert the boot image to a sparse bundle
hdiutil convert /Volumes/install_app/BaseSystem.dmg -format UDSP -o /tmp/Mavericks
# Increase the sparse bundle capacity to accommodate the packages
hdiutil resize -size 8g /tmp/Mavericks.sparseimage
# Mount the sparse bundle for package addition
hdiutil attach /tmp/Mavericks.sparseimage -noverify -nobrowse -mountpoint /Volumes/install_build
# Remove Package link and replace with actual files
rm /Volumes/install_build/System/Installation/Packages
cp -rp /Volumes/install_app/Packages /Volumes/install_build/System/Installation/
# Unmount the installer image
hdiutil detach /Volumes/install_app
# Unmount the sparse bundle
hdiutil detach /Volumes/install_build
# Resize the partition in the sparse bundle to remove any free space
hdiutil resize -size `hdiutil resize -limits /tmp/Mavericks.sparseimage | \
tail -n 1 | awk '{ print $1 }'`b /tmp/Mavericks.sparseimage
# Convert the sparse bundle to ISO/CD master
hdiutil convert /tmp/Mavericks.sparseimage -format UDTO -o /tmp/Mavericks
# Remove the sparse bundle
rm /tmp/Mavericks.sparseimage
# Rename the ISO and move it to the desktop
mv /tmp/Mavericks.cdr ~/Desktop/Mavericks.iso
Thanks!
iOS 7 experiences
Thursday, September 19. 2013
Is it just me, or is Apple's new iOS 7 just bunch of hot air?
I got the released version immediately to my iPhone and iPad. My initial reaction: the new colors are disgusting. Perhaps person using the new user interface needs to be drunk or on drugs to like them.
After half an hour of browsing archived 1995 black and white webpages, I was able to start using the painter's color sheet ... erhm... iOS 7. There was nothing improved there. Calendar had been made worse, month view didn't display entries anymore. The top left "bar" indicator had been turned into weird dots. Now it's not possible to ask "how many bars do you have?".
In the spirit of trying to be positive I found a single thing I liked. iCloud supports notes now. That I've been really waiting for. Hopefully they finally fixed the iPad's losing APN-settings bug. I have to admit, that the new swipe-screen looks good, much better than the classic old one. But something funny happens when you swipe, too many colors burn trough my eyes. ![]()
The official list of new features is here, but I still cannot find anything with a "wow"-factor in it.
