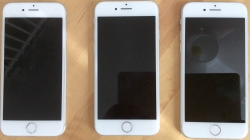
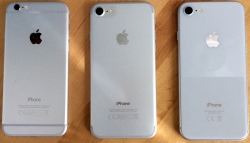
iPhone iOS 18 Password manager
Thursday, September 12. 2024
It took "couple" iterations on Apple to realize they'll must add a password manager to their mobile operating system.
Next Monday, iOS 18 will be released with one. It's called "Passwords":
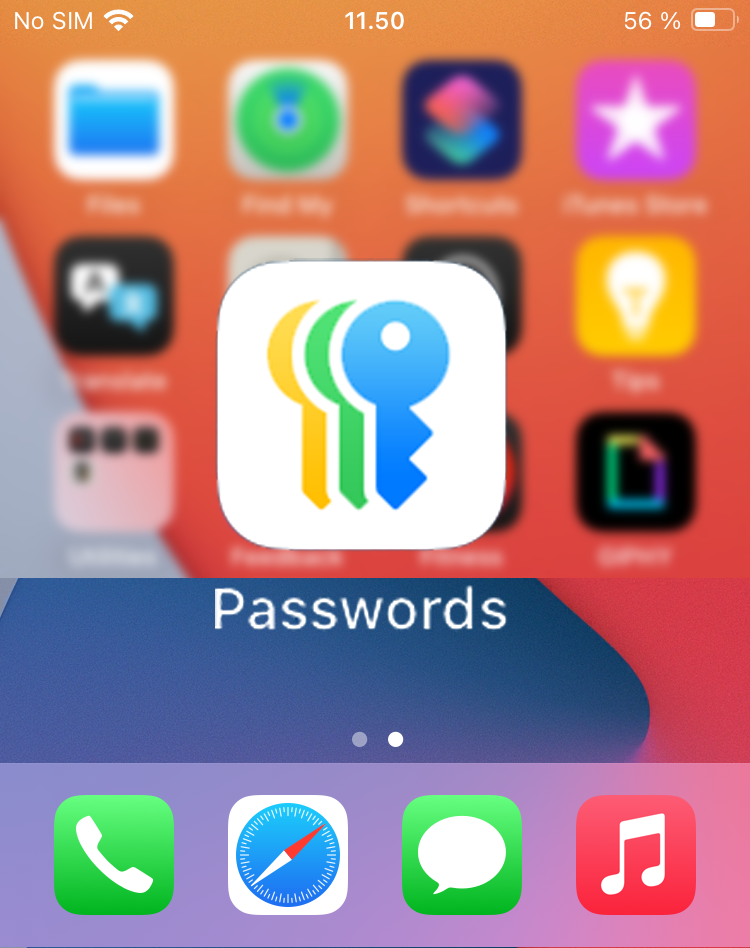
As I already have a password manager, this isn't a big deal. However, this new password-thingie extends functionality beyond passwords and has something The World has never seen: Possibility to edit Passkeys. (Anti-climatic, huh!)
Taking a closer look, this is what the password-app contains:
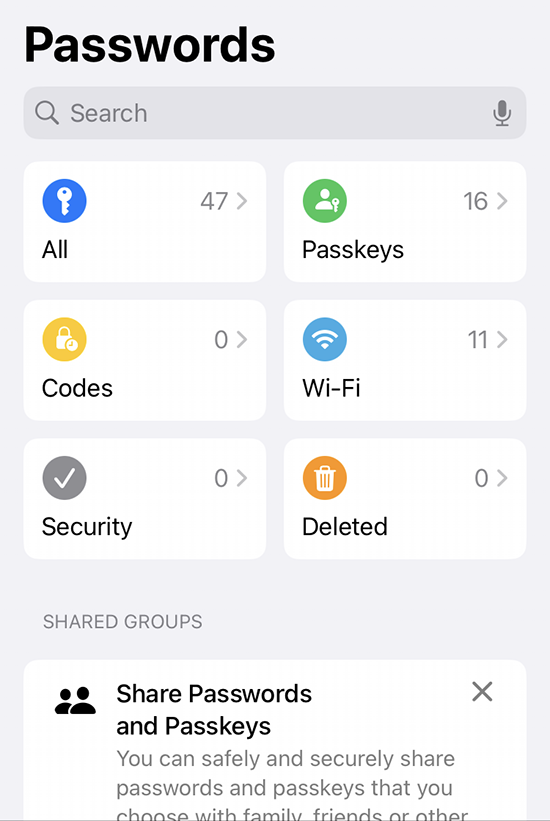
Further dill-down on (the never-seen-before) Passkeys:
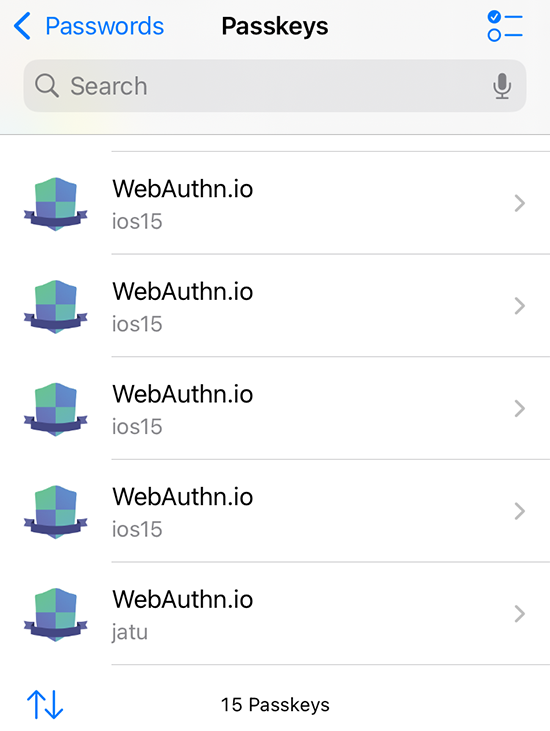
See how many dupes I have for https://webauthn.io/!
Three years back, I wrote a piece about Passkeys and it required a lot of research, testing and snooping around. Toying around throw-away Passkeys resulted in lot of junk, it seems.
While muttering "my precious", Yubico declared all information on existing passkeys a state secret. After the first one's example all other major Passkeys-providers like Appe and Google followed suit. They hid Passkeys well out of your reach.
I really never got the logic behind that. Why is it not allowed to see your own passkeys? Maybe if your security device is lost, also the criminals can see the list of your passkeys? Puzzling.
Finally I can get rid of all test junk. It took unbelievebly long to get this feature. However, I love the fact it is there.
More USB Ports for iMac - HyperDrive 5-in-1 USB-C Hub
Sunday, September 3. 2023
Apple computers are known to have not-so-many ports. Design philosophy is for a machine to be self-sufficient and to not need any extensions nor ports for extensions. Reality bites and eats any ideology for a breakfast. I definitely need the extensions!
So, for my new iMac, I went shopping for more ports. Whenever I need to do this, I'll first check Hyper. Their products are known to be of highest quality and well designed to meet the specific requirements of a Mac. To be clear: on an iMac there are four ports: two USB-C and two Thunderbolt 4. This ought to be enough for everybody, right? Nope. All of them are in the back of the computer. What if you need something with easy access?
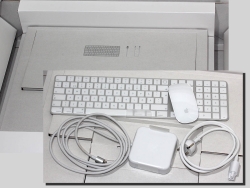
This is what's in a HyperDrive for iMac box:
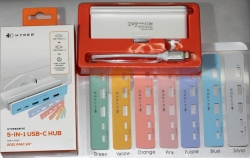
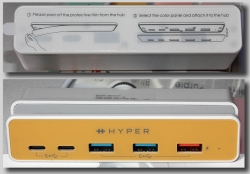
Those changeable covers are designed to match the colour of the iMac. This reminds me of 1998 when Nokia introduced the Xpress-on Covers for 5110:
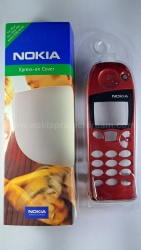
Image courtesy of nokiaprojectdream.com.
This is how the USB-hub clamps into iMac:
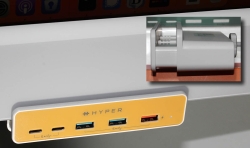
Now I don't have to try and blindly attempt to touchy/feely the location of a port behind the computer. On my desk, back of the iMac is definitely not visible nor available. Also, it is noteworthy, somebody might declare the setup "ugly" or complain of my choice of color express-on cover. The iMac is silver, but I have a yellow cover on the HyperDrive. That's how I roll! ![]()
New toys - Apple iMac
Monday, August 28. 2023
Summer here in Finland is over. It's windy and raining cats&dogs. Definitely beginning of autumn.
For me, summer is typically time to do lots of other things than write blog posts. No exceptions this time. I did tinker around with computers some: new rack server to replace the old Intel Atom, some USB-probing via DLMS, some Python code, etc. etc. I may post someething on those projects later.
And: I got a new iMac. Here are some pics:
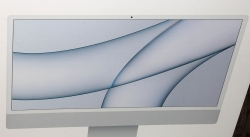
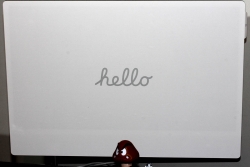
Back-in-the-days, there used to be 21.5" and 27" iMac. Actually, my old one is the small one. Since Apple abandoned Intel CPUs, one-size-fits-all, only 24" option available. Also, the iMacs I have are VESA-mounted ones. There is no room on my desk.
Apple's magic mouse is for somebody else. I hate the thing! Good thing I still have a perfectly working MX Anywhere 2. On my other computer I (obviously) use a MX Anywhere 3 and have plans to upgrade it into a 3S.
Cabling in an iMac is not-so-standard:
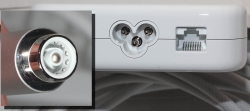
Ethernet RJ-45 -socket is in the PSU, which has your standard IEC C5 "Mickey Mouse" connector. On the other end, there is a Magsafe. With Ethernet in it! It has to be some sort of USB-C / Thunderbolt 4 -thingie with really weird magnetic connector.
Transferring setteings and data from a OS X to modern macOS works like a charm. Nothing in Windows can touch that level of easiness. Also, now I have an OS that can do Time Machine backups to a Linux/Samba. Nice! Maybe I should post something about that setup also.
Next: Run the thing for 10+ years. Btw. the old one is for sale, it really has no monetary value, but it works and I don't need it anymore.
MacBook Pro - Fedora 36 sleep wake - part 2
Friday, September 30. 2022
This topic won't go away. It just keeps bugging me. Back in -19 I wrote about GPE06 and couple months ago I wrote about sleep wake. As there is no real solution in existence and I've been using my Mac with Linux, I've come to a conclusion they are in fact the same problem.
When I boot my Mac, log into Linux and observe what's going on. Following CPU-hog can be observed in top:
   RES    SHR S  %CPU  %MEM   TIME+   COMMAND

     0      0 I  41.5   0.0   2:01.50 [kworker/0:1-kacpi_notify]
ACPI-notify will chomp quite a lot of CPU. As previously stated, all of this will go to zero if /sys/firmware/acpi/interrupts/gpe06 would be disabled. Note how GPE06 and ACPI are intertwined. They do have a cause and effect.
Also, doing what I suggested earlier to apply acpi=strict noapic kernel arguments:
grubby --args="acpi=strict noapic" --update-kernel=$(ls -t1 /boot/vmlinuz-*.x86_64 | head -1)
... will in fact reduce GPE06 interrupt storm quite a lot:
   RES    SHR S  %CPU  %MEM   TIME+   COMMAND

     0      0 I  10.0   0.0  0:22.92 [kworker/0:1-kacpi_notify]
Storm won't be removed, but drastically reduced. Also, the aluminium case of MBP will be a lot cooler.
However, by running grubby, the changes won't stick. Fedora User Docs, System Administrator’s Guide, Kernel, Module and Driver Configuration, Working with the GRUB 2 Boot Loader tells following:
To reflect the latest system boot options, the boot menu is rebuilt automatically when the kernel is updated or a new kernel is added.
Translation: When you'll install a new kernel. Whatever changes you did with grubby won't stick to the new one. To make things really stick, edit file /etc/default/grub and have line GRUB_CMDLINE_LINUX contain these ACPI-changes as before: acpi=strict noapic
Many people are suffering from this same issue. Example: Bug 98501 - [i915][HSW] ACPI GPE06 storm
Even this change won't fix the problem. Lot of CPU-resources are still wasted. When you close the lid for the first time and open it again, this GPE06-storm miraculously disappears. Also what will happen, your next lid open wake will take couple of minutes. It seems the entire Mac is stuck, but it necessarily isn't (sometimes it really is). It just takes a while for the hardware to wake up. Without noapic, it never will. Also, reading the Freedesktop bug-report, there is a hint of problem source being Intel i915 GPU.
Hopefully somebody would direct some development resources to this. Linux on a Mac hardware runs well, besides these sleep/sleep-wake issues.
MacBook Pro - Fedora 36 sleep wake
Thursday, August 25. 2022
Few years back I wrote about running Linux on a MacBook Pro. An year ago, the OpenSuse failed to boot on the Mac. Little bit of debugging, I realized the problem isn't in the hardware. That particular kernel update simply didn't work on that particular hardware anymore. Totally fair, who would be stupid enough to attempt using 8 years old laptop. Well, I do.
There aren't that many distros I use and I always wanted to see Fedora Workstation. It booted from USB and also, unlike OpenSuse Leap, it also booted installed. So, ever since I've been running a Fedora Workstation on encrypted root drive.
One glitch, though. It didn't always sleep wake. Quite easily, I found stories of a MBP not sleeping. Here's one: Macbook Pro doesn't suspend properly. Unlike that 2015 model, this 2013 puppy slept ok, but had such deep state, it had major trouble regaining consciousness. Pressing the power for 10 seconds obviously recycled power, but it always felt too much of a cannon for simple task.
Checking what ACPI has at /proc/acpi/wakeup:
Device  S-state   Status   Sysfs node

P0P2      S3    *enabled   pci:0000:00:01.0

PEG1      S3    *disabled

EC        S4    *disabled  platform:PNP0C09:00

GMUX      S3    *disabled  pnp:00:03

HDEF      S3    *disabled  pci:0000:00:1b.0

RP03      S3    *enabled   pci:0000:00:1c.2

ARPT      S4    *disabled  pci:0000:02:00.0

RP04      S3    *enabled   pci:0000:00:1c.3

RP05      S3    *enabled   pci:0000:00:1c.4

XHC1      S3    *enabled   pci:0000:00:14.0

ADP1      S4    *disabled  platform:ACPI0003:00

LID0      S4    *enabled   platform:PNP0C0D:00
For those had-to-sleep -cases, disabling XHC1 and LID0 did help, but made wakeup troublesome. While troubleshooting my issue, I did try if disabling XHC1 and/or LID0 would a difference. It didn't.
Also, I found it very difficult to find any detailed information on what those registered ACPI wakeup -sources translate into. Lid is kinda obvious, but rest remain relatively unknown.
While reading System Sleep States from Intel, a thought occurred to me. Let's make this one hibernate to see if that would work. Sleep semi-worked, but I wanted to see if hibernate was equally unreliable.
Going for systemctl hibernate didn't quite go as well as I expected. It simply resulted in an error of: Failed to hibernate system via logind: Not enough swap space for hibernation
With free, the point was made obvious:
               total        used        free      shared  buff/cache   available

Mem:         8038896     1632760     2424492     1149792     3981644     4994500

Swap:        8038396           0     8038396
For those not aware: Modern Linux systems don't have swap anymore. They have zram instead. If you're really interested, go study zram: Compressed RAM-based block devices.
To verify the previous, running zramctl displayed prettyy much the above information in form of:
NAME       ALGORITHM DISKSIZE DATA COMPR TOTAL STREAMS MOUNTPOINT

/dev/zram0 lzo-rle       7.7G   4K   80B   12K       8 [SWAP]
I finally gave up on that by bumping into article Supporting hibernation in Workstation ed., draft 3. It states following:
The Fedora Workstation working group recognizes hibernation can be useful, but due to impediments it's currently not practical to support it.
Ok ok ok. Got the point, no hibernate.
Looking into sleep wake issue more, I bumped into this thread Ubuntu Processor Power State Management. There a merited user Toz suggested following:
It may be a bit of a stretch, but can you give the following kernel parameters a try:
acpi=strictnoapic
I had attempted lots of options, that didn't sound that radical. Finding the active kernel file /boot/vmlinuz-5.18.18-200.fc36.x86_64, then adding mentioned kernel arguments to GRUB2 with: grubby --args=acpi=strict --args=noapic --update-kernel=vmlinuz-5.18.18-200.fc36.x86_64
... aaand a reboot!
To my surprise, it improved the situation. Closing the lid and opening it now works robust. However, that does not solve the problem where battery is nearly running out and I plug the Magsafe. Any power input to the system taints sleep and its back to deep freeze. I'm happy about the improvement, tough.
This is definitely a far fetch, but still: If you have an idea how to fix Linux sleep wake on an ancient Apple-hardware, drop me a comment. I'll be sure to test it out.
eSIM in iPhone
Friday, July 29. 2022
For vacation / touristing purposes, I did some travel. When leaving the comfort of EU/ETA-region cell phone mobile data changes into something tricky. Most telcos here in Finland offer you 15 GiB of roaming transfer per month inside EU/ETA. As I travelled into post-brexit UK, the gravity of current roaming agreements hit me. For those unaware (like me on London Heathrow airport): nothing works and if works, expect to pay per-GiB on gold bullions.
At hotel, free Wi-Fi was more than welcome addition to their service offering. With that I was able to figure out what the heck happened to my iPhone data and what measures could I take to enable it.
After weighing all the options, my solution was to purchase an eSIM. That's something I never even considered before. Being in "the spot" I just went for Holafly eSIM. I'm 99,9% sure their offering is not the best nor cheapest, their product simply was easily available. Their marketing must be superb!
List of options considered, but abandoned for different reasons included following:
- Not having data in my phone.
- Relying on public Wi-Fis. They were generally available in many sights and locations.
- Enabling non-EU/ETA data roaming on my subscription.
- Purchasing a prepaid SIM from nearby groceries store. They were generally available, not too expensive and easy to obtain.
This is what I paid with a credit card:
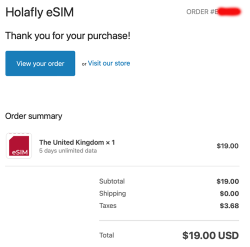
$19 USD. Living in Finland, the country most of the mobile stuff was invented at, the price for unlimited 5 day data was horrible. This is what Holafly delivered me via email:

A QR-code! What! Are eSIMs distributed as QR-codes? Really?
More googling revealed: yes, that's correct. An eSIM is essentially a QR-code.
Payload of above matrix barcode would be as follows:
LPA:1$h3a.prod.ondemandconnectivity.com$8083B8A60025B1BA0E92A460388592035501C61BB74516AB176BA714D64AD60B
Studying the topic more with eSIM Whitepaper - The what and how of Remote SIM Provisioning and How Does an eSIM Work? Acronym LPA from the QR-code stands for Local Profile Assistant. Most stuff encoded into a QR-code I've ever seen has some sort of classifier as the initial value, so having something there would be expected. Next section with $-signs contain a hostname to contact followed by a password to provide for a server answering to requests on mentioned hostname to issue details of my newly purchased subscription for my phone. Host h3a.prod.ondemandconnectivity.com translates into 91.240.72.102, property of Thales group.
After walking through iPhone new data profile wizard, this is what I ended up with:
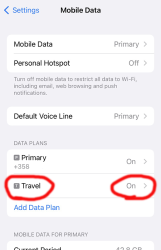
For unknown reason, the name of my eSIM was "Travel". That's something that can be chosen and renamed, even. Taking a look into the settings of my Travel-profile reveals following:
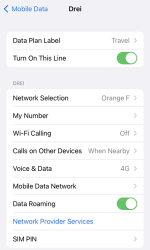
Whoo! That's an Austrian telco 3 subscription. The name "Drei" is German and means three (3). There are number of subsidiaries on 3 or Hutchison 3G Enterprises S.A.R.L., in case you are unaware of such telco group.
Now that I had mobile data, the obvious first thing was to verify where my Internet exit-node was located at. It seemed, my IPv4-range 91.223.100.0/26 was operated by Nexthop AS from Norway. A closer look on their geo-feed at https://geofeed.wgtwo.com/geofeed.csv revealed two network ranges of /26 or 62 available addresses:
# prefix,country_code,region_code,city,postal

91.223.100.0/26,GB,ENG,London,EC2V

91.209.212.0/26,GB,ENG,London,EC2V
Ultimately I was happy. Everything worked well, my iPhone had data connection for maps, googling, mail and iMessage.
To summarize:
- My iPhone is designed in California, USA and manufactured in China.
- I purchased an eSIM from Holafly, a Spanish company.
- I paid US dollars for the product on their website located in an UK server.
- What I got delivered from the purchase was credentials to connect to a French server.
- Response payload of from the French server was an Austrian mobile data subscription.
- Subscription's public Internet exit was located at United Kingdom, operated by a Norwegian company.
That's what I call an international operation! ![]()
PS. If you can hack the above eSIM to work for you, please inform me. It's a pre-paid, so I won't be the one taking the loss.
macOS Monterey upgrade
Monday, November 1. 2021
macOS 12, that one I had been waiting. Reason in my case was WebAuthN. More about that is in my article about iOS 15.
The process is as you can expect. Simple.
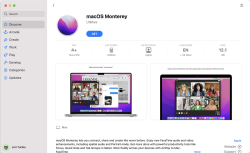
Download is big-ish, over 12 gigabytes:

After the wait, an install will launch. At this point I'll typically quit to create the USB-stick. This way I'll avoid downloading the same thing into all of my Macs.
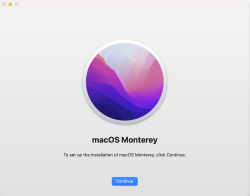
To create the installer, I'll erase an inserted stick with typical command of:
diskutil partitionDisk /dev/disk2 1 GPT jhfs+ "macOS Monterey" 0b
Then change into /Applications/Install macOS Monterey.app/Contents/Resources and run command:
./createinstallmedia \

  --volume /Volumes/macOS\ Monterey/ \

  --nointeraction
It will output the customary erasing, making bootable, copying and done as all other macOSes before this:
Erasing disk: 0%... 10%... 20%... 30%... 100%

Making disk bootable...

Copying to disk: 0%... 10%... 20%... 30%... 40%... 50%... 60%... 70%... 80%... 90%... 100%

Install media now available at "/Volumes/Install macOS Monterey"
Now stick is ready. Either boot from it, or re-run the Monterey installed from App Store.
When all the I's have been dotted and T's have been crossed, you'll be able to log into your newly upgraded macOS and verify the result:
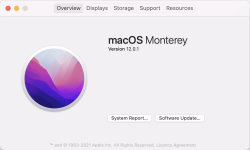
At this point disappointment hit me. The feature I was looking for, WebAuthN or Syncing Platform Authenticator as Apple calls it wasn't available in Safari. To get it working, follow instructions in Apple Developer article Supporting Passkeys. First enable Developer-menu for your Safari (if you haven't already) and secondly, in it:
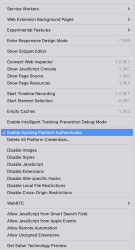
Tick the box on Enable Syncing Platform Authenticator. Done! Ready to go.
Now I went to https://webauthn.io/, registered and account with the Mac's Safari, logged in with WebAuthN to confirm it works on the Mac's Safari. Then I took my development iPhone with iOS 15.2 beta and with iOS Safari went to the same site and logged in using the same username. Not using a password! Nice. ![]()
Maybe in near future WebAuthN will be enabled by default for all of us. Now unfortunate tinkering is required. Anyway, this is a really good demo how authentication should work, cross-platform, without using any of the insecure passwords.
WebAuthN Practically - iOS 15
Monday, September 20. 2021
As Apple has recently released iOS 15, and iPadOS 15 and macOS 12 will be released quite soon. Why that is important is for Apple's native support for WebAuthN. In my WebAuthN introduction -post there is the release date for the spec: W3C Recommendation, 8 April 2021. Given the finalization of the standard, Apple was the first major player to step forward and start supporting proper passwordless authentication in it's operating systems. For more details, see The Verge article iOS 15 and macOS 12 take a small but significant step towards a password-less future.
For traditional approach with USB-cased Yubikey authenticator, see my previous post.
Registration
Step 1: Enter the username you'd like to register as.
Step 2: Go for Register
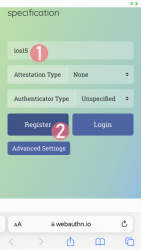
Step 3: Your browser will need a confirmation for proceeding with registration.
In Apple's ecosystem, the private key is stored into Apple's cloud (what!?). To allow access to your cloud-based secerts-storage, you must enter your device's PIN-code and before doing that, your permission to proceed is required.
Note: The option for "Use Security Key" is for using the Yubikey in Lightning-port. Both are supported. It is entirely possible to login using the same authenticator with a USB-C in my PC or Mac and Lightning with my iPhone or iPad.
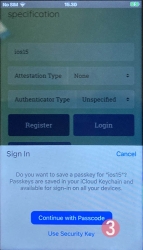
Step 4: Enter your device PIN-code
Step 5: You're done! Now you have successfully registered.
Best part: No passwords! Private key is stored into Syncing Platform Authenticator. Btw. weird name that for WebAuthN in Apple-lingo. Ok, to be honest, WebAuthN is a mouthful too.
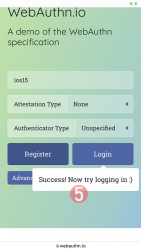
This was couple steps simpler than with Yubikey. Also there is the benefit (and danger) of cloud. Now your credential can be accessed from your other devices too.
Login
Step 1: Enter the username you'd like to log in as.
Step 2: Go for Login
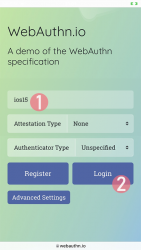
Step 3: Your browser will need a confirmation for proceeding with login. A list of known keys and associated user names will be shown.
Step 4: Enter your device PIN-code
Step 5: You're done! Now you have successfully logged in.
Best part: No passwords!

That's it. Really.
Finally
I don't think there is much more to add into it.
In comparison to Yubikey, any of your Apple-devices are authenticators and can share the private key. Obviously, you'll need iOS 15 or macOS 12 for that support.
Notes on running openSUSE on a MacBook Pro
Sunday, August 18. 2019
This one is related to a previous post of mine Installing openSUSE Leap 15.1 into a MacBook Pro with encrypted root drive.
kworker CPU-hog
Symptoms:
CPU-load is high. Top consumer is kworker:
top - 11:16:47 up 6 min,  4 users,  load average: 0.93, 0.70, 0.36

Tasks: 248 total,   2 running, 246 sleeping,   0 stopped,   0 zombie


  PID USER      PR  NI    VIRT    RES    SHR S  %CPU  %MEM     TIME+ COMMAND

   58 root      20   0       0      0      0 R 73.33 0.000   4:29.74 kworker/0:
What a kernel worker (or kworker) is, a sensible explanation can be found from Kworker, what is it and why is it hogging so much CPU?. In this case, high CPU on a kworker is a symptom, not the fault.
This same issue is faced by multiple users on different hardware, for example Kworker is at 100% - I think I've tried everything!. Also Fedora Linux users on MBP are suffering from the same Bug 1192856 - ACPI Interrupt storm causes high kworker CPU usage.
Checking some kernel performance counters (more about those, see perf: Linux profiling with performance counters), perf-report:
  Children    Self  Command     Shared Object     Symbol

+   50.51%   0.01%  swapper     [kernel.kallsyms] [k] cpu_startup_entry

+   41.67%   0.31%  swapper     [kernel.kallsyms] [k] acpi_hw_read_port

+   39.99%  39.99%  swapper     [kernel.kallsyms] [k] acpi_os_read_port

+   37.62%   0.00%  kworker/0:2 [kernel.kallsyms] [k] ret_from_fork
Something really fishy is going on with acpi_os_read_port. To get the amount of interrupts generated, most people run a simple grep . /sys/firmware/acpi/interrupts/*, but not me. My solution is to do a simple(?) Perl one-liner wrapped here on multiple lines for readability:
perl -ne 'next if (!/^\s*(\d+)\s+/);

 next if (!$1);

 $intrs{$ARGV}=$1;

 END {foreach (sort {$intrs{$b} <=> $intrs{$a}} keys(%intrs)) {

  printf("%s: %d\n", $_, $intrs{$_});

 };

}' /sys/firmware/acpi/interrupts/*
It will output interrupt counts. On my system, the counters are something like this:
/sys/firmware/acpi/interrupts/gpe_all: 4695534

/sys/firmware/acpi/interrupts/sci: 4694806

/sys/firmware/acpi/interrupts/gpe06: 4694582

/sys/firmware/acpi/interrupts/gpe17: 940
If you're really interested in what's happening inside ACPI and how General Purpose Events (GPE) work, read the document ACPI in LinuxArchitecture, Advances, and Challenges.
Anyway, it looks like ACPI event 06 is firing a lot. Way too lot keeping kworker busy handling the interrupts. This interrupt-handling on the other hand, takes a lot of CPU-power making your system run hotter than expected.
Fix:
As root, a simple echo disable > /sys/firmware/acpi/interrupts/gpe06 will do the trick. Resulting in CPU cooling down:
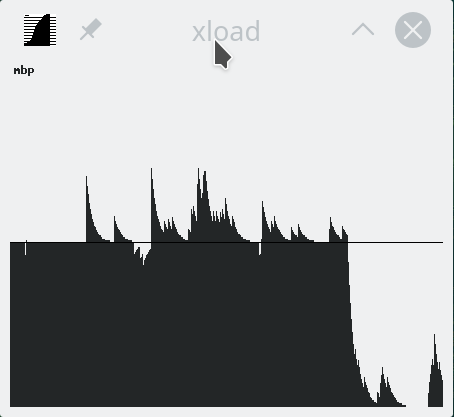
The effect is instantaneous and easy to notice. To persist this setting over reboots, things get bit more trickier. A lot of people suggest putting the above disable into crontab to be run on a @reboot. My opinion is clear: this is a system problem, system fix and needs to be addressed by system, not user. The @reboot-magic doesn't work in /etc/crontab, only on user's crontab-file.
A very good alternative is to go with acpi_mask_gpe-kernel parameter. It is documented in The kernel’s command-line parameters. And docs state "This facility can be used to prevent such uncontrolled GPE floodings". Nice! Exactly what I need. The tricky part is to edit /etc/default/grub and add acpi_mask_gpe=0x06 into GRUB_CMDLINE_LINUX-setting.
That's not all. Simply having the setting in a file won't change a anything yet. To make the new setting stick, on most Linuxes you would run update-grub. Some smart brain chose not to implement that helper into openSUSE, so that's not an option. To achieve the same, go for a: grub2-mkconfig -o /boot/grub2/grub.cfg
Now you're all set. Reboot and confirm. Of course you didn't fix the actual problem with ACPI, you simply made kernel ignore the interrupt-flood. You may want to settle for that at this point. I did file a bug report about this (Bug 1146023), but it seems the problem is limited to a specific set of MBPs and Fedora kernel guys are having hard time reproducing the issue. So, I'm not expecting SuSE guys to fix this anytime soon either.
Touchpad scroll direction
In 2011 when OS X 10.7 Lion was released, Apple made a drastic change on how touchpad (or how Apple calls it: Trackpad) scrolling works. Personally I totally understand this new logic, they wanted the scrolling user experience to be exactly the same and you would do on your phone's touch screen. You place your finger on the screen and pull the finger to the direction you want the screen to scroll. Before macOS 10.7 (note: the name change from OS X to macOS happened on 10.12 sierra) touchpad scrolling was targeted for the scrollbar, not to the actual content like on your touchscreen effectively reversing the direction.
So, as a macOS / iPad user, I want my scrolling to happen correctly, not the Windows way. To change, navigate to Touchpad settings and reverse the vertical scrolling:
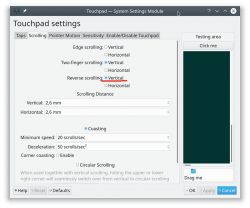
Reversing the reverse makes your head spin, but there is a logic there.
Touchpad gestures
On any typical use case, I would use a mouse. As in real external device, not the skin-on-my-fingertips damaging trackpad. For reasons unknown to me, it literally hurts to use those trackpads for too many hours. So, I normally steer away from them. It looks like I'm pretty alone with this one, but all I can do is to complain and use a mouse.
Typical this you may want to do:
- Right-click: On macOS, hold Ctrl and tap is a right click. This won't work on a Linux. You need to do the two-finger-tap for right-clicking.
- Scrolling: You can go with keyboard or keep dragging the scrollbars, that's ok. Doing a two-finger scroll with the touchpad, however, is much faster and less error prone.
- Zoom: Pinch won't work on a Linux, you need to use the actual zoom-control of whatever application you want to zoom
All the Apple's gestures are documented in HT204895 suppor article Use Multi-Touch gestures on your Mac, but as already mentioned, not all gestures are supported on a Linux.
Something else?
Nothing more pops into my mind. If you have anything to comment, please do so.
Installing openSUSE Leap 15.1 into a MacBook Pro with encrypted root drive
Thursday, August 15. 2019
I happen to have a spare 3rd generation 15" MBP. It is late 2013 model, used for years but recently just gathering dust. Back in the days, when the laptop was shiny and new, it was a serious piece of hardware and cost north of 2000 €. Even today, a fully working second hand 15" late 2013 would be priced around 25% of the original value. Couple years later Apple started manufacturing MBPs with faulty keyboards, faulty touch bar (the really weird top row) and faulty batteries. I'm in luck, as my unit pre-dates all of those. Yes, there are also some fatures missing which I'd love to have, fingerprint reader, USB-C -port and improved display to mention the most important ones.
Since the dust-gathering, I decided to see how a fresh Linux installation would go. Back in the days, I had a plastic MacBook running Linux. Given 32-bits and not-so-powerful CPU, I recycled it at the point I got tired of waiting for pages to load too long on Firefox. The amount of JavaScript modern web pages run is staggering. All that requires huge amounts of CPU to parse, process and run. Old low-end models simply won't cope making web browsing nearly impossible. So, I didn't have a Linux-Mac for couple years and now I wanted one.
Known facts
This I could figure out before doing any real installing:
- Installation can be done. openSUSE docs describe the process @ https://en.opensuse.org/SDB:Installation_on_a_Mac
- The built-in Broadcom WiFi isn't properly supported by most Linuxes, that includes openSUSE
- Debian Linux wiki @ https://wiki.debian.org/MacBook/Wireless states:
"MacBooks before the late 2008 models use Atheros chipsets, while late 2008 are now using Broadcom 4322 chipset." - StackExchange article @ https://unix.stackexchange.com/a/175813/241396:
"Broadcom 4360 actually comes with either of two distinct chips, 14E4:4360 and 14E4:43A0. There is no driver in Linux for the first one, while wl is an appropriate driver for the second one." - Arc Linux wiki @ https://wiki.archlinux.org/index.php/broadcom_wireless#broadcom-wl only states the fact wl-driver not being open-source.
- It is unclear which exact chipset is in the Mac, but it seems not to be properly supported in Linux.
- Debian Linux wiki @ https://wiki.debian.org/MacBook/Wireless states:
- My MBP doesn't have Ethernet RJ-45 port
- The existing USB-ports or Thunderbolt-ports could be used to host a network adapter, either wired or wireless, but I choose not to go down that path. Having an USB-dongle stick out of the Mac isn't something I'm willing to do.
- There is a good chance, that a Linux-driver for the built-in Broadcom WiFi exists. The existing driver can be downloaded from the net, but require some trickery to install during openSUSE installer.
- In macOS, drives are encrypted. In Windows using BitLocker is a good option to keep your data secure. Linux supports drive encryption as well.
Prerequisites
- A MacBook Pro with SSD full of data you don't care about. Also emptied SSD-drives will do.

- openSUSE Leap 15.1 ISO-image from https://www.opensuse.org/
- I personally will go for the full DVD, but it is not absolutely necessary. Small network installer will work as well.
- Skills to create a bootable USB-stick from the install image
- Your wireless network credentials and skills to connect a new device into it
- Two USB-sticks:
- One to boot openSUSE installer from. This stick will contain installation image and cannot be easily written into and must be attached to the Mac during installation.
- Second to transfer the WiFi-driver files
- Broadcom Linux wl-driver from http://download.opensuse.org/repositories/home:/Sauerland:/hardware/openSUSE_Leap_15.1/x86_64/
- Installer will need file
broadcom-wl-kmp-default-6.30.223.271_k4.12.14_lp151.27-lp151.121.1.x86_64.rpm. - Store the file into the second USB-stick.
- Installer will need file
- Since kernel-default -package has an update, the above RPMs needed for installer won't work in your installed openSUSE. To fix this, you will need also Broadcom Linux wl-driver from http://download.opensuse.org/repositories/home:/Sauerland:/hardware/openSUSE_Leap_15.1_Update/x86_64/
- Your installed openSUSE will need two files
broadcom-wl-6.30.223.271-lp151.121.4.x86_64.rpmandbroadcom-wl-kmp-default-6.30.223.271_k4.12.14_lp151.28.10-lp151.121.4.x86_64.rpm. - Store these files into the second USB-stick.
- Your installed openSUSE will need two files
- To make your life easier, having access to another computer while doing the install will help the process greatly. Especially, if you need to get a newer version of the Broadcom-drivers.
- That's it!
Disclaimer for RPM-files:
Those versions of files are valid at the time of writing. Both the install ISO and installed & updated openSUSE Linux are likely to eventually get updated and the versions of those files WILL change. Keep reading! There are instructions for you on how to compensate for updated versions. However, download locations will not change for openSUSE 15.1. The locations won't be valid for 15.2, but I'm sure you got that already.
Step 1: Prepare openSUSE 15.1 install
As instructed in https://en.opensuse.org/SDB:Installation_on_a_Mac, copy the installer ISO-file to the USB-stick. On macOS and Linux, figuring out the exact output drive can be bit tricky, so be careful with that. On Windows, the best utility for USB-drives is Rufus. You can get it from https://rufus.ie/.
While at it, download the required driver from above URLs pointing to Sauerland repository. Both versions are eventually needed, so just download them.
Note: for installer, only broadcom-wl-kmp-default -package is needed. We can safely ignore any RPM dependencies, as it is not possible to actually install the package. For installed Linux both files are needed, they have a dependency between packages. More about that when you're actually tinkering with the files.
Step 2: Boot the Mac into openSUSE installer
Plug in the installer USB (the other USB isn't needed yet). Power up the Mac. When you hear the boot-sound, press and hold the Alt/option-key. When you see the boot-menu, you can release the key. Displayed on your screen, there is a boot drive selection menu:
Go for the USB UEFI, that will start openSUSE installer.
Old geezers like me will remember the times when Macs required special bootloaders and tons of tinkering just to get the USB-boot to work. For past years, thanks to UEFI, USB-booting a Mac isn't any different than booting a PC.
Step 3: Establish facts
When the graphical installer launches, you'll see the license agreement screen:
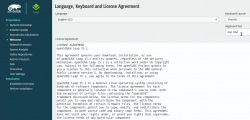
On top-right corner of that screen is also keyboard map choice. This is your chance to make sure your keys will work correctly on the GUI. This won't affect the text-console.
Switch to text-mode console
There are two critical pieces of information needing to be confirmed to get the WiFi-driver working. Since the openSUSE installer is running in graphical mode, you need to switch to text-mode. In a Linux, the console can be chosen with Alt-<function key> -combo. When graphical interface is running, key combo is Ctrl-Alt-<function key>. To make things even trickier, in a Mac <function key>s require the actual Fn-key to be pressed, so ultimately you'll need to press and hold Fn-Ctrl-Alt and then tap F2-key to go for a text-console.
Confirm kernel version
On a bash-prompt, check the exact Linux kernel version with a:
cat /proc/version
As a result, my install image will display:
Linux version 4.12.14-lp151.27-default
In Linux, all device modules are stamped with the specific kernel version they'll work with, so it is imperative to get the Broadcom driver for that exact kernel version.
Confirm broadcom WiFi hardware
On a bash-prompt, get a listing for wireless network devices. List PCI-devices with class 280, that's for all network controllers (listing is at https://pci-ids.ucw.cz/read/PD/), as already established, there shouldn't be too many of those:
lspci -d '::280' -vv -n
On my Mac, the response is:
02:00.0 0280: 14e4:43a0 (rev 03)
Remember from above: "Broadcom 4360 actually comes with either of two distinct chips, 14E4:4360 and 14E4:43A0. There is no driver in Linux for the first one, while wl is an appropriate driver for the second one." So, this is the confirmation we needed. wl is the driver needed and we can move forward with installing the driver.
Step 4: Install the Broadcom driver
This screenshot depicts my process:
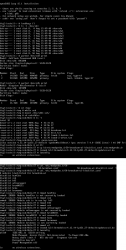
Now that you know the kernel version (4.12.14_lp151.27 in my installer) and copied the downloaded RPMs into the other USB-stick, plug it in. Remember: the installer USB is needed and cannot be removed.
Determine the correct device and mount it
In the above screenhot, the USB-stick having the drivers is /dev/sdb. First I checked out which storage devices Linux found. There are number of those for: Apple SSD, installer USB and driver USB. Since I knew, my driver USB is a Kingston Datatraveller, displaying the block-device partition table by running parted /dev/sdb print helped to identify the correct drive.
I mounted the USB-stick with a:
mkdir /tmp/usb

mount /dev/sdb1 /tmp/usb
Locate the files from the USB-stick.
Unpack the driver RPM
At this point, the Broadcom RPMs versioned for openSUSE installer kernel need to be popped open. The ones for your running Linux will install as-is, so no need to unpack them. It would be easy & smart to just install the RPM, but given Linux installer, it is not possible. Most of the mounted filesystems in an installer are SquashFS filesystems (more info from https://en.wikipedia.org/wiki/SquashFS) and are read-only. Well... you CAN alter a SquashFS, but it is more complicated than just running couple commands to extract the driver from RPM and injecting it into a running system.
To unpack an RPM, in a temporary directory run following (this is a single-liner, I just wrapped it into two lines for readability):
rpm2cpio broadcom-wl-kmp-default-6.30.223.271_k4.12.14_lp151.27-lp151.121.1.x86_64.rpm \

 | cpio -ivd
This will create any subdirectories and files into the current directory where cpio-command is run. That's why a temporary location is suggested.
Install wl-driver
As already established, Broadcom on Linux is a messy business. And this Broadcom chip in your MBP is especially messed up. So beware! Trickery ahead.
The other file you won't be needing during installation, but you will for your running openSUSE would contain a file etc/modprobe.d/50-broadcom-wl-blacklist.conf. This blacklisting mechanism exists in Linux to prevent device-modules from being loaded when a particular device is being used. Now, at the point you're running the commands on your Linux-installer its too late. Your installer already loaded bunch of device drivers you won't be needing. So, they must go. Contents of the file suggests what to remove:
# modules blacklisted for broadcom-wl

blacklist bcm43xx

blacklist ssb

blacklist b43

blacklist ndiswrapper

blacklist brcm80211

blacklist bcma

blacklist brcmsmac
You can run command rmmod for each of those, but I choose to go for a for-loop:
for module in bcm43xx ssb b43 ndiswrapper brcm80211 bcma brcmsmac; do

  rmmod $module

done
In my Mac, at least modules b43, ssb and bcma were loaded.
Warning: If you DON'T rmmod conflicting modules, your wl-module will NOT work.
Finally, it's time to go for the good driver. When you unpacked the driver RPM, it contains a subdirectory. My driver is at lib/modules/4.12.14-lp151.27-default/updates. Go there and run:
insmod wl.ko
There is zero feedback for your command. To get an indication of success, run iwconfig. It will display something like:
wlan0     IEEE 802.11  ESSID:off/any

          Mode:Managed  Access Point: Not-Associated   Tx-Power=200 dBm

          Retry short limit:7   RTS thr:off   Fragment thr:off

          Encryption key:off

          Power Management:off
When you see an existing wlan0, you're golden! Now you're good to go forward with graphical installer.
Step 5: Install openSUSE Leap 15.1
First, go back to graphical installer. The key combination for that is:
Press and hold Fn-Alt and then tap F7-key
Add your Mac's Broadcom to Linux
In the graphical installer, go Next from license screen and witness a blank Network Settings screen. The installer wasn't able to determine any operational network interfaces in your system. Not to worry, now that your Broadcom is on-line, you can add it. Click Add, and add a Wireless device using Kernel module wl:
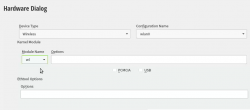
Moving forward with Wireless Network Card Configuration, a screen to connect to your WiFi will appear:
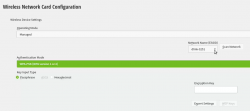
Scanning for any available networks will provide you a drop-list of found networks. Your own network needs to be in that list. Just add your authentication details to the dialog and you're good to go.
Instruct openSUSE installer to encrypt your root drive
(This is completely optional, you don't NEED to have an encrypted hard-drive. I just love doing stuff like this.) When your installer wizard will reach Suggested Partitioning, that's your cue. Going for encrypted root partition is actually surprisingly easy on openSUSE:
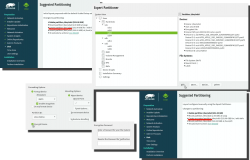
Go to Expert Partitioner using the suggested partition as a baseline for your custom partitioning. The only thing you need to change is to enable encryption on your root partition. Find mount point / and Edit it. Just click Encrypt Device and choose a wise password for your encryption. That's it. Then you can Accept the partition plan and move forward.
Add an user to new Linux
For security reasons, I'll always separate my administrators and regular users. What level of security you're targeting for is completely up to you. I, personally won't use Automatic Login and won't use same passwords for super-user and regular users. The Local Users dialog will look like this:
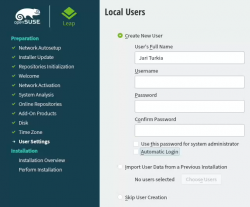
Hang tight, you're almost there.
Install!
When you reach the Installation Settings, you're about to start destroying any previous data on your Mac and start installing the Linux:
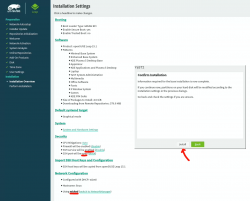
Enabling SSH and drilling a hole for it into firewall is up to you. Also, the choice of tooling for network management is up to you. I do dislike NetworkManager and obviously choose to drop it and go with wicked. If you want to learn more, go read wicked FAQ at https://github.com/openSUSE/wicked/wiki/FAQ.
When you click Install in the Confirm Installation -dialog, the ball starts rolling. If you missed the previous warning, before this point your data is still intact in the drive, after this point it won't be anymore. This is the part where you can go grab a cup of coffee:
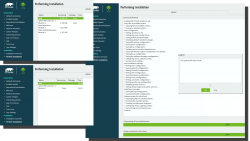
At the successful end, your system will automatically reboot. When the installer reboots the computer, you can remove the installer USB. It won't be needed anymore.
Step 6: Reboot into your newly installed Linux
If you went with encrypted partition, GRUB will require the password to decrypt the drive to load Linux kernel:
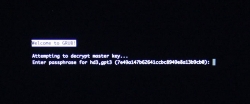
Hint: If you already didn't, just yank out the installer USB.
The "funny" thing about encrypted root partition is: when your kernel is loaded by GRUB, kernel will need the same password again!
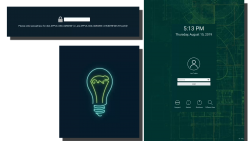
Yes, punch in the same password again to reach login-screen.
Add your Mac's Broadcom to Linux - Again!
Once logged in all the hard work you did with the Broadcom-driver are lost. Your newly installed openSUSE will NOT have the Broadcom-driver installed. What! What! What?
But wait! This time installing is much easier. You actually CAN simply install the RPMs from the other USB-stick. On an installed Linux, the system can be written into.
Confirm the kernel version (again) and notice how it is different. My system has:
Linux version 4.12.14-lp151.28.10-default
Just like before, figure out which one the device is (with a great likelihood, it is not the same device anymore) and mount it. Once mounted, as root you can do something like:
rpm --install -h *.rpm
Installing the RPMs won't make your network operational. In a Linux, there are always ways to avoid rebooting, but in this instance I found it simply easier to go the Windows-way and reboot. You can do that at this point. Alternatively if you don't just yet need a network, you can also remove the second query for encryption password and then reboot to fix two problems on a single reboot.
Remove the 2nd password prompt
This is something I wouldn't do on a shared machine. Since I'm almost certain, nobody else will use my laptop, in this instance I'm willing to add ease of use with cost of potentially losing my security. If a logged-in user can access the encryption key-file, my encryption security is gone! Before allowing a second encryption key to be used, the plain-text password is not stored anywhere. To keep my system still secure, I need to make sure the permissions for the file are correctly set and also keep any malware or unwanted software from stealing my precious key-file.
Process for setting up encrypted root in openSUSE is described well in https://en.opensuse.org/SDB:Encrypted_root_file_system. As instructed there, create a keyfile, add the keyfile as a valid key into LUKS and secure the setup:
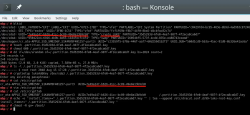
For relaxing my system's security, the general idea is to load some random bytes from /dev/urandom and create a random-content key-file. The docs are using 1024 bytes, I went double that for a 2048 byte keyfile. In my sequence, I first create an empty file, then lock all other users out of it and then populate the file with random bytes:
touch /.partition.35d5293d-6fe0-4eaf-987f-4f2eca8ca6d7.key

chmod 600 /.partition.35d5293d-6fe0-4eaf-987f-4f2eca8ca6d7.key

dd if=/dev/urandom \

  /.partition.35d5293d-6fe0-4eaf-987f-4f2eca8ca6d7.key \

  bs=1024 count=2
Then this newly created filename needs to be added into two places. First /etc/crypttab. After setup, there are only two columns. As instructed in the documentation, a third column needs to be added. Note: This single line having three columns is split into three lines here for readability. If you fail to have this as a single line, your system will fail to reboot:
cr_ata-APPLE_SSD_SM0256F_S1K4NYBF401257-part3

UUID=7e49a147-b626-41cc-bc89-49e8a13b9cb0

/.partition.35d5293d-6fe0-4eaf-987f-4f2eca8ca6d7.key
Second into initRD by creating a new Dracut configuration segment /etc/dracut.conf.d/99-root-key.conf:
echo -e 'install_items+=" /.partition.35d5293d-6fe0-4eaf-987f-4f2eca8ca6d7.key "' \
 | sudo tee --append /etc/dracut.conf.d/99-root-key.conf
Yet again, to keep your system secure, make sure nobody else can access your /boot-stuff:
chmod -R go= /boot/
To have this Dracut segment have any effect, you need to run mkinitrd as root. If you want more information about initRDs or Dracut, go to https://dracut.wiki.kernel.org/.
Now, you're ready to reboot the Linux. Both WiFi and password setups are done.
Step 7: Reboot and verify setup
You will need to enter the encryption password for GRUB, no change there. However, your Linux should go directly to login-screen. If it doesn't, you failed somewhere.
Also, after a login, your WiFi should work. To confirm, go to a prompt:
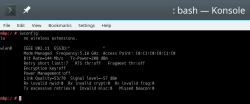
Since installer saved your wireless connection details, now you have network connectivity also in your installed Linux!
Step 8: Finalize
Remember the part where your installer used a different version of Linux kernel than your ready system? Kinda hard to not remember it, right. Now some additional work is needed to keep your system working:
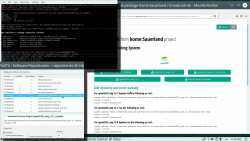
As root, run this in a bash-prompt (again, a single-liner):
zypper addrepo \

  https://download.opensuse.org/repositories/home:Sauerland/openSUSE_Leap_15.1_Update/home:Sauerland.repo
The setup information is available at https://software.opensuse.org/download.html?project=home%3ASauerland&package=broadcom-wl.
Finally: Go to YaST2 and use the GUI to inspect all the software repositories your system has. It must have Sauerland's repo enabled for the Broadcom driver to get updates as openSUSE's kernel-default -package does.
Step last: All done
 That's it. Now your Mac is successfully running an openSUSE 15.1 Leap Linux.
Enjoy! ![]()
Apple iOS device reset - Dismantling an old phone to be sold
Thursday, May 30. 2019
Every one of use will eventually end up in a situation where old mobile device is upgraded to a new one. Most of us can manage getting the new one working without problems. There are backups somewhere in the cloud and the new device will have the intial setup done from the backup and everything in the out-of-the-box experience will go smoothly.
But what about the old one? You might want to sell or give or donate the perfectly functioning piece of hardware to somebody who wants it more. But not without your data, accounts and passwords!
Apple support has this HT201351 article What to do before you sell, give away, or trade in your iPhone, iPad, or iPod touch. It instructs you to do a full erase of the device, but doesn't go too much into the details.
Personally, I've struggled with this one a number of times. So, I decided to record the full sequence for me and anybody else needing it. Here goes!
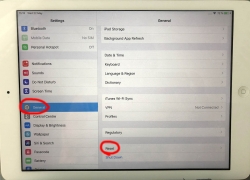
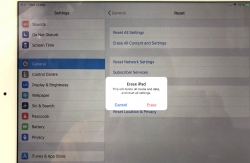
Start with Settings, General. In the bottom of General-menu, there is Reset. That's your choice. For curious ones, you can go see the menus and choices without anything dangerous happening. You WILL get plenty of warning before all your precious data is gone.
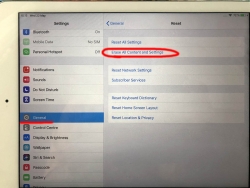
In Reset, there are number of levels of reseting to choose from. You want to go all the way. To erase every single bit of your personal data from the device. To get that, go for Erase All Content and Settings.
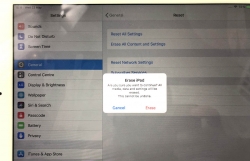
You will have two separate warnings about your intent to destroy your data. Even if you pass that gateway, there is more. Nothing will be erased until a final blow.
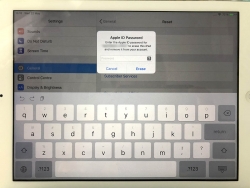
The final thing to do is to inform Apple, that this device won't be associated to your Apple ID anymore. For that, your password will be needed. This is the final call. When you successfully punch in your password, then the big ball starts rolling.
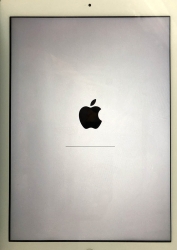
When you see this, you're past point-of-no-return.
It takes a while to erase all data. Wait patiently.
When all the erasing is done, the device will restart and it will go for the out-of-the-box dialog. This is where new user needs to choose the user interface language, network and associate the device with their own Apple ID.
iOS Voicemail number
Tuesday, November 6. 2018
The other day I realized, that my mobile subscription has a voicemail. Since its a corporate one, I really cannot control it much, it just ... well ... is.
This existence of voicemail became evident for a simple reason. Somebody left me a message there. Ufff! Why! Personally I hate those 70s relics. If you cannot get a hold of me, just send a SMS or an email! ... People... They just don't get it.
So. I had an easy task, go listen the message. In an iPhone, there is a Voicemail menu:
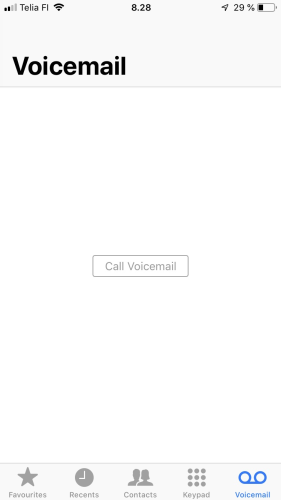
Tapping the "Call Voicemail" does absolutely nothing. Eventually I did find the voicemail number from my subscription paperworks. That is, if I really was interested in the message, but I wasn't. Being a geek, I wanted to get my iPhone to do what the button caption says. To Call Voicemail.
Apparently that is something my Telco should fix. Or, that's how its done in the Big World. No such joy for me. After a good while of googling around, I found bunch of codes, which actually didn't either work, or do anything useful on an iPhone. Finally, I bumped into an ancient Apple community discussion with topic Q: iphone 5 change/add voicemail number? This user had been instructed the following:
I have just been in contact with Orange regarding this they advised to dial:
*5005*86*123#
This will set the voicemail number to 123 (orange) so hopefully (i've not tested) you can just put your voicemail number inplace of 123!
Yes! Doing a *5005*86*<my voicemail number here># does the trick for my iPhone 8 running iOS 12.1.
While at it, I googled more and found article iPhone codes from the same era.
| Code | Description |
## 5005*86 # |
Erases the Voice Mail number (iOS specific) |
*# 5005*86 # or *# 61 # |
Displays the Voice Mail number (iOS specific) |
* 5005*86 * <a number> # |
Sets the voicemail number (iOS specific) |
*# 06 # |
Display IMEI number, see: https://en.wikipedia.org/wiki/International_Mobile_Equipment_Identity |
*# 30 # |
Caller-ID display check (on / off), see https://en.wikipedia.org/wiki/Caller_ID#Caller_ID_blocking |
*# 43 # |
Check if call waiting is activated |
*# 21 # |
Displays any call forwarding settings enabled |
*# 33 # |
Displays call barring settings, see https://en.wikipedia.org/wiki/Unstructured_Supplementary_Service_Data |
* 004 # |
Enable voicemail |
# 004 # |
Disable voicemail |
For a complete list of generic mobile phone Unstructured Supplementary Service Data (USSD), or "Quick Codes" or "Feature codes" see Wikipedia article https://en.wikipedia.org/wiki/Unstructured_Supplementary_Service_Data#Code_table.
New toys: iPhone 8
Wednesday, April 25. 2018
Whenever there are new toys, I'm excited! Now that I have new iPhone 8, there is no other way to phrase it: it IS same as 7, which was same as 6. The observation Woz pointed out when X and 8 came out:
I’m happy with my iPhone 8 — which is the same as the iPhone 7, which is the same as the iPhone 6, to me.
Last year around this time, I wasn't especially impressed when I got my 7. See and/or read it at /archives/345-New-toys-iPhone-7.html. This year, I'm kinda hoping to still have my 6. The good part is, that I won't have to pay for these toys myself. If I would, I would be really really disappointed.
Replacing MacBook Air SSD
Saturday, February 10. 2018
I've never disassembled an Apple laptop. A while back I got a chance to peek into one, as I was summoned to add more SSD-capacity into an Air. As you can see from the spec, it is a rather early model of Air. But hey, Apple hardware is quite robust and the value you get for your money is huge. So, after 7 years of usage, it is still worth replacing the SSD with a bigger one.
The instructions for this can be found from EveryMac.com, but I'll describe my experiences here. Also having video instructions only is not something I'd like to see. A high quality picture has its value too.
Prepare job
- Make sure there is a restorable Time Machine backup of the laptop.
- If you don't care for the data on the machine, this is not necessary.
- Make sure you can boot the device from an USB-stick:
- You can restore entire SSD content from Time Machine.
- You can do a fresh install to the new SSD
Part job
A new SSD is needed. Given the availability and low price, a Transcend 240GB JetDrive 500 SATAIII 6Gb/s Solid State Drive Upgrade Kit for Select MacBook Air Models (TS240GJDM500) was selected.
Getting one from Amazon.de was a painless and fast operation. Initially, I was wondering why would be selling an "external" replacement part, because the SSD I wanted to replace is surely inside the Mac. It surely has to do something with making an Apple spare part available. Normally parts are not available for general public.
To pop open an MacBook Air, you will need a pentalobe TS4 screwdriver, and to disconnect the SSD from the motherboard, a Torx T5 screwdriver is needed. Both of which are known to hardware hackers, but not commonly owned by general public. Luckily somebody knows this, and in the box with the new SSD both are there:
Replacement job
Popping the hood of a mac is almost a no-operation. There are 10 pentalobes there, remove them and the lid will open easily. After all the years of usage, there was some dust in the CPU-fan, so I carefully removed all that before proceeding.
When the guts are seen, first task is to remove the battery connector. This ensures, that the motherboard and SSD are shut down during the operation. The connector can be disconnected quite easily without any tools:
Target-of-the-day, SSD, can be located right next to CPU:
The arrow points to the Torx T5. That is the only screw holding the SSD in place. Since I had a cool aluminium external case for the SSD, of course I placed the old SSD there:
The new Transcent SSD looks like this. Exactly what the original Samsung:
After that it's just to flip the lid back on and tighten 10 pentalobes.
Entire hardware job was completed in 15 minutes. That part was designed to be replaced!
macOS job
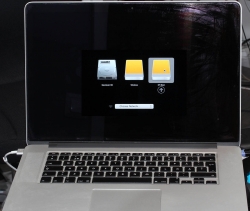
Now we have a laptop with a completely blank SSD in it. Of course I had to test it, but it really doesn't do much on boot. The only real option was to insert an USB-stick and press the Option-key to get the boot menu, select the USB-stick and then get to the Install/Upgrade -menu. Select Disk Utility from that:
As expected, the new drive is unitialized and you cannot select a device with that status as macOS install destination.
Since Apple engineers are quite smart, to convert an uninitialized drive to an intialized one, the operation needed is to erase it. WHAT! Yes. To repeat, the operation is to erase the drive. ![]() The drive is completely empty, it does not have a partition table, file system or data in it, but in their infinite wisdom Apple engineers have decided, the only way I can initialize the new SSD is by making double-sure there is nothing on it.
The drive is completely empty, it does not have a partition table, file system or data in it, but in their infinite wisdom Apple engineers have decided, the only way I can initialize the new SSD is by making double-sure there is nothing on it.
The erase will take a lot of time. Most if it, the installer tries to do something erase-related to it, but keeps failing miserably mainly due to lack of partition table. After the erase completes, there is a file system and regular macOS install can proceed. I chose to restore the machine from a TM-backup:
That really took couple hours and I didn't want to eyeball that through.
Job well done!
First boot from newly installed SSD, from restored machine image was success. First login indicated no changes at all. It was just like this machine was running as-is.
Ultimately a great success (like Borat would say)!
New toys: iPhone 7
Monday, May 22. 2017
My employer was kind enough to issue me new toys. Any proper nerd loves new toys, I know I do!
So, I got an upgrade for my old(ish) iPhone 6. To a rather big surprise, they're exactly the same thing. Here is a quiz for you iPhone-fans. Tell me which one is 6 and which one is 7:
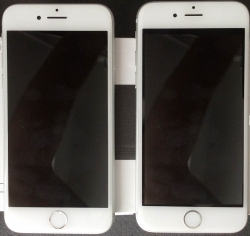


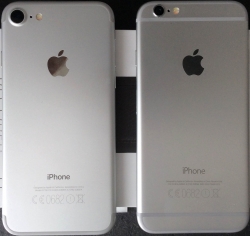
For the first three pics, I honestly don't know which one is which. The fourth one is an easy one, in iPhone 6 there is a white line right below the camera lens, also the lens is bigger on 7. Fifth one is a no-brainer, no 3.5 mm headphone jack exists in the new one.
Other than the missing jack, there isn't much to tell. Upgrade is almost a no-upgrade. Everything is the same, except I had to spend couple hours of restoring the backup. Actually, there was a quirk, my new phone had latest iOS, but the un-boxed one didn't, so I first had to go through the out-of-box-experience and then upgrade it to latest firmware. Then it was possible to do the restore and after restore the thing could start installing my apps.
List of things that didn't transfer:
- Touch ID fingerprints
- Apple support HT204136 says that it should, but ...
- Apps from my employer's app store
- Keyboard dictionary
- Ringtone selections
- I have a dozen or so own-made ringtones for incoming callers.
- The ringtones did transfer ok, but the selection of which one is used didn't survive the transfer.
- Google Authenticator keys
- Read the article "Is there an easy way to transfer Google Authenticator codes to a new device?" for reasoning.
- ... maybe something else I forgot to mention here
Ultimately I have to say, this wasn't worth it. I got the same phone without headphone jack, and I had to spend couple hours of work to get a 32 GiB thing to the point I started with a 64 GiB one. It's a shame there is no 64 GiB iPhone 7. They didn't let me get the 128 GiB, because it's too expensive. The new A10 CPU should be more energy efficient, but in reality it doesn't show. Only after upgrading to iOS 10.3.2, there was some improvement on battery usage. Before that, I had to charge the phone more often that my old one.
The only positive thing is, that now I have a fresh battery to my iPhone. I guess I should find some positive things with the new and improved "best ever" camera, but I simply cannot.
