Monitor Arm installation
Sunday, November 20. 2022
This is one of my computing setups at home office:
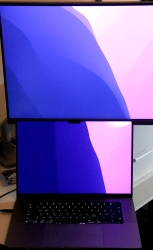
This one has a MacBook Pro 16" at desk and some extra display real estate on top of it. It's a Samsung 4K screen. As there are other computers on this desk, this display has no room anywhere else and it has to go high.
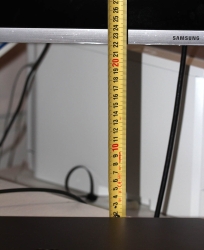
An open lid of this MBP will take ~24 cm in height. On this particular Samsung, there is couple centimeters of frame. For the display area to start at 24 cm, bottom of screen has to be at ~22 cm. Like this:
Most inexpensive no-brand solutions (like my previous one) at their arm can go up to to 50 cm. Then at the end of arm, there is the VESA mount, which will be attached to back of the monitor. Like this:
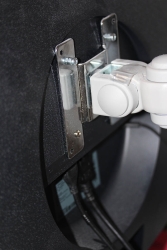
Again, on this particular Samsung the VESA D-mount is a 75x75 mm and it is located at nearly at the top of the screen making the bottom go low. Most displays have a 100x100 and the VESA-mount is typically at center of the thing. Looking at the picture, notice how commonly sold monitor arms have both 100x100 and 75x75 end. This Samsung has a really beautiful round space for all connectors and VESA-mount (invisible to user at the back of the thing). Nobody at Samsung thought how a bigger 100x100 mount would fit inside this obviously-too-small-ring. I couldn't use the regular M4 screws and had to use extra long ones.
Here is a picture of the problem with this Samsung's let's-place-the-mount-at-top -design:
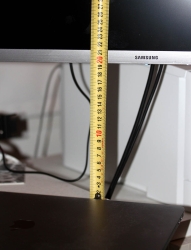
When I go to max height of 50 cm on my arm, I'm missing ~3 cm at the bottom. Monitor is only at 19, but need to be at 22 for the MBP's lid to not obstruct anything at the 4K display. Crap! My old arm clearly has grown too small. There is an illustration of the problem:

Should my MBP be a 13" model or Samsung have its mount in a more reasonable location, this old monitor arm would do it for me. To monitor arm shopping, then. This is the one I got:
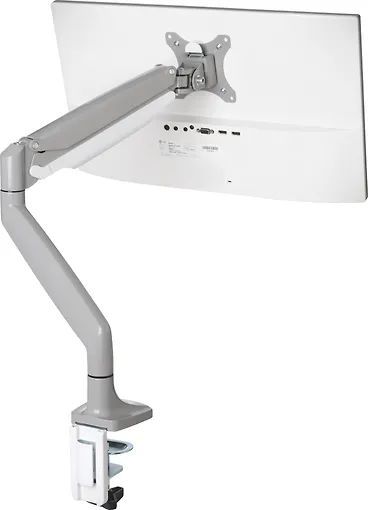
It's a Kensington SmartFit® One-Touch Height Adjustable Single Monitor Arm. This more expensive baby can go the required height and much more! Problem solved by throwing money at it.
Davis Vantage Vue battery life
Sunday, November 13. 2022
Over three years ago I had to get a new weather station. See my blog post about it.
Yesterday a storm hit and I wanted to see the measured wind and gust speeds. They were zero. As in no wind at all!
This measurement of nothingness vastly differed what my eyeballs and ears could measure. Wind was strong enough to rip shingles of my roof. Any storm effects were also very audible indoors. ---> To troubleshooting the issue.
My indoors console of Davis Vantage Vue reported: Low battery in sensor 1. Darn!
VeeWX web UI confirmed the fact. Signal quality was flaky:
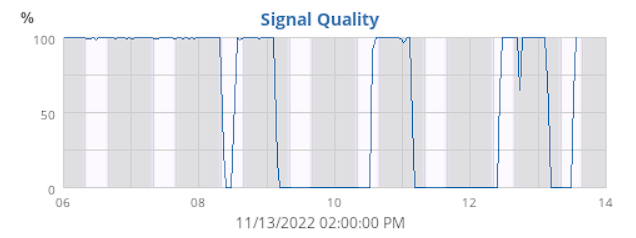
Notice how signal quality would plummet on dark bars (no sunlight) and recover on light bars (sun started shining into the panel). The battery had gotten its share of -30° C winters and +38° C summers. Sustaining Finnish weather isn't easy for man made objects.
I dug up pictures from my 2019 blog post:
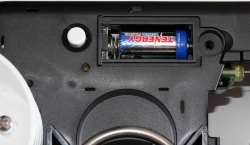
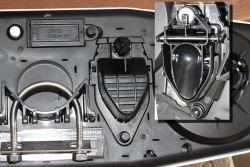
It all came back to me vividly. Indeed, in the bottom of the outdoors unit there is a lithium CR-123 battery. Integrated Sensor Suite (or ISS) has a plastic cover which can be easily removed by opening the plastic screw. As the unit is well designed, the battery pack is well protected from rain, sleet and snow.
Next, getting a replacement. Maybe this battery is one of those hard-to-get and possibly expensive ones? To my surprise a lithium CR-123 is easily available:

Pack of two costs 9,90€ on my local hardware store. Not even expensive!
Yet another well-designed feature of a Vantage Vue.
Unfortunately the second battery has its expiry date before 2025 which is the due time of next change. Generally speaking I'd rather power the unit from a cable. That way I wouldn't have to climb to my garage roof at all. Doing the climbing every three years in a reasonably good weather isn't too bad.

