Windows 10 weeks: Getting an activated Windows 10 Pro for free
Sunday, July 17. 2016
I'd like to be clear on this: I did not figure this one out myself, I just bumped into Philip Yip's page about this. All the credit should go to him, I just tested this and confirmed it to be working.
One of the upgrades I did earlier this month was for a Windows Vista. Computer geeks point out two things immediately: 1) Vista! Really? Who would use that voluntarily? 2) well, it cannot be upgraded into Windows 10. Both very true. It just so happened, that there was an OEM Vista running on a computer. Vista will cease to have security upgrades on 10th April 2017, so I suggested to upgrade the thing into a 10 while I did some other work on the thing. Obviously the person owning the poor computer didn't want to pay for the upgrade, so I chose to go with Mr. Yip's method on it.
Prerequisites
For this to happen you will need:
- An USB-stick, minimum size 4 GiB
- This will be used to host the Windows 10 installation image
- I went to a supermarket and got a brand new 16 GiB USB3 stick for the speed improvements
- Ability to boot the target computer from the above USB-stick
- Most computers I've worked with can do this
- Windows 10 ISO, build 10130
- Ok, this one is harder one to come by, but it is generally available in the Big Net. I'm talking about software piracy here.
- You will need this specific build. Older or newer ones won't do the trick.
- A piece of software to write this ISO-file into the above USB-stick and make it bootable.
- My favorite thing for doing that is Rufus. It is a solid piece of software to write images into USB-sticks.
- Windows 10 media creation tool
- You can get one from Microsoft's website
- Possibility to disable internet connection from the target machine and enable it when needed
- Finally: Possiblity to change the BIOS/UEFI date on the target computer.
- This trick solely relies on the fact, that you can pretend the date to be in the history.
Also please note, that there is NO UPGRADE possibility here. This is effectively a fresh install. If you choose to re-install on top of your existing Vista installation, please take care no to lose any precious data. I installed a bigger hard drive to the computer, so I made sure that the old drive was intact during this process.
Steps
This is how the entire process goes:
- Use Rufus to create Windows 10 build 10130 USB-stick
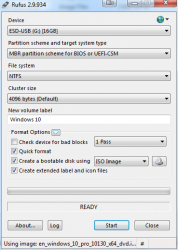
- Boot into BIOS/UEFI setup, set date to anything around September 2015. I just bumped back the year and did my installation in "July 2015".
- Make sure, there is no Internet connection during the installation. THIS IS IMPORTANT!
- Boot from Windows 10 build 10130 USB. Make sure there is no Internet connectivity on the machine, so that it is impossible for it to update date via NTP or talk to Microsoft.
- Create a recent Windows 10 install USB
- I had my own computer for media creation and didn't have to use the target computer for this. This can be a parallel process.
- When asked about the edition, choose Win 10 Pro
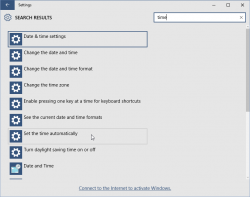
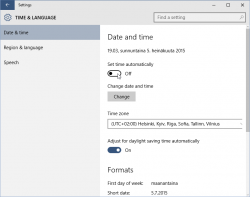
- Turn off internet time when install done. I found that one to be little tricky, but the setting is there.
- Set a specific license key. For this you'll need to open
CMD.exeas Administrator. If you attempt this as a regular user, ie. not right clicking thecmd.exeand selecting "run as administrator", you'll notice that soon. The command to execute is:
slmgr /ipk 6P99N-YF42M-TPGBG-9VMJP-YKHCF
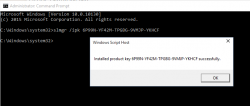
- Connect to internet. THIS is the first time the install machine is allowed to get there. If your box did connect to The Net before this, you have failed.
- Activate Windows (remember: Admin prompt):
slmgr /ato
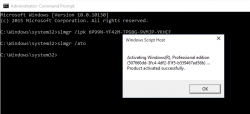
- Now you have an activated Windows 10 running. You can go to My Computer and Properties to confirm.
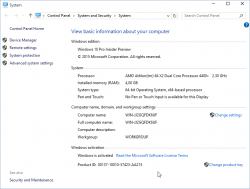
However, it's an old edition and you don't want to keep that. The important thing is, that now your computer's fingerprint has been stored into Microsoft's server and any subsequent Windows 10 installations will proceed without entering any license key. - Just insert the USB install stick with the newer Windows 10 installer (the one you created on step 5) and run
setup.exeon that. There is no need for reboot or anything, just run the installer. - Install it again! This is your second installation.
- I choose to keep nothing. This just makes sure, that all the old garbage will be gone after you're done.
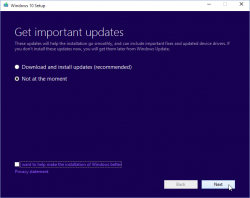
- Please note, that when asked for license key, don't enter any. Always select "Do this later" or "Skip". This is not needed and your newly installed Windows 10 will be activated at the end.
- Wait 15 minutes
- You're done!
 Your Windows is ready to be used.
 - Remove the first installation stored into
C:\Windows.old, you don't need to keep any of that. However, the files are protected by operating system and deleting the entire directory prooved to be little tricky. I ended up booting from the USB-installation stick into rescue-mode and chose thecmd.exefrom that. On prompt I entered two commands:
del /S /F /Q c:\Windows.old

	rd /S /Q c:\Windows.old
Finally
This process worked for me on 5th July 2016. I don't think this has anything to do with July 29 free upgrade -limitation.
Also I'm sure guys at Microsoft keep track of their installations. They'll know exactly how many licenses they gave out using this method. My thinking is, that they simply don't care. Pretty much all of the competition is giving out operating systems for free and they cannot for some strange reason. Anybody choosing this method needs to be aware, that in an unfortunate scenario they would deactivate all licenses distributed this way.
Happy installing! I know I created one ex-Vista user very happy with this.
