Wi-Fi access point - TRENDnet TEW-818DRU - Part 2: Software
Monday, May 8. 2017
In my previous post, I un-boxed my new Wi-Fi access point. This is the part for running something in it.
For this to happen, the obvious prerequisite is DD-WRT binary image built specifically for TEW-818DRU. DD-WRT supported devices -list doesn't say much. Little bit of poking around results in build 23720 back in the 2014 for this one. It is at: https://www.dd-wrt.com/site/support/other-downloads?path=betas%2F2014%2F03-13-2014-r23720%2Ftrendnet-818DRU%2F. As I wanted something newer, I went for November 2016 build 30880 at: ftp://ftp.dd-wrt.com/betas/2016/11-14-2016-r30880/trendnet-818DRU/.
My typical approach for flashing new firmware is to stay connected with a wire. In practice that means, that I'll hook up an ethernet cable to my laptop and the other end to the access point's LAN-switch. Then I'll configure a static IP-address at the laptop's operating system. This makes sure, that I'm 100% connected whenever the box is running. Doing this over wireless connection and/or using dynamicly assigned IP-address may or may not work. As these boxes are expensive enough, I didn't push my luck. The downside of this approach is, that I'll need to know what the actual management IP-address will be.
Ok, let's start!
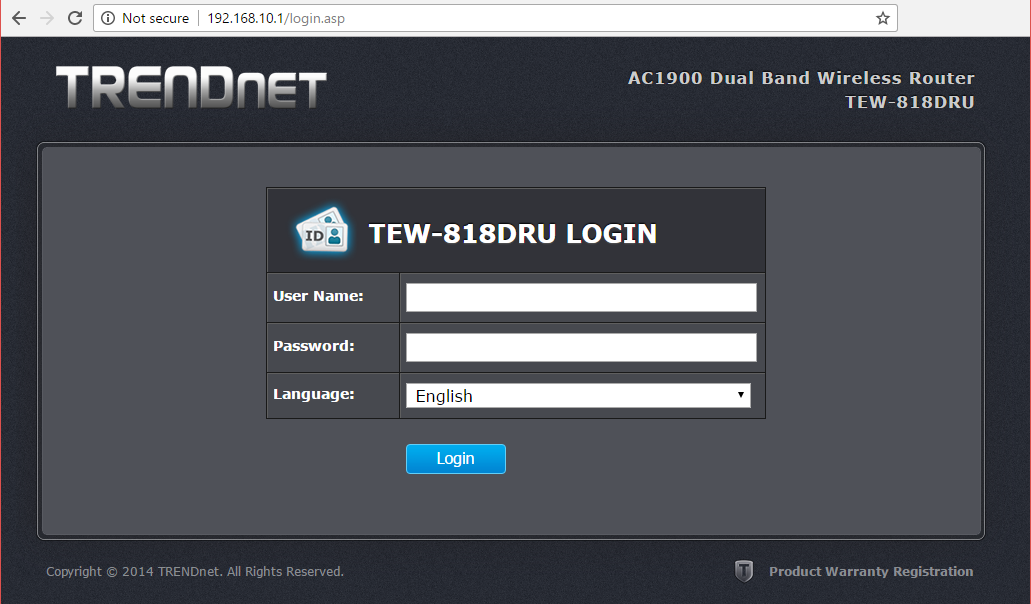
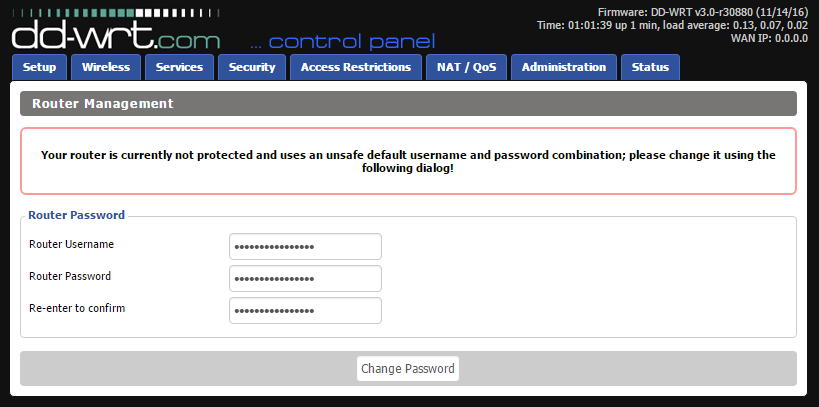
On out-of-box-experience the web GUI is at 192.168.10.1:
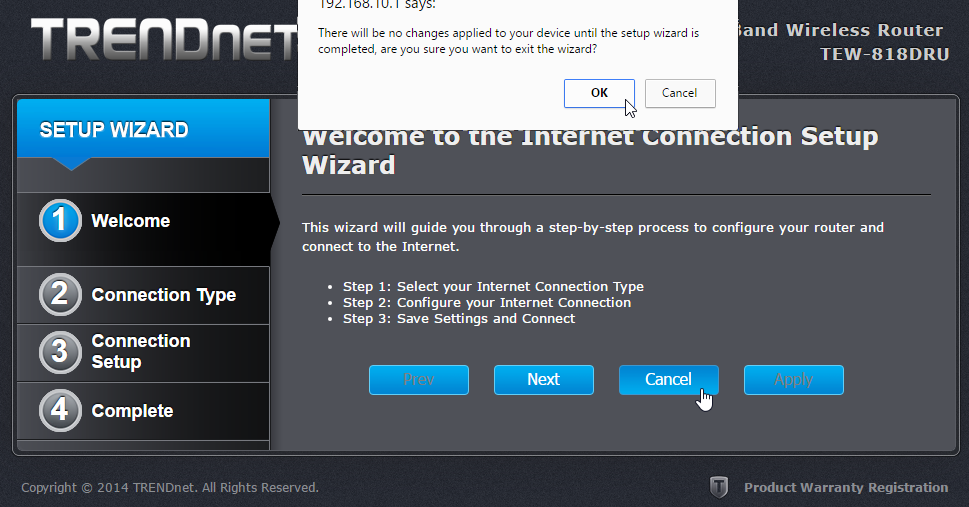
After login, there is a nice setup-wizard. Which of course, we'll just skip by acknowleding the alert:
Now we're at the normal administrator environment:

For me, the word "advanced" is like honey to a grizzly bear  . I'll always home towards it, I know that all the goodies are stored there:

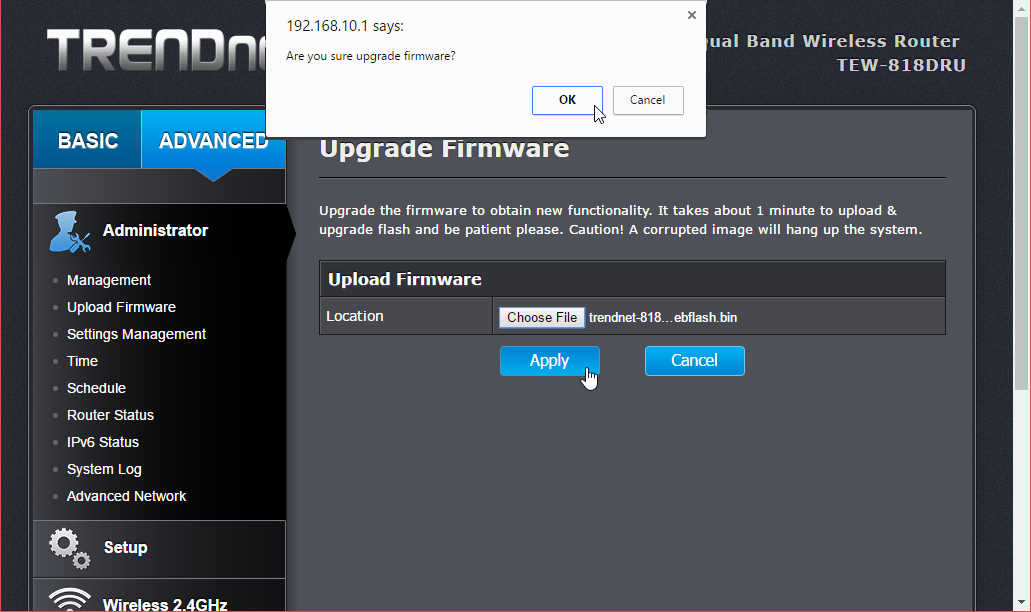
And also this time I was right, firmware upload/upgrade has its own menu item. Its clear, that this device is 100% designed by engineers, they cannot even seem to be able to agree on a single terminology. Menu has "upload", page title has "upgrade". Any self-respecting user experience designer would yell "You're confusing the user with that!", but I guess this stuff is for nerds only, and they don't care.
After selecting the trendnet-818dru-webflash.bin file to be uploaded, there is yet again a nice warning:
It will take couple minutes for the flashing to complete:
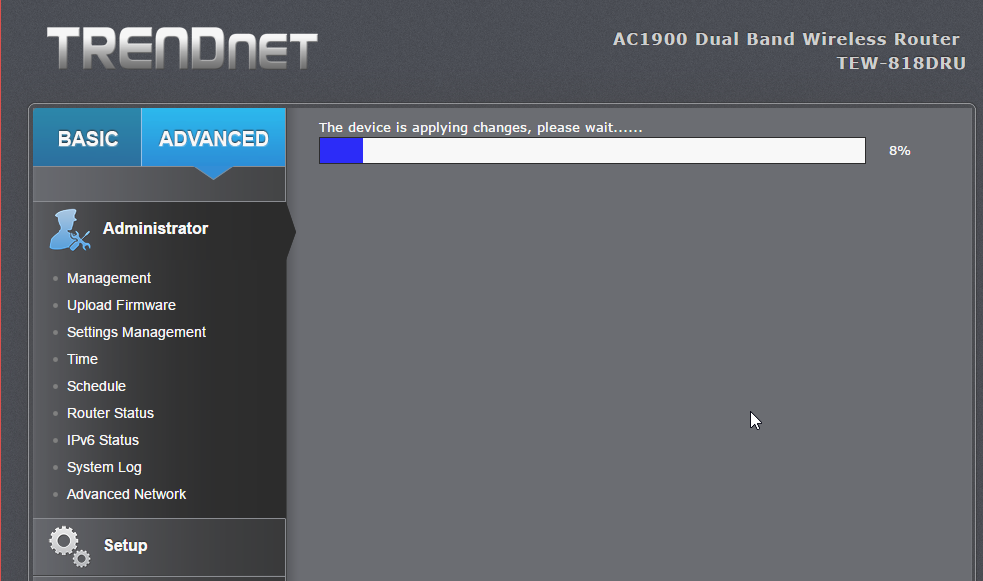
There is very little indication, that the process completed. I didn't notice any lights blinking or something like that. It just completed, rebooted and stayed silent.
Now the IP-addess will change. DD-WRT is 192.168.1.1 at out-of-box-experience:
And that's pretty much it for firmware upgrade. At this point I did my wireless access point -setup including:
- Admin username and password
- AP's LAN IP-address, my LAN isnt' at 192.168.1/24
- Enable SSH-service
- Enable GUI-access for HTTPS and SSH
- Wireless network setup for 2.4 GHz and 5 GHz, WPA2 Personal with pre-shared key as security
DD-WRT is for knowledgeable administrators, no setup wizards or mumbo-jumbo. Just the settings.
Btw. configuration docs can be found at: https://www.dd-wrt.com/wiki/index.php/Configuration_HOWTOs
Fedora 21 DHCP client failing to get an IP-address from Elisa [Solved!]
Monday, July 18. 2016
One of my own boxes runs a Fedora Linux. A while back my upgrade failed miserably due to Fedora installer not getting an IP-address from my ISP, Elisa. I had a minor skirmish for an hour or so with the installer, but no avail, Fedora installer beat me on that one. As I love to have that box up and running, I gave up and decided to investigate that later. Now that day came and I'm victorious!
Basics
DHCP is what pretty much everybody has for getting an IPv4 address in 2016. Mobile connections have something different, but everything else including Wi-Fi hotspots, ADSL-routers, Fiber-to-the-Home -connections, etc. etc. issue an IP-address (mostly IPv4, sometimes IPv6) to any well-behaving customer of theirs. Today, the de-facto is that the IP-address is allocated out of a well known broadband address range, or pool. Lists of those are generally available, so that home customers can be differentiated from data centers and companies.
To put DHCP simply, it is a mechanism for allocating an unique address for your Internet connection. The Wikipedia definition for Dynamic Host Configuration Protocol uses more words and isn't as concise as mine, but you'll get the idea.
Details of the problem
In case of mis-use or unpaid internet bill, they'd naturally decline any DHCP-requests for an IP-address. Since everything I tested, including various Windowses, OS Xes and Linuxes worked it wasn't about that. The connection was ok, the DHCP server issued a valid DHCP-lease as it had been doing for couple years, but not for my Fedora installer. Duh? 
At this point I went to google for the symptoms and quite soon I landed into RedHat Bugzilla. It contains bug 1154200 which is titled as "not getting a dhcp address assigned". Mr. Krovich reports that his Fedora 21 installer won't get an IP-address from ISP. I pulled up a Fedora 20 installer for the previous version. It worked ok! Yep, they changed something into Fedora 21. The change affects Fedora 22, 23 and the latest 24. It does not affect RedHat nor CentOS (yet).
Fix (aka. trial and error)
In the comments of bug 1154200 they're talking about Option 61 commit which was introduced for Fedora 21 release. A possible fix would be to use DHCP-configuration: send dhcp-client-identifier = hardware;
I downloaded Fedora 24 installer and tested it out. It didn't help any. After a lot of wiresharking the traffic, I isolated this:
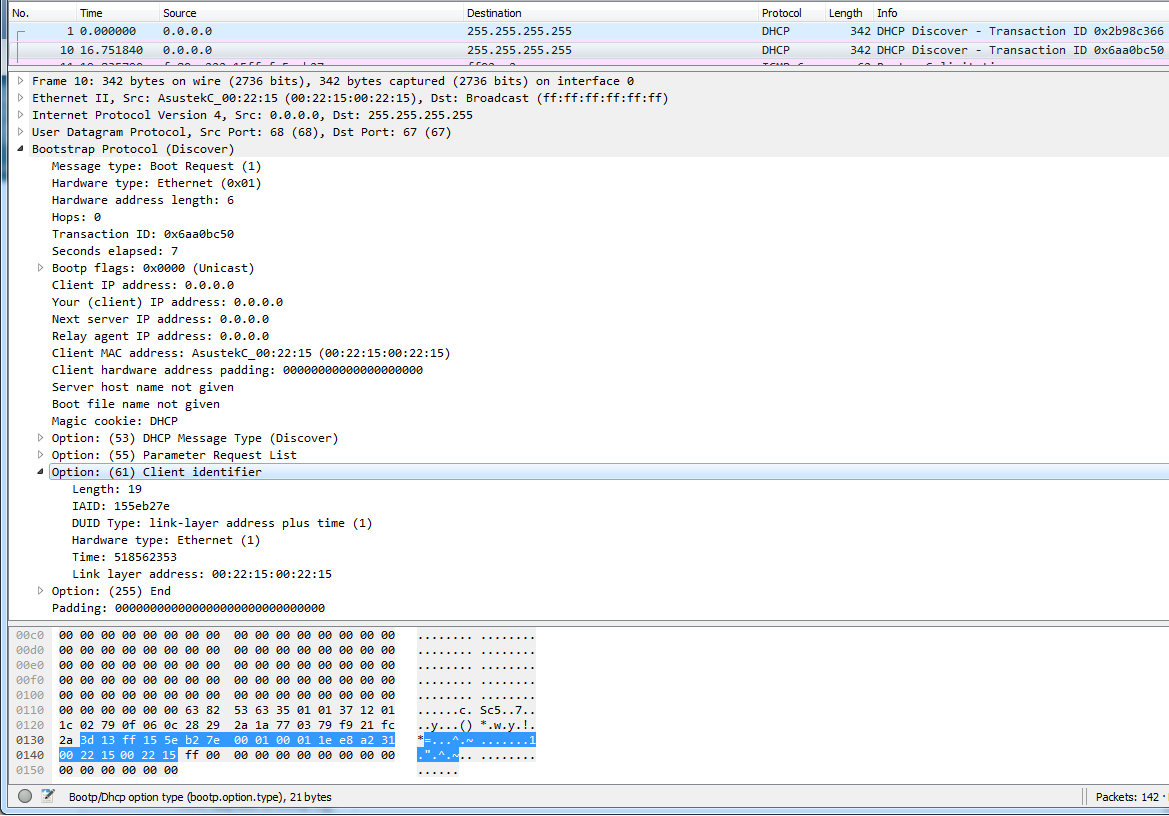 In the DHCP Discover -packet, there was an Option 61 present.
More poking for man 5 dhclient-options revealed that it was possible to specify a fixed string for identifier. So, again I edited /etc/dhcp/dhclient.conf (btw. the file didn't exist to begin with, I had to create one) to contain:
send dhcp-client-identifier = "";
That did the trick! Now even Fedora 24 installer got a a valid IP-address and it was possible to install.
Specs
In the early days, all IP-addresses were assigned manually. Everybody was given an IP-address and they punched all the details manually. That was frustrating and error-prone, so somebody invented BOOTP to automate the entire setup. Quite soon, that evolved into DHCP, defined by RFC 1531. When DHCP gained traction and more and more vendors joined the dynamically allocated -game, couple of clarifying iterations later, we're at RFC 2131 for current breed of DHCPing. It is basically the original BOOTP, but with most wrinkles ironed out.
The options are defined at RFC 1533 for DHCP Options and BOOTP Vendor Extensions. Looks like nobody supported Option 61 for a long time. Windowses don't, Apple doesn't, most Linux Distros don't, but RFC 4361 for Node-specific Client Identifiers for Dynamic Host Configuration Protocol Version Four (DHCPv4) must have done it for Fedora-guys. They chose to implement request 560361 (Dhclient doesn't use client-identifier; may cause issues in certain bridged environments) and make sure everybody uses it, with assumption that all ISPs that won't support Client Identifiers will merrily ignore the option. Nice!
Afterwards
I'll target equal blame to my ISP. The Option 61 is well-defined and it should be possible to ignore it. Looks like they're running Alcatel-Lucent hardware there and for some reason it is configured to spit on Option 61 requests.
Naturally I reported the error to my ISP, but you can assume how well that goes. Any regular customer facing clerk won't know DHCP or what it does, nor any options of it. So all I got back is the classic "we'll investigate" -style response. I'm not keeping my hopes up. I have more hope on my own Bugzilla request 1357469 to have an option to enable or disable usage of Option 61 on Fedora. They might even implement that one day.
Anyway, I'm hoping that this post will help somebody strugging to install their Fedora.
CentOS 7.2 network install fail [Solved]
Sunday, June 5. 2016
I was about to upgrade an old CentOS 6 box into 7. It was all planned, backups taken, necessary information gathered and USB stick prepared with 7.2 DVD image in it. A shutdown and boot from the installation USB, bunch of settings, date/time, keyboard, network, but Däng! No dice.
My initial attempt was to install from USB, but for some reason the server didn't see the USB volume as a valid installation source. No problem, I thought, let's go for network-install then. The interface was already up and the box could reach Internet ok. Installing from a mirror shouldn't take too long. But no. All I could accomplish was a "Error setting up base repository". I went googling about this and found CentOS 7.2 Netinstall Guide – Network Installation Screenshots.
First I set up installation source as On the network: http://mirror.centos.org/centos/7.2.1511/os/x86_64/ and then This URL refers to a mirror list: Checked. No avail. It took about 8 minutes to get the error, but this approach failed miserably. What /tmp/packaging.log had was:
ERR packaging: failed to grab repo metadata for anaconda: Cannot find a valid baseurl for repo: anaconda
ERR packaging: metadata download for repo anaconda failed after 10 retries
Argh! 8 minutes to determine, that the thing didn't work.
There was plenty of time to plan for the next move. I went to see CentOS mirror list, and picked the local Finnish mirror at nic.FUNET. Setting that as source: http://ftp.funet.fi/pub/mirrors/centos.org/7.2.1511/os/x86_64/ and with This URL refers to a mirror list: set as Unchecked got me butkus, /tmp/packaging.log had:
ERR packaging: failed to grab repo metadata for anaconda: failure: repodata/6990209f63a9fd811f13e830ac3c6de4c5d70a42b1c6873e4329b523d394c3bd-primary.xml.gz from anaconda: [Errno 256] No more mirrors to try.
http://ftp.funet.fi/pub/mirrors/centos.org/7.2.1511/os/x86_64/repodata/
6990209f63a9fd811f13e830ac3c6de4c5d70a42b1c6873e4329b523d394c3bd-primary.xml.gz: [Errno 14] HTTP Error 404 - Not Found
Finally a tangible result. Obviously the HTTP/404 was correct. There is no such file in that directory. It took me about 15 seconds to determine, that the URL should be http://ftp.funet.fi/pub/mirrors/centos.org/7.2.1511/os/x86_64/repodata/
0e54cd65abd3621a0baf9a963eafb1a0ffd53603226f02aadce59635329bc937-primary.xml.gz. Something was off in the installer metadata. But where?
I checked treeinfo at http://ftp.funet.fi/pub/mirrors/centos.org/7.2.1511/os/x86_64/.treeinfo, but no avail. Then my poking around landed at /var/run/install/repo/repodata. It has among others, a file named repomd.xml. Looking at the network version from http://ftp.funet.fi/pub/mirrors/centos.org/7.2.1511/os/x86_64/repodata/repomd.xml made everything clear as crystal.
- Drive had:
- revision 1449702798
- 6990209f63a9fd811f13e830ac3c6de4c5d70a42b1c6873e4329b523d394c3bd, the file that doesn't exist in the mirror
- Network had:
- revision 1449700451
- 0e54cd65abd3621a0baf9a963eafb1a0ffd53603226f02aadce59635329bc937, the file that does exist
But how to fix this?
My initial attempt was to wget http://ftp.funet.fi/pub/mirrors/centos.org/7.2.1511/os/x86_64/repodata/repomd.xml into /var/run/install/repo/repodata and retry, but that didn't change anything, still the same frustrating error after 10 minute delay.
I rebooted the box and relized, that my change persisted on the USB-drive. Whoa! Anyway, I got things cooking this time. Finally the base repository was accepted, I got to go make installation selection and got the install forward.
What the hell was going on there? Where did the incorrect repomd.xml come from? It isn't in the installation image. Or it is, but it comes from a place I didn't find. Whatever it is, there is something seriously off in the process. Why doesn't the installer try to get the most recent version from the network. It is a network install, after all!! After frustrating couple hours later than anticipated, I finally got the box upgraded. Hopefully this information saves you that time.
Improving Nuvoton NCT6776 lm_sensors output
Monday, November 16. 2015
Problem
My home Linux-box was outputting more-or-less useless lm_sensor output. Example:
coretemp-isa-0000

Adapter: ISA adapter

Physical id 0:  +36.0°C (high = +80.0°C, crit = +98.0°C)

Core 0:         +34.0°C (high = +80.0°C, crit = +98.0°C)

Core 1:         +31.0°C (high = +80.0°C, crit = +98.0°C)

Core 2:         +36.0°C (high = +80.0°C, crit = +98.0°C)

Core 3:         +33.0°C (high = +80.0°C, crit = +98.0°C)


nct6776-isa-0290

Adapter: ISA adapter

Vcore:          +0.97 V  (min =  +0.00 V, max =  +1.74 V)

in1:            +1.02 V  (min =  +0.00 V, max =  +0.00 V)  ALARM

AVCC:           +3.33 V  (min =  +2.98 V, max =  +3.63 V)

+3.3V:          +3.31 V  (min =  +2.98 V, max =  +3.63 V)

in4:            +1.01 V  (min =  +0.00 V, max =  +0.00 V)  ALARM

in5:            +2.04 V  (min =  +0.00 V, max =  +0.00 V)  ALARM

in6:            +0.84 V  (min =  +0.00 V, max =  +0.00 V)  ALARM

3VSB:           +3.42 V  (min =  +2.98 V, max =  +3.63 V)

Vbat:           +3.36 V  (min =  +2.70 V, max =  +3.63 V)

fan1:             0 RPM  (min =    0 RPM)

fan2:           703 RPM  (min =    0 RPM)

fan3:             0 RPM  (min =    0 RPM)

fan4:           819 RPM  (min =    0 RPM)

fan5:             0 RPM  (min =    0 RPM)

SYSTIN:         +36.0°C  (high =  +0.0°C, hyst = +0.0°C)  ALARM  sensor = thermistor

CPUTIN:         -60.0°C  (high = +80.0°C, hyst = +75.0°C) sensor = thermal diode

AUXTIN:         +35.0°C  (high = +80.0°C, hyst = +75.0°C) sensor = thermistor

PECI Agent 0:   +26.0°C  (high = +80.0°C, hyst = +75.0°C)

                         (crit = +88.0°C)

PCH_CHIP_TEMP:   +0.0°C

PCH_CPU_TEMP:    +0.0°C

PCH_MCH_TEMP:    +0.0°C
That's all great and all, but what the heck are in 1, 4-6 and fan 1-5? Are the in 1, 4-6 readings really reliable? Why are there sensors with 0 RPM readings? CPUTIN indicating -60 degrees, really? PCH-temps are all 0, why?
Investigation
In order to get to bottom of all this, let's start from the chip in question. lm_sensors -setup identified it as NCT6776. For some reason Nuvoton doesn't have the data sheet anymore, but by little bit of googling, a PDF with title NCT6776F / NCT6776D Nuvoton LPC I/O popped up.
Analog inputs:
Following information can be found:
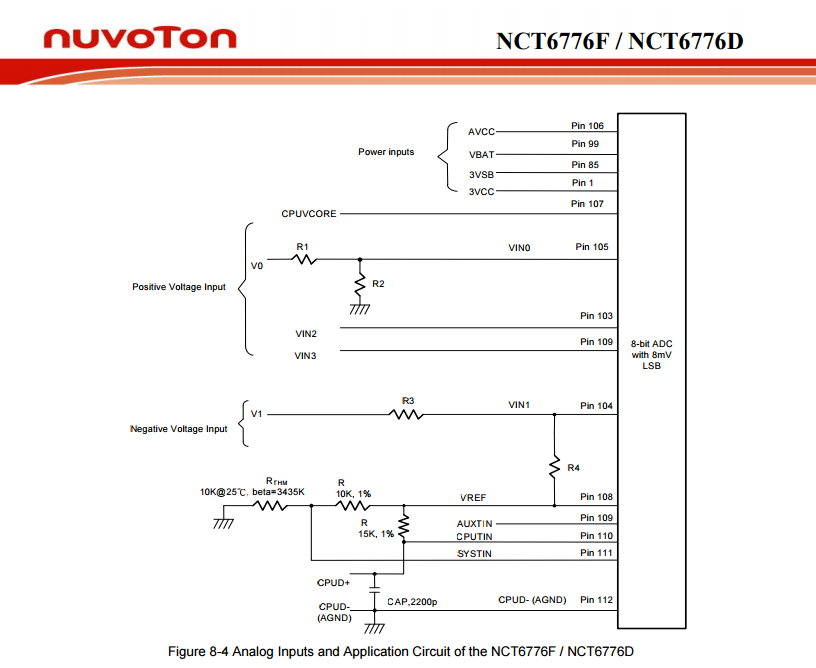
It contains following analog inputs:
- AVCC
- VBAT
- 3VSB
- 3VCC
- CPUVCORE
- VIN0
- VIN1
- VIN2
- VIN3
The good thing is, that first 5 of them are clearly labeled, but inputs 0 through 3 are not. They can be pretty much anything.
Revolution Pulse counters:
When it comes to RPM-readings, following information is available:

That lists following inputs:
- SYSFANIN
- CPUFANIN
- AUXFANIN0
- AUXFANIN1
- AUXFANIN2
Looks like all of those have connectors on my motherboard.
Temperature Sources:
For the temperature measurements, the chip has:

The analog temperature inputs are:
- SMIOVT1
- SMIOVT2
- SMIOVT3
- SMIOVT4
- SMIOVT5
- SMIOVT6
According to the above table, they're mapped into AUXTIN, CPUTIN and SYSTIN.
Also on top of those, there is PECI (Platform Environment Control Interface). A definition says "PECI is a new digital interface to read the CPU temperature of Intel® CPUs". So, there aren't any analog pins for that, but there are readings available, when questioned.
Configuration
A peek in to /etc/sensors3.conf at the definition of the chip shows:
chip "w83627ehf-*" "w83627dhg-*" "w83667hg-*" "nct6775-*" "nct6776-*"

    label in0 "Vcore"

    label in2 "AVCC"

    label in3 "+3.3V"

    label in7 "3VSB"

    label in8 "Vbat"


    set in2_min  3.3 * 0.90

    set in2_max  3.3 * 1.10

    set in3_min  3.3 * 0.90

    set in3_max  3.3 * 1.10

    set in7_min  3.3 * 0.90

    set in7_max  3.3 * 1.10

    set in8_min  3.0 * 0.90

    set in8_max  3.3 * 1.10
And that's all. I guess that would be ok for the generic case, but in my particular box that list of settings doesn't cover half of the inputs.
Solution
Configuration changes
I added following settings for temperature into "chip "w83627ehf-*" "w83627dhg-*" "w83667hg-*" "nct6775-*" "nct6776-*""-section:
label in0 "Vcore"

set in0_min 1.1 * 0.9

set in0_max 1.1 * 1.15


label in1 "+12V"

compute in1 @ * 12, @ / 12

set in1_min 12 * 0.95

set in1_max 12 * 1.1


label in2 "AVCC"

set in2_min 3.3 * 0.95

set in2_max 3.3 * 1.1


label in3 "+3.3V"

set in3_min 3.3 * 0.95

set in3_max 3.3 * 1.1


label in4 "+5V"

compute in4 @ * 5, @ / 5

set in4_min 5 * 0.95

set in4_max 5 * 1.1


ignore in5

ignore in6


label in7 "3VSB"

set in7_min 3.3 * 0.95

set in7_max 3.3 * 1.1


label in8 "Vbat"

set in8_min 3.3 * 0.95

set in8_max 3.3 * 1.1
The obvious problem still stands: what are the undocumented in 1, 4, 5 and 6? Mr. Ian Dobson at Ubuntuforums.org discussion about NCT6776 claims, that in1 is for +12 VDC power and in4 is for +5VDC power. I cannot deny nor confirm that for my board. The Novoton-chip only provides the inputs, but there is absolutely no way of telling how the manufacturer chooses to connect them to various parts of the MoBo. I took the same assumption, so all that was necessary, was to multiply the input data by 12 and 5 to get a proper reading. I don't know what in5 and in6 are for, that's why I remove them from the display. All the other ones are min and max boundaries for the known readings.
The fan settings are machine specific, in my case:
label fan2 "CPU fan"

set fan2_min 200

label fan4 "HDD fan"

set fan4_min 200

ignore fan1

ignore fan3

ignore fan5
As I only have fans connected to 2 out of 5, I'll ignore the not connected ones. For the connected, I set a lower limit of 200 RPM.
Temperatures are motherboard-specific. In my case, I did following additions:
label temp1 "MB"

set temp1_max 38

set temp1_max_hyst 35

label temp3 "CPU"

label temp7 "CPU?"

ignore temp2

ignore temp8

ignore temp9

ignore temp10
The easy part is to remove the values not displaying anything. The hard part is to try to figure out what the measurements indicate. Based on the other readings, temp3 is CPU combined somehow. The other sensor is displaying rougly same values for each core I have there. However, the temp7 is for PECI, but it doesn't behave anything like CPU-temps. It should, but it doesn't. That's why I left a question mark after it.
Resulting output
After the additions, following output is available:
coretemp-isa-0000

Adapter: ISA adapter

Physical id 0:  +48.0°C  (high = +80.0°C, crit = +98.0°C)

Core 0:         +48.0°C  (high = +80.0°C, crit = +98.0°C)

Core 1:         +40.0°C  (high = +80.0°C, crit = +98.0°C)

Core 2:         +43.0°C  (high = +80.0°C, crit = +98.0°C)

Core 3:         +39.0°C  (high = +80.0°C, crit = +98.0°C)


nct6776-isa-0290

Adapter: ISA adapter

Vcore:        +1.22 V  (min =  +0.99 V, max =  +1.26 V)

+12V:        +12.29 V  (min = +11.42 V, max = +13.25 V)

AVCC:         +3.33 V  (min =  +3.14 V, max =  +3.63 V)

+3.3V:        +3.31 V  (min =  +3.14 V, max =  +3.63 V)

+5V:          +5.04 V  (min =  +4.76 V, max =  +5.52 V)

3VSB:         +3.42 V  (min =  +3.14 V, max =  +3.63 V)

Vbat:         +3.38 V  (min =  +3.14 V, max =  +3.63 V)

CPU fan:      912 RPM  (min =  200 RPM)

HDD fan:      897 RPM  (min =  200 RPM)

MB:           +35.0°C  (high = +38.0°C, hyst = +35.0°C)  sensor = thermistor

CPU:          +37.0°C  (high = +80.0°C, hyst = +75.0°C)  sensor = thermistor

CPU?:         +37.0°C  (high = +80.0°C, hyst = +75.0°C)

                       (crit = +88.0°C)
Before taking the readings, I ran sensors -s to set the min/max values.
Now my output starts making sense and I can actually monitor any changes.
PS.
At the time of writing this article, website http://www.lm-sensors.org/ was down for multiple days in a row. I can only hope, that project personnel solves the issue with the web site and it is up at the time you're seeing this.
Replacing physical drive for LVM - pvcreate Can't open /dev exclusively
Sunday, November 8. 2015
This is part 2 of my hard drive upgrade. My previous part was about failure to partition a replaced hard drive with GNU Parted: It was just emitting an error of: "The resulting partition is not properly aligned for best performance"
When I had the drive partitioned properly, I failed to proceed with my setup in a yet another mysterious error. My drives are always using LVM, so that I get more control over the filesystem sizes. To get the new partition into LVM, it needs to be associated with a Volume Group (VG). First step is to inform LVM about new physical drive:
# pvcreate /dev/sda1

  Can't open /dev/sda1 exclusively.  Mounted filesystem?
Oh really? It's definitely not mounted, but ... somebody is stealing my resource. The root of this problem is obviously on the fact, that there used to be a PV on that partition, but I replaced the drive and partitioned it. It is entirely possible, that LVM likes to fiddle with my new partition somehow.
The device mapper knows about the partition:
# dmsetup ls

Box_vg1-LogVol_wrk2   (253:9)
That's kind of bad. I guess it likes to hold on into it. Further check of:
# pvdisplay
... indicates, that LVM doesn't know about the partition (yet), but Linux kernel does.
An attempt to fix:
# dmsetup remove Box_vg1-LogVol_wrk2
And new attempt:
# pvcreate /dev/sda1

  Can't open /dev/sda1 exclusively.  Mounted filesystem?
No change. Perhaps a strace will provide helpful details of the problem:
# strace pvcreate /dev/sda1

...

stat("/dev/sda1", {st_mode=S_IFBLK|0660, st_rdev=makedev(8, 1), ...}) = 0

stat("/dev/sda1", {st_mode=S_IFBLK|0660, st_rdev=makedev(8, 1), ...}) = 0

open("/dev/sda1", O_RDWR|O_EXCL|O_DIRECT|O_NOATIME) = -1 EBUSY (Device or resource busy)

...
Reading a fragment of OPEN(2) man page:
OPEN(2)
open, openat, creat - open and possibly create a file
O_EXCL Ensure that this call creates the file: if this flag is
specified in conjunction with O_CREAT, and pathname already
exists, then open() will fail.
In general, the behavior of O_EXCL is undefined if it is used
without O_CREAT. There is one exception: on Linux 2.6 and
later, O_EXCL can be used without O_CREAT if pathname refers
to a block device. If the block device is in use by the
system (e.g., mounted), open() fails with the error EBUSY.
... confirms the suspicion, that somebody is holding a handle to the block device. Running lsof(8) or fuser(1) yield nothing. It's not a file-handle, when kernel has your block device as hostage.
My only idea at this point was to do a wimpy Windows-style reboot. The thing is: Linux-men don't reboot on anything, but this time I was out of ideas. I'm sure somewhere there is an IOCTL-call to release the handle, but I couldn't find it easily. So, a reboot was in order.
After the reboot: yes results:
# pvcreate /dev/sda1

  Physical volume "/dev/sda1" successfully created
Then I could proceed with my build sequence. Next, associate a Volume Group with the new Pysical Volume. The options would be to to add the drive into an existing VG, or create a new one. I chose the latter:
# vgcreate Box_vg1 /dev/sda1

  Volume group "Box_vg1" successfully created
Then create a logical partition, or Logical Volume in LVM-lingo on the newly created VG:
# lvcreate -L 800G -n LogVol_wrk2 Box_vg1

  Logical volume "LogVol_wrk2" created
As a physical partition also a LV needs to have a filesystem on it, to be usable for the operating system:
# mkfs.ext4 /dev/Box_vg1/LogVol_wrk2

mke2fs 1.42.12 (29-Aug-2014)

Creating filesystem with 209715200 4k blocks and 52428800 inodes

Filesystem UUID: 93be6c97-3ade-4a62-9403-789f64ef73d0

Superblock backups stored on blocks:

        32768, 98304, 163840, 229376, 294912, 819200, 884736, 1605632, 2654208,

        4096000, 7962624, 11239424, 20480000, 23887872, 71663616, 78675968,

        102400000


Allocating group tables: done

Writing inode tables: done

Creating journal (32768 blocks): done

Writing superblocks and filesystem accounting information: done
Now the drive was ready to be mounted and I had plenty of completely empty space waiting for data to be stored on it.
I plugged in a SATA-USB -dock and started looking for my old data. I intentionally had created a VG with precisely the same name as the old drive had, so there was an obvious collision. My syslog had entries about the pvscan:
Nov  8 16:03:21 pvscan: device-mapper: create ioctl on Box_vg1-LogVol_wrk2 failed: Device or resource busy

Nov  8 16:03:21 pvscan: 0 logical volume(s) in volume group "Box_vg1" now active

Nov  8 16:03:21 pvscan: Box_vg1: autoactivation failed.
Yes, that one I had coming. No autoactivation, as VG names collided. A check:
# vgdisplay

  --- Volume group ---

  VG Name               Box_vg0

...

  --- Volume group ---

  VG Name               Box_vg1

...

  --- Volume group ---

  VG Name               Box_vg1

...

  VG UUID               trx8sq-2Mtf-2tfa-2m1P-YPGq-cVzA-6fWflU
No surprises there, there were two Volume Groups with exactly same name. To address them, there are unique identifiers or UUIDs. With UUID, it is possible to rename the VG. Like this:
# vgrename trx8sq-2Mtf-2tfa-2m1P-YPGq-cVzA-6fWflU Box_vgold

  Volume group "Box_vg1" successfully renamed to "Box_vgold"
Now it would be possible to activate and it would appear on udev:
# vgchange -ay Box_vgold

  1 logical volume(s) in volume group "Box_vgold" now active
Now the old data was available at /dev/Box_vgold/LogVol_wrk2 and ready to be mounted and files copied out of it.
Done and mission accomplished! Now I had much more space on a fast drive.
GNU Parted: Solving the dreaded "The resulting partition is not properly aligned for best performance"
Saturday, November 7. 2015
On the other day I was cleaning out junk from my shelfs and found a perfectly good WD Caviar Black hard drive. Obviously in the current SSD-era where your only computer is a laptop and most of your data is stashed into a cloud somewhere, no regular Joe User is using spinning platters.
Hey! I'm not a regular, nor joe. I have a Linux-server running with plenty of capacity in it for my various computing needs. So, the natrural thing to do is to pop out one of the old drives and hook this 1,5 TiB high performing storage monster to replace it. The actual hardware installation on an ATX-case isn't anything worth documenting, but what happens afterwards goes pretty much this sequence: 1) partition the drive, 2) copy all/some of the old data back to it and 3) continue living successfully ever after.
The typical scenario is that something always at least hiccups, if not fails. And as expected, I choked on the 1).
Here goes:
Preparation
The drive had been used previously, and I just wasted the beginning of the drive by writing 10k sectors of nothingness. This will remove all traces of possible partition tables, boot sectors and all the critical metadata of the drive you normally value highly:
# dd if=/dev/zero of=/dev/sda bs=512 count=10000
Pay attetion to the details. It would be advisable to target a correct drive. In my case a regular JBOD-drive really appears as /dev/sda on the Linux-side. On your case, I'm pretty sure your operating system runs on /dev/sda, so please don't wipe that.
Then with GNU Parted, create a GUID partition table (or GPT):
# parted /dev/sda

GNU Parted 3.1

Using /dev/sda

Welcome to GNU Parted! Type 'help' to view a list of commands.

(parted) mktable gpt
That's it for the preparation part.
Attempt 1: The stupid way
Regardless what's on the drive already (in my case, its completely empty), Parted syntax allows an approach, where you create a partition using the maximum allowed capacity from start 0, to end -1. Like this:
(parted) mkpart LVM ext4 0 -1

Warning: The resulting partition is not properly aligned for best performance.

Ignore/Cancel? c
That obviously will emit an error about non-optimal partition alignment. But hey, that's what I asked for. I obviously cancelled that attempt.
Attempt 2: The smart way
A smart approach would be to see about the boundaries:
(parted) print free

Model: ATA WDC WD1502FAEX-0 (scsi)

Disk /dev/sda: 1500GB

Sector size (logical/physical): 512B/512B

Partition Table: gpt Disk Flags:


Number Start  End    Size   File system Name Flags
17.4kB 1500GB 1500GB Free Space
Now we have a range of 17.4 KiB to 1500 GiB which can be used for a new partition. Let's try that:
(parted) mkpart LVM ext4

Start? 17.4kB

End? 1500GB

Warning: You requested a partition from 16.9kB to 1500GB (sectors 33..2929687500).

The closest location we can manage is 17.4kB to 1500GB (sectors 34..2930277134).

Is this still acceptable to you? Yes/No? y

Warning: The resulting partition is not properly aligned for best performance.

Ignore/Cancel? c
I have bumped into this number of times earlier. Why in the f**k cannot the Parted tell me what values it wants to see there!! Come on!
This is the part where it hits me like a hammer: enough bullshit, let's solve this once and for all!
Attempt 3: Solution
This is the script I wrote: parted_mkpart_calc.sh.
It is based on the information found from following sources:
- How to align partitions for best performance using parted, somebody else is having the same fight than I do
- I/O Limits: block sizes, alignment and I/O hints, information about the Parted alignment calculation
- https://www.kernel.org/doc/Documentation/ABI/testing/sysfs-block, Linux kernel block-device ABI information
It is a Bash-script to do the math for you. Example usage:
$ ./parted_mkpart_calc.sh sda

Using default 1 MiB default alignment in calc

Calculated alignment for /dev/sda (gpt) is: 2048s


If you would be root, you could create partition with:

# parted /dev/sda mkpart [name] [type] 2048s 2930276351s

Verify partition alignment with:

# parted /dev/sda align-check optimal 1 Should return: 1 aligned
I just enter one argument to the script: sda. From that, the script deduces the alignment, that should be used when partitioning that block-device. In this case it is 2048 sector boundaries (what it doesn't say is, that a sector contains 512 bytes). But it outputs 2 commands which can be copy/pasted (as root):
parted /dev/sda mkpart [name] [type] 2048s 2930276351s
If you would replace [name] with a partition name and [type] with a partition type, it would create a correctly aligned partition to fill up most of the drive. It won't fill up exactly all of the drive, because of the alignment issues.
To help that issue, I added a feature to do the following:
$ ./parted_mkpart_calc.sh sda LVM ext4
Optionally, you can provide the partition name and type on the command line to get:
parted /dev/sda mkpart LVM ext4 2048s 2930276351s
as output. That's ready-to-go copy/paste material.
Finally, you can verify the correct alignment:
# parted /dev/sda align-check optimal 1

1 aligned
That's the proof, that calc worked ok.
Attempt 4: The simple way
It didn't take long, before I got my first comment on this article. It was simply: "Why didn't you use percentages?". What? What percentages.
Example:
(parted) unit s

(parted) print

Model: ATA WDC WD1502FAEX-0 (scsi)

Disk /dev/sda: 2930277168s

Sector size (logical/physical): 512B/512B

Partition Table: gpt

Disk Flags:


Number Start End         Size        File system Name Flags

 1     2048s 2930276351s 2930274305s             LVM

(parted) rm 1

(parted) mkpart LVM ext4 0% 100%

(parted) print

Model: ATA WDC WD1502FAEX-0 (scsi)

Disk /dev/sda: 2930277168s

Sector size (logical/physical): 512B/512B

Partition Table: gpt

Number Start End         Size        File system Name Flags
1 2048s 2930276351s 2930274305s LVM
Using range 0% 100% will produce exactly the same results. Amazing!
So, parted knows the alignment and can use it, but not if you don't first do a rain dance and knock three times on a surface sprinkled with holy water.
Final Words
Why does Parted complain about mis-alignment, but offers no help at all? That's just plain stupid!
Of course, I should add the feature to the source code and offer the patch to FSF, but on the other hand. Naah. I don't want to waste any more energy on this madness.
HighPoint RocketRAID 620 Linux driver
Wednesday, May 27. 2015
I've had my run of bad things with Intel soft-RAID earlier. The constant RAID-verify -runs made me want stop using it. As its my Windows-box, I just wanted something that is hardware-based, reasonably fast and affordable. My choice is HighPoint RocketRAID 620.
For a switch-over -project I had a simple plan:
- Clonezilla the existing RAID into an another drive which I could plug into a motherboard for the duration of the move
- Un-configure the Intel soft-RAID at the motherboard
- Plug in the RocketRAID-card
- Change the hard-drive cables from motherboard RAID-connectors into RocketRAID-card
- Configure a new RAID-1 mirror wit RocketRAID
- Clonezilla the data back to the newly created RAID-1 volume
- Be happy and continue computing
Guess what. Things fell trough at point #6. I was using an USB-bootable Clonezilla live on my first data move and obviously was planning to use it for the second one too. Whichever Linux-distro they use as the base for Clonezilla, they don't have the driver for the RAID-card. Darn!
The next best thing is a commercial distro for Clonezilla, Parted Magic. They used to be free (as in beer and speech), but they went commercial. The price is $9 USD for a single download, so I got it. And guess what again! They don't support Highpoint RocketRAID either.
I did ask about it in their support forums (closed to registered users only, sorry). And they replied:
We do not do "random" out-of-tree drivers because commonly these are supported by their vendors in a haphazard way. E.g. in the HighPoint case the latest driver is 3 versions behind our kernel version.
Luckily the vendor is providing the partial source code for the driver. There is a binary-part of in it and it is kind-of open-source. The biggest problem seems to be, that it doesn't build on any reasonably modern Linux.
By googling, I found that somebody else had the same process of thought and there was a Github project for the upgraded driver. Unfortunately that too was 3 years old and wouldn't build. Also it was for the vendor driver 1.1, and they already had 1.2 out.
In this imperfect world everything that you need to be done properly, you need to do by yourself. So, here it is: https://github.com/HQJaTu/rr62x
You can help yourselves with that one.
This is how it looks on my dmesg:
[ 85.518732] rr62x: module license 'Proprietary' taints kernel.

[ 85.518737] Disabling lock debugging due to kernel taint

[ 85.519709] rr62x:RocketRAID 62x SATA controller driver v1.2 (Jul 1 2012)
[ 85.735773] rr62x:adapter at PCI 3:0:0, IRQ 16

[ 85.950487] rr62x:[0 0 ] start port.

[ 85.950488] rr62x:[0 0 ] start port hard reset (probe 1).

[ 86.150712] rr62x:[0 1 ] start port.

[ 86.150712] rr62x:[0 1 ] start port hard reset (probe 1).

[ 89.093649] rr62x:[0 0 ] start port soft reset (probe 1).

[ 89.841048] rr62x:[0 1 ] start port soft reset (probe 1).

[ 90.501075] rr62x:[0 0 ] port started successfully.

[ 90.501078] rr62x:[0 0 0] device probed successfully.

[ 90.791364] rr62x:[0 1 ] port started successfully.

[ 90.791369] rr62x:[0 1 0] device probed successfully.

[ 90.806570] scsi host13: rr62x

[ 90.806870] scsi 13:0:0:0: Direct-Access HPT DISK_13_0 4.00 PQ: 0 ANSI: 5

[ 90.809711] sd 13:0:0:0: [sdd] 2930114560 512-byte logical blocks: (1.50 TB/1.36 TiB) [ 90.809847] sd 13:0:0:0: [sdd] Write Protect is off

[ 90.809852] sd 13:0:0:0: [sdd] Mode Sense: 2f 00 00 00

[ 90.809909] sd 13:0:0:0: [sdd] Write cache: disabled, read cache: enabled, doesn't support DPO or FUA

[ 90.832339] sdd: unknown partition table

[ 90.832903] sd 13:0:0:0: [sdd] Attached SCSI disk
I've tested that with Linux 4.0.4 and 3.19.3. It builds and works on both. Any comments, Github forks, pull requests, etc. are welcome. I will get back to the actual disk cloning project later, the driver won't help unless it is used properly in an operating system.
Fedora 20: Services failing to start on boot
Thursday, October 23. 2014
Something funny happened to my Fedora 20 installation. Stuff that used to work stopped doing so. I understand, that I'm dealing with "bleeding edge" Linux-distro, but it kind of starts to annoy me, when things don't get back like they were.
Here is one:
# systemctl status iscsi.service --all
iscsi.service - Login and scanning of iSCSI devices
Loaded: loaded (/usr/lib/systemd/system/iscsi.service; enabled)
Active: inactive (dead)
start condition failed at Thu 2014-07-17 12:23:18 EEST; 1min 24s ago
none of the trigger conditions were met
Docs: man:iscsid(8)
man:iscsiadm(8)
Jul 17 12:23:17 box systemd[1]: Started Login and scanning of iSCSI devices.
Jul 17 12:23:18 box systemd[1]: Started Login and scanning of iSCSI devices.
Aow come on! "none of the trigger conditions were met"!! I don't know what changed with the precious trigger conditions. Basic checks didn't reveal anything noteworthy:
# systemctl is-active iscsi.service
active
# systemctl list-dependencies iscsi.service
iscsi.service
There are some other people suffering from the same issue. Fedora 20 ypbind won’t start at boot. NIS logins unavailable immediately after boot (ypbind service NOT started). and Bug 1027114 - nfs mount fails during boot because network is not ready point me to the direction of service trying to start too early. There is a document explaining how to run services only after network is up (Running Services After the Network is up), but the point is: somebody goofed! This used to work.
I tried a classic off/on -trick:
# systemctl disable iscsi.service
# systemctl enable iscsi.service
... no avail. Still after a boot I have a list of failing services:
# systemctl --failed
UNIT LOAD ACTIVE SUB DESCRIPTION
arpwatch.service loaded failed failed Arpwatch daemon which keeps track of ether
dhcpd.service loaded failed failed DHCPv4 Server Daemon
iscsi.service loaded failed failed Login and scanning of iSCSI devices
LOAD = Reflects whether the unit definition was properly loaded.
ACTIVE = The high-level unit activation state, i.e. generalization of SUB.
SUB = The low-level unit activation state, values depend on unit type.
3 loaded units listed. Pass --all to see loaded but inactive units, too.
To show all installed unit files use 'systemctl list-unit-files'.
Finally I chose to add the After=network-online.target -line to my service description. First the service description needs to be copied from /usr/lib/systemd/system/ into /etc/systemd/system/. The rule is very simple: don't edit files under /usr/ and it applies also here. Systemd has a built in fall-back mechanism. If your own tailor made file doesn't exist in /etc/, it will take the default one. It is good to have that, but better if no such tinkering wasn't needed at all. What if there is an update to the service-description? I have to manually update my copied file.
So, I did a:
# cd /etc/systemd/system/
# cp /usr/lib/systemd/system/iscsi.service .
and edited the file. I added one line to Unit-description:
[Unit]
After=network-online.target
To be absolutely clear: I didn't touch the other lines.
Since systemd doesn't pick up the changes very easily, I did a:
# systemctl disable iscsi.service
# systemctl enable iscsi.service
after status informed, that my change was in place:
# systemctl status iscsi
iscsi.service - Login and scanning of iSCSI devices
Loaded: loaded (/etc/systemd/system/iscsi.service; enabled)
Notice how, the service description is now under /etc/.
Anyway, that did the trick for all of my failing services. Now they start nicely on bootup.
Deactivating Arch Linux IPv6 Privacy Extensions
Thursday, July 24. 2014
Something funny happened to my Arch Linux, it changed the IPv6 address rather surprisingly. When I failed to SSH into it, I went to the console.
On none of my machines I have the RFC 4941 privacy extensions enabled. The first thing to do was to confirm, that the IP-address was not based on my Ethernet Address:
2: eth0: <BROADCAST,MULTICAST,UP,LOWER_UP> mtu 1500 qdisc pfifo_fast state UP group default qlen 1000
link/ether 52:54:00:cf:1c:36 brd ff:ff:ff:ff:ff:ff
inet6 2001::e2:349d:bcc6:c9fc/64 scope global noprefixroute dynamic
valid_lft 84267sec preferred_lft 12267sec
There is absolutely no reference to the MAC-address 52:54:00:cf:1c:36 of in the EUI-64 address 00e2:349d:bcc6:c9fc. Given the calculator result of 5054:00ff:fecf:1c36. Apparently something modifies the autoconfiguration address.
First culprit could be Linux kernel:
# cat /proc/sys/net/ipv6/conf/all/use_tempaddr
0
I even iterated all the configurations:
find /proc/sys/net/ipv6/conf/ -name use_tempaddr -print -exec cat {} \;
just to make sure, that privacy is off.
That was puzzling. What the heck is going on in the machine!! After all, it used to work ok before. What could be doing that?
Lot of googling around landed me on Arch Linux ArchWiki IPv6 page. It says: "dhcpcd includes in its default configuration file since version 6.4.0 the option slaac private, which enables "Stable Private IPv6 Addresses instead of hardware based ones", implementing RFC 7217". Hum? I've never heard of RFC 7217, nor "A Method for Generating Semantically Opaque Interface Identifiers with IPv6 Stateless Address Autoconfiguration (SLAAC)", but there it was.
I confirmed /etc/dhcpcd.conf and yes, it did contain a:
slaac private
in it. Why?! I didn't ask for it. I simply put a comment (#) in front of the line and did a:
systemctl restart dhcpcd@eth0.service
To refresh the situation. No change. A reboot. Yes change!
2: eth0: <BROADCAST,MULTICAST,UP,LOWER_UP> mtu 1500 qdisc pfifo_fast state UP group default qlen 1000
link/ether 52:54:00:cf:1c:36 brd ff:ff:ff:ff:ff:ff
inet6 2001::5054:ff:fecf:1c36/64 scope global noprefixroute dynamic
valid_lft 86399sec preferred_lft 14399sec
Now my IPv6-address was exactly what it used to be. Weird incident, though. There is a perfectly good mechanism for privatizing addressses, if wanted to. But now somebody had created another and some higher power made a choice for me to start using it. Really weird! Well, I'm hoping that my addresses won't change any more.
Arch Linux failing to start network interface
Monday, June 16. 2014
One of my boxes is running an Arch Linux. Out of the box it is really a slim one. The install runs only a blink and as a result the operating system won't have anything that is not absolutely necessary to boot the thing for the first time. Given any of the other distros who require gigabytes and gigabytes of storage for crap you won't ever need this is a refreshing change. Every Arch Linux user needs to "build their own excitement" (originally about Gentoo from obsoleted http://www.usenix.org.uk/pictures/despair-linux/gentoo.jpg).
Recently they maintainers have been fiddling around too much with network interface naming conventions. When I installed it was eth0, then it changed to ens3, and guess what happened when I last updated! Yuupp! Back to eth0, but with a twist. Now the eth0 won't come up on boot. Crap!
The Arch Linux discussion forum's section Networking, Server, and Protection has a discussion with topic [SOLVED] Update broke netctl (I guess?). It discusses the problem with a sys-subsystem-net-devices-ens3.device. However, in my box none of the repair instructions were accurate.
Later I realized that my dmesg has following lines in it:
systemd[1]: Expecting device sys-subsystem-net-devices-eth0.device...
systemd[1]: Expecting device sys-subsystem-net-devices-ens3.device...
Ok. On bootup it waits for two, as in not one, network interfaces to become alive. The problem is that my box only has one. A check for the ghost-interface:
systemctl status sys-subsystem-net-devices-ens3.device
* sys-subsystem-net-devices-ens3.device
Loaded: loaded
Active: inactive (dead)
Yields pretty much what I know. It is inactive and dead. A manual fix would be to start the DHCP-client manually with a:
systemctl start dhcpcd@eth0.service
... after which the network starts functioning again, but which does not fix the problem. On bootup the interface won't work!
What I did to fix this was to disable dhcpcd for both interfaces:
systemctl disable dhcpcd@ens3.service
systemctl disable dhcpcd@eth0.service
And enabled it to the proper one:
systemctl enable dhcpcd@eth0.service
This does seem to help, but on bootup it still complains "Dependency failed for dhcpcd on ens3". I don't know exactly where the old interface keeps popping up.
In the end, this does work, but it simply takes a bit longer to boot than it used to. Any suggestions to improve booting are welcome.
Wrangling permissions on an enforcing SElinux setup
Saturday, March 22. 2014
Most people don't much care about their Linux-boxes' security. You install it, you run it, you use it and occasionally run some system updates into it. Not me. When I have a box running against the wild wild Net, I absolutely positively plan to make the life of anybody cracking into one of my boxes as difficult as possible (with some usability left for myself). See Mr. Tan's article about Security-Functionality-Usability Trade-Off.

So, my choice is at the Functionality - Security -axis with less on the Ease-of-use. The rationale is that, a web application needs to run as safely as possible and can have the ease-of-use in it. The system administrator is a trained professional, he doesn't need the easy-part so much. However, there is a point, when things are set up too tight:

Image courtesy of Dilbert by Scott Adams
So, I voluntarily run software designed and implemented by NSA, SElinux. I even run it in the the Enforcing-mode which any even remotely normal system administrator thinks as being totally insane! Any small or even a tiny slip-up from the set security policy will render things completely useless. Mordac steps in and stuff simply does not work anymore.
On my Fedora-box there was a bug in BIND, the name server and an update was released to fix that. After running the update, the DNS was gone. As in, it didn't function, it didn't respond to any requests and the service didn't start. All it said was:
# systemctl status named-chroot.service --full
named-chroot.service - Berkeley Internet Name Domain (DNS)
Loaded: loaded (/usr/lib/systemd/system/named-chroot.service; enabled)
Active: failed (Result: timeout)
Any attempt to start the service resulted in a 60 second wait and a failure. dmesg-log had nothing about the issue, nor BIND's own log had nothing about the issue in it. So I started suspecting a SElinux-permission issue. My standard SElinux debugging always starts with a:
cat /var/log/audit/audit.log | audit2allow -m local
... to see if SElinux's audit logger is logging any permission-related audit faults. Indeed it did:
require {
type named_conf_t;
type named_t;
class dir write;
}
#============= named_t ==============
allow named_t named_conf_t:dir write;
That reads:
A process running in named_t security context is trying to access a directory with named_conf_t security context to gain a write access, but is denied while doing so.
It is obvious that the process in question must be the BIND name server. No other process has the named_t security context in it. When starting up, BIND name server was about to write into its own configuration directory, which is a big no no! When you write, you write only to designated directories, nowhere else (remember: running in enforcing-mode is insanity).
That is definitely a reason for a daemon not to start or to timeout while starting. Further investigation showed that also Fedora's SElinux policy had been updated a week ago: selinux-policy-3.12.1-74.19.fc19.
At this point I had all the pieces for the puzzle, it was simply a matter of putting it all together. The recently released SElinux policy has a bug in it, and nobody else was there to fix it for me.
The exact audit-log line is:
type=AVC msg=audit(1395481575.712:15239): avc:
denied { write } for
pid=4046 comm="named" name="named" dev="tmpfs" ino=14899
scontext=system_u:system_r:named_t:s0
tcontext=system_u:object_r:named_conf_t:s0 tclass=dir
So, my chrooted BIND-damon was trying to write into a tmpfs. There aren't that many of those in a system. I've even touched the tmpfs-subject earlier when I wrote a systemd-configuration into my own daemon. To find the tmpfs-usage, I ran:
# mount | fgrep tmpfs
tmpfs on /var/named/chroot/run/named type tmpfs
BIND's chroot-environment has one. That is very likely the culprit. That can be confirmed:
# ls -Z /var/named/chroot/run/
drwxrwx---. named named system_u:object_r:named_conf_t:s0 named
Yep! That's it. The directory has incorrect security context in it. To compare into system's non-chrooted one:
# ls -Zd /run/
drwxr-xr-x. root root system_u:object_r:var_run_t:s0 /run/
There is a difference between named_conf_t and var_run_t. You can write temporary files into latter, but not to the first one. The fix is very simple (assuming, that you speak fluent SElinux):
semanage fcontext -a -t var_run_t "/var/named/chroot/run(/.*)?"
restorecon -R -v named/
The two commands are:
First, re-declare a better security-context for the directory in question and then start using the new definition. Now my BIND started and was fully operational! Nice.
My investigation ran further. I needed to report this to Fedora-people. I looked into the policy-file of /etc/selinux/targeted/contexts/files/file_contexts and found the faulty line in it:
/var/named/chroot/var/run/named.* system_u:object_r:named_var_run_t:s0
That line almost works. The directory in question has only two files in it. One of them even has a matching name. The problem, obviously, is that the another one does not:
# ls -l /var/named/chroot/run/named/
total 8
-rw-r--r--. 1 named named 5 Mar 22 12:02 named.pid
-rw-------. 1 named named 102 Mar 22 12:02 session.key
See Bug 1079636 at Red Hat Bugzilla for further developments with this issue.
Installing OpenSuse 13.1 into a MacBook
Monday, February 10. 2014
OpenSuse 13.1 was released November 2013. During Christmas holidays I started a project of upgrading my previous installation.
Since I'm running on a MacBook 1,1 it was obvious that I was looking for trouble. Previously I had rEFIt running just to get a GRUB 2 -prompt. This time I decided to start from a clean slate. Literally. I ran
dd if=/dev/zero of=/dev/sda
for the 10 first MiB of the drive to make sure, that it definitely has no trace of any of my previous settings. Since rEFIt has been abandoned years ago, I went for the replacement project rEFInd. I approached the author Mr. Roderick W. Smith and he was very helpful, but no matter what I did, I could not get rEFInd running on my very old 32-bit Mac. So, I had two options left: to go back to abandonware or see what would happen without a Boot Manager.
I failed on the installer settings-dialog, by trying to out-smart OpenSuse logic. My completed installation didn't boot. On 2nd try I simply went with the flow. As Mr. Smith instructed me, I didn't touch the most critical thing: MBR is not the way to go on a Mac! Here are my settings:

And guess what, it worked! OpenSuse 13.1 installer has enough logic to create a bootable Linux-installation to a completely blank hard drive. Nice!
The installer was pretty smart. Wi-Fi network was configured properly, it worked out-of-the-box. Apple-keys work: screen brightness, volume, etc. work as is. Also the typical trouble-makers sleep (on RAM) / hibernate (to disk), battery info, sound, and what not. There were only two minor issues: iSight does not work without the Apple proprietary firmware and the keyboard Apple-keys don't do anything usable.
To get the iSight camera working, see ift-extract -tool at Apple Built-in iSight Firmware Tools for Linux. It can dig the guts out of Mac OS X iSight-driver and equip your Linux with a functioning camera. The keyboard is a trivial one. Like previously, I just keyfuzz'ed the keys into something useful. See the OpenSuse 12.3 installation blog entry for details.
There is one thing you may want to check. If you enable SSHd, like I always do on all servers. As default /etc/sysconfig/SuSEfirewall2.d/services/sshd defines as TCP/22 to be open. That is the general idea, but apparently there is so much SSHd bombing going on, that I always tar pit my installations. For some strange reason Suse engineers chose not to allow that in a specific service definition file, but it has to be in the classic /etc/sysconfig/SuSEfirewall2 file, section FW_SERVICES_ACCEPT_EXT="0/0,tcp,22,,hitcount=3,blockseconds=60,recentname=ssh"
I urge everyone of you to rename the services/sshd into something else and add the above line. This makes bombing your SSH-port so much more difficult. And it does not affect your own login performance, unless you choose to bomb it yourself.
You may want to check OpenSuse's hardware compatibility list for details about Apple Laptops. The HCL has info about what works and what doesn't.
In general OpenSuse folks did a very good job with this one. There was a real improvement on ease installation. Thanks Roderick W. Smith for his help during my installation and thanks to Novell for giving this great distro for free!

