Notes on running openSUSE on a MacBook Pro
Sunday, August 18. 2019
This one is related to a previous post of mine Installing openSUSE Leap 15.1 into a MacBook Pro with encrypted root drive.
kworker CPU-hog
Symptoms:
CPU-load is high. Top consumer is kworker:
top - 11:16:47 up 6 min,  4 users,  load average: 0.93, 0.70, 0.36

Tasks: 248 total,   2 running, 246 sleeping,   0 stopped,   0 zombie


  PID USER      PR  NI    VIRT    RES    SHR S  %CPU  %MEM     TIME+ COMMAND

   58 root      20   0       0      0      0 R 73.33 0.000   4:29.74 kworker/0:
What a kernel worker (or kworker) is, a sensible explanation can be found from Kworker, what is it and why is it hogging so much CPU?. In this case, high CPU on a kworker is a symptom, not the fault.
This same issue is faced by multiple users on different hardware, for example Kworker is at 100% - I think I've tried everything!. Also Fedora Linux users on MBP are suffering from the same Bug 1192856 - ACPI Interrupt storm causes high kworker CPU usage.
Checking some kernel performance counters (more about those, see perf: Linux profiling with performance counters), perf-report:
  Children    Self  Command     Shared Object     Symbol

+   50.51%   0.01%  swapper     [kernel.kallsyms] [k] cpu_startup_entry

+   41.67%   0.31%  swapper     [kernel.kallsyms] [k] acpi_hw_read_port

+   39.99%  39.99%  swapper     [kernel.kallsyms] [k] acpi_os_read_port

+   37.62%   0.00%  kworker/0:2 [kernel.kallsyms] [k] ret_from_fork
Something really fishy is going on with acpi_os_read_port. To get the amount of interrupts generated, most people run a simple grep . /sys/firmware/acpi/interrupts/*, but not me. My solution is to do a simple(?) Perl one-liner wrapped here on multiple lines for readability:
perl -ne 'next if (!/^\s*(\d+)\s+/);

 next if (!$1);

 $intrs{$ARGV}=$1;

 END {foreach (sort {$intrs{$b} <=> $intrs{$a}} keys(%intrs)) {

  printf("%s: %d\n", $_, $intrs{$_});

 };

}' /sys/firmware/acpi/interrupts/*
It will output interrupt counts. On my system, the counters are something like this:
/sys/firmware/acpi/interrupts/gpe_all: 4695534

/sys/firmware/acpi/interrupts/sci: 4694806

/sys/firmware/acpi/interrupts/gpe06: 4694582

/sys/firmware/acpi/interrupts/gpe17: 940
If you're really interested in what's happening inside ACPI and how General Purpose Events (GPE) work, read the document ACPI in LinuxArchitecture, Advances, and Challenges.
Anyway, it looks like ACPI event 06 is firing a lot. Way too lot keeping kworker busy handling the interrupts. This interrupt-handling on the other hand, takes a lot of CPU-power making your system run hotter than expected.
Fix:
As root, a simple echo disable > /sys/firmware/acpi/interrupts/gpe06 will do the trick. Resulting in CPU cooling down:
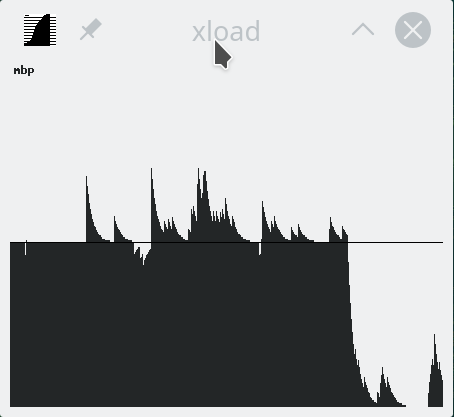
The effect is instantaneous and easy to notice. To persist this setting over reboots, things get bit more trickier. A lot of people suggest putting the above disable into crontab to be run on a @reboot. My opinion is clear: this is a system problem, system fix and needs to be addressed by system, not user. The @reboot-magic doesn't work in /etc/crontab, only on user's crontab-file.
A very good alternative is to go with acpi_mask_gpe-kernel parameter. It is documented in The kernel’s command-line parameters. And docs state "This facility can be used to prevent such uncontrolled GPE floodings". Nice! Exactly what I need. The tricky part is to edit /etc/default/grub and add acpi_mask_gpe=0x06 into GRUB_CMDLINE_LINUX-setting.
That's not all. Simply having the setting in a file won't change a anything yet. To make the new setting stick, on most Linuxes you would run update-grub. Some smart brain chose not to implement that helper into openSUSE, so that's not an option. To achieve the same, go for a: grub2-mkconfig -o /boot/grub2/grub.cfg
Now you're all set. Reboot and confirm. Of course you didn't fix the actual problem with ACPI, you simply made kernel ignore the interrupt-flood. You may want to settle for that at this point. I did file a bug report about this (Bug 1146023), but it seems the problem is limited to a specific set of MBPs and Fedora kernel guys are having hard time reproducing the issue. So, I'm not expecting SuSE guys to fix this anytime soon either.
Touchpad scroll direction
In 2011 when OS X 10.7 Lion was released, Apple made a drastic change on how touchpad (or how Apple calls it: Trackpad) scrolling works. Personally I totally understand this new logic, they wanted the scrolling user experience to be exactly the same and you would do on your phone's touch screen. You place your finger on the screen and pull the finger to the direction you want the screen to scroll. Before macOS 10.7 (note: the name change from OS X to macOS happened on 10.12 sierra) touchpad scrolling was targeted for the scrollbar, not to the actual content like on your touchscreen effectively reversing the direction.
So, as a macOS / iPad user, I want my scrolling to happen correctly, not the Windows way. To change, navigate to Touchpad settings and reverse the vertical scrolling:
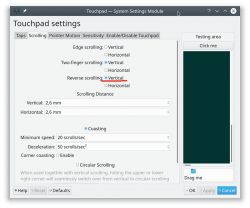
Reversing the reverse makes your head spin, but there is a logic there.
Touchpad gestures
On any typical use case, I would use a mouse. As in real external device, not the skin-on-my-fingertips damaging trackpad. For reasons unknown to me, it literally hurts to use those trackpads for too many hours. So, I normally steer away from them. It looks like I'm pretty alone with this one, but all I can do is to complain and use a mouse.
Typical this you may want to do:
- Right-click: On macOS, hold Ctrl and tap is a right click. This won't work on a Linux. You need to do the two-finger-tap for right-clicking.
- Scrolling: You can go with keyboard or keep dragging the scrollbars, that's ok. Doing a two-finger scroll with the touchpad, however, is much faster and less error prone.
- Zoom: Pinch won't work on a Linux, you need to use the actual zoom-control of whatever application you want to zoom
All the Apple's gestures are documented in HT204895 suppor article Use Multi-Touch gestures on your Mac, but as already mentioned, not all gestures are supported on a Linux.
Something else?
Nothing more pops into my mind. If you have anything to comment, please do so.
Installing openSUSE Leap 15.1 into a MacBook Pro with encrypted root drive
Thursday, August 15. 2019
I happen to have a spare 3rd generation 15" MBP. It is late 2013 model, used for years but recently just gathering dust. Back in the days, when the laptop was shiny and new, it was a serious piece of hardware and cost north of 2000 €. Even today, a fully working second hand 15" late 2013 would be priced around 25% of the original value. Couple years later Apple started manufacturing MBPs with faulty keyboards, faulty touch bar (the really weird top row) and faulty batteries. I'm in luck, as my unit pre-dates all of those. Yes, there are also some fatures missing which I'd love to have, fingerprint reader, USB-C -port and improved display to mention the most important ones.
Since the dust-gathering, I decided to see how a fresh Linux installation would go. Back in the days, I had a plastic MacBook running Linux. Given 32-bits and not-so-powerful CPU, I recycled it at the point I got tired of waiting for pages to load too long on Firefox. The amount of JavaScript modern web pages run is staggering. All that requires huge amounts of CPU to parse, process and run. Old low-end models simply won't cope making web browsing nearly impossible. So, I didn't have a Linux-Mac for couple years and now I wanted one.
Known facts
This I could figure out before doing any real installing:
- Installation can be done. openSUSE docs describe the process @ https://en.opensuse.org/SDB:Installation_on_a_Mac
- The built-in Broadcom WiFi isn't properly supported by most Linuxes, that includes openSUSE
- Debian Linux wiki @ https://wiki.debian.org/MacBook/Wireless states:
"MacBooks before the late 2008 models use Atheros chipsets, while late 2008 are now using Broadcom 4322 chipset." - StackExchange article @ https://unix.stackexchange.com/a/175813/241396:
"Broadcom 4360 actually comes with either of two distinct chips, 14E4:4360 and 14E4:43A0. There is no driver in Linux for the first one, while wl is an appropriate driver for the second one." - Arc Linux wiki @ https://wiki.archlinux.org/index.php/broadcom_wireless#broadcom-wl only states the fact wl-driver not being open-source.
- It is unclear which exact chipset is in the Mac, but it seems not to be properly supported in Linux.
- Debian Linux wiki @ https://wiki.debian.org/MacBook/Wireless states:
- My MBP doesn't have Ethernet RJ-45 port
- The existing USB-ports or Thunderbolt-ports could be used to host a network adapter, either wired or wireless, but I choose not to go down that path. Having an USB-dongle stick out of the Mac isn't something I'm willing to do.
- There is a good chance, that a Linux-driver for the built-in Broadcom WiFi exists. The existing driver can be downloaded from the net, but require some trickery to install during openSUSE installer.
- In macOS, drives are encrypted. In Windows using BitLocker is a good option to keep your data secure. Linux supports drive encryption as well.
Prerequisites
- A MacBook Pro with SSD full of data you don't care about. Also emptied SSD-drives will do.

- openSUSE Leap 15.1 ISO-image from https://www.opensuse.org/
- I personally will go for the full DVD, but it is not absolutely necessary. Small network installer will work as well.
- Skills to create a bootable USB-stick from the install image
- Your wireless network credentials and skills to connect a new device into it
- Two USB-sticks:
- One to boot openSUSE installer from. This stick will contain installation image and cannot be easily written into and must be attached to the Mac during installation.
- Second to transfer the WiFi-driver files
- Broadcom Linux wl-driver from http://download.opensuse.org/repositories/home:/Sauerland:/hardware/openSUSE_Leap_15.1/x86_64/
- Installer will need file
broadcom-wl-kmp-default-6.30.223.271_k4.12.14_lp151.27-lp151.121.1.x86_64.rpm. - Store the file into the second USB-stick.
- Installer will need file
- Since kernel-default -package has an update, the above RPMs needed for installer won't work in your installed openSUSE. To fix this, you will need also Broadcom Linux wl-driver from http://download.opensuse.org/repositories/home:/Sauerland:/hardware/openSUSE_Leap_15.1_Update/x86_64/
- Your installed openSUSE will need two files
broadcom-wl-6.30.223.271-lp151.121.4.x86_64.rpmandbroadcom-wl-kmp-default-6.30.223.271_k4.12.14_lp151.28.10-lp151.121.4.x86_64.rpm. - Store these files into the second USB-stick.
- Your installed openSUSE will need two files
- To make your life easier, having access to another computer while doing the install will help the process greatly. Especially, if you need to get a newer version of the Broadcom-drivers.
- That's it!
Disclaimer for RPM-files:
Those versions of files are valid at the time of writing. Both the install ISO and installed & updated openSUSE Linux are likely to eventually get updated and the versions of those files WILL change. Keep reading! There are instructions for you on how to compensate for updated versions. However, download locations will not change for openSUSE 15.1. The locations won't be valid for 15.2, but I'm sure you got that already.
Step 1: Prepare openSUSE 15.1 install
As instructed in https://en.opensuse.org/SDB:Installation_on_a_Mac, copy the installer ISO-file to the USB-stick. On macOS and Linux, figuring out the exact output drive can be bit tricky, so be careful with that. On Windows, the best utility for USB-drives is Rufus. You can get it from https://rufus.ie/.
While at it, download the required driver from above URLs pointing to Sauerland repository. Both versions are eventually needed, so just download them.
Note: for installer, only broadcom-wl-kmp-default -package is needed. We can safely ignore any RPM dependencies, as it is not possible to actually install the package. For installed Linux both files are needed, they have a dependency between packages. More about that when you're actually tinkering with the files.
Step 2: Boot the Mac into openSUSE installer
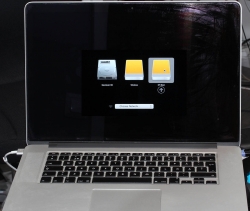
Plug in the installer USB (the other USB isn't needed yet). Power up the Mac. When you hear the boot-sound, press and hold the Alt/option-key. When you see the boot-menu, you can release the key. Displayed on your screen, there is a boot drive selection menu:
Go for the USB UEFI, that will start openSUSE installer.
Old geezers like me will remember the times when Macs required special bootloaders and tons of tinkering just to get the USB-boot to work. For past years, thanks to UEFI, USB-booting a Mac isn't any different than booting a PC.
Step 3: Establish facts
When the graphical installer launches, you'll see the license agreement screen:
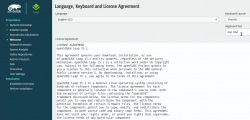
On top-right corner of that screen is also keyboard map choice. This is your chance to make sure your keys will work correctly on the GUI. This won't affect the text-console.
Switch to text-mode console
There are two critical pieces of information needing to be confirmed to get the WiFi-driver working. Since the openSUSE installer is running in graphical mode, you need to switch to text-mode. In a Linux, the console can be chosen with Alt-<function key> -combo. When graphical interface is running, key combo is Ctrl-Alt-<function key>. To make things even trickier, in a Mac <function key>s require the actual Fn-key to be pressed, so ultimately you'll need to press and hold Fn-Ctrl-Alt and then tap F2-key to go for a text-console.
Confirm kernel version
On a bash-prompt, check the exact Linux kernel version with a:
cat /proc/version
As a result, my install image will display:
Linux version 4.12.14-lp151.27-default
In Linux, all device modules are stamped with the specific kernel version they'll work with, so it is imperative to get the Broadcom driver for that exact kernel version.
Confirm broadcom WiFi hardware
On a bash-prompt, get a listing for wireless network devices. List PCI-devices with class 280, that's for all network controllers (listing is at https://pci-ids.ucw.cz/read/PD/), as already established, there shouldn't be too many of those:
lspci -d '::280' -vv -n
On my Mac, the response is:
02:00.0 0280: 14e4:43a0 (rev 03)
Remember from above: "Broadcom 4360 actually comes with either of two distinct chips, 14E4:4360 and 14E4:43A0. There is no driver in Linux for the first one, while wl is an appropriate driver for the second one." So, this is the confirmation we needed. wl is the driver needed and we can move forward with installing the driver.
Step 4: Install the Broadcom driver
This screenshot depicts my process:
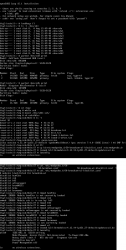
Now that you know the kernel version (4.12.14_lp151.27 in my installer) and copied the downloaded RPMs into the other USB-stick, plug it in. Remember: the installer USB is needed and cannot be removed.
Determine the correct device and mount it
In the above screenhot, the USB-stick having the drivers is /dev/sdb. First I checked out which storage devices Linux found. There are number of those for: Apple SSD, installer USB and driver USB. Since I knew, my driver USB is a Kingston Datatraveller, displaying the block-device partition table by running parted /dev/sdb print helped to identify the correct drive.
I mounted the USB-stick with a:
mkdir /tmp/usb

mount /dev/sdb1 /tmp/usb
Locate the files from the USB-stick.
Unpack the driver RPM
At this point, the Broadcom RPMs versioned for openSUSE installer kernel need to be popped open. The ones for your running Linux will install as-is, so no need to unpack them. It would be easy & smart to just install the RPM, but given Linux installer, it is not possible. Most of the mounted filesystems in an installer are SquashFS filesystems (more info from https://en.wikipedia.org/wiki/SquashFS) and are read-only. Well... you CAN alter a SquashFS, but it is more complicated than just running couple commands to extract the driver from RPM and injecting it into a running system.
To unpack an RPM, in a temporary directory run following (this is a single-liner, I just wrapped it into two lines for readability):
rpm2cpio broadcom-wl-kmp-default-6.30.223.271_k4.12.14_lp151.27-lp151.121.1.x86_64.rpm \

 | cpio -ivd
This will create any subdirectories and files into the current directory where cpio-command is run. That's why a temporary location is suggested.
Install wl-driver
As already established, Broadcom on Linux is a messy business. And this Broadcom chip in your MBP is especially messed up. So beware! Trickery ahead.
The other file you won't be needing during installation, but you will for your running openSUSE would contain a file etc/modprobe.d/50-broadcom-wl-blacklist.conf. This blacklisting mechanism exists in Linux to prevent device-modules from being loaded when a particular device is being used. Now, at the point you're running the commands on your Linux-installer its too late. Your installer already loaded bunch of device drivers you won't be needing. So, they must go. Contents of the file suggests what to remove:
# modules blacklisted for broadcom-wl

blacklist bcm43xx

blacklist ssb

blacklist b43

blacklist ndiswrapper

blacklist brcm80211

blacklist bcma

blacklist brcmsmac
You can run command rmmod for each of those, but I choose to go for a for-loop:
for module in bcm43xx ssb b43 ndiswrapper brcm80211 bcma brcmsmac; do

  rmmod $module

done
In my Mac, at least modules b43, ssb and bcma were loaded.
Warning: If you DON'T rmmod conflicting modules, your wl-module will NOT work.
Finally, it's time to go for the good driver. When you unpacked the driver RPM, it contains a subdirectory. My driver is at lib/modules/4.12.14-lp151.27-default/updates. Go there and run:
insmod wl.ko
There is zero feedback for your command. To get an indication of success, run iwconfig. It will display something like:
wlan0     IEEE 802.11  ESSID:off/any

          Mode:Managed  Access Point: Not-Associated   Tx-Power=200 dBm

          Retry short limit:7   RTS thr:off   Fragment thr:off

          Encryption key:off

          Power Management:off
When you see an existing wlan0, you're golden! Now you're good to go forward with graphical installer.
Step 5: Install openSUSE Leap 15.1
First, go back to graphical installer. The key combination for that is:
Press and hold Fn-Alt and then tap F7-key
Add your Mac's Broadcom to Linux
In the graphical installer, go Next from license screen and witness a blank Network Settings screen. The installer wasn't able to determine any operational network interfaces in your system. Not to worry, now that your Broadcom is on-line, you can add it. Click Add, and add a Wireless device using Kernel module wl:
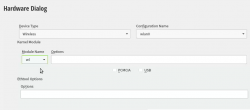
Moving forward with Wireless Network Card Configuration, a screen to connect to your WiFi will appear:
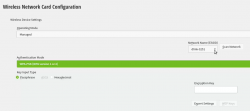
Scanning for any available networks will provide you a drop-list of found networks. Your own network needs to be in that list. Just add your authentication details to the dialog and you're good to go.
Instruct openSUSE installer to encrypt your root drive
(This is completely optional, you don't NEED to have an encrypted hard-drive. I just love doing stuff like this.) When your installer wizard will reach Suggested Partitioning, that's your cue. Going for encrypted root partition is actually surprisingly easy on openSUSE:
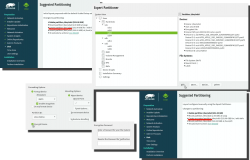
Go to Expert Partitioner using the suggested partition as a baseline for your custom partitioning. The only thing you need to change is to enable encryption on your root partition. Find mount point / and Edit it. Just click Encrypt Device and choose a wise password for your encryption. That's it. Then you can Accept the partition plan and move forward.
Add an user to new Linux
For security reasons, I'll always separate my administrators and regular users. What level of security you're targeting for is completely up to you. I, personally won't use Automatic Login and won't use same passwords for super-user and regular users. The Local Users dialog will look like this:
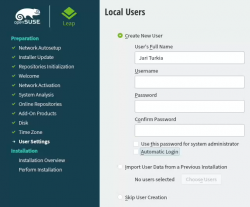
Hang tight, you're almost there.
Install!
When you reach the Installation Settings, you're about to start destroying any previous data on your Mac and start installing the Linux:
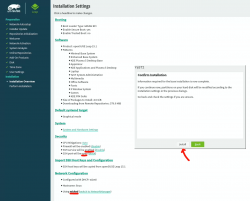
Enabling SSH and drilling a hole for it into firewall is up to you. Also, the choice of tooling for network management is up to you. I do dislike NetworkManager and obviously choose to drop it and go with wicked. If you want to learn more, go read wicked FAQ at https://github.com/openSUSE/wicked/wiki/FAQ.
When you click Install in the Confirm Installation -dialog, the ball starts rolling. If you missed the previous warning, before this point your data is still intact in the drive, after this point it won't be anymore. This is the part where you can go grab a cup of coffee:
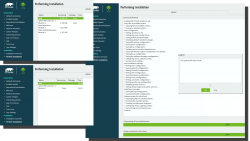
At the successful end, your system will automatically reboot. When the installer reboots the computer, you can remove the installer USB. It won't be needed anymore.
Step 6: Reboot into your newly installed Linux
If you went with encrypted partition, GRUB will require the password to decrypt the drive to load Linux kernel:
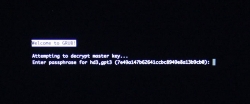
Hint: If you already didn't, just yank out the installer USB.
The "funny" thing about encrypted root partition is: when your kernel is loaded by GRUB, kernel will need the same password again!

Yes, punch in the same password again to reach login-screen.
Add your Mac's Broadcom to Linux - Again!
Once logged in all the hard work you did with the Broadcom-driver are lost. Your newly installed openSUSE will NOT have the Broadcom-driver installed. What! What! What?
But wait! This time installing is much easier. You actually CAN simply install the RPMs from the other USB-stick. On an installed Linux, the system can be written into.
Confirm the kernel version (again) and notice how it is different. My system has:
Linux version 4.12.14-lp151.28.10-default
Just like before, figure out which one the device is (with a great likelihood, it is not the same device anymore) and mount it. Once mounted, as root you can do something like:
rpm --install -h *.rpm
Installing the RPMs won't make your network operational. In a Linux, there are always ways to avoid rebooting, but in this instance I found it simply easier to go the Windows-way and reboot. You can do that at this point. Alternatively if you don't just yet need a network, you can also remove the second query for encryption password and then reboot to fix two problems on a single reboot.
Remove the 2nd password prompt
This is something I wouldn't do on a shared machine. Since I'm almost certain, nobody else will use my laptop, in this instance I'm willing to add ease of use with cost of potentially losing my security. If a logged-in user can access the encryption key-file, my encryption security is gone! Before allowing a second encryption key to be used, the plain-text password is not stored anywhere. To keep my system still secure, I need to make sure the permissions for the file are correctly set and also keep any malware or unwanted software from stealing my precious key-file.
Process for setting up encrypted root in openSUSE is described well in https://en.opensuse.org/SDB:Encrypted_root_file_system. As instructed there, create a keyfile, add the keyfile as a valid key into LUKS and secure the setup:
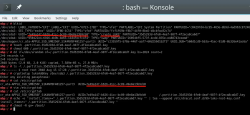
For relaxing my system's security, the general idea is to load some random bytes from /dev/urandom and create a random-content key-file. The docs are using 1024 bytes, I went double that for a 2048 byte keyfile. In my sequence, I first create an empty file, then lock all other users out of it and then populate the file with random bytes:
touch /.partition.35d5293d-6fe0-4eaf-987f-4f2eca8ca6d7.key

chmod 600 /.partition.35d5293d-6fe0-4eaf-987f-4f2eca8ca6d7.key

dd if=/dev/urandom \

  /.partition.35d5293d-6fe0-4eaf-987f-4f2eca8ca6d7.key \

  bs=1024 count=2
Then this newly created filename needs to be added into two places. First /etc/crypttab. After setup, there are only two columns. As instructed in the documentation, a third column needs to be added. Note: This single line having three columns is split into three lines here for readability. If you fail to have this as a single line, your system will fail to reboot:
cr_ata-APPLE_SSD_SM0256F_S1K4NYBF401257-part3

UUID=7e49a147-b626-41cc-bc89-49e8a13b9cb0

/.partition.35d5293d-6fe0-4eaf-987f-4f2eca8ca6d7.key
Second into initRD by creating a new Dracut configuration segment /etc/dracut.conf.d/99-root-key.conf:
echo -e 'install_items+=" /.partition.35d5293d-6fe0-4eaf-987f-4f2eca8ca6d7.key "' \
 | sudo tee --append /etc/dracut.conf.d/99-root-key.conf
Yet again, to keep your system secure, make sure nobody else can access your /boot-stuff:
chmod -R go= /boot/
To have this Dracut segment have any effect, you need to run mkinitrd as root. If you want more information about initRDs or Dracut, go to https://dracut.wiki.kernel.org/.
Now, you're ready to reboot the Linux. Both WiFi and password setups are done.
Step 7: Reboot and verify setup
You will need to enter the encryption password for GRUB, no change there. However, your Linux should go directly to login-screen. If it doesn't, you failed somewhere.
Also, after a login, your WiFi should work. To confirm, go to a prompt:
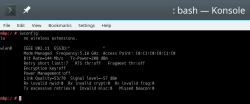
Since installer saved your wireless connection details, now you have network connectivity also in your installed Linux!
Step 8: Finalize
Remember the part where your installer used a different version of Linux kernel than your ready system? Kinda hard to not remember it, right. Now some additional work is needed to keep your system working:
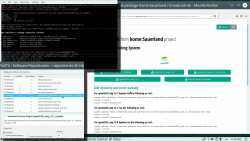
As root, run this in a bash-prompt (again, a single-liner):
zypper addrepo \

  https://download.opensuse.org/repositories/home:Sauerland/openSUSE_Leap_15.1_Update/home:Sauerland.repo
The setup information is available at https://software.opensuse.org/download.html?project=home%3ASauerland&package=broadcom-wl.
Finally: Go to YaST2 and use the GUI to inspect all the software repositories your system has. It must have Sauerland's repo enabled for the Broadcom driver to get updates as openSUSE's kernel-default -package does.
Step last: All done
 That's it. Now your Mac is successfully running an openSUSE 15.1 Leap Linux.
Enjoy! ![]()
systemd setting overrides
Monday, June 17. 2019
In couple past posts of mine, I've instructed people to do alter systemd service descriptions. Examples from Randomness in computers and Handling /run with systemd. As we all know, systemd is quite a beast. It just keeps on giving complexity as we stumble along trying to grasp all of it.
For example:
To add more command arguments to rngd.service, you can do what I instructed earlier. You can copy /usr/lib/systemd/system/rngd.service to /etc/systemd/system/, edit the file and do a systemctl daemon-reload to update the changes.
If you want to choose more systemd'ic (Python developers always say "pythonic") way, you can do a:
systemctl edit rngd
This command will open a text-editor. The editor is your default one from EDITOR environment variable, or if you haven't picked one, a default will be chosen for you by your favorite Linux distro vendor.
What you should make the text file contain, is following three (3) lines:
[Service]

ExecStart=

ExecStart=/sbin/rngd -f --rng-device=/dev/TrueRNG --fill-watermark=4000
Those lines will re-define service description. First by clearing out the previous value(s) and then defining a new one. On save, this setting will take automatically effect and you don't have to do anything else. Also, this setting is persisted in a file called /etc/systemd/system/rngd.service.d/override.conf. Of course, you can create that particular file yourself, but then the familiar systemctl daemon-reload is needed to make your changes stick.
Nice and easy! ![]()
Adding a source of randomness to a Linux
Monday, June 3. 2019
Randomness in computers
You don't need to know much about computers to understand, that computers cannot do random things. Yes, all programming languages and libraries do offer you a rand()-function to emulate randomness. However, the resulting output will follow the carefully crafted programming implementing this "randomness". The most trivial pseudo-random functions will merely provide a sequence of numbers appearing random, but this sequence can be reset to start from beginning making the "randomness" predicatable. That's not really very random, huh!
Improved randomness in computers
To be fair, there does exist improved pseudo-random algorithms which take their initial seed-values from something volatile (time is one such volatile parameter) making the quality of randomness better. Still, even high-quality pseudo-random algorithm is just complex sequence of operations, which will produce duplicate results on same input values. Sometimes its just very tricky to craft a situation where all of the input values would match.
If somebody is capable of doing that, your randomness changes into predictability. Read the story of Dual_EC_DRBG on Wikipedia https://en.wikipedia.org/wiki/Dual_EC_DRBG. When you're generating your precious private keys, you don't want anybody (including NSA) to be able to guess what you have there.
Random source in Linux
Since a proper random source is something every single user, developer and sysadmin would love to have, the problem has been approached on your Linux by authors of the operating system. An excellent description can be found from Wikipedia article https://en.wikipedia.org/wiki//dev/random#Linux. Briefly put, your Linux will collect environmental entropy from number of sources (including human interaction with keyboard and mouse) to a pool, which can then be used to produce naturally random numbers. It actually works very well, the quality of randomness is top-notch.
Obvious problem with this approach is, that you cannot pull too many random numbers out of this source without exhausting it. The fix is to keep typing something while moving your mouse (not a joke!) to generate entropy for the random source. This will eventually help fill the entropy pool and /dev/random will spit couple bytes more.
Those users who have exhausted their /dev/random on an idling rack server without a console keyboard, mouse and video know that it takes painfully long for the entropy pool to fill. A busy server doing something will be able to fill the pool much faster.
A real random source
If you need a real proper random source, which works without human intervention and can provide really good randomness as a stream, there are possibilities on hardware. I know of two good ones, Simtec Electronics Entropy Key and ubld.it TrueRNG Hardware Random Number Generator.
Note: if you consider getting one, get the TrueRNG version 3 (http://ubld.it/truerng_v3). Its just that I have the 1st gen version at hand and haven't found the reason to upgrade.
It is essentially an USB-stick.
Linux lsusb info essentially identifies it as a Microchip (vendor ID 0x04d8) manufactured USB-device (with ID 0xf5fe) providing RS-232 communications:
Bus 002 Device 009: ID 04d8:f5fe Microchip Technology, Inc.

Device Descriptor:

  bLength                18

  bDescriptorType         1

  bcdUSB               2.00

  bDeviceClass            2 Communications

  bDeviceSubClass         0

  bDeviceProtocol         0

  bMaxPacketSize0         8

  idVendor           0x04d8 Microchip Technology, Inc.

  idProduct          0xf5fe

  bcdDevice            1.00

  iManufacturer           1 ubld.it

  iProduct                2 TrueRNG

  iSerial                 0

  bNumConfigurations      1

  Configuration Descriptor:

    bLength                 9

    bDescriptorType         2

    wTotalLength       0x0043

    bNumInterfaces          2

    bConfigurationValue     1

    iConfiguration          0

    bmAttributes         0x80

      (Bus Powered)

    MaxPower              100mA

    Interface Descriptor:

      bLength                 9

      bDescriptorType         4

      bInterfaceNumber        0

      bAlternateSetting       0

      bNumEndpoints           1

      bInterfaceClass         2 Communications

      bInterfaceSubClass      2 Abstract (modem)

      bInterfaceProtocol      1 AT-commands (v.25ter)

      iInterface              0

      CDC Header:

        bcdCDC               1.10

      CDC ACM:

        bmCapabilities       0x02

          line coding and serial state

      CDC Union:

        bMasterInterface        0

        bSlaveInterface         1

      CDC Call Management:

        bmCapabilities       0x00

        bDataInterface          1

      Endpoint Descriptor:

        bLength                 7

        bDescriptorType         5

        bEndpointAddress     0x81  EP 1 IN

        bmAttributes            3

          Transfer Type            Interrupt

          Synch Type               None

          Usage Type               Data

        wMaxPacketSize     0x000a  1x 10 bytes

        bInterval               1

    Interface Descriptor:

      bLength                 9

      bDescriptorType         4

      bInterfaceNumber        1

      bAlternateSetting       0

      bNumEndpoints           2

      bInterfaceClass        10 CDC Data

      bInterfaceSubClass      0

      bInterfaceProtocol      0

      iInterface              0

      Endpoint Descriptor:

        bLength                 7

        bDescriptorType         5

        bEndpointAddress     0x02  EP 2 OUT

        bmAttributes            2

          Transfer Type            Bulk

          Synch Type               None

          Usage Type               Data

        wMaxPacketSize     0x0040  1x 64 bytes

        bInterval               0

      Endpoint Descriptor:

        bLength                 7

        bDescriptorType         5

        bEndpointAddress     0x82  EP 2 IN

        bmAttributes            2

          Transfer Type            Bulk

          Synch Type               None

          Usage Type               Data

        wMaxPacketSize     0x0040  1x 64 bytes

        bInterval               0

Device Status:     0x0001

  Self Powered
And by looking at /dev/, there is a /dev/ttyACM0. That's how udevd will populate a CDC-device when it sees one.
How is this a "true" random source?
Oh, that's easy. The device will produce a random 0 or 1 bit constantly when its on. Or to be precise, there is an internal algorithm producing those based on a constant flow of electrons on a transistor PN-surface. The exact phenomenon is called avalance effect or avalance breakdown. For those who can do electronics, there is a good explanation about this in Difference Between Avalanche Breakdown and Zener Breakdown (I borrowed the visualisation pic from above link).

To (over)simplify that, in a carefully constructed electronic circuit, inside a transistor an electron may or may not be emitted on the other side of a semiconducting surface. The occurrence is as random as it can be in nature. Other circuitry will detect this random flow of electrons (or lack of flow) to produce ones and zeros.
What makes this a really good for randomness, as it is well established that this avalance of electrons will happen. Also, it will happen often enough to produce a stream of events. It's just that we don't know exactly WHEN the avalance of electrons will happen. If you time-slice this to slots, a slot can be empty (no avalance) or full (electrons avalanching).
Linux tweaking:
udev
Anybody having multiple devices in their Linuxes knows, that you really cannot control which device name some specific device will get on reboot. To overcome that, udevd can be instructed to do things when it sees a device. My rules for TrueRNG include setting it to highest possible speed and creating a symlink-device so, that I can point to a known source of random. Also, I'm loosening access to that source of randomness to any users belonging to dialout-group. If I wouldn't do that, only root would have access to this fine random-source.
My /etc/udev/rules.d/99-TrueRNG.rules contains:
SUBSYSTEM=="tty", ATTRS{product}=="TrueRNG", SYMLINK+="TrueRNG", RUN+="/bin/stty raw -echo -ixoff -F /dev/%k speed 3000000"

ATTRS{idVendor}=="04d8", ATTRS{idProduct}=="f5fe", ENV{ID_MM_DEVICE_IGNORE}="1", GROUP="dialout", MODE="0664"
If you want to take your random-device for a spin, you can do something like:
dd if=/dev/TrueRNG of=random.bytes bs=64 count=1024
That would create a file of 64 KiB containing very very random bytes. In theory you can just cp data out of the character device, but since it has an infite flow, you'll need to cut it at one point.
rngd
Remember the part I said earlier about Linux using your keypresses and mouse movements as entropy source for randomness. Even with the USB-stick popped into a PC, that still remains the case. What needs to be done next is to offer a helping hand to the Linux kernel and make sure the entropy pool is always full.
My Fedora has package called rng-tools. It is packaged from Mr. Horman's https://github.com/nhorman/rng-tools. What's in there are the tools for pumping those precious truly random bits out of the USB-source to Linux kernel's entropy pool. As default, rngd will use /dev/hwrng as the source for randomness. Some Linuxes don't have that device at all, some Linuxes point that into CPU's random source. What's guaranteed, it will not point to your USB-stick! We need to change that.
Btw. you might be horrified by the fact, that something is fidding with your randomness. The exact bits transferred from USB to entropy pool won't be the actual bits getting out of /dev/random. Your keypresses and many other events are still a factor. Its still a good idea to not run randomness-monitoring malware or spyware in your Linux.
Systemd works so, that I did create a copy of /usr/lib/systemd/system/rngd.service into /etc/systemd/system/rngd.service. The contents of the copy in /etc/systemd/system/ can be freely modified and it has priority over the /usr/lib/systemd/system/ one. The only change I made was to have the ExecStart-line say as:
ExecStart=/sbin/rngd -f --rng-device=/dev/TrueRNG --fill-watermark=4000
When rngd-service would be started, it will use the USB-stick as source and make sure, there are at least 4000 bits of entropy in the pool.
Making sure rngd setup works
At any given point, you can query how many bits are available in the Linux entropy-pool:
cat /proc/sys/kernel/random/entropy_avail
Since my setup is working correctly, it will display a number greater than 4000 and smaller than 4096. The upper limit comes from /proc/sys/kernel/random/poolsize, which is a hard-coded number from Linux kernel source.
Hint: If you do the stupid thing like I did and set the /proc/sys/kernel/random/write_wakeup_threshold (using --fill-watermark) into 4096 (or above), your rngd will keep hogging CPU like there is no tomorrow. It is impossible for the pool to contain maximum number of bits at any given time. Give your system a break and set the threshold bit lower than max.
Finally
It's always nice to know for a fact, that random numbers are random. This fact can be verified and has been verified by number of other people.
Enjoy!
Bacula 9 vchanger: Tape count fix
Sunday, June 2. 2019

One of the first ever blog posts I've written here is about Bacula, the open-source backup software (more at https://www.bacula.org/). I published Fedora 17 binaries for the virtual tape changer running for Bacula 7. The post from year 2013 is here.
Running Bacula in Fedora Linux isn't much of a trick, ready-made binaries are available by the distro and configuring one is covered in Bacula's documentation. Then again, running Bacula with a NAS (see Wikipedia for Network-attached storage) as storage backend is where things get very very tricky. I've written about my Qnap NAS-device's support earlier, see the post about that.
Since its inception, Bacula is baked to require a tape drive (or drives) and a set of tapes (a single tape is supported also). Given modern day computing environment, actual physical tapes aren't used that much. Even I stopped using DLT (Wikipedia Digital Linear Tape) or LTO (Wikipedia Linear Tape-Open) tapes years ago and went for an easy, fast and inexpensive solution for storing my backups on a NAS. So, I really do need to have a concept of a "tape" somehow. That's where the virtual Bacula tape changer steps in. It is a piece of software attaching to Bacula autochanger API emulating a virtual "tape" drive and set of tapes with all the necessary operations, but doing all that on a filesystem. More details about autochangers can be found from Bacula Autochanger Resource page.
The obvious idea is to create a set of files to act as a set of "tapes". For system administration purposes, the tapes are just files in a subdirectory. Smart thing to do is to make that particular subdirectory located on a NAS to store the backups where there is plenty of external capacity outside your system. In my case, I'll access them over an iSCSI-mounted filesystem. More details about iSCSI on a Linux can be found from RedHat Enterprise Linux 7 manual pages at https://access.redhat.com/documentation/en-us/red_hat_enterprise_linux/7/html/storage_administration_guide/online-storage-management#osm-target-setup. For those planning something similar: I chose NOT to go with a NFS. A NFS-connection get stuck very easily and you will be rebooting your stuff a lot. See How-To: Release Stuck NFS Mounts without a Reboot @ Linux Journal for more about that.
When I went to Fedora 29, my Bacula setup got an automatic bump to version 9. My previous setup was for Bacula version 7 and quite soon I realized that I needed to alter my vchanger somehow to get it to support version 9. Bacula-guys did make changes to autochanger-API in their version-bump process. Luckily vchanger author was ahead of me and I got the code from http://sourceforge.net/projects/vchanger/. Soon realized that when I did a simple command of vchanger /etc/qnap.conf LIST, it displayed an extra tape which didn't exist in reality. I was puzzled. Old setup displayed the tape count correctly.
I did some C++ debugging and found out an obvious bug in the code. In src/diskchanger.cpp, DiskChanger-class InitializeVirtSlots()-method calculates the last changer slot numer incorrectly. It is guaranteed to be one-off. After fixing this, I contacted the vchanger author Mr. J. Fisher about my findings, and he agreed, there was a bug in his code.
Unfortunately, couple of months have passed and there is no 1.0.3 release yet, so the fix isn't in the SourceForge git-repo yet. For Fedora-users, my RPMs are available at http://opensource.hqcodeshop.com/Bacula/vchanger for B9/. Go get them there! I've been using those since last December, so I think my fix is correct and doesn't introduce any issues.
Fedora dhclient broken
Monday, December 10. 2018
I'm not a huge fan of NetworkManager. Since I am a fan of many RedHat products, it creates a nice conflict. They develop it, so it is pre-installed in all of RedHat's Linuxes. Luckily its very easy to yank off and replace with something that actually works and is suitable for server computing.
Also, a third player exists in the Linux networking setup -scene. systemd-networkd (https://www.freedesktop.org/software/systemd/man/systemd-networkd.html) does exactly the same as NetworkManager or classic network-scripts would do. It is the newcomer, but since everybody's box already has systemd, using it to run your networking makes sense to some.
I don't know exactly when, but at some point Fedora simply abandoned all the classic ways of doing networking. I know for a fact, that in Fedora 26 ISC's dhclient worked ok, but looks like around the time of 26 release, they simply broke it. Now we're at 29 and it has the same code as 28 did. Since almost nobody uses classic networking, this bug went unnoticed for a while. There is a bug in RedHat's Bugzilla which looks similar to what I'm experiencing: Bug 1314203 - dhclient establishes a lease on the explicitly specified interface, but then endlessly retries old leases on other interfaces, but looks like it didn't get any attention. To make this bug even more difficult to spot, you need to have multiple network interfaces in your machine for this problem to even exist. Most people don't, and looks like those who do, aren't running dhclient.
The issue, in detail, is following:
When run ifup eno1, no IP-address will be issued by my ISP for that interface.
When running dhclient in diagnostics mode, with following command:
/sbin/dhclient -1 -d -pf /run/dhclient-eno1.pid -H myPCame eno1
output will be:
Internet Systems Consortium DHCP Client 4.3.6

Copyright 2004-2017 Internet Systems Consortium.

All rights reserved.

For info, please visit https://www.isc.org/software/dhcp/


Listening on LPF/enp3s0f1/90:e2:ba:00:00:01

Sending on LPF/enp3s0f1/90:e2:ba:00:00:01

Listening on LPF/eno1/60:a4:4c:00:00:01

Sending on LPF/eno1/60:a4:4c:00:00:01

Listening on LPF/enp3s0f0/90:e2:ba:00:00:02

Sending on LPF/enp3s0f0/90:e2:ba:00:00:02

Sending on Socket/fallback

DHCPDISCOVER on enp3s0f1 to 255.255.255.255 port 67 interval 3 (xid=0x90249a1f)

DHCPREQUEST on eno1 to 255.255.255.255 port 67 (xid=0xe612e570)

DHCPDISCOVER on enp3s0f0 to 255.255.255.255 port 67 interval 5 (xid=0xb568cb15)

DHCPACK from 62.248.219.2 (xid=0xe612e570)

DHCPREQUEST on enp3s0f0 to 255.255.255.255 port 67 (xid=0xb568cb15)

DHCPOFFER from 84.249.192.3

DHCPACK from 84.249.192.3 (xid=0xb568cb15)

DHCPDISCOVER on enp3s0f1 to 255.255.255.255 port 67 interval
Notice how DHCP-client was requested on network interface eno1, but it is actually run for all there are. For me, this is a real problem, so I spent a while on it. Bug report is at Bug 1657848 - dhclient ignores given interface and it contains my patch:
--- ../dhcp-4.3.6/common/discover.c    2018-12-10 16:14:50.983316937 +0200

+++ common/discover.c    2018-12-10 15:20:12.825557954 +0200

@@ -587,7 +587,7 @@

                state == DISCOVER_REQUESTED))

         ir = 0;

     else if (state == DISCOVER_UNCONFIGURED)

-        ir = INTERFACE_REQUESTED | INTERFACE_AUTOMATIC;

+        ir = INTERFACE_AUTOMATIC;

     else {

         ir = INTERFACE_REQUESTED;

         if (state == DISCOVER_RELAY && local_family == AF_INET) {
My fix is to break the functionality of dhclient. If you don't specify an interface for dhclient to run on, it will run on all. To me (or my network-scripts) that won't make any sense, so I'm choosing to run only on specified interfaces, or interface in my case. This patch when applied and compiled to a binary will fully fix the problem.
Arch Linux failing to start network interface, part 2
Saturday, March 17. 2018
I genuinely love my Arch Linux. It is a constant source of mischief. In a positive sense. There is always something changing making the entire setup explode. The joy I get, is when I need to get the pieces back together. ![]()
In the Wikipedia article of Arch Linux, there is a phrase:
... and expects the user to be willing to make some effort to understand the system's operation
The is precisely what I use my Arch Linux for. I want the practical experience and understanding on the system. And given it's rolling release approaches, it explodes plenty.
Back in 2014, Arch Linux impemented Consistent Network Device Naming. At that time the regular network interface names changed. For example my eth0 become ens3. My transition was not smooth. See my blog post about that.
Now it happened again! Whaat?
Symptoms:
- Failure to access the Linux-box via SSH
- Boot taking very long time
- Error message about service
sys-subsystem-net-devices-ens3.devicefailing on startup
Failure:
Like previous time, the fix is about DHCP-client failing.
You vanilla query for DHCP-client status:
systemctl status dhcpcd@*
... resulted as nothingness. A more specific query for the failing interface:
systemctl status dhcpcd@ens3
... results:
* dhcpcd@ens3.service - dhcpcd on ens3

  Loaded: loaded (/usr/lib/systemd/system/dhcpcd@.service; enabled; vendor pre>

  Active: inactive (dead)
Yup. DHCP failure. Like previously, running ip addr show revealed the network interface name change:
2: enp0s3: mtu 1500 qdisc fq_codel state UP group default qlen 1000 link/ether 52:54:52:54:52:54 brd ff:ff:ff:ff:ff:ff
There is no more ens3, it is enp0s3 now. Ok.
Fix:
A simple disable for the non-existent interface's DHCP, and enable for the new one:
systemctl disable dhcpcd@ens3

systemctl enable dhcpcd@enp0s3
To test that, I rebooted the box. Yup. Working again!
Optional fix 2, for the syslog:
Debugging this wasn't as easy as I expected. dmesg had nothing on DHCP-clients and there was no kernel messages log at all! Whoa! Who ate that? I know, that default installation of Arch does not have syslog. I did have it running (I think) and now it was gone. Weird.
Documentation is at https://wiki.archlinux.org/index.php/Syslog-ng, but I simply did a:
pacman -S syslog-ng
systemctl enable syslog-ng@default

systemctl start syslog-ng@default
... and a 2nd reboot to confim, that the syslog existed and contained boot information. Done again! ![]()
What:
The subject of Consistent Network Device Naming is described in more detail here: https://access.redhat.com/documentation/en-us/red_hat_enterprise_linux/7/html/networking_guide/ch-consistent_network_device_naming
Apparently, there are five different approaches on how to actually implement the CNDN. And given the old ens-device, which is according to PCI hotplug slot (enS for slot) index number (Scheme 2), the new naming scheme was chosen to be physical location (enP for physical) of the connector (Scheme 3).
The information of when/what/why the naming scheme change was made eludes me. I tried searching Arch discussion forums at https://bbs.archlinux.org/, but nothing there that I could find. But anyway, I got the pieces back together. Again! ![]()
Update 30th March 2018:
Yup. The interface naming rolled back. Now ens3 is the interface used again. Darnnation this naming flapping!
Arch Linux failing to update man-db
Friday, January 26. 2018
This week seems to be especially hard on my Linuxes. Doing a regular pacman -Syu started spitting crap on me:
error: failed to commit transaction (conflicting files)

man-db: /usr/bin/accessdb exists in filesystem

man-db: /usr/bin/apropos exists in filesystem

man-db: /usr/bin/catman exists in filesystem

man-db: /usr/bin/convert-mans exists in filesystem

man-db: /usr/bin/lexgrog exists in filesystem

man-db: /usr/bin/man exists in filesystem

man-db: /usr/bin/mandb exists in filesystem

man-db: /usr/bin/manpath exists in filesystem

man-db: /usr/bin/whatis exists in filesystem

man-db: /usr/lib/man-db/globbing exists in filesystem

man-db: /usr/lib/man-db/libman-2.7.6.1.so exists in filesystem

man-db: /usr/lib/man-db/libman.so exists in filesystem

man-db: /usr/lib/man-db/libmandb-2.7.6.1.so exists in filesystem

...
A simple query for what's wrong:
# pacman -Qkk man-db

man-db: 363 total files, 0 altered files
So, nothing wrong with it. It just loves busting my balls! ![]()
Using a bigger hammer:
# pacman -S --force man-db

...

:: Processing package changes...

(1/1) upgrading man-db      [######################] 100%

New optional dependencies for man-db

    gzip [installed]

:: Running post-transaction hooks...

(1/2) Creating temporary files...

(2/2) Arming ConditionNeedsUpdate...
Now my pacman -Syu works. Weird case, that.
Open Management Infrastructure in Azure gone wild
Thursday, January 25. 2018
I opened my mail, and I had 730 new e-mails there! Whaat!
One of my Azure boxes has (for reason unknown to me), following crontab-entry on root's crontab:
* * * * * [ \( ! -f /etc/opt/omi/creds/omi.keytab \) -o

   \( /etc/krb5.keytab -nt /etc/opt/omi/creds/omi.keytab \) ] &&

   /opt/omi/bin/support/ktstrip /etc/krb5.keytab /etc/opt/omi/creds/omi.keytab
/opt/omi/bin/support/ktstrip keeps failing, because /etc/krb5.keytab is missing. And that command is run every single minute on my machine. So, every single minute I get a new information about the failure. Nice! ![]()
The sequence of events is totally unclear to me. I haven't touched anything, but this morning an influx of e-mails stated pouring in.
OMI, or Open Management Infrastructure is something Linux-images in Azure have, so it shouldn't be anything dangerous.
The obvious fix as to remove that stupid line.
HOWTO: Configuring a router on a Mini-PC with CentOS
Thursday, January 18. 2018
Over half an year later, I realized, that I never published my article about operating system and software setup of my Mini-PC router. This is a follow-up post about the Qotom-hardware I wrote earlier. So, its probably about time to do that! ![]()
To get the ball rolling on new CentOS installation, a good start is to download it, Rufus it into an USB-stick and install the minimal setup into router-PC. The CentOS installation is so well documented and trivial process, I won't go into any details of it. Read something like Installing Red Hat Enterprise Linux 7.4 on all architectures for details of that.
Goal
Every project needs a goal. In any kind of engineering there is a specification and criteria, that the goal has been met.
The goal of this project is to create a Linux-server capable of securing a local network from the Internet and allow traffic to pass from the LAN to the wild-wild-net.
Spec:
- There is a working CentOS Linux running on the MiniPC
- ISP's cable modem is configured as bridge, no double NATting done
- MiniPC gets a public IP-address from ISP
- MiniPC can be accessed from the Net via the IP-address
- Configurations persist a reboot on the MiniPC
- MiniPC issues dynamic IP-addresses to LAN-clients
- MiniPC acts as a caching nameserver to LAN-clients
- Any requests from the Net are not served
- Wireless access point is configured not do do any routing, aka. it is in access point mode
- The setup is secure with attack surface minimized
- LAN IP-address range is 192.168.1.0/24
Definition of done:
- Internet works!
- MiniPC can connect to net
- MiniPC can be connected from net and LAN via SSH
- Wired clients can connect to net via Ethernet cable without any manual configuration
- Wireless clients can connec to the net via Wi-Fi without any manual configuration
Step 1: Packages
After minimal installation, the set of tools and packages required includes:
net-tools bind-utils screen tcpdump policycoreutils-python setools
- net-tools: mostly for netstat, using
routeorifconfigis deprecated - bind-utils: for dig and nslookup
- screen: for full-screen window manager
- tcpdump: taking a look into Ethernet and TCP/IP-packages, when something goes wrong, getting detailed view is very important
- policycoreutils-python setools: for managing SELinux
Step 2: Remove NetworkManager
Packages to install: -none needed-
Why a server would have GNOME NetworkManager installed on a server is beyond me. I simply cannot comprehend what CentOS-people are thinking, when they as default treat my server as a laptop. But the main thing is, that this piece of shit needs to go! The quicker, the better!
DANGER!
When you actually run the yum-command to remove NetworkManager, your system will lose all network connectivity. So, please, do run this at a console, not via SSH-connection.
DANGER!
Run command as root on console:
yum erase NetworkManager
Now your system's networking is royally messed up.
Step 3: Setup NICs
Packages to install: -none needed-
Check that NetworkManager created and left ifcfg-files into /etc/sysconfig/network-scripts/. If the appropriate ifcfg-files (one for each interface) are gone, you need to start learning how to write one fast. A good starting point on that would be RedHat Enterprise Linux 7 product documentation, Networking Guide, section 2.2 Editing Network Configuration Files.
LAN interface
Out of the two Ethernet-interfaces, 50/50 coin-flip ended as enp3s0 LAN and enp1s0 WAN. For any practical purposes, it really doesn't matter which one is which, but I'm describing here my setup. If you're using some other hardware, your interface names won't match those.
For any sensible use of your LAN-side, this interface should be connected to a network switch, so that your local network can be shared by your PC, Playstation, TV, Wi-Fi access point or whatever you have there running. Of course you can run it with only one host connected directly to the router.
This is critical: Your LAN-interface MUST have a static IP-address for it. It really cannot act as LAN-side of a router without one.
I chose my LAN to be private IP-range 192.168.1.0/24, so I edited /etc/sysconfig/network-scripts/ifcfg-enp3s0 to contain:
TYPE=Ethernet

BOOTPROTO=none

DEFROUTE=yes

IPV6INIT=yes

NAME=enp3s0

UUID=-don't-touch-this-

DEVICE=enp3s0

ONBOOT=yes


NETWORK=192.168.1.0

BROADCAST=193.168.1.255

USERCTL=no


IPADDR=192.168.1.1

PREFIX=24

IPV4_FAILURE_FATAL=no

IPV6_AUTOCONF=yes

IPV6_DEFROUTE=yes

IPV6_PEERDNS=yes

IPV6_PEERROUTES=yes

IPV6_FAILURE_FATAL=no
WAN interface
For WAN, there is no need to touch enp1s0 setup (much). When your WAN-interface (enp1s0) starts, it will obtain an IP-address from your ISP. With that, it will also get your ISP's DNS-address an overwrite your precious manual changes in /etc/resolv.conf. You don't want that to happen. So, prevent that and edit /etc/sysconfig/network-scripts/ifcfg-enp1s0 and add:
PEERDNS="no"
Well, that was easy!
IP-forwarding
For routing to work, it requires Linux kernel to have IP-forwarding enabled. It will allow network packets to travel between interfaces.
Enable IP-forwarding immediately:
sysctl -w net.ipv4.ip_forward=1
Enable IP-forwarding on boot:
sysctl net.ipv4.ip_forward > /etc/sysctl.d/1_ip_forward.conf
Finalize network setup
When your network interface configurations are ok, restart everything by running following as root:
systemctl enable network
systemctl restart network
Now your system:
- has both interfaces on-line
- is reachable from a machine on your wired-LAN using a static IP-address other than 192.168.1.1.
Note: your router doesn'ht have DHCPd running yet, so you need to figure out how to configure a static IP-address to your device - still gets an IP-address from your ISP from your external interface
- can reach IP-addresses via both external and internal interfaces
If these criteria are not met, there is simply no point in proceeding. Your system won't work as a router without those prerequisites.
Finally, make sure that your IPtables-rules have effect. Your box is connected to Internet and it can be accessed/bombarded from there, so run following to secure your setup:
systemctl restart firewalld
Now your system is ready to become a router.
Step 4: Firewalld
Packages to install: -none needed-
Zones
Out-of-box CentOS has firewalld enabled. It has only one zone defined for public wild-wild-net, also TCP/22 SSH is open for the world. This needs to be run as root. First split off LAN into own zone home:
# firewall-cmd --zone home --change-interface enp3s0 --permanent
Check the zones and their assigned interfaces:
# firewall-cmd --get-active-zones

home

  interfaces: enp3s0

public

  interfaces: enp1s0
Setup network address translation (NAT) and allow traffic to flow from your LAN to outside world. Any relevant traffic is allowed to flow in from Internet back to your LAN. Commands to run:
# firewall-cmd --permanent --direct --add-rule ipv4 nat POSTROUTING 0 -o enp1s0 -j MASQUERADE

# firewall-cmd --permanent --direct --add-rule ipv4 filter FWDI_home_allow 0 -o enp1s0 -j ACCEPT

# firewall-cmd --permanent --direct --add-rule ipv4 filter FWDI_public_allow 0 -o enp3s0 -m state --state RELATED,ESTABLISHED -j ACCEPT
Enable the DNS-server we'll setup later, also disable any outgoing DNS-queries from your LAN (a security measure):
# firewall-cmd --permanent --zone home --add-service dns

# firewall-cmd --permanent --direct --add-rule ipv4 filter FWDI_home_deny 0 -p udp -m udp --dport 53 -j REJECT
At this point do a reload:
# firewall-cmd --reload
... and test your firewall setup from router:
- You still must be able to access Internet from your router
- Your LAN does work at this point. A client with a static IP must be able to access Internet.
Step 5: Named
Packages to install: bind-chroot
You can continue to use your ISP's nameserver, but I never do that. It makes much more sense to have a caching nameserver running at your own router. This allows your box to go directly to Internet root servers and do all the name queries for you. In many countries ISPs intentionally drop some domains out or are forced by government to do that. Running your own resolver makes sure that you get all the records as is and in case of changes you can flush caches whenever you want and don't have to wait for a record to expire.Out-of-box the BIND 9.9.4 does not server anybody else than localhost. To fix this, find following two lines in /etc/named.conf:
listen-on port 53 { 127.0.0.1; };

allow-query     { localhost; };
Edit them to contain:
listen-on port 53 { 127.0.0.1; 192.168.1.1; };
allow-query { localhost; 192.168.1.0/24; };
Finally, change your system's default name resolver by editing /etc/resolv.conf to contain a single line:
nameserver 127.0.0.1
Start the server and enable it to start on boot:
systemctl start named-chroot
systemctl enable named-chroot
Now you're ready to test the setup. Just host www.google.com or your favorite site. Successful reply will include IP-address(es) for your query.
Step 6: DHCP
Packages to install: dhcp
Edit/etc/dhcp/dhcpd.conf and have it contain:
ddns-update-style interim;

ignore client-updates;

authoritative;

default-lease-time 14400;

max-lease-time 86400;

option subnet-mask 255.255.255.0;

option broadcast-address 192.168.1.255;

option routers 192.168.1.1;

option domain-name "my.own.lan";

option domain-name-servers 192.168.1.1;

subnet 192.168.1.0 netmask 255.255.255.0 {

        range 192.168.1.50 192.168.1.99;

}
That piece of configuration will use your router as DNS for the clients and issue them addresses from range .50 - .99.
Start the server and enable it to start on boot:
systemctl start dhcpd
systemctl enable dhcpd
At this point, configure your client to use DHCP for IP-addressing. You must get an IP from the above range, also DNS-resolve and NAT should work, but that's the next step to do. Test it all.
Step 7: Testing it
Make sure:
- A client in your LAN gets an IP-address from DHCP
- A client in your LAN can ping your router at 192.168.1.1
- A client in your LAN can ping something in the Internet, like Google's name server at 8.8.8.8
- A client in your LAN resolves names, for example:
nslookup www.google.comreturns IP-addresses - A client in your LAN can access https://www.google.com/ via a web-browser
That's it! What else would you need?
Done!
Congratulations on your new router!
What I did next was set up my own DNS-zone so that my hosts had FQDNs. But that's beyond this blog post. Read something like How To Configure BIND as a Private Network DNS Server on CentOS 7 by DigitalOcean for that.
Saving the day - Android tethering with Linux
Sunday, December 3. 2017
The fail
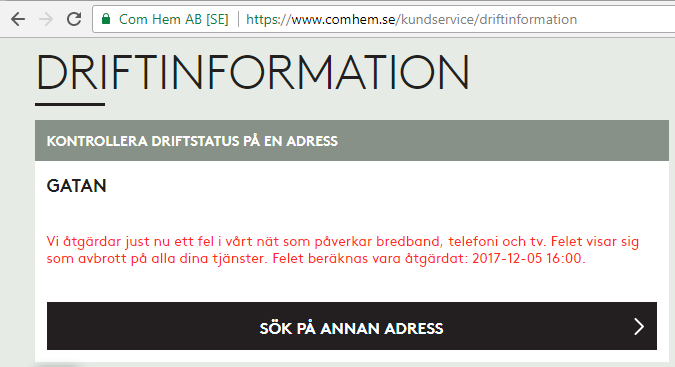
On a peaceful Sunday, I was just minding my own business and BOOM! Internet connection was gone. After a quick debugging session, restarting the router and eyeballing the LEDs, it was evident: something with my ISP Com Hem was down:
Ok, ISP down, what next?
I whipped up the iPhone and went for any possible service announcements. And yes, the above announcement was placed on my user account information. I was stunned by this, it was so cool to have:
- confirmation, that something was down with ISP: Yup, it's broken.
- that information tailored with the geographical location of my subscription: Yup, that fail affects you.
No Finnish ISP or telco has that. I was very impressed with such detail (and still am).
The fix
There is no way I'm sitting on my thumbs on such an event. I was just about to start playing Need for Speed and now Origin wouldn't even log me in, so, no Internet, no gaming.
I have an el-cheapo Huawei Android lying around somewhere, with a Swedish SIM-card in it. My dirt cheap subscription has couple of gigs data transfer per month in it, which I never use. I came up with a plan to temporarily use the cell phone as an Internet connection. The idea would be to hook it up into my Linux router with an USB-cable, make sure the Android pops up as a network interface and then configure the Linux to use that network interface as primary connection.
Thethering
I found tons of information about Android-tethering from Arch Linux wiki. It basically says:
- Make sure your Android is newer than 2.2
- Connect the phone to a Linux
- Enable USB-tethering from the phone's connection sharing -menu
- Confirm the new network interface's existence on the Linux end
On my phone, there was two settings for personal hotspot. Wifi/Bluetooth and USB:
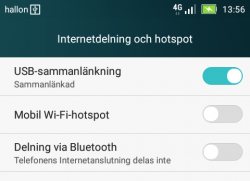
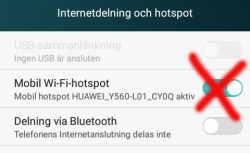
Connection
New phones have USB-C, but its such a new connector type, that anything older than couple years, has most likely micro-USB -connector:
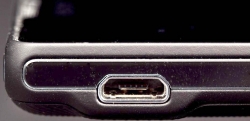
Hooking it up to a Linux will output tons of dmesg and and ultimately result in a brand new network interface:
# ip addr show

5: enp0s20u4u3:

    link/ether 82:49:a8:b4:96:c9 brd ff:ff:ff:ff:f

    inet 192.168.42.90/24 brd 192.168.42.255 scope

       valid_lft 3595sec preferred_lft 3595sec

    inet6 fe80::7762:e1a9:9fa:69f5/64 scope link

       valid_lft forever preferred_lft forever
Routing configuration
Now that there was a new connection, I tried pinging something in the wild world:
ping -I enp0s20u4u3 193.166.3.2
Nope. Didn't work.
I confirmed, that the default network gateway was still set up into the broken link:
# ip route show

default via 192.168.100.1 dev enp1s0 proto static metric 100
That needs to go to enable some functionality. But what to replace the bad gateway with?
Since the connection had IP-address from Telco DHCP, there is a lease-file with all the necessary information:
# cat /var/lib/NetworkManager/dhclient-*-enp0s20u4u3.lease

lease {

  interface "enp0s20u4u3";

  fixed-address 192.168.42.90;

  option subnet-mask 255.255.255.0;

  option routers 192.168.42.129;
The fixed-address in the file matches the above ip addr show -information. Required information was gathered, and the idea was to ditch the original gateway and replace it with a one from the Android phone's telco:
# ip route del default via 192.168.100.1

# ip route add default via 192.168.42.129 dev enp0s20u4u3

# ip route show

default via 192.168.42.129 dev enp0s20u4u3 proto static metric 101
Now it started cooking:
# ping -c 5 ftp.funet.fi

PING ftp.funet.fi (193.166.3.2) 56(84) bytes of data.

64 bytes from ftp.funet.fi (193.166.3.2): icmp_seq=1 ttl=242 time=35.6 ms

64 bytes from ftp.funet.fi (193.166.3.2): icmp_seq=2 ttl=242 time=31.7 ms
To finalize the access from my LAN, I ran following firewall-cmd --direct commands:
 --remove-rule ipv4 nat POSTROUTING 0 -o enp1s0 -j MASQUERADE

 --add-rule ipv4 nat POSTROUTING 0 -o enp0s20u4u3 -j MASQUERADE

 --add-rule ipv4 filter FORWARD 0 -i enp3s0 -o enp0s20u4u3 -j ACCEPT

 --add-rule ipv4 filter FORWARD 0 -i enp0s20u4u3 -o enp3s0 \

    -m state --state RELATED,ESTABLISHED -j ACCEPT
There is no firewall-cmd --permanent on purpose. I don't intend those to stick too long. I just wanted to play the darn game!
Done!
Now my gaming PC would connect to The Big Net. I could suft the web, read mail and even Origin logged me in.
That's it! Day saved! ![]()
Cygwin X11 with window manager
Saturday, November 4. 2017
Altough, I'm a Cygwin fan, I have to admit, that the X11-port is not one of their finest work. Every once in a while I've known to run it.
Since there are number of window managers made available for Cygwin, I found it surprisingly difficult to start using one. According to docs (Chapter 3. Using Cygwin/X) and /usr/bin/startxwin, XWin-command is executed with a -multiwindow option. Then XWin man page says: "In this mode XWin uses its own integrated window manager in order to handle the top-level X windows, in such a way that they appear as normal Windows windows."
As a default, that's ok. But what if somebody like me would like to use a real Window Manager?
When startxwin executes xinit, it optionally can run a ~/.xserverrc as a server instead of XWin. So, I created one, and made it executable. In the script, I replace -multiwindow with -rootless to not use the default window manager.
This is what I have:
#!/bin/bash


# If there is now Window Maker installed, just do the standard thing.

# Also, if xinit wasn't called without a DISPLAY, then just quit.

if [ ! -e /usr/bin/wmaker ] || [ -z "$1" ]; then

     exec XWin "$@"

     # This won't be reached.

fi


# Alter the arguments:

# Make sure, there is no "-multiwindow" -argument.

args_out=()

for arg; do

     [ $arg == "-multiwindow" ] && arg="-rootless"

     args_out+=("$arg")

done


exec XWin "${args_out[@]}" &


# It takes a while for the XWin to initialize itself.

# Use xset to check if it's available yet.

while [ ! DISPLAY="${args_out[0]}" xset q > /dev/null ]; do

     sleep 1

done

sleep 1


# Kick on a Window Manager

DISPLAY="${args_out[0]}" exec /usr/bin/wmaker &


wait
The script assumes, that there is a Window Maker installed (wmaker.exe). The operation requires xset.exe to exist. Please, install it from package xset, as it isn't installed by default.
Fedora 26: SElinux-policy failing on StrongSWAN IPsec-tunnel
Monday, September 4. 2017
SElinux is a beautiful thing. I love it! However, the drawback of a very fine-grained security control is, that the policy needs to be exactly right. Almost right won't do it.
This bite me when I realized, that systemd couldn't control StrongSWAN's charon - IKE-daemon. It worked flawlessly, when running a simple strongswan start, but failing on systemctl start strongswan. Darn! When the thing works, but doesn't work as a daemon, to me it has the instant smell of SElinux permission being the culprit.
Very brief googling revealed, that other people were suffering from that same issue:
- Bug 1444607 - SELinux is preventing starter from execute_no_trans access on the file /usr/libexec/stro
ngswan/charon. - Bug 1467940 - SELinux is preventing starter from 'execute_no_trans' accesses on the file /usr/libexec/strongswan/charon.
Others had made the same conclusion: it's a SElinux -policy failure. Older bug report was from April. That's a month before Fedora 26 was released! But neither bug report had a fix for it. I went to browse Bodhi and found out that there is a weekly release of selinux-policy .rpm-file, but this hadn't gotten the love it desperately needed from RedHat guys.
Quite often self-help is the best help, so I ran audit2allow -i /var/log/audit/audit.log and deduced a following addition to my local policy:
#============= ipsec_t ==============

allow ipsec_t ipsec_exec_t:file execute_no_trans;

allow ipsec_t var_run_t:sock_file { unlink write };
I have no idea if that fix is ever going to be picked up by RedHat, but it definitely works for me. Now my IPsec tunnels survive a reboot of my server.
Update 10th Sep 2017:
Package selinux-policy-3.13.1-260.8.fc26.noarch.rpm has following changelog entry:
2017-08-31 - Lukas Vrabec <lvrabec@redhat.com> - 3.13.1-260.8
- Allow ipsec_t can exec ipsec_exec_t
... which fixes the problem.
To test that, I dropped my own modifications out of local policy and tested. Yes, working perfectly! Thank you Fedora guys for this.
Handling /run with systemd, Part II
Sunday, June 4. 2017
It took me less than 4 years to finally revisit this subject. I'd like to thank all the people who commented the original blog post. It looks like for those years SystemD (am I writing it wrong?) was in constant evolution and new features were added.
This is what I'm running in production. Containing System and omitting Unit and Install -parts as they are unchanged:
[Service]

Type=forking

PrivateTmp=yes

User=nobody

Group=nobody


RuntimeDirectory=dhis

RuntimeDirectoryMode=0750


ExecStart=/usr/sbin/dhid -P /run/dhis/dhid.pid

PIDFile=/run/dhis/dhid.pid
This also makes my RPM spec-file simpler, I got to remove stuff there, because temporary directory creation is taken care. Finally, I think that this one is done and ready! ![]()
If you want to download my source RPM-package, go here.
If you want to know more about RPM-specs, read Maximum RPM - Taking the RPM Package Manager to the Limit.
Wi-Fi access point - TRENDnet TEW-818DRU - Part 2: Software
Monday, May 8. 2017
In my previous post, I un-boxed my new Wi-Fi access point. This is the part for running something in it.
For this to happen, the obvious prerequisite is DD-WRT binary image built specifically for TEW-818DRU. DD-WRT supported devices -list doesn't say much. Little bit of poking around results in build 23720 back in the 2014 for this one. It is at: https://www.dd-wrt.com/site/support/other-downloads?path=betas%2F2014%2F03-13-2014-r23720%2Ftrendnet-818DRU%2F. As I wanted something newer, I went for November 2016 build 30880 at: ftp://ftp.dd-wrt.com/betas/2016/11-14-2016-r30880/trendnet-818DRU/.
My typical approach for flashing new firmware is to stay connected with a wire. In practice that means, that I'll hook up an ethernet cable to my laptop and the other end to the access point's LAN-switch. Then I'll configure a static IP-address at the laptop's operating system. This makes sure, that I'm 100% connected whenever the box is running. Doing this over wireless connection and/or using dynamicly assigned IP-address may or may not work. As these boxes are expensive enough, I didn't push my luck. The downside of this approach is, that I'll need to know what the actual management IP-address will be.
Ok, let's start!
On out-of-box-experience the web GUI is at 192.168.10.1:
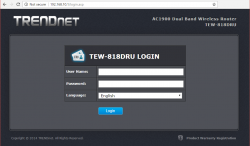
After login, there is a nice setup-wizard. Which of course, we'll just skip by acknowleding the alert:
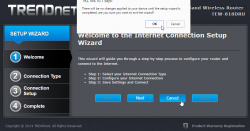
Now we're at the normal administrator environment:
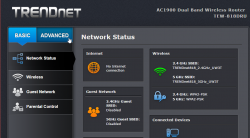
For me, the word "advanced" is like honey to a grizzly bear ![]() . I'll always home towards it, I know that all the goodies are stored there:
. I'll always home towards it, I know that all the goodies are stored there:
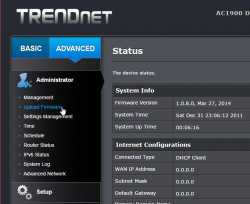
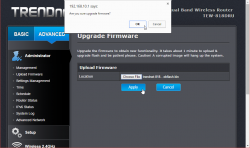
And also this time I was right, firmware upload/upgrade has its own menu item. Its clear, that this device is 100% designed by engineers, they cannot even seem to be able to agree on a single terminology. Menu has "upload", page title has "upgrade". Any self-respecting user experience designer would yell "You're confusing the user with that!", but I guess this stuff is for nerds only, and they don't care.
After selecting the trendnet-818dru-webflash.bin file to be uploaded, there is yet again a nice warning:
It will take couple minutes for the flashing to complete:
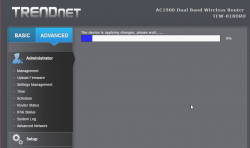
There is very little indication, that the process completed. I didn't notice any lights blinking or something like that. It just completed, rebooted and stayed silent.
Now the IP-addess will change. DD-WRT is 192.168.1.1 at out-of-box-experience:
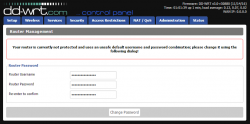
And that's pretty much it for firmware upgrade. At this point I did my wireless access point -setup including:
- Admin username and password
- AP's LAN IP-address, my LAN isnt' at 192.168.1/24
- Enable SSH-service
- Enable GUI-access for HTTPS and SSH
- Wireless network setup for 2.4 GHz and 5 GHz, WPA2 Personal with pre-shared key as security
DD-WRT is for knowledgeable administrators, no setup wizards or mumbo-jumbo. Just the settings.
Btw. configuration docs can be found at: https://www.dd-wrt.com/wiki/index.php/Configuration_HOWTOs
