New toys - Apple iMac
Monday, August 28. 2023
Summer here in Finland is over. It's windy and raining cats&dogs. Definitely beginning of autumn.
For me, summer is typically time to do lots of other things than write blog posts. No exceptions this time. I did tinker around with computers some: new rack server to replace the old Intel Atom, some USB-probing via DLMS, some Python code, etc. etc. I may post someething on those projects later.
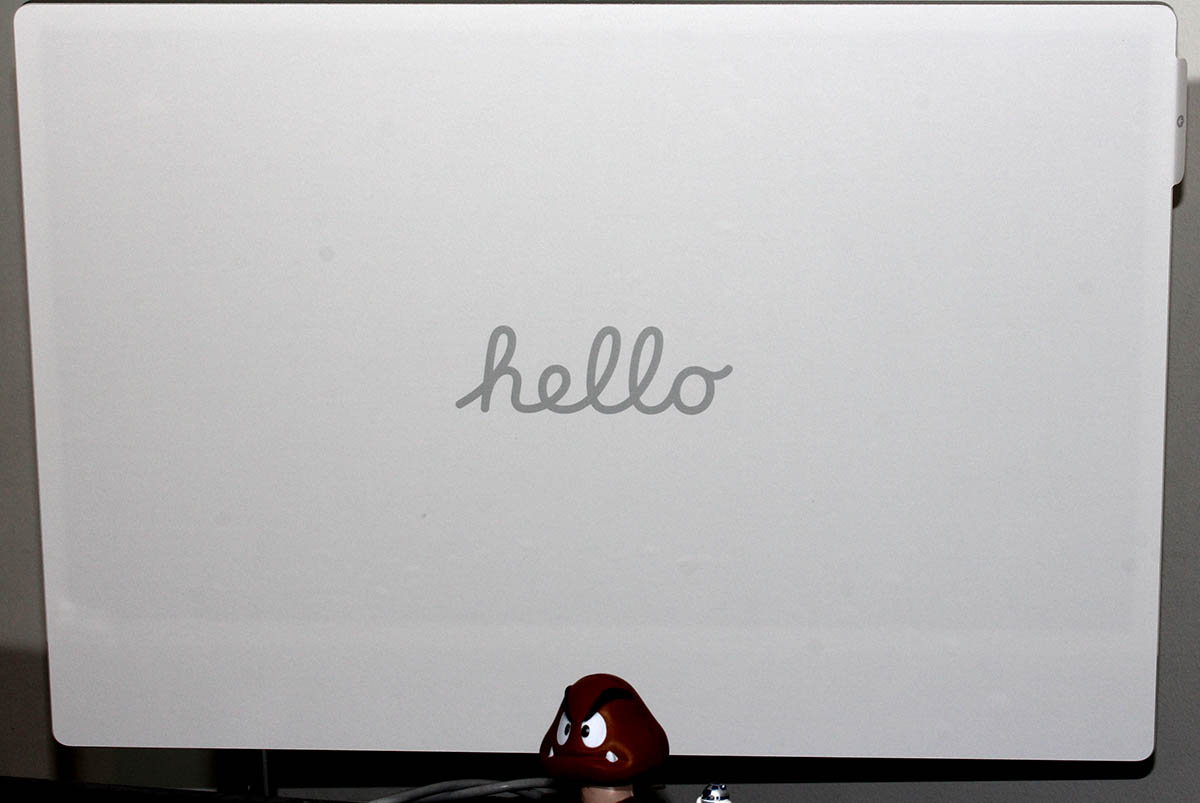
And: I got a new iMac. Here are some pics:
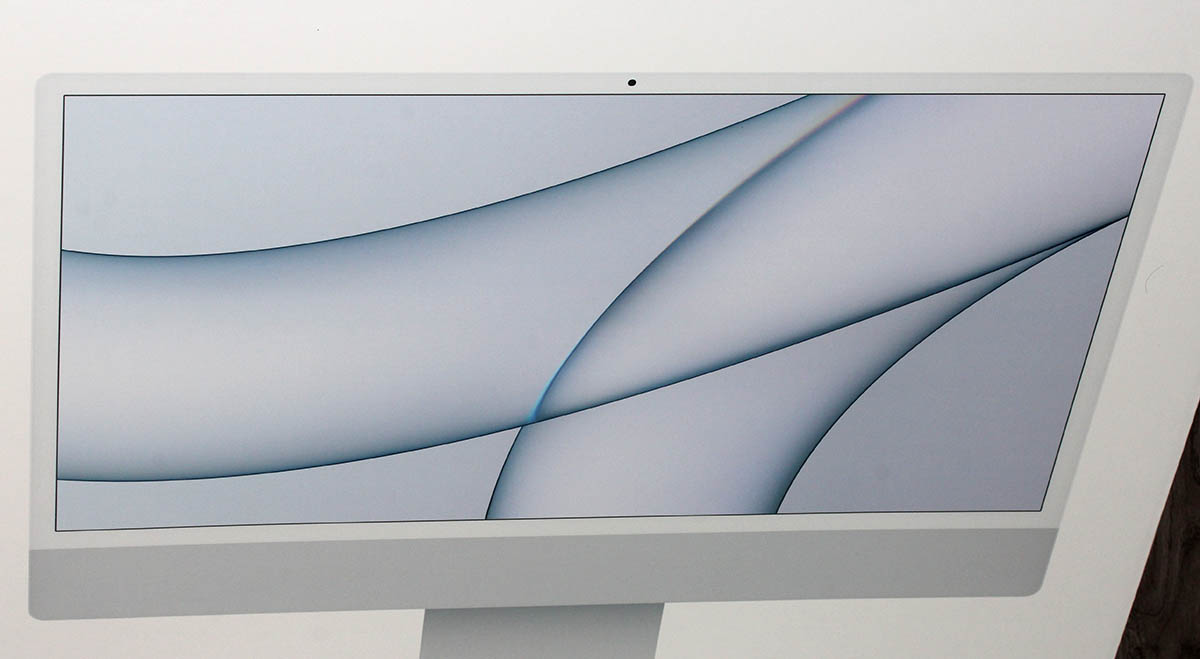
Back-in-the-days, there used to be 21.5" and 27" iMac. Actually, my old one is the small one. Since Apple abandoned Intel CPUs, one-size-fits-all, only 24" option available. Also, the iMacs I have are VESA-mounted ones. There is no room on my desk.
Box contents:
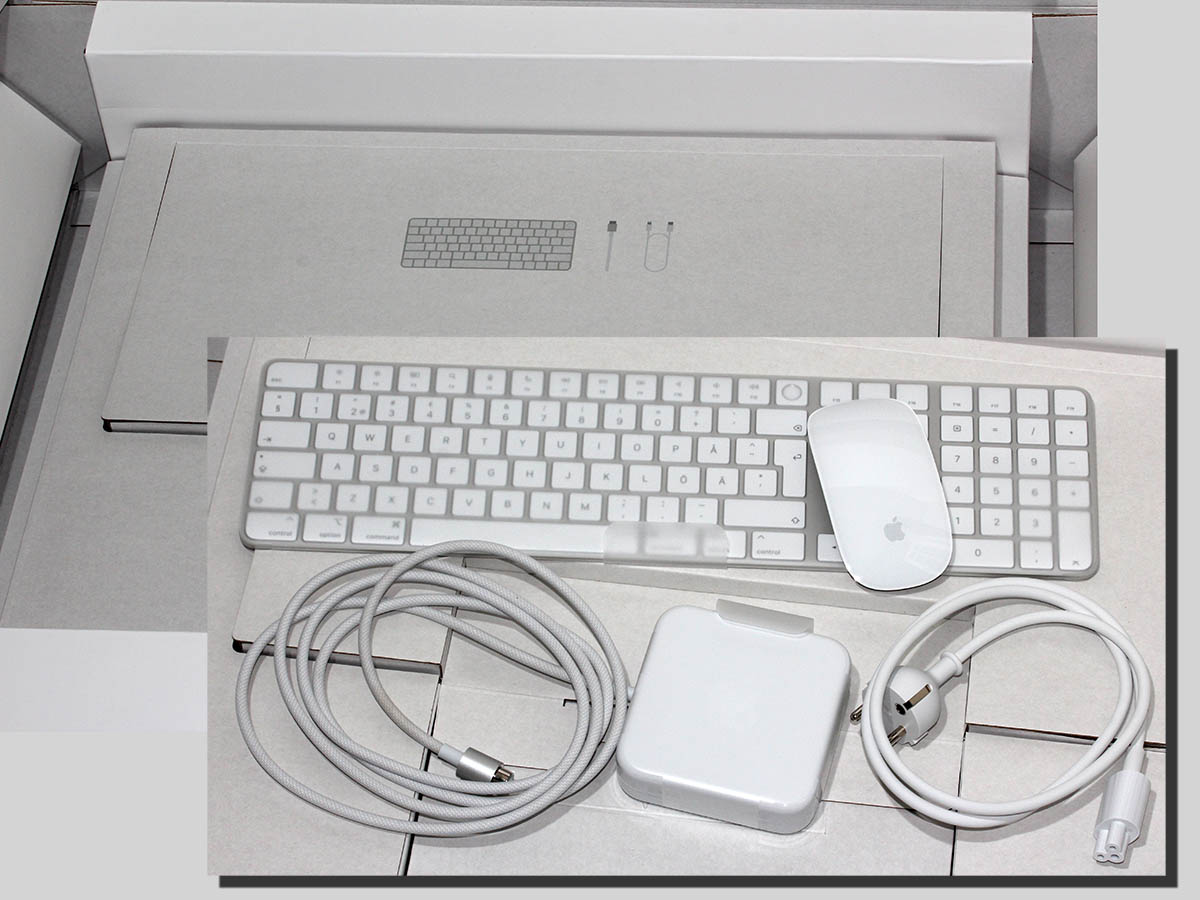
Apple's magic mouse is for somebody else. I hate the thing! Good thing I still have a perfectly working MX Anywhere 2. On my other computer I (obviously) use a MX Anywhere 3 and have plans to upgrade it into a 3S.
Cabling in an iMac is not-so-standard:
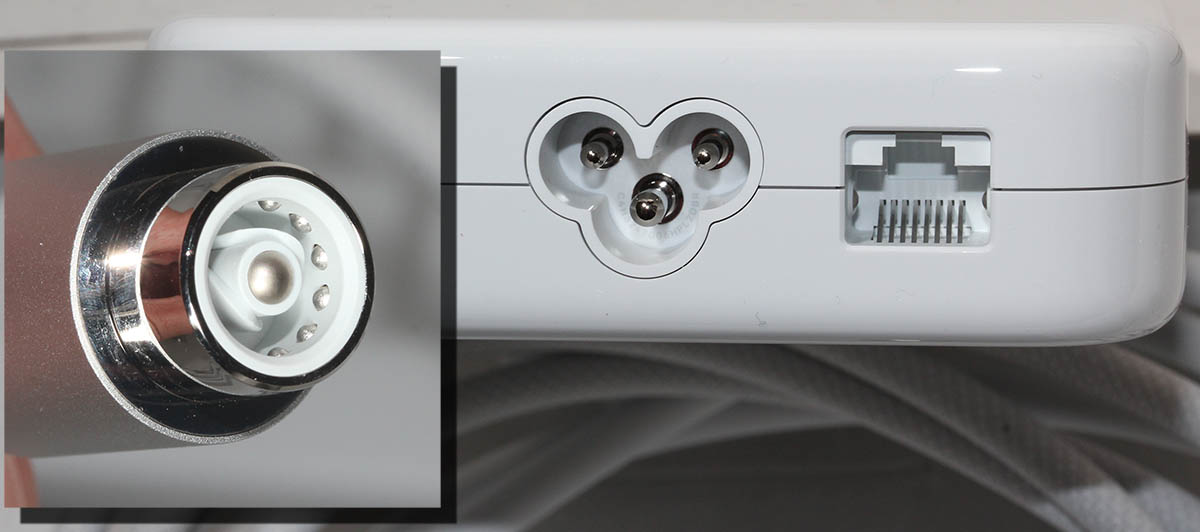
Ethernet RJ-45 -socket is in the PSU, which has your standard IEC C5 "Mickey Mouse" connector. On the other end, there is a Magsafe. With Ethernet in it! It has to be some sort of USB-C / Thunderbolt 4 -thingie with really weird magnetic connector.
Transferring setteings and data from a OS X to modern macOS works like a charm. Nothing in Windows can touch that level of easiness. Also, now I have an OS that can do Time Machine backups to a Linux/Samba. Nice! Maybe I should post something about that setup also.
Next: Run the thing for 10+ years. Btw. the old one is for sale, it really has no monetary value, but it works and I don't need it anymore.
Nuvoton NCT6793D lm_sensors output
Monday, July 3. 2023
LM-Sensors is set of libraries and tools for accessing your Linux server's motheboard sensors. See more @ https://github.com/lm-sensors/lm-sensors.
If you're ever wondered why in Windows it is tricky to get readings from your CPU-fan rotation speed or core temperatures from you fancy GPU without manufacturer utilities. Obviously vendors do provide all the possible readings in their utilities, but people who would want to read, record and store the data for their own purposes, things get hairy. Nothing generic exists and for unknown reason, such API isn't even planned.
In Linux, The One toolkit to use is LM-Sensors. On kernel side, there exists The Linux Hardware Monitoring kernel API. For this stack to work, you also need a kernel module specific to your motherboard providing the requested sensor information via this beautiful API. It's also worth noting, your PC's hardware will have multiple sensors data providers. An incomplete list would include: motherboard, CPU, GPU, SSD, PSU, etc.
Now that sensors-detect found all your sensors, confirm sensors will output what you'd expect it to. In my case there was a major malfunction. On a boot, following thing happened when system started sensord (in case you didn't know, kernel-stuff can be read via dmesg):
systemd[1]: Starting lm_sensors.service - Hardware Monitoring Sensors...

kernel: nct6775: Enabling hardware monitor logical device mappings.

kernel: nct6775: Found NCT6793D or compatible chip at 0x2e:0x290

kernel: ACPI Warning: SystemIO range 0x0000000000000295-0x0000000000000296 conflicts with OpRegion 0x0000000000000290-0x0000000000000299 (_GPE.HWM) (20221020/utaddress-204)

kernel: ACPI: OSL: Resource conflict; ACPI support missing from driver?

systemd[1]: Finished lm_sensors.service - Hardware Monitoring Sensors.
This conflict resulted in no available mobo readings! NVMe, GPU and CPU-cores were ok, the part I was mostly looking for was fan RPMs and mobo temps just to verify my system health. No such joy.  Uff.
Uff.
It seems, this particular Linux kernel module has issues. Or another way to state it: mobo manufacturers have trouble implementing Nuvoton chip into their mobos. On Gentoo forums, there is a helpful thread: [solved] nct6775 monitoring driver conflicts with ACPI
Disclaimer: For ROG Maximus X Code -mobo adding acpi_enforce_resources=no into kernel parameters is the correct solution. Results will vary depending on what mobo you have.
Such ACPI-setting can be permanently enforced by first querying about the Linux kernel version being used (I run a Fedora): grubby --info=$(grubby --default-index). The resulting kernel version can be updated by: grubby --args="acpi_enforce_resources=no" --update-kernel DEFAULT. A reboot shows fix in effect, ACPI Warning is gone and mobo sensor data can be seen.
As a next step you'll need userland tooling to interpret the raw data into human-readable information with semantics. A new years back, I wrote about Improving Nuvoton NCT6776 lm_sensors output. It's mainly about bridging the flow of zeros and ones into something having meaning to humans. This is my LM-Sensors configuration for ROG Maximus X Code:
chip "nct6793-isa-0290"


    # 1. voltages

    ignore in0

    ignore in1

    ignore in2

    ignore in3

    ignore in4

    ignore in5

    ignore in6

    ignore in7

    ignore in8

    ignore in9

    ignore in10

    ignore in11


    label in12 "Cold Bug Killer"

    set in12_min 0.936

    set in12_max 2.613

    set in12_beep 1


    label in13 "DMI"

    set in13_min 0.550

    set in13_max 2.016

    set in13_beep 1


    ignore in14


    # 2. fans

    label fan1 "Chassis fan1"

    label fan2 "CPU fan"

    ignore fan3

    ignore fan4

    label fan5 "Ext fan?"


    # 3. temperatures

    label temp1 "MoBo"


    label temp2 "CPU"

    set temp2_max 90

    set temp2_beep 1


    ignore temp3

    ignore temp5

    ignore temp6

    ignore temp9

    ignore temp10

    ignore temp13

    ignore temp14

    ignore temp15

    ignore temp16

    ignore temp17

    ignore temp18


    # 4. other

    set beep_enable 1

    ignore intrusion0

    ignore intrusion1
I'd like to credit Mr. Peter Sulyok on his work about ASRock Z390 Taichi. This mobo happens to use the same Nuvoton NCT6793D -chip for LPC/eSPI SI/O (I have no idea what those acronyms are for, I just copy/pasted them from the chip data sheet). The configuration is in GitHub for everybody to see: https://github.com/petersulyok/asrock_z390_taichi
Also, I''d like to state my ignorance. After reading less than 500 pages of the NCT6793D data sheet, I have no idea what is:
- Cold Bug Killer voltage
- DMI voltage
- AUXTIN1 is or exactly what temperature measurement it serves
- PECI Agent 0 temperature
- PECI Agent 0 Calibration temperature
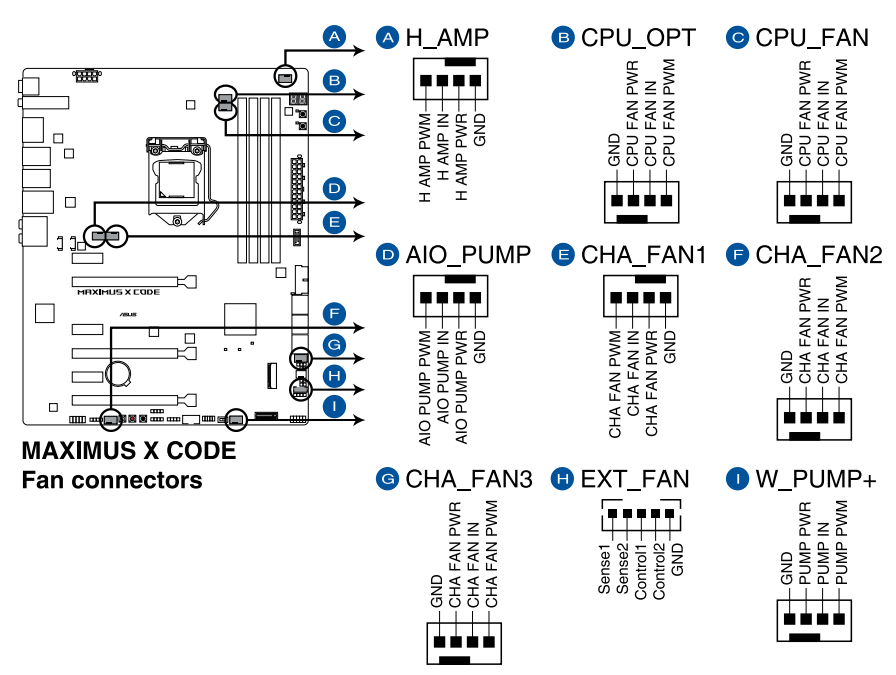
Remember, I did mention semantics. From sensors-command output I can read a reading, what it translates into, no idea! Luckily there are some of the readings seen are easy to understand and interpret. As an example, fan RPMs are really easy to measure by removing the fan from its connector. Here is an excerpt from my mobo manual to explain fan-connectors:
As data quality is taken care of and output is meaningful, next step is to start recording data. In LM-Sensors, there is sensord for that. It is a system service taking a snapshot (you can define the frequency) and storing it for later use. I'll enrich the stored data points with system load averages, this enables me to estimate a relation with high temperatures and/or fan RPMs with how much my system is working.
Finally, all data gathered into a RRDtool database can be easily visualized with rrdcgi into HTML + set of PNG-images to present a web page like this:
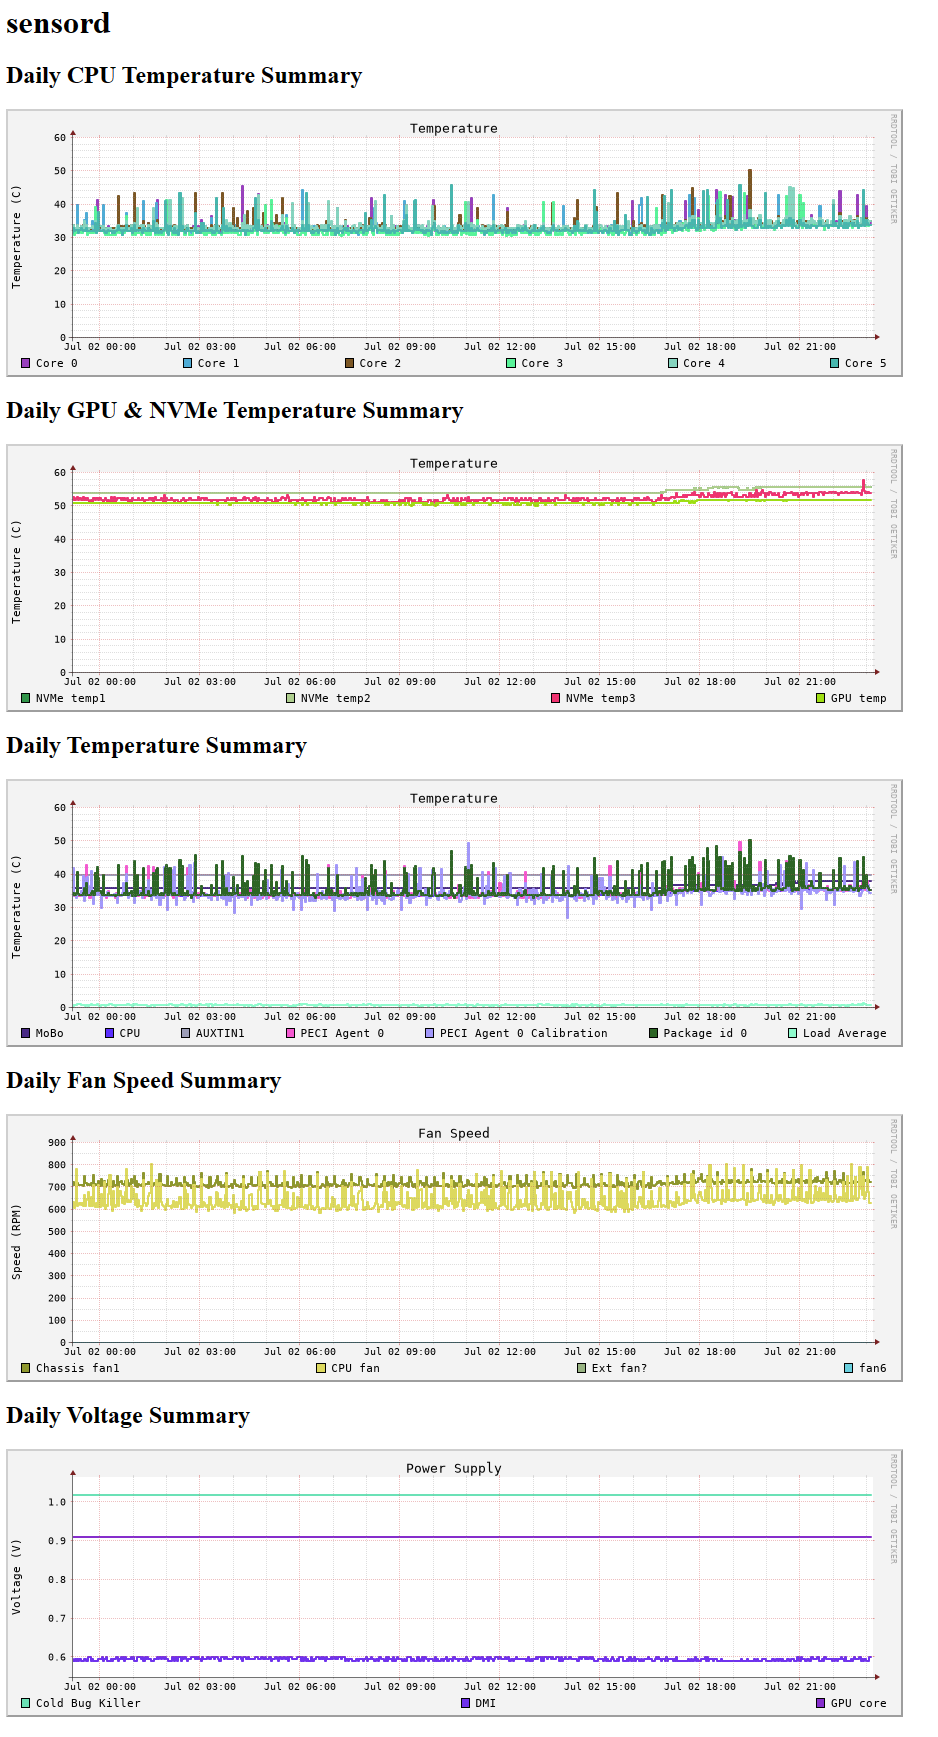
Nice!
HP Color LaserJet custom X.509 certificate - Part 2
Sunday, June 18. 2023
Earlier this year, I wrote how it was impossible to replace X.509 certificate on a HP printer.
Let's state the good news first: Me and many other people suspected, it was a broken firmware. Indeed, that was the case. Now there is a more recent firmware which contains a fix for the issue.
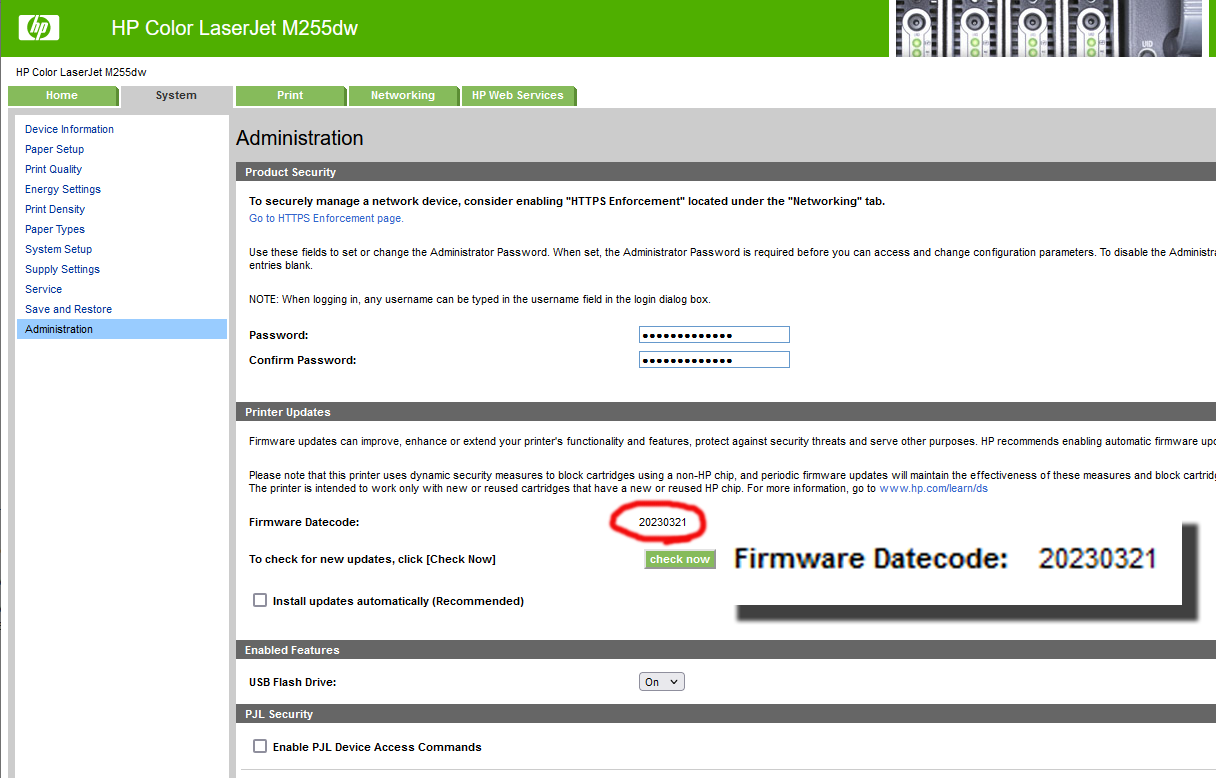
Determining current firmware version
Version can be verified in System --> Administration menu.
How Laserjet's on-line firmware check works
While tinkering on this, it became evident my HP Laserjet unit isn't especially good at figuring out if there was a new firmware available or not. After some wiresharking, it was possible to determine the logic.
Main endpoint is at http://h19005.www1.hp.com/pub/laserjet/updates/me/manifest. Note: yes it is HTTP, not HTTPS. Also, if you click the link, a file will be downloaded to your machine. This is because most browsers refuse to display octet-streams on screen.
Response will contain a human-readable proprietary application/octet-stream with information about available Laserjet firmwares. Among the data is a mapping table:
20190819: 20211122
20200324: 20211122
20200603: 20211122
20201022: 20211122
20211122: 20230321
20211221: 20230321
20220224: 20230321
20220309: 20230321
20220411: 20230321
20220729: 20230321
My interpretation is as follows:
- Firmware versions 20190819, 20200324, 20200603 and 20201022 can be upgraded into version 20211122.
- Any firmware versions beginning from 20211122 up to most recent one can be upgraded 20230321
As we know, latest frimware 20230321 contains the fix for certificate uploading, there is an upgrade path for any firmware to have the latest and the brightest version.
If I wanted to, using this URL it would be possible to create a daily/weekly/monthly check if I should take a look at my printer. The own mechanism isn't especially good, and I'd rather do the upgrading manually anyway.
Certificate / PKCS #12
When the bug prevented upload of any new certificates, I did investigate pretty much all available options OpenSSL has for packing PKCS#12-files.
Fixed firmware does accept any reasonable PKCS#12-file. This will work with full chain certificate in the file or not. In Laserjet, only the certificate will be picked and used, any intermediate CA certs will be ignored.
Finally
It took HP half a year to fix this. Unacceptable!
Assembly of my new PC 2023
Friday, April 28. 2023
It's funny how fast you stop paying much attention to your car or sofa. First you spend reasonable amount of money on it. Then they just exist as everyday items. Then, slowly but surely, there is the urge: Should I get a new one?
Exactly the same thing happens with your PC. Maybe one of those precious resources starts running out, SSD or RAM. Maybe CPU or GPU starts feeling bit slow. Then you remember how good everything was when you first got the thing. Yup, the urge is there. Must obtain new.
Roughly five years ago, I was doing my PC on Twitch. As Larpdog doesn't stream anymore, no public appearances this time. I did assemble a new rig, though.
During those years, things have evolved. This happens all the time.
- EATX is a real thing, see Wikipedia for ATX info
- The fact that both cases and motherboard are sold is a big deal.
- This is not a real standard!
- CPU is LGA1700
- Back in the days, I thought 1200 pins connecting my CPU to motherboard was a lot.
- DDR-5
- Having slight overclock on DDR-4 made it pretty fast.
- Now slowest DDR-5 begins way above OCd DDR-4.
- PCIe is 5.0
- I don't own any extension cards supporting 5.0. Good thing 4.0 and 3.0 cards work ok.
- M.2 NMVe with 5.0 is generally available.
- Every single case has a plexi-glass side
- What! Why? For what purpose!!
- If I wanted to see into my PC, I'd also wanted to see into my own stomach and would install plexiglass 6-pack into myself.
- Well. I don't want either. Stupid idea!
- There are almost no USB-connectors in cases
- There used to be. Plenty of those connectors.
- Motherboard box contains coded messages in swag
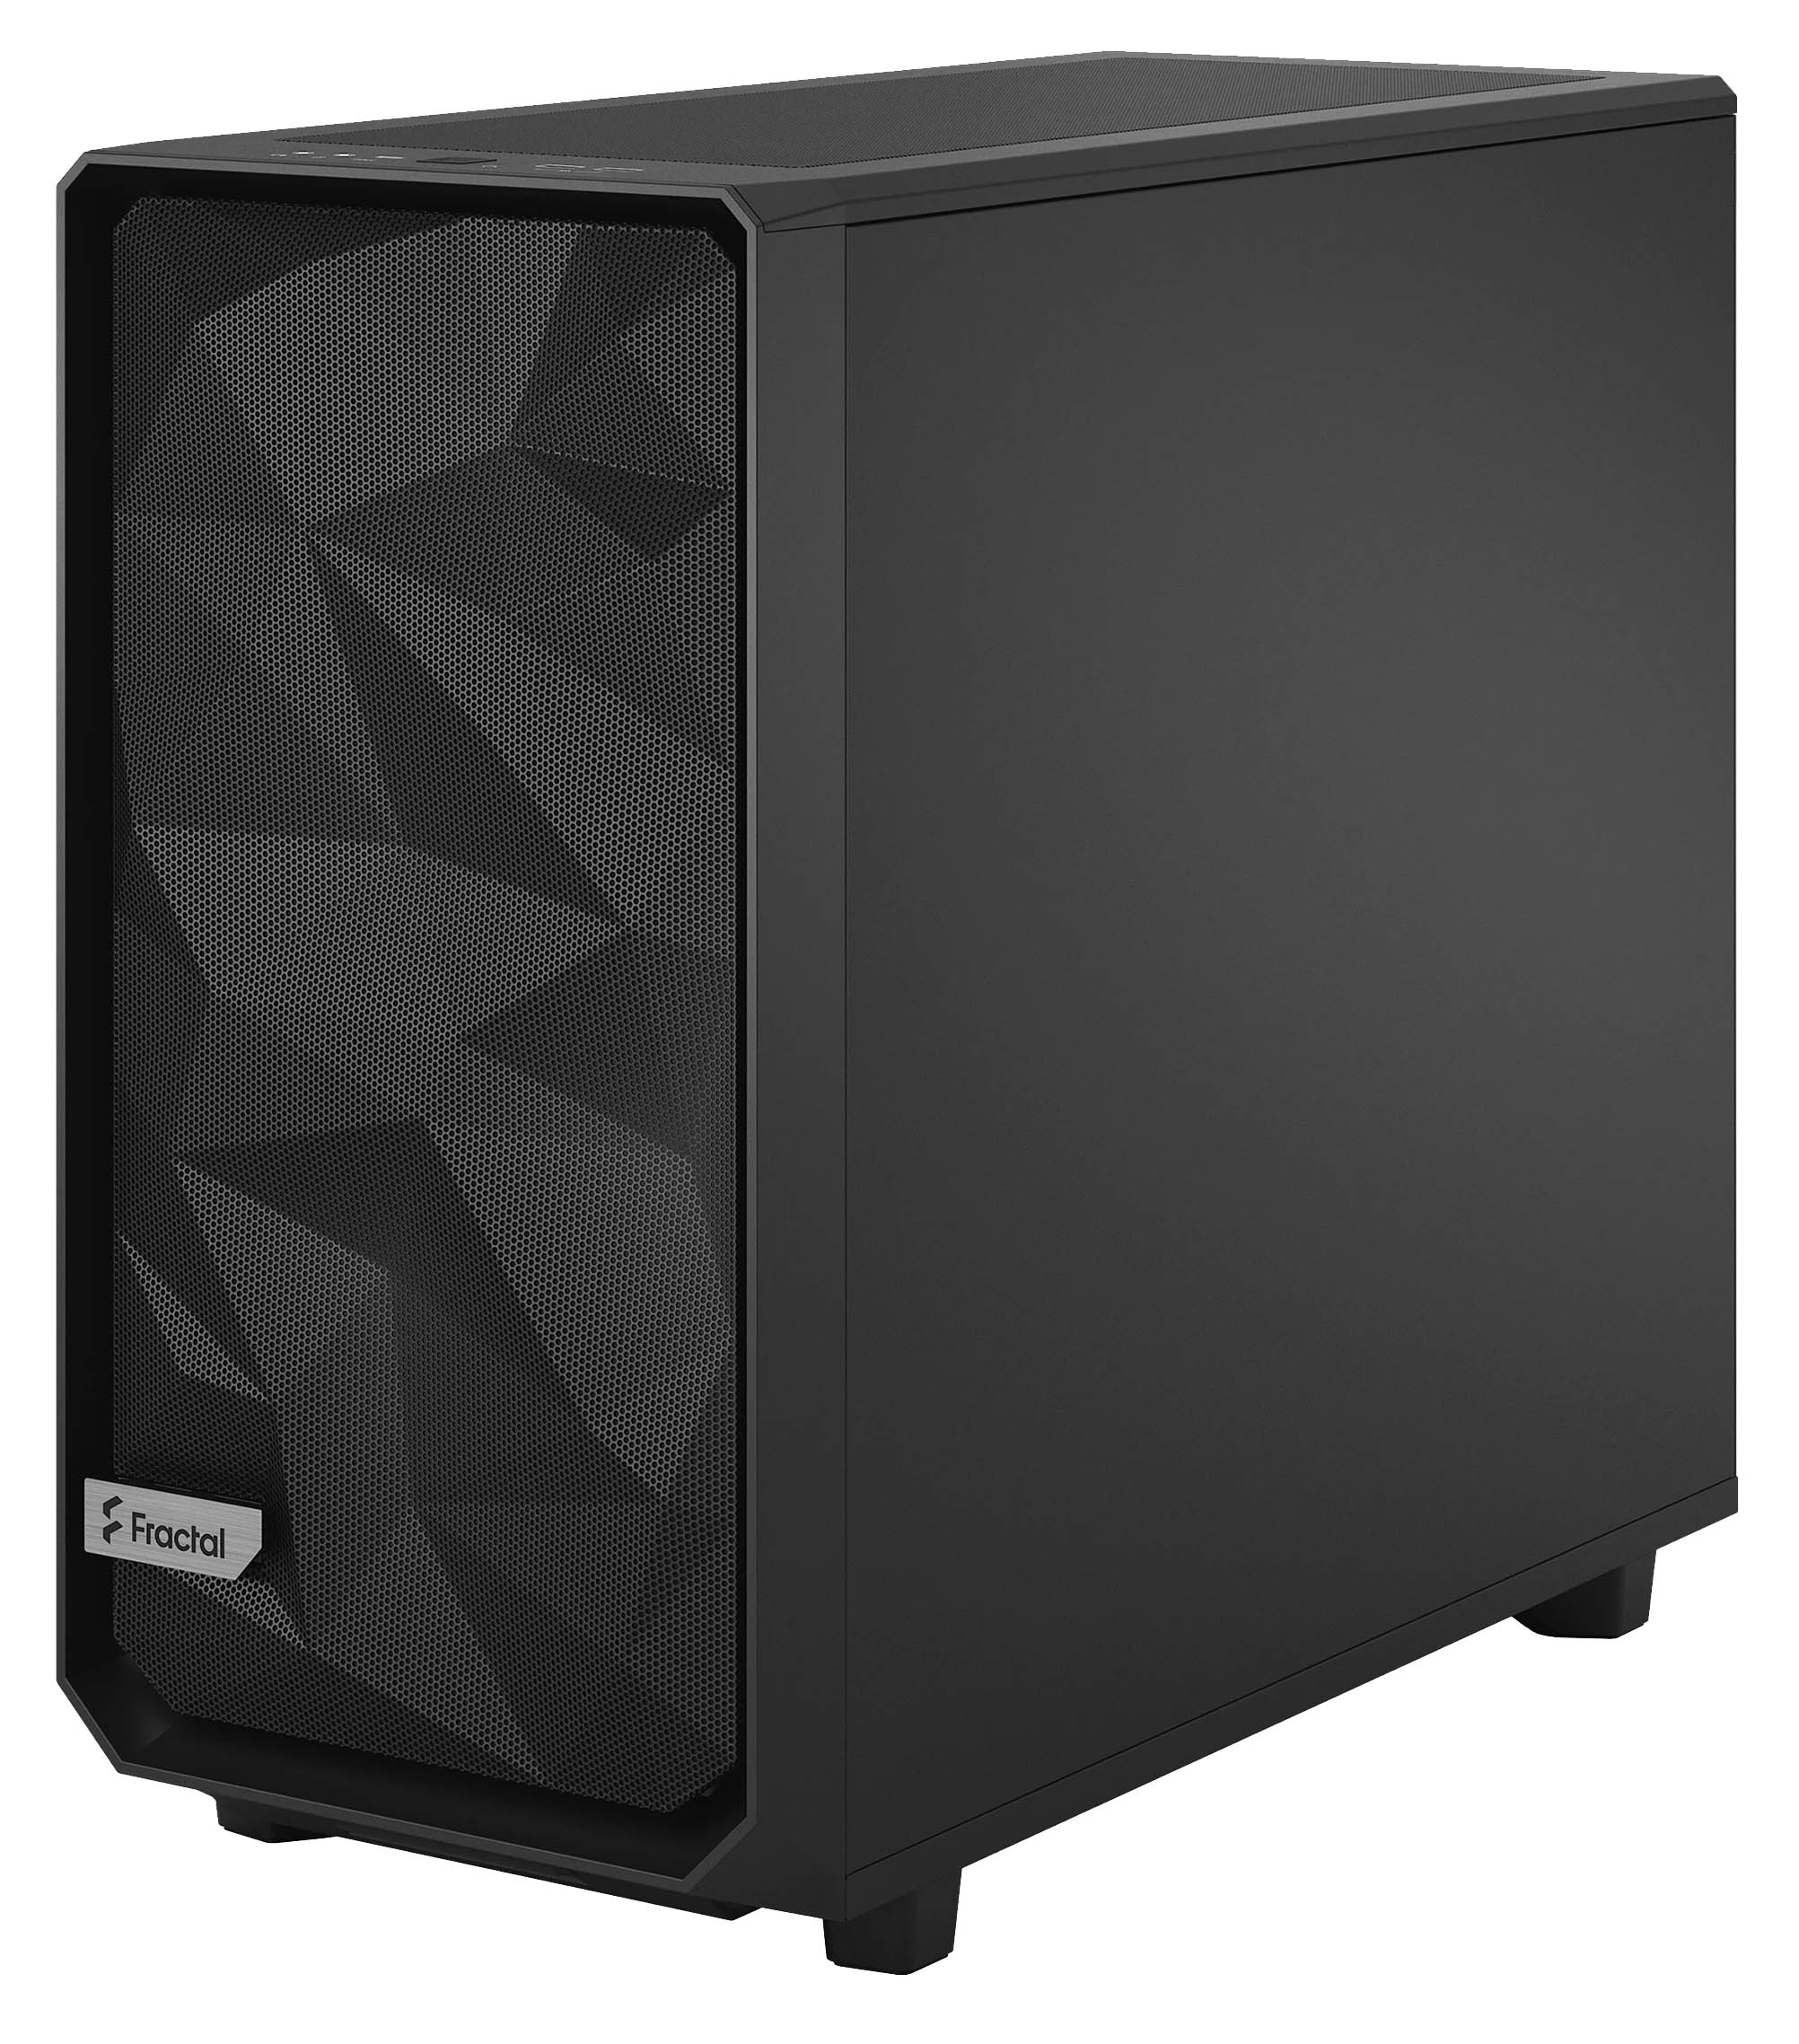
I ordered the first case I found without ridiculous see-through side. It is from Swedish manufacturer Fractal, Meshify 2. The entire case is steel mesh. Like full of tiny holes. It's bad if you'd spill Pepsi into it, but it's good for ventilation.
 This is what Republic of Games mobo box has in it, some swag with a message:
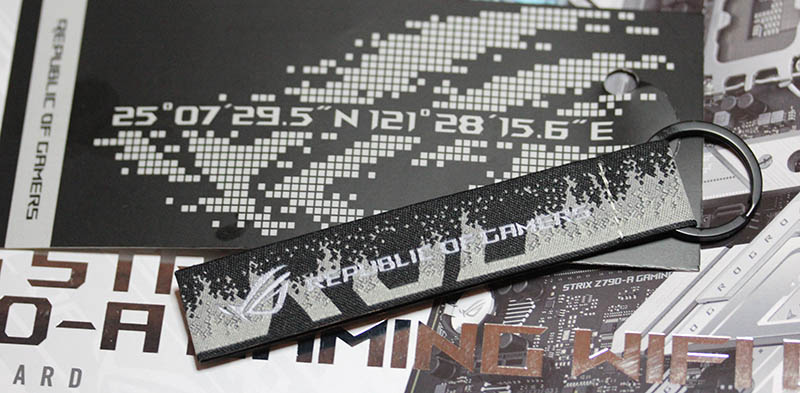
The first thing I had to do is put 25°07'29.5"N 121°28'15.6"E into Google Maps. It results in this link: https://goo.gl/maps/diiBipMcFfz5oBgz7
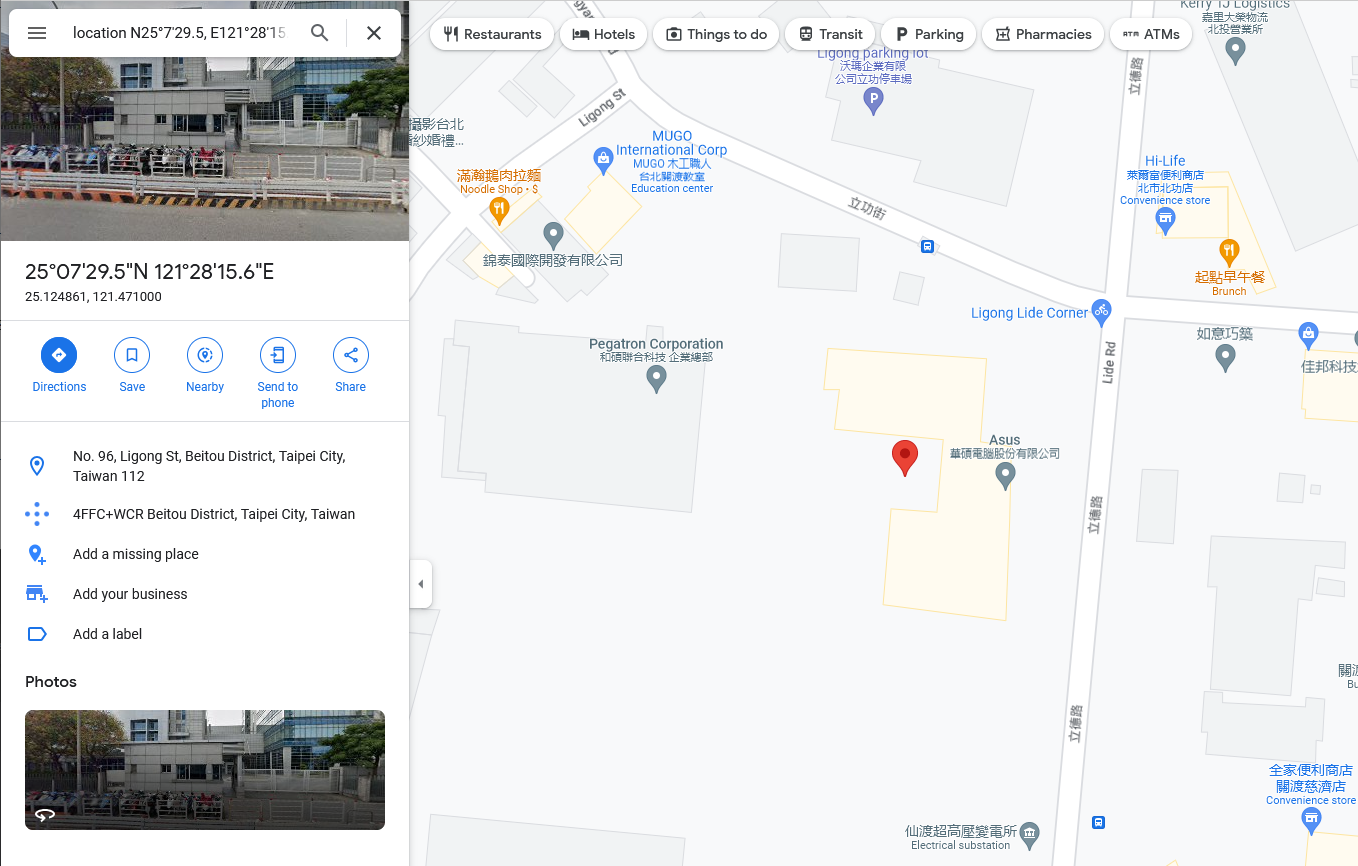
Ah! Those coordinates point to Asus headquarters in Taiwan. It was a nice gift. Also, it was a fun "spy game" trying to figure out what those numbers translate into. 👍
I/O performance of M.2 is satisfactory:

Those ATTO Benchmark results are very good! I'm happy with my investment.
This is a solid PC for my next 5-year period. I know I will upgrade the GPU in next couple years. At the moment, my existing ATI does a fine job running Dead Island 2.
Secure Torx - Drive decommission trouble
Tuesday, March 28. 2023
I'm a known owner of an angle grider:
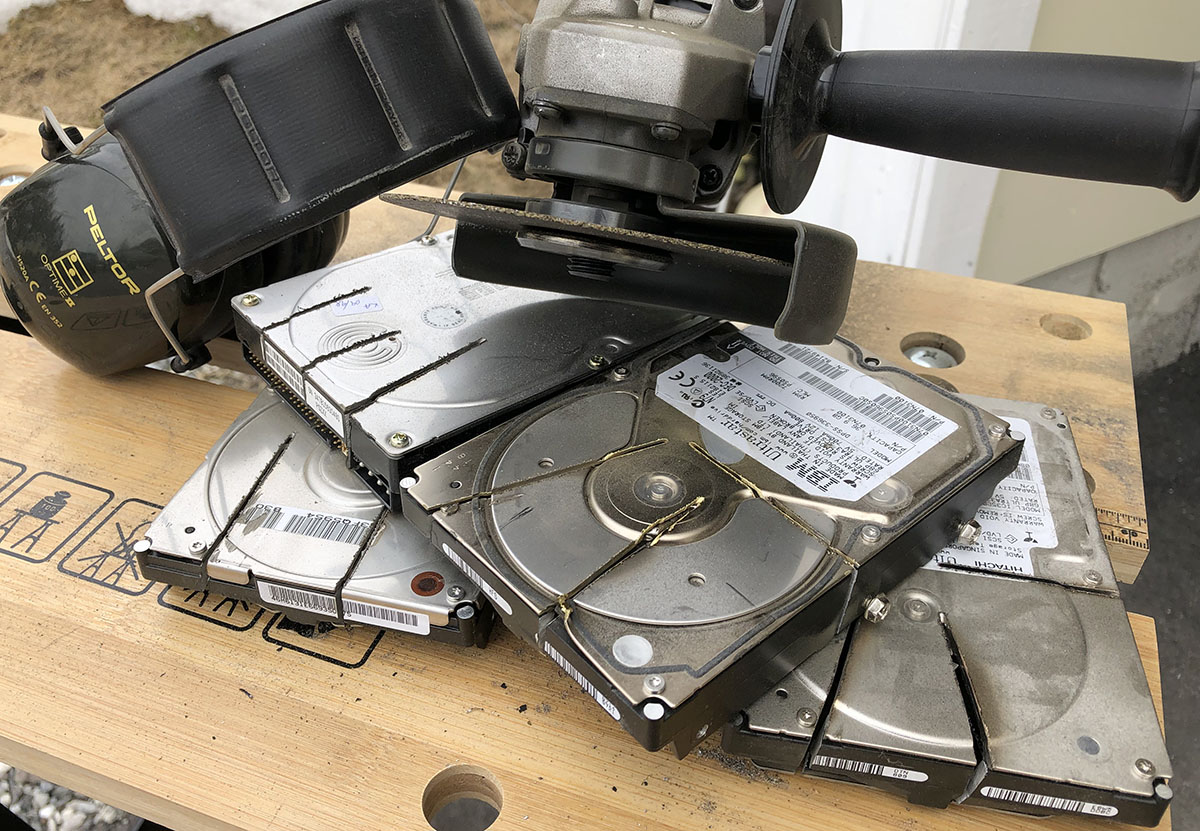
Above pic is from my blog post about making sure my data won't be read off on a decommissioned hard drive.
One day I had an untypical burst of let's-clean-the-storage-to-make-room-for-new-stuff -energy. In storege, there were two rack-servers, which hadn't been running for many years, so it was time to let them to a greener pastures. I have an absolute policy of recycling obsoleted electronics without storage media. Drives will be a "special" treatment. See the above pic.
This is what I wanted to do, get the drive removed from the hot-swap cage. No avail!
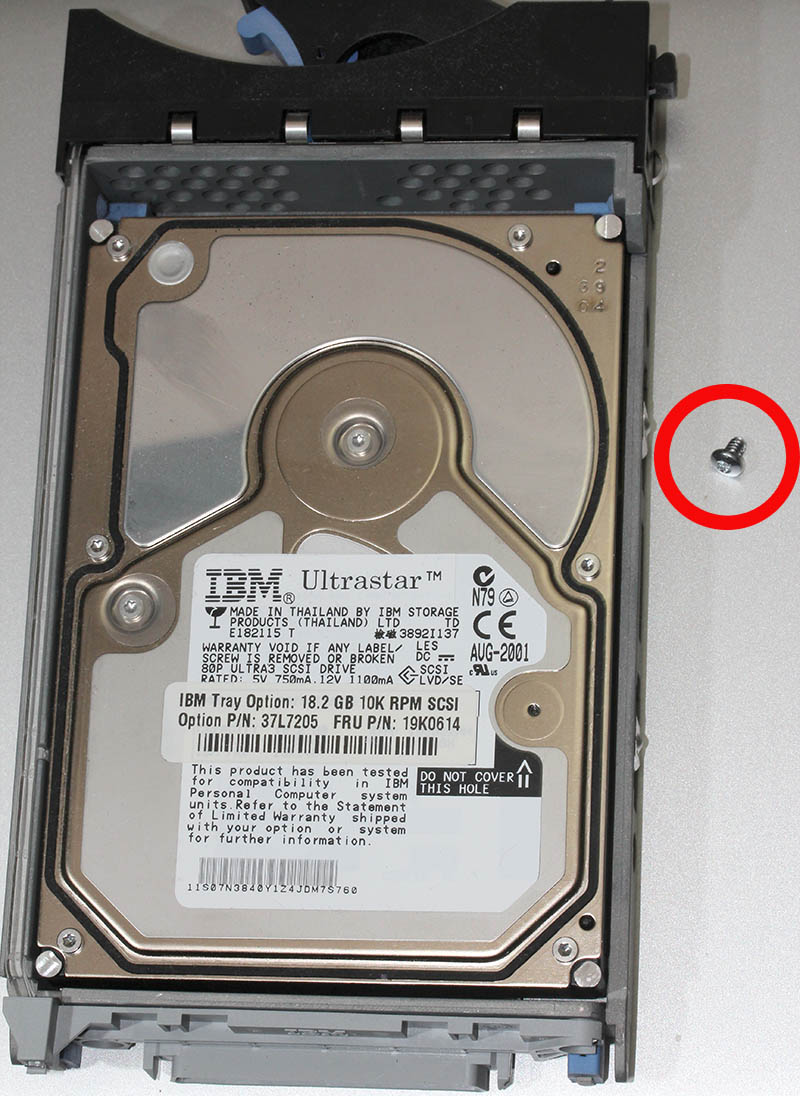
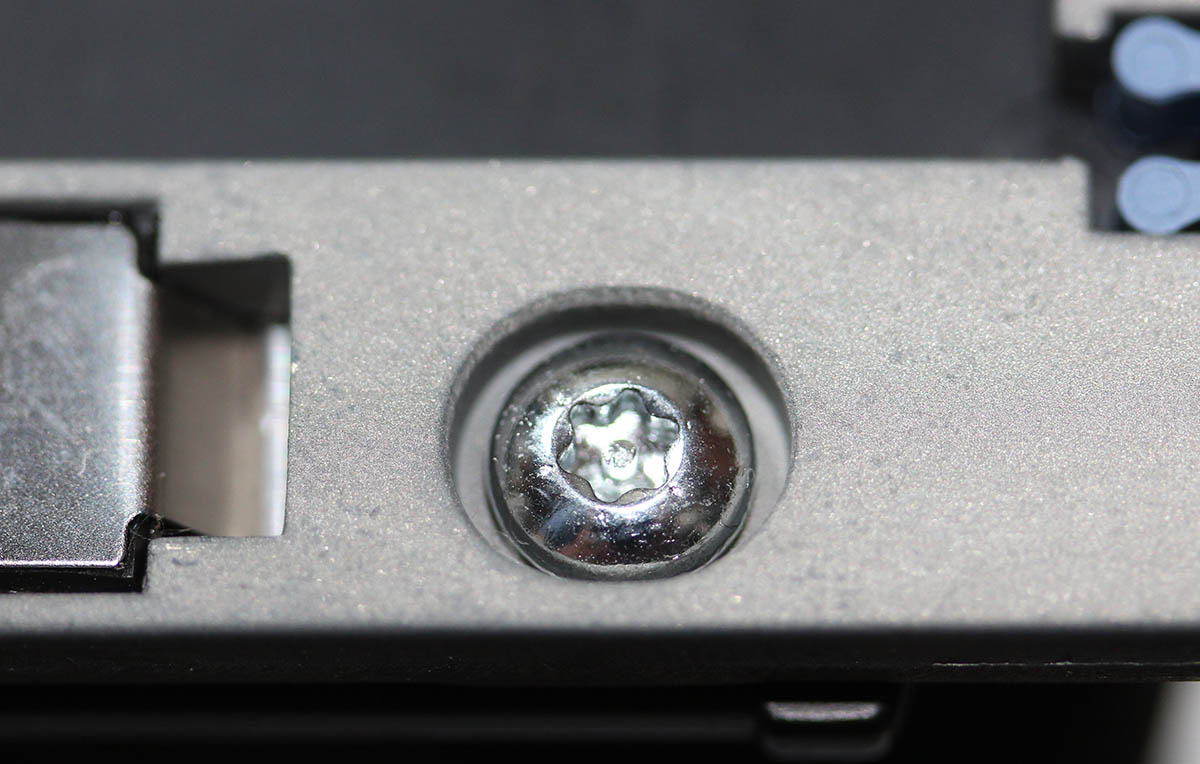
Blocker was a screw head which looked like a T-10 Torx, but not exactly. There was an unexpected post in the middle of the head making a T-10 fit really badly:
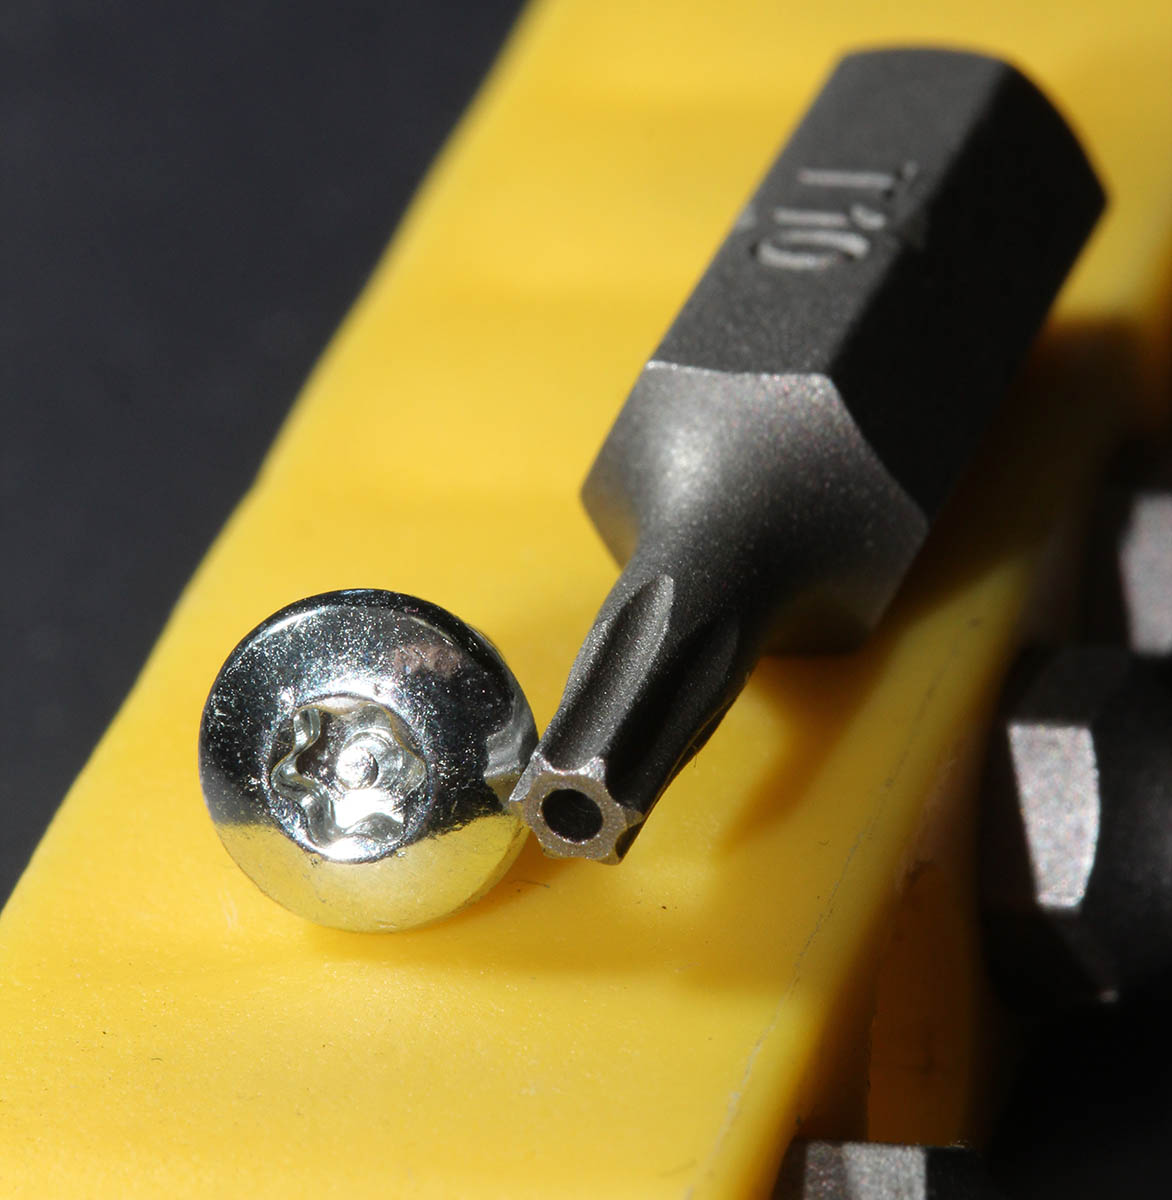
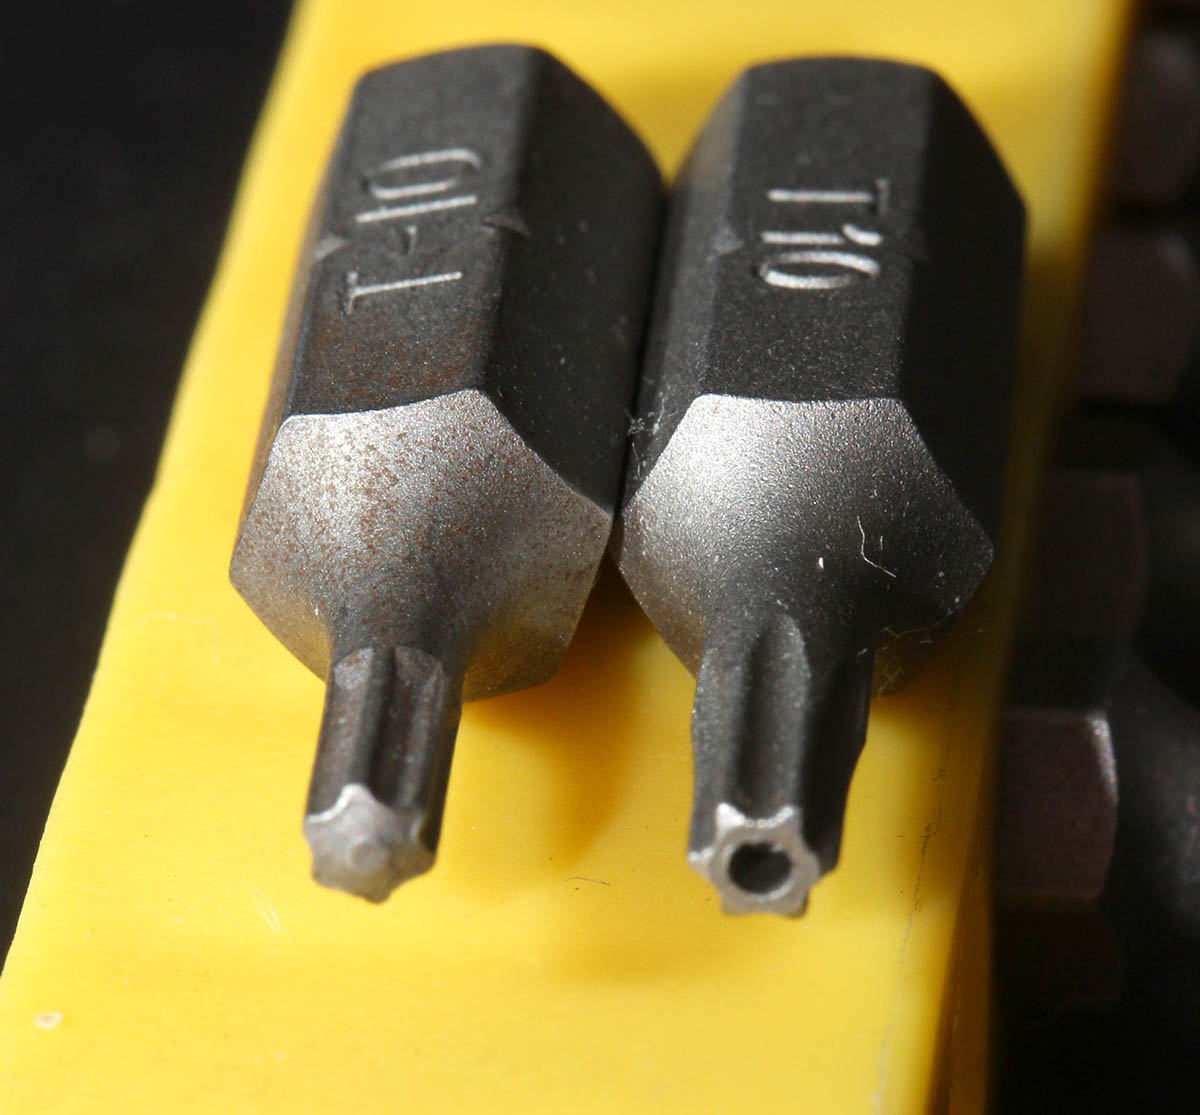
By reading the Wikipedia page for Torx, I realized the problem. This was an infamous Security Torx! I had a faint recollection of such thing existing, but those are so rare, I'd never seen one. Quickly browsing trough my tools and bits, it seemed I didn't own anything to make the task possible.
This meant I got to go to a hardware store to get new toys:

Right tools for the job and problem was solved!
Now there is a stack of rack-server drives ready to bite the grinder disc.
Nokia 5.3 de-bricking after reset
Friday, March 3. 2023
Given the vast differences between Apple's iOS and Google's Android platforms, I own, run and operate both. For those interested: Apple I have as my daily mobile, Android, the more popular platform, I use for more experimental features which are not available on the other one. These features include: access to mobile radios, access to NFC and Bluetooth.
Nokia (or HMD Global to be precise) is a really good Android mobile manufacturer. Generally speasking, they don't bloat their firmware with mandatory always forced-on Facebook or any such crap. Also, my years old 5.3 got Android 12 update. Obviously, this was nice as most manufacturers sell you forgetware getting no updates, but ... (there is always a but-part). What typically happens with electronics, is the hardware becomes obsolete faster than consumer would like to. This puppy doesn't pack the oomph in it's Snapdragon CPU to fluently run Android 12. I had no problems with Androids 10 or 11, with 12 everything started feeling too sluggish. To shopping I went. I came back with a Nokia G21.
Resetting an Android
Onboarding new phone was almost painless. Most icons on my start screen were lost, apps were loaded from Play, icons not so much. Such a thing is easy to fix, so I made the call to do a full reset to the old mobile. That is the standard procedure when you're about to donate/sell/hand out your old computing hardware.
Aftermath – Reset bricked my Nokia!
Crap! The thing failed to boot after reset.
What! What? How is this possible?
Yes, I wasn't alone. Nokia Community forum has following post: WARNING - Do NOT factory reset Nokia 5.3 -- Bricked phone. Factory resetting stuff is such a basic operation done commonly, I didn't much do any research for it. On hindsight (it is 20-20 always) I should have done some.
De-brick
On above thread Mr. Adam Howard faced the same situation and presented a solution.
Prerequisites
Following is needed:
- A computer capable of running Android SDK.
- I used macOS, no drivers or such needed
- I know Linux will work fine, my understanding is no drivers are needed there either
- Windows is known to work, but will require device driver for Android. Which one? No idea here.
- Enough permissions and skills to run Android tools on your computer.
- USB-C cable to connect Android to your computer
- Make sure the device is unconnected, it will be connected later
- Android SDK Platform Tools
- Available @ https://developer.android.com/studio/releases/platform-tools
- Install and test run Android Remote Debugger
adb
- Nokia 5.3 Android 12 firmware
- Available @ https://android.googleapis.com/packages/ota-api/package/d50cb0137919fd20d43cb67a7cb47a073966269d.zip
- Do NOT unzip! Package is needed by
adbin zipped form.
- That's it! Time and your favorite beverages (don't spill, electronics and liquids won't match).
Hard reset / Recovery mode
Apparently you can manually reset any Nokia 5.3 enough to force it into a mode suitable for force installing a new firmware. In this situation, obviously very helpful for recovery purposes. Scary as hell if you have a habit of losing your mobile to dishonest people. They can do nasty stuff to your mobile.
Instructions are here: HardReset.info: How to put NOKIA 5.3 in recovery mode?
Here is the sequence:
- Power off device
- Power on. This is your typical turn-it-on -sequence. Press power-button for ~4 seconds.
- This is your typical turn-it-on -sequence. Release power button.
- Press and hold: power button & volume down.
- Keep pressing the buttons until recovery screen appears: "START"
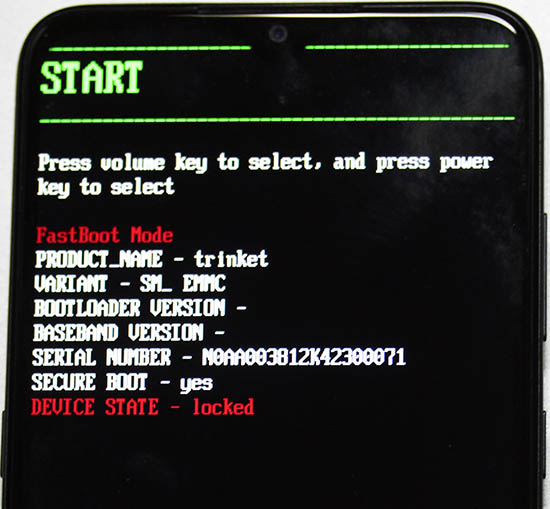
- Tap volume down 2 times: "Recovery mode"
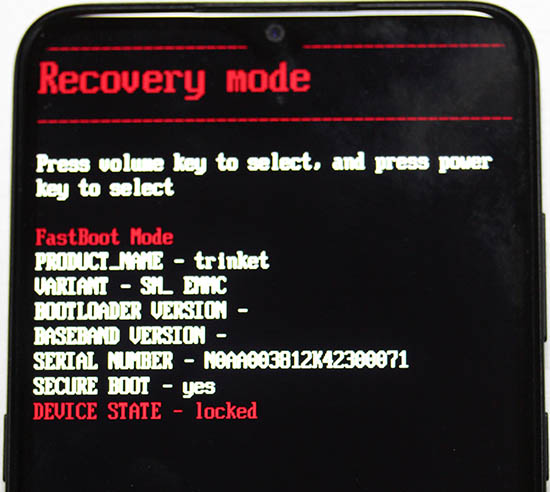
- Press power button to select Recovery mode
- Device will restart.
- Wait for Android with side open to appear. Note: there are no options in this screen.
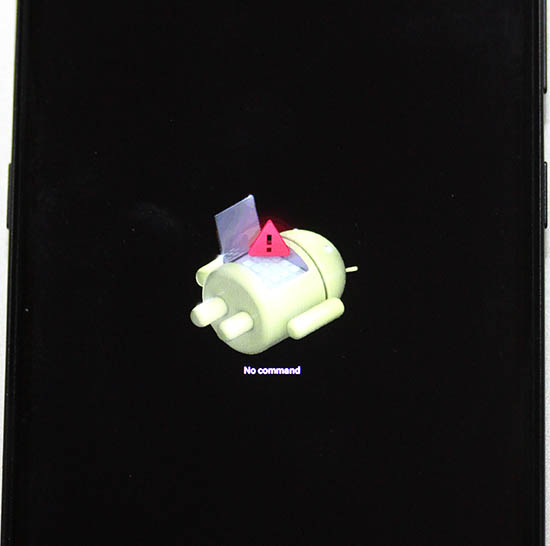
- Press and release: power button & volume up.
- Android Recovery menu will appear
- Tap volume down 3 times, "Apply update from ADB"
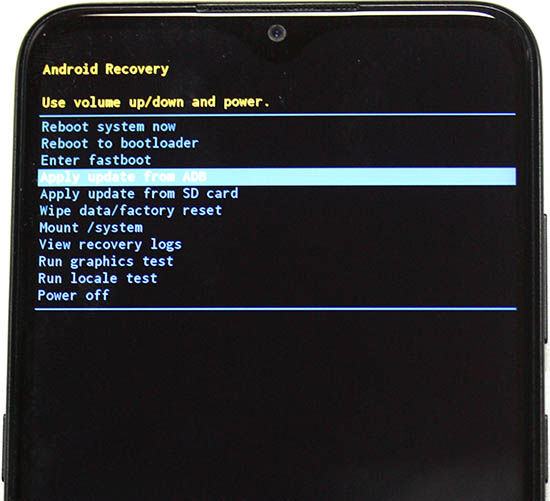
- Connect cable
- Press power button to select Apply update from ADB
- Leave you mobile be, next operation will be done on your computer.
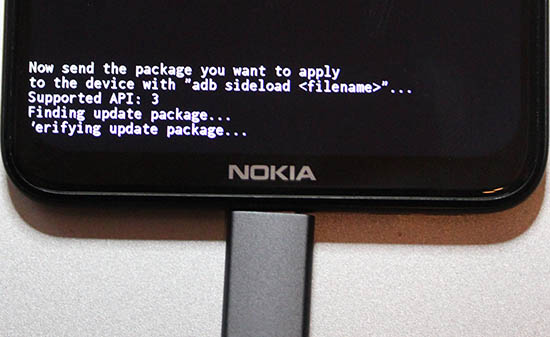
On your computer: Upload firmware
Here is the sequence:
- Requirement: Your mobile must be waiting for firmware to be uploaded
- Info: Android Platform Tools (directory
platform-tools) will contain utilityadb - Info: You will be using sideload-function of
adb. Info @ Sideload ROMs and Mods Using ADB Sideload - Run adb and point it to downloaded firmware, adapt your filename:
adb sideload ../Nokia\ 5.3\ firmware.zip - On your mobile following will happen:
- As time passes, progress will be updated:
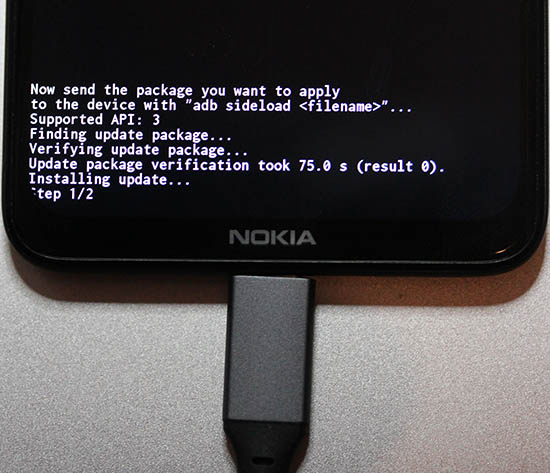
- Firmware update done
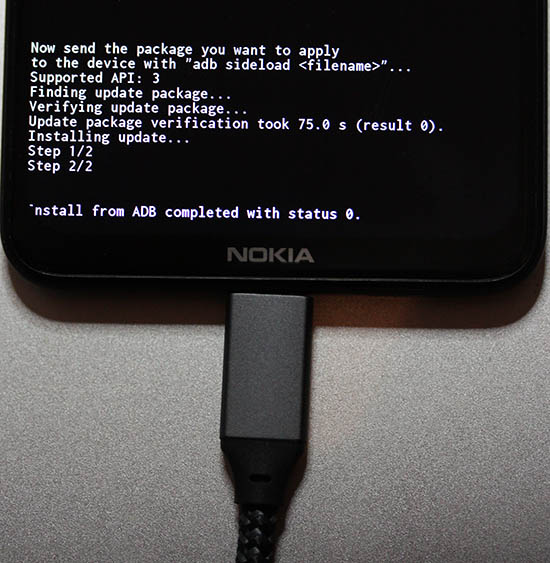
- That's it!
Done
Observe out-of-box -experience on your mobile:
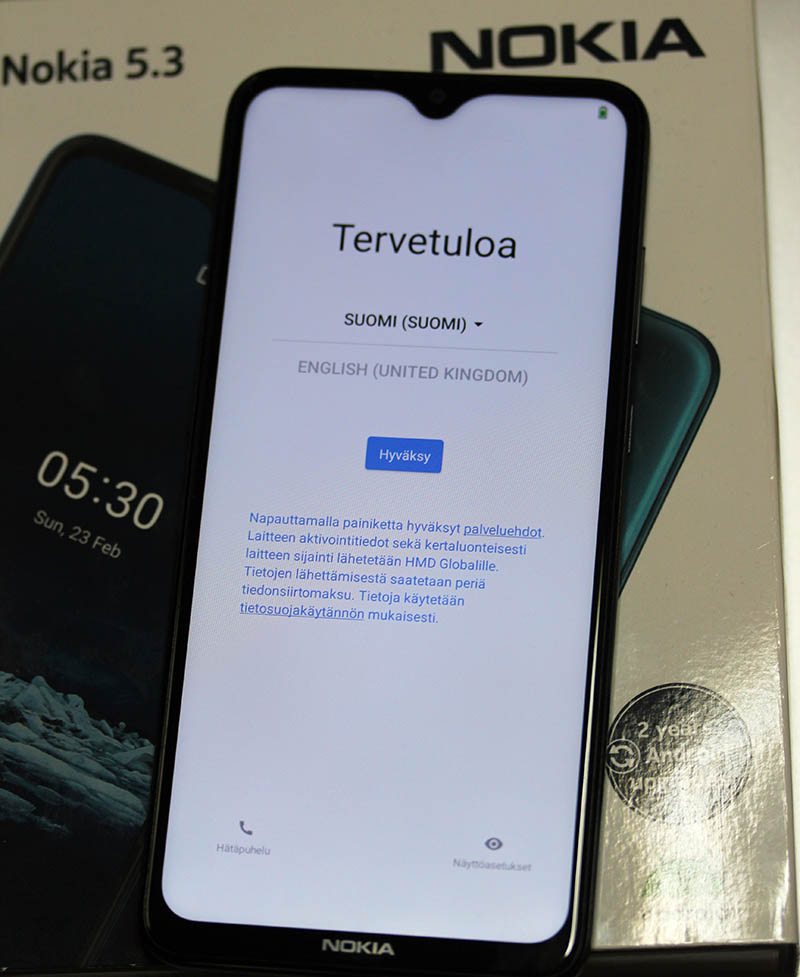
This is a major blooper by HMD guys. The community forum is full of angry people who bricked their 5.3 with Android 12.
RAID1 Disc Drive upgrade
Tuesday, January 31. 2023
On my home Linux server I ran out of disc space on my 2 TB hard drive. Or, technically speaking there were hundred or so unallocated megs left on my Logical Volume Manager. That translates as I hadn't yet ran out, I was about to run out of space. There was some reserves left, but it would have required some LVM-tinkering to do to unleash what was left into actual use.
---> To hardware shopping!
This is what I got:

That's a pair of 8 TB Seagate Barracudas hooked up into my old-but-trustworthy LSI MegaRAID.
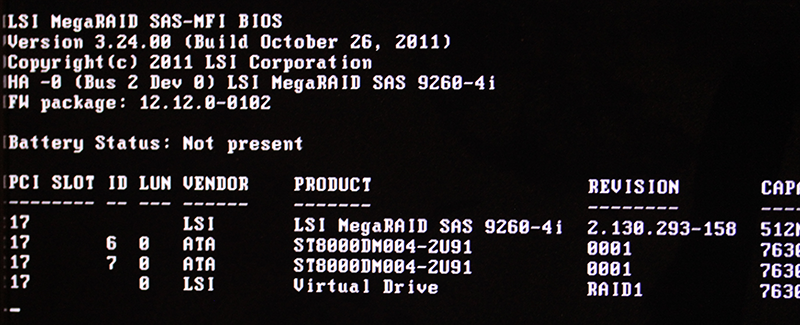
Yeah, you read it right. BIOS is from year 2011. The logical volume / virtual drive created by 90s-looking WebBIOS looks really nice with all those terabytes:

Hint: Don't do what I did and forgot to hook up one S-ATA power cable properly after finalizing installations. The mirrored RAID-1 -drive will need rebuil. On this particular LSI MegaRAID such rebuild takes ~20 hours to complete. Good thing, the drive was fully available during the operation. It did respond bit slowly during rebuild, but that's what spinning platters do anyways.
Amounts of data I seem to have lying around at my home server is a handful. This simple LVM-tinkering sequence of vgextend / pvmove took nearly five hours to complete. This is one of the multiple advantages of having a logical volume, there exists capability to tell at which physical drive a volume resides at.
When I made the purchase order for new drives, I was considering whether I should not use LVM anymore and go for btrfs. Obvious advantage if upgrade would give me even more flexibility on disc space allocation. On negatives, such transition would require for me to copy all data from old LVM/Ext4 drives to new btrfs-drive. LVM's transition simplicity of entire file system without touching individual files did it for me and I chose to not go for The New Thing™.
Hopefully these platters keep spinning for many years to come.
HP Color LaserJet custom X.509 certificate
Monday, January 30. 2023
Update 18th June 2023: See part 2.
One of the pieces of hardware I own and opereate is a HP printer. Most of the time it acts as a ... well, paperweight. Then there is an urgent need to have an A4 with information to be delivered somewhere.
As a keen enthusiast for custom TLS certificates, I always take the option to install one. Especially to a LAN-connected device like printer. This one, however, is broken:
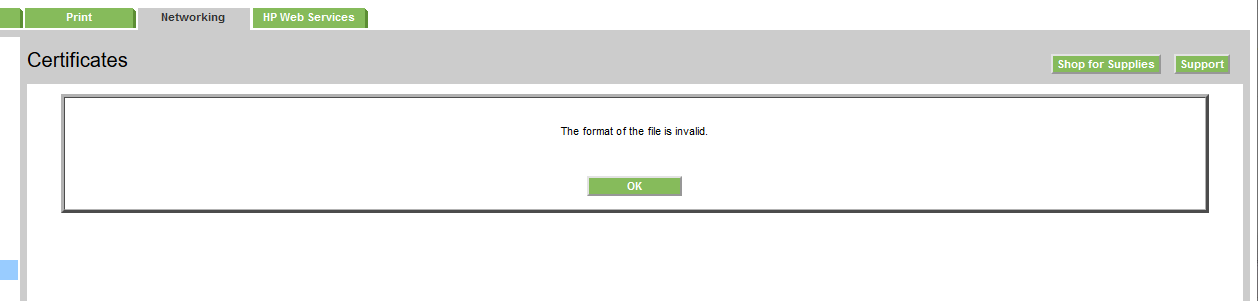
All I can manage from it is: "The format of the file is invalid."
Not so cool. Uh!
For troubleshooting, I looked at Error message "The format of the file is invalid" when attempting to import certificate on HP printer and No more ssl certificate update possible. Both are pretty much stating it doesn't work. Couple years ago in Installing TLS certificates on HP printers automatically the thing worked.
In an attempt to solve this, I exported the generated self-signed key as PKCS #12. Certificate has rather "interesting" crypto, pbeWithSHA1And40BitRC2-CBC, Iteration 2048. That is a seriously obsoleted one! Private key has pbeWithSHA1And3-KeyTripleDES-CBC, Iteration 2048, which is also on the tired side. MAC verification has iteration count 1, which is well aligned with the other insecurity.
No matter what I do, AES, DES, 3-DES, RC2, the PKCS #12 won't import. Neither will CA root cert as PEM.
My conclusion has to be the same: recent firmware upgrades have broken the import.
Multiple hours wasted on that! Darn.
Monitor Arm installation
Sunday, November 20. 2022
This is one of my computing setups at home office:
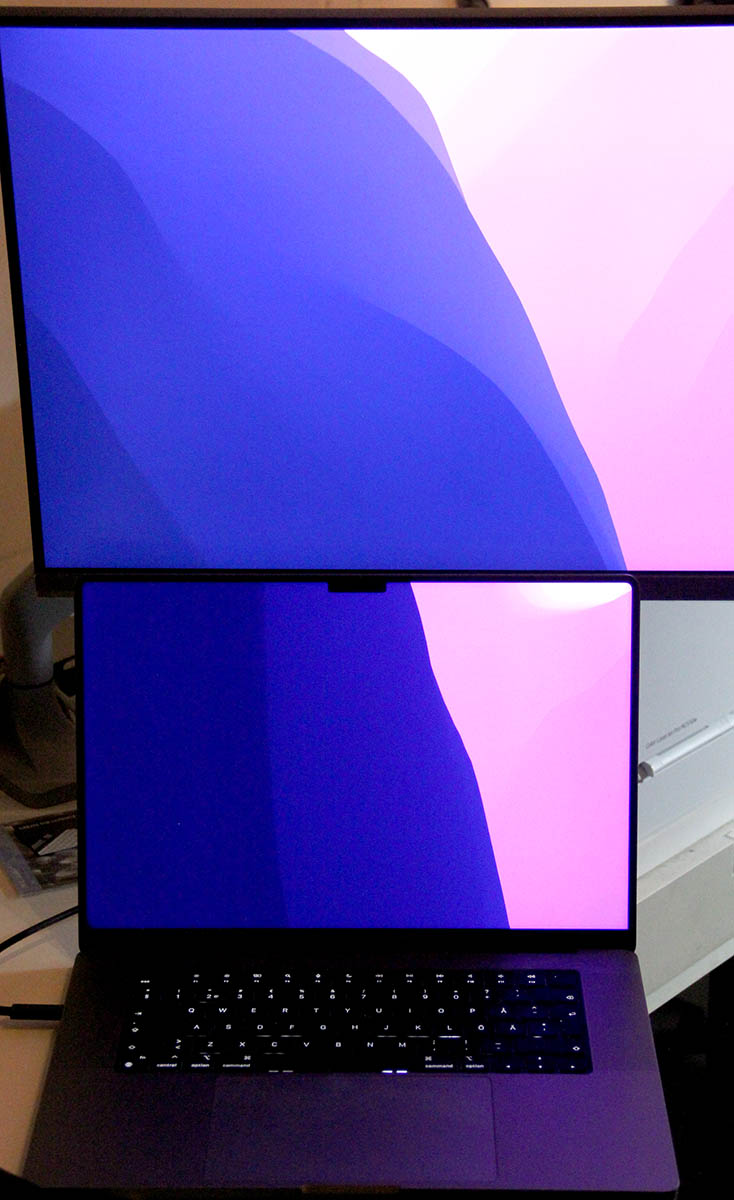
This one has a MacBook Pro 16" at desk and some extra display real estate on top of it. It's a Samsung 4K screen. As there are other computers on this desk, this display has no room anywhere else and it has to go high.
An open lid of this MBP will take ~24 cm in height. On this particular Samsung, there is couple centimeters of frame. For the display area to start at 24 cm, bottom of screen has to be at ~22 cm. Like this:

Most inexpensive no-brand solutions (like my previous one) at their arm can go up to to 50 cm. Then at the end of arm, there is the VESA mount, which will be attached to back of the monitor. Like this:

Again, on this particular Samsung the VESA D-mount is a 75x75 mm and it is located at nearly at the top of the screen making the bottom go low. Most displays have a 100x100 and the VESA-mount is typically at center of the thing. Looking at the picture, notice how commonly sold monitor arms have both 100x100 and 75x75 end. This Samsung has a really beautiful round space for all connectors and VESA-mount (invisible to user at the back of the thing). Nobody at Samsung thought how a bigger 100x100 mount would fit inside this obviously-too-small-ring. I couldn't use the regular M4 screws and had to use extra long ones.
Here is a picture of the problem with this Samsung's let's-place-the-mount-at-top -design:
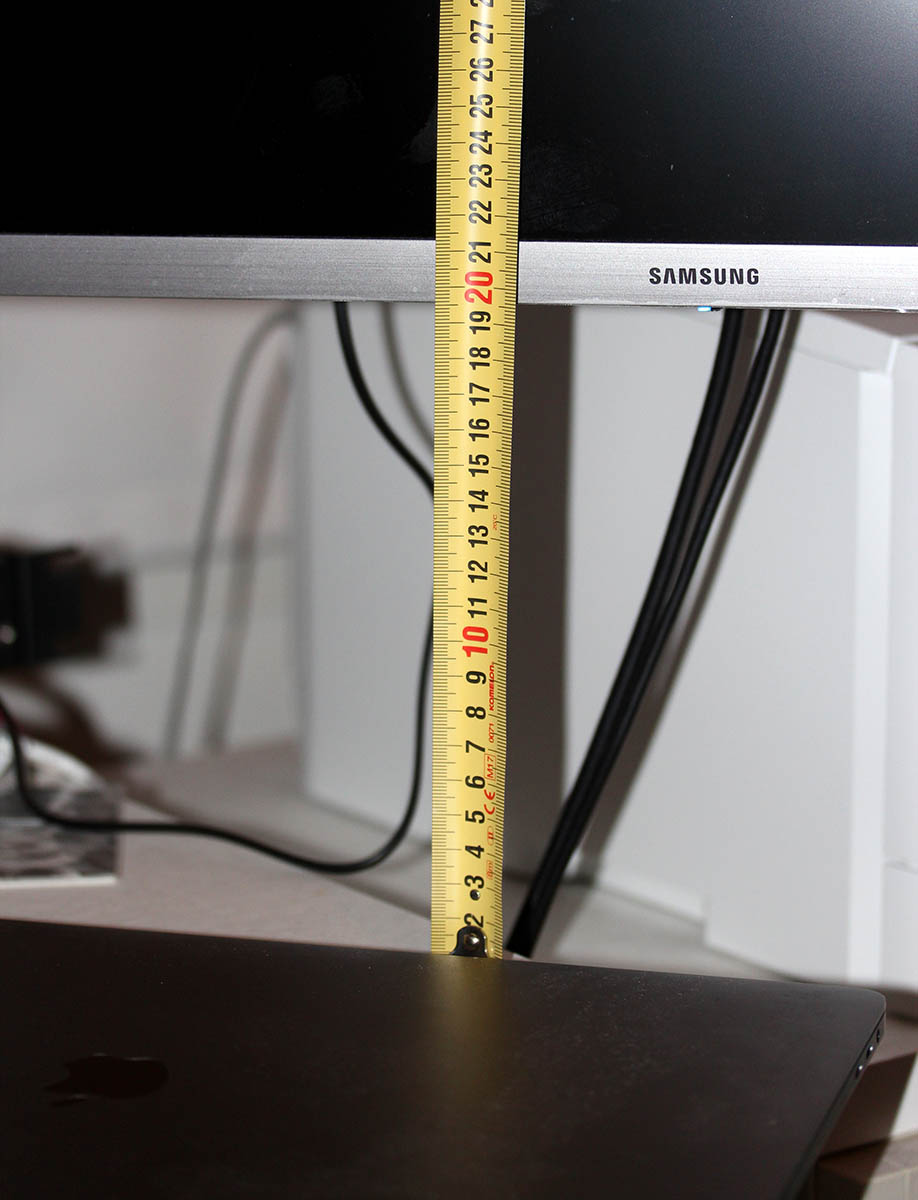
When I go to max height of 50 cm on my arm, I'm missing ~3 cm at the bottom. Monitor is only at 19, but need to be at 22 for the MBP's lid to not obstruct anything at the 4K display. Crap! My old arm clearly has grown too small. There is an illustration of the problem:

Should my MBP be a 13" model or Samsung have its mount in a more reasonable location, this old monitor arm would do it for me. To monitor arm shopping, then. This is the one I got:
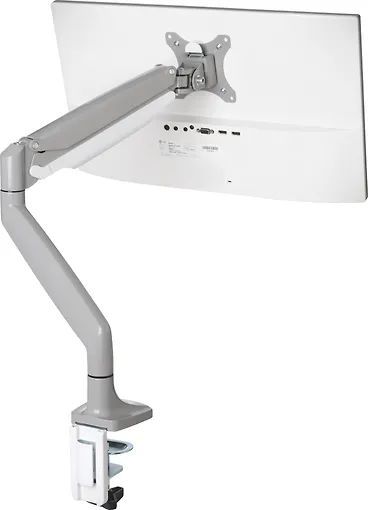
It's a Kensington SmartFit® One-Touch Height Adjustable Single Monitor Arm. This more expensive baby can go the required height and much more! Problem solved by throwing money at it.
Davis Vantage Vue battery life
Sunday, November 13. 2022
Over three years ago I had to get a new weather station. See my blog post about it.
Yesterday a storm hit and I wanted to see the measured wind and gust speeds. They were zero. As in no wind at all!
This measurement of nothingness vastly differed what my eyeballs and ears could measure. Wind was strong enough to rip shingles of my roof. Any storm effects were also very audible indoors. ---> To troubleshooting the issue.
My indoors console of Davis Vantage Vue reported: Low battery in sensor 1. Darn!
VeeWX web UI confirmed the fact. Signal quality was flaky:
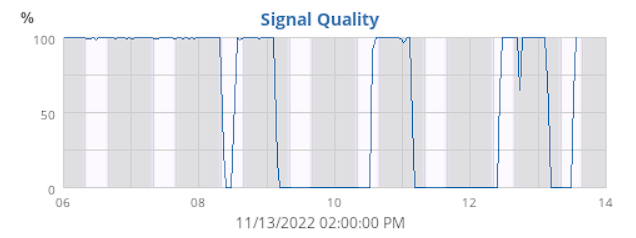
Notice how signal quality would plummet on dark bars (no sunlight) and recover on light bars (sun started shining into the panel). The battery had gotten its share of -30° C winters and +38° C summers. Sustaining Finnish weather isn't easy for man made objects.
I dug up pictures from my 2019 blog post:

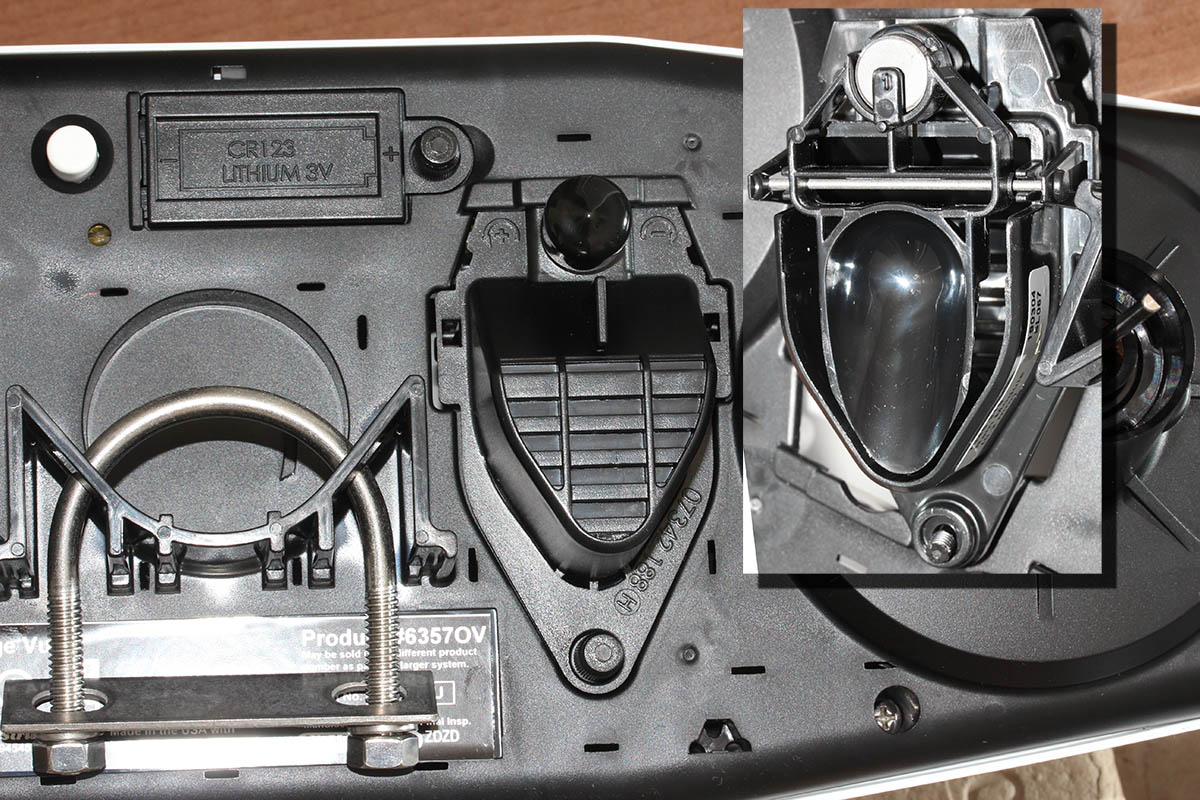
It all came back to me vividly. Indeed, in the bottom of the outdoors unit there is a lithium CR-123 battery. Integrated Sensor Suite (or ISS) has a plastic cover which can be easily removed by opening the plastic screw. As the unit is well designed, the battery pack is well protected from rain, sleet and snow.
Next, getting a replacement. Maybe this battery is one of those hard-to-get and possibly expensive ones? To my surprise a lithium CR-123 is easily available:

Pack of two costs 9,90€ on my local hardware store. Not even expensive!
Yet another well-designed feature of a Vantage Vue.
Unfortunately the second battery has its expiry date before 2025 which is the due time of next change. Generally speaking I'd rather power the unit from a cable. That way I wouldn't have to climb to my garage roof at all. Doing the climbing every three years in a reasonably good weather isn't too bad.
MacBook Pro - Fedora 36 sleep wake - part 2
Friday, September 30. 2022
QNAP Stopping Maintenance of TS-419P II (yet again)
Monday, September 19. 2022
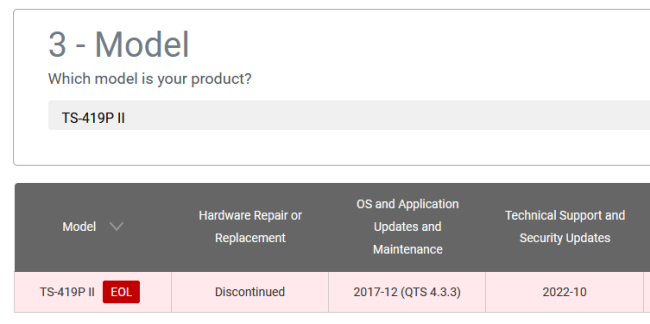
Back in 2018, Qnap announced to stop supporting my NAS on December 2020. They walked that date back multiple times and at the time of writing, the EOL date is on October 2022. I hope they don't mean it this time, but am afraid they will:
Recent security advisory QSA-22-24 is warning about DeadBolt Ransomware.
The campaign appears to target QNAP NAS devices running Photo Station with internet exposure.
Apparently, if you published your Photo Station photos to public Internet, your NAS-box was at risk of being encrypted and ransom would be required.
This is something similar what happened back in February 2019, see NAS-201902-13 about details of QNAPCrypt / eCh0raix. If you hadn't patched your Qnap and something crawled past the box, it was possible to brute-force their way into it aaaaand encrypt the files aaaand ransom bitcoin to restore the files. See: New eCh0raix Ransomware Brute-Forces QNAP NAS Devices
Apparently running a NAS is becoming more and more demanding. Maybe I have a wrong brand or something?
MacBook Pro - Fedora 36 sleep wake
Thursday, August 25. 2022
eSIM in iPhone
Friday, July 29. 2022
For vacation / touristing purposes, I did some travel. When leaving the comfort of EU/ETA-region cell phone mobile data changes into something tricky. Most telcos here in Finland offer you 15 GiB of roaming transfer per month inside EU/ETA. As I travelled into post-brexit UK, the gravity of current roaming agreements hit me. For those unaware (like me on London Heathrow airport): nothing works and if works, expect to pay per-GiB on gold bullions.
At hotel, free Wi-Fi was more than welcome addition to their service offering. With that I was able to figure out what the heck happened to my iPhone data and what measures could I take to enable it.
After weighing all the options, my solution was to purchase an eSIM. That's something I never even considered before. Being in "the spot" I just went for Holafly eSIM. I'm 99,9% sure their offering is not the best nor cheapest, their product simply was easily available. Their marketing must be superb!
List of options considered, but abandoned for different reasons included following:
- Not having data in my phone.
- Relying on public Wi-Fis. They were generally available in many sights and locations.
- Enabling non-EU/ETA data roaming on my subscription.
- Purchasing a prepaid SIM from nearby groceries store. They were generally available, not too expensive and easy to obtain.
This is what I paid with a credit card:

$19 USD. Living in Finland, the country most of the mobile stuff was invented at, the price for unlimited 5 day data was horrible. This is what Holafly delivered me via email:

A QR-code! What! Are eSIMs distributed as QR-codes? Really?
More googling revealed: yes, that's correct. An eSIM is essentially a QR-code.
Payload of above matrix barcode would be as follows:
LPA:1$h3a.prod.ondemandconnectivity.com$8083B8A60025B1BA0E92A460388592035501C61BB74516AB176BA714D64AD60B
Studying the topic more with eSIM Whitepaper - The what and how of Remote SIM Provisioning and How Does an eSIM Work? Acronym LPA from the QR-code stands for Local Profile Assistant. Most stuff encoded into a QR-code I've ever seen has some sort of classifier as the initial value, so having something there would be expected. Next section with $-signs contain a hostname to contact followed by a password to provide for a server answering to requests on mentioned hostname to issue details of my newly purchased subscription for my phone. Host h3a.prod.ondemandconnectivity.com translates into 91.240.72.102, property of Thales group.
After walking through iPhone new data profile wizard, this is what I ended up with:
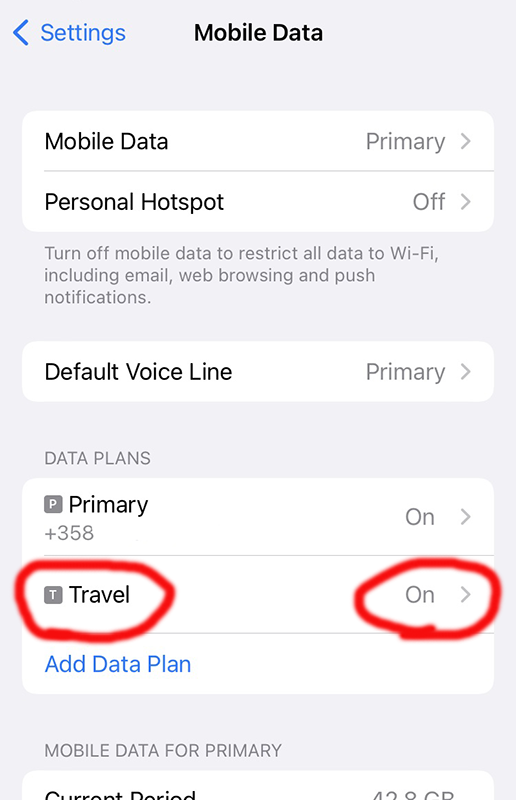
For unknown reason, the name of my eSIM was "Travel". That's something that can be chosen and renamed, even. Taking a look into the settings of my Travel-profile reveals following:

Whoo! That's an Austrian telco 3 subscription. The name "Drei" is German and means three (3). There are number of subsidiaries on 3 or Hutchison 3G Enterprises S.A.R.L., in case you are unaware of such telco group.
Now that I had mobile data, the obvious first thing was to verify where my Internet exit-node was located at. It seemed, my IPv4-range 91.223.100.0/26 was operated by Nexthop AS from Norway. A closer look on their geo-feed at https://geofeed.wgtwo.com/geofeed.csv revealed two network ranges of /26 or 62 available addresses:
# prefix,country_code,region_code,city,postal

91.223.100.0/26,GB,ENG,London,EC2V

91.209.212.0/26,GB,ENG,London,EC2V
Ultimately I was happy. Everything worked well, my iPhone had data connection for maps, googling, mail and iMessage.
To summarize:
- My iPhone is designed in California, USA and manufactured in China.
- I purchased an eSIM from Holafly, a Spanish company.
- I paid US dollars for the product on their website located in an UK server.
- What I got delivered from the purchase was credentials to connect to a French server.
- Response payload of from the French server was an Austrian mobile data subscription.
- Subscription's public Internet exit was located at United Kingdom, operated by a Norwegian company.
That's what I call an international operation! 
PS. If you can hack the above eSIM to work for you, please inform me. It's a pre-paid, so I won't be the one taking the loss.
Post-passwords life: Biometrics for your PC
Monday, July 4. 2022
Last year I did a few posts about passwords, example. The topic is getting worn out as we have established the fact about passwords being a poor means of authentiaction, how easily passwords leak from unsuspecting user to bad people and how you really should be using super-complex passwords which are stored in a vault. Personally I don't think there are many interesting password avenues left to explore.
This year my sights are set into life after passwords: how are we going to authenticate ourselves and what we need to do to get there.
Biometrics. A "password" everybody of us carries everywhere and is readily available to be used. Do the implementation wrong, leak that "password" and that human will be in big trouble. Biometric "password" isn't so easy to change. Impossible even (in James Bond movies, maybe). Given all the potential downsides, biometrics still beats traditional password in one crucial point: physical distance. To authenticate with biometrics you absolutely, positively need to be near the device you're about to use. A malicious cracker from other side of the world won't be able to brute-force their way trough authentication unless they have your precious device at their hand. Even attempting any hacks remotely is impossible.
While eyeballing some of the devices and computers I have at hand:


The pics are from iPhone 7, MacBook Pro and Lenovo T570. Hardware that I use regularily, but enter password rarely. There obviously exists other types of biometrics and password replacements, but I think you'll catch the general idea of life after passwords.
Then, looking at the keyboard of my gaming PC:

Something I use on daily basis, but it really puzzles me why Logitech G-513 doesn't have the fingerprint reader like most reasonable computer appliance does. Or generally speaking, if not on keyboard could my self assembled PC have a biometric reader most devices do. Why must I suffer from lack of simple, fast and reliable method of authentication? Uh??
Back-in-the-days fingerprint readers were expensive, bulky devices weren't that accurate and OS-support was mostly missing and injected via modifying operating system files. Improvements on this area is something I'd credit Apple for. They made biometric authentication commonly available for their users, when it became popular and sensor prices dropped, others followed suit.
So, I went looking for a suitable product. This is the one I ended up with:
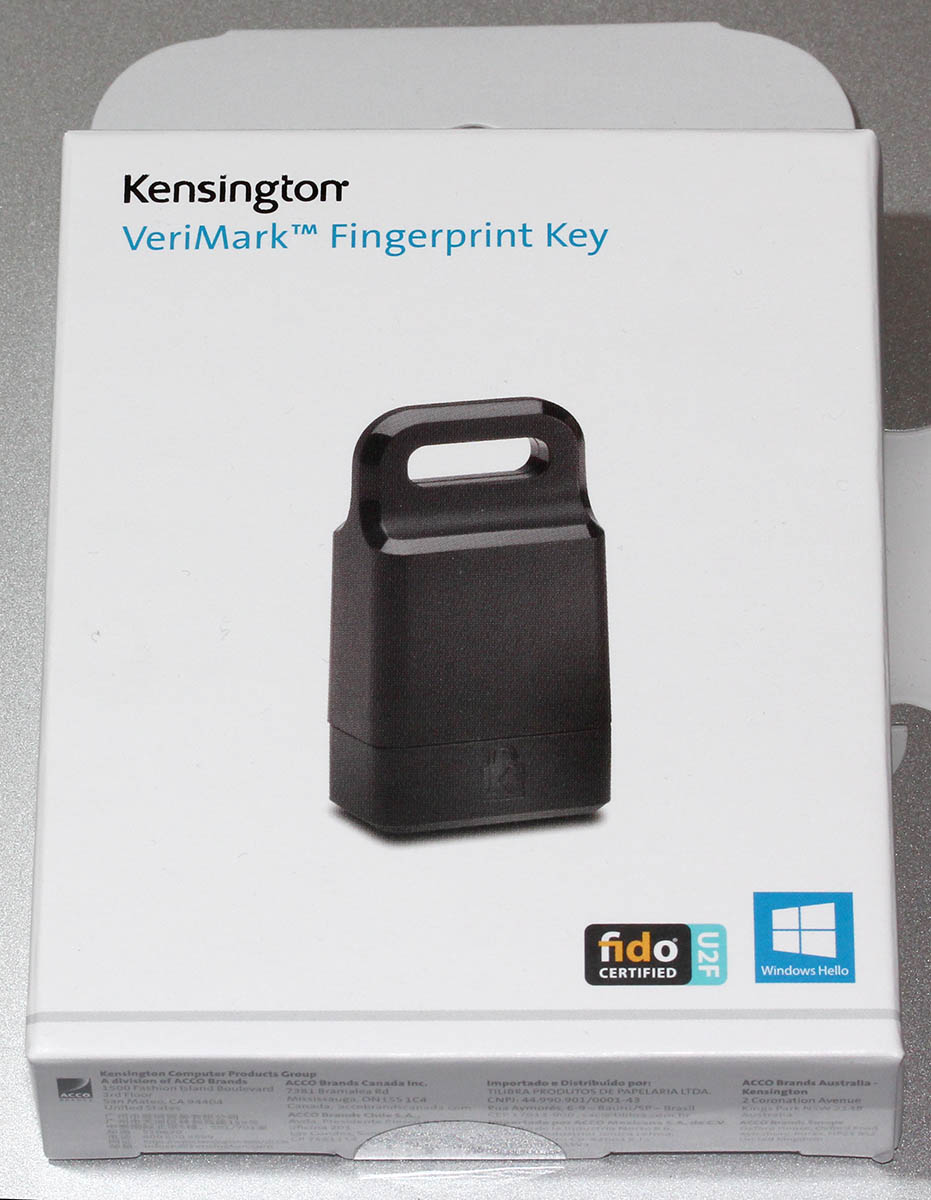
A note: I do love their "brief" product naming! 
It is a Kensington® VeriMark™ Fingerprint Key supporting Windows Hello™ and FIDO U2F for universal 2nd-factor authentication. Pricing for one is reasonable, I paid 50€ for it. As I do own other types of USB/Bluetooth security devices, what they're asking for one is on par with market. I personally wouldn't want a security device which would be "cheapest on the market". I'd definitely go for a higher price range. My thinking is, this would be the appropriate price range for these devices.
Second note: Yes, I ended up buying a security device from company whose principal market on mechanical locks.
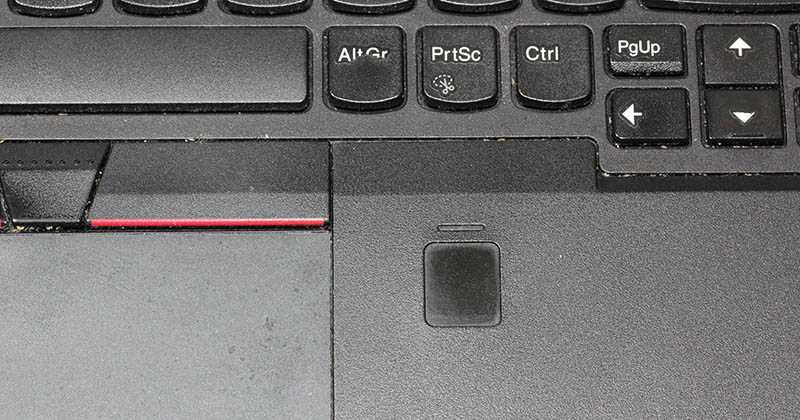
Here is one of those lock slots on the corner of my T570:

From left to right, there is a HDMI-port, Ethernet RJ-45 and a Kensington lock slot. You could bolt the laptop into a suitable physical object making the theft of the device really hard. Disclaimer: Any security measure can be defeated, given enough time.
Back to the product. Here is what's in the box:

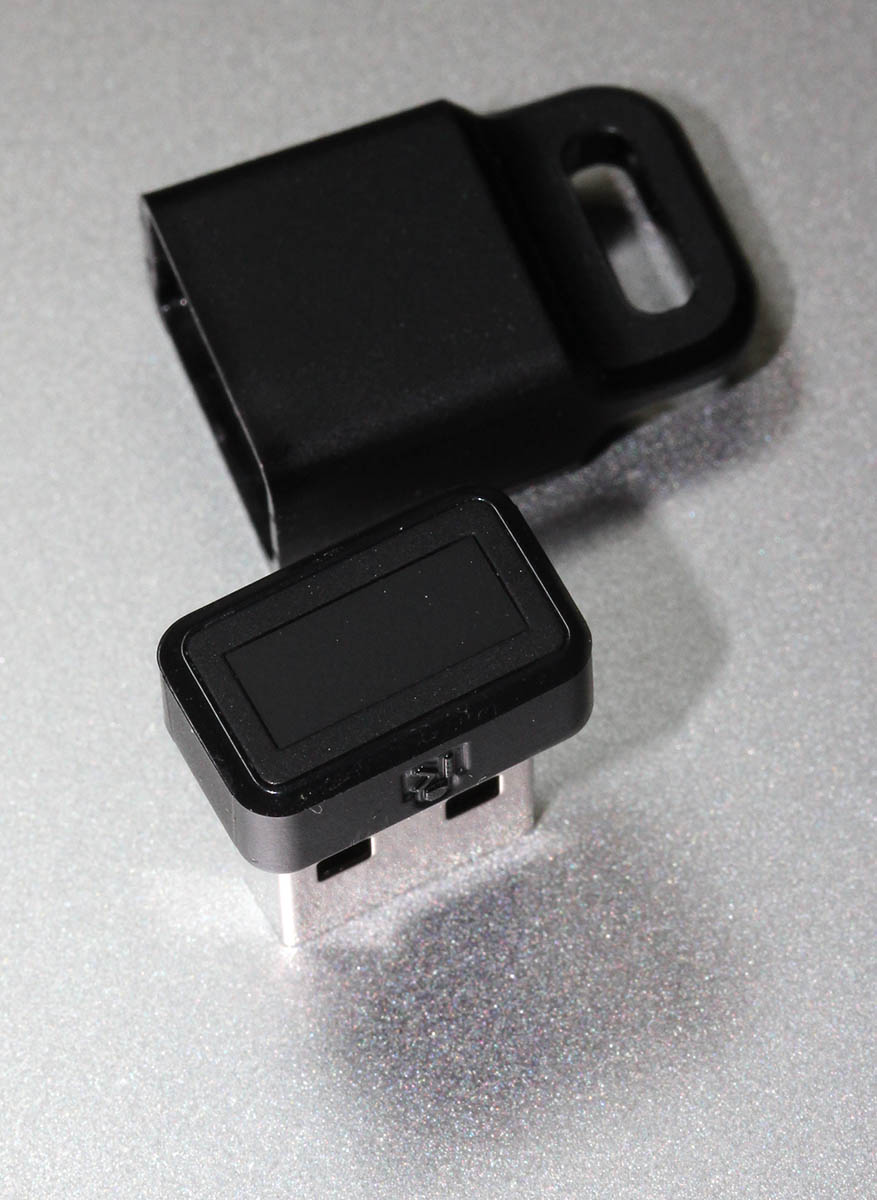
That would be a very tiny USB-device. Similar sized items would be your Logitech mouse receiver or smallest WiFi dongles.
With a Linux running lsusb, following information can be retrieved:
Bus 001 Device 006: ID 06cb:0088 Synaptics, Inc.
Doing the verbose version lsusb -s 1:6 -vv, tons more is made available:
Bus 001 Device 006: ID 06cb:0088 Synaptics, Inc.

Device Descriptor:

  bLength                18

  bDescriptorType         1

  bcdUSB               2.00

  bDeviceClass          255 Vendor Specific Class

  bDeviceSubClass        16

  bDeviceProtocol       255

  bMaxPacketSize0         8

  idVendor           0x06cb Synaptics, Inc.

  idProduct          0x0088

  bcdDevice            1.54

  iManufacturer           0

  iProduct                0

  iSerial                 1 -redacted-

  bNumConfigurations      1

  Configuration Descriptor:

    bLength                 9

    bDescriptorType         2

    wTotalLength       0x0035

    bNumInterfaces          1

    bConfigurationValue     1

    iConfiguration          0

    bmAttributes         0xa0

      (Bus Powered)

      Remote Wakeup

    MaxPower              100mA

    Interface Descriptor:

      bLength                 9

      bDescriptorType         4

      bInterfaceNumber        0

      bAlternateSetting       0

      bNumEndpoints           5

      bInterfaceClass       255 Vendor Specific Class

      bInterfaceSubClass      0

      bInterfaceProtocol      0

      iInterface              0

      Endpoint Descriptor:

        bLength                 7

        bDescriptorType         5

        bEndpointAddress     0x01  EP 1 OUT

        bmAttributes            2

          Transfer Type            Bulk

          Synch Type               None

          Usage Type               Data

        wMaxPacketSize     0x0040  1x 64 bytes

        bInterval               0

      Endpoint Descriptor:

        bLength                 7

        bDescriptorType         5

        bEndpointAddress     0x81  EP 1 IN

        bmAttributes            2

          Transfer Type            Bulk

          Synch Type               None

          Usage Type               Data

        wMaxPacketSize     0x0040  1x 64 bytes

        bInterval               0

      Endpoint Descriptor:

        bLength                 7

        bDescriptorType         5

        bEndpointAddress     0x82  EP 2 IN

        bmAttributes            2

          Transfer Type            Bulk

          Synch Type               None

          Usage Type               Data

        wMaxPacketSize     0x0040  1x 64 bytes

        bInterval               0

      Endpoint Descriptor:

        bLength                 7

        bDescriptorType         5

        bEndpointAddress     0x83  EP 3 IN

        bmAttributes            3

          Transfer Type            Interrupt

          Synch Type               None

          Usage Type               Data

        wMaxPacketSize     0x0008  1x 8 bytes

        bInterval               4

      Endpoint Descriptor:

        bLength                 7

        bDescriptorType         5

        bEndpointAddress     0x84  EP 4 IN

        bmAttributes            3

          Transfer Type            Interrupt

          Synch Type               None

          Usage Type               Data

        wMaxPacketSize     0x0010  1x 16 bytes

        bInterval              10

Device Status:     0x0000

  (Bus Powered)
So, this "Kensington" device is ultimately something Synaptics made. Synaptics have a solid track-record with biometrics and haptic input, so I should be safe with the product of my choice here.
For non-Windows users, the critical thing worth mentioning here is: There is no Linux support. There is no macOS support. This is only for Windows. Apparently you can go back to Windows 7 even, but sticking with 10 or 11 should be fine. A natural implication for being Windows-only leads us to following: Windows Hello is mandatory (I think you should get the hint from the product name already).
Without biometrics, I kinda catch the idea with Windows Hello. You can define a 123456-style PIN to log into your device, something very simple for anybody to remember. It's about physical proximity, you need to enter the PIN into the device, won't work over network. So, that's kinda ok(ish), but with biometrics Windows Hello kicks into a high gear. What I typically do, is define a rather complex alphanumeric PIN to my Windows and never use it again. Once you go biometrics, you won't be needing the password. Simple!
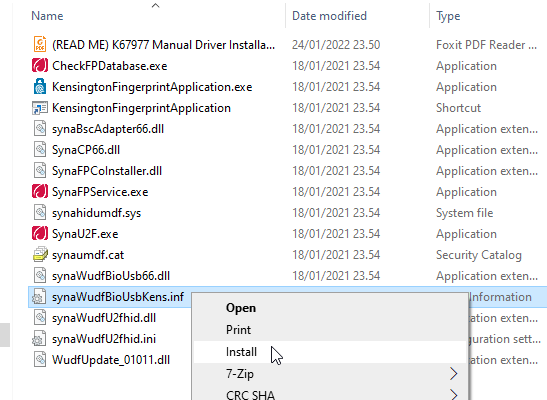
Back to the product. As these Kensington-people aren't really software-people, for installation they'll go with the absolutely bare minimum. There is no setup.exe or something any half-good Windows developer would be able to whip up. A setup which would execute pnputil -i -a synaWudfBioUsbKens.inf with free-of-charge tools like WiX would be rather trivial to do. But noooo. Nothing that fancy! They'll just provide a Zip-file of Synaptics drivers and instruct you to right click on the .inf-file:
To Windows users not accustomed to installing device drivers like that, it is a fast no-questions-asked -style process resulting in a popup:
When taking a peek into Device Manager:
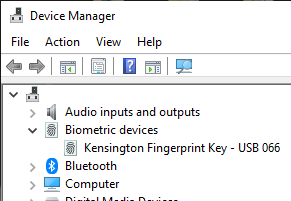
My gaming PC has a biometric device in it! Whoo!
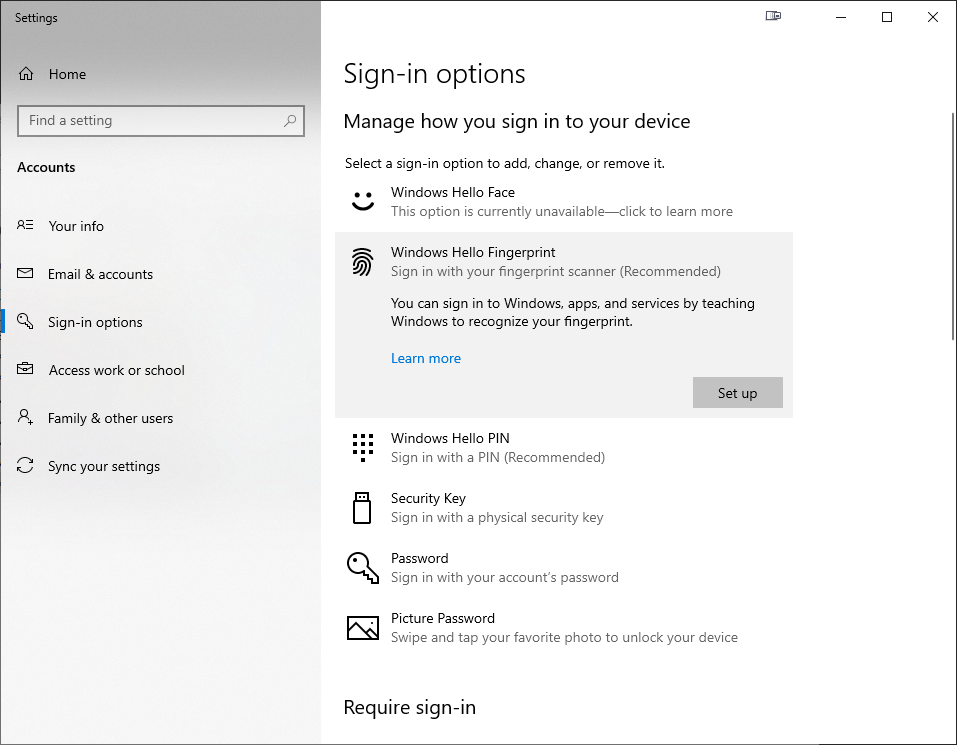
Obviously this isn't enough. Half of the job is done now. Next half is to train some of my fingers to the reader. Again, this isn't Apple, so user experience (aka. UX) is poor. There seems not to be a way to list trained fingers or remove/update them. I don't really understand the reasoning for this sucky approach by Microsoft. To move forward with this, go to Windows Settings and enable Windows Hello:
During the setup-flow of Windows Hello, you'll land at the crucial PIN-question:
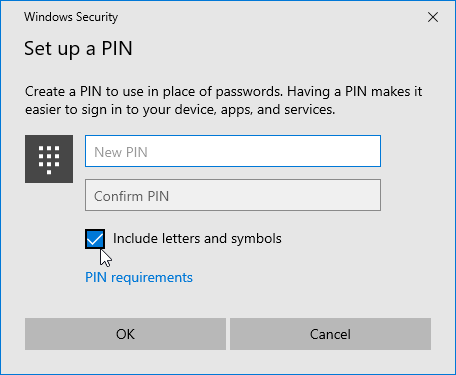
Remeber to Include letters and symbols. You don't have to stick with just numbers! Of course, if that suits your needs, you can.
After that you're set! Just go hit ⊞ Win+L to lock your computer. Test how easy it is to log back in. Now, when looking at my G-513 it has the required feature my iPhone 7, MBP and Lenovo has:

Nicely done!

