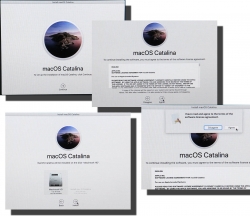
macOS Catalina upgrade from USB-stick
Saturday, November 2. 2019
macOS 10.15 Catalina is a controversial one. It caused lot of commotion already before launch.
Changes in 10.15 from previous versions
64-bit Only
For those using legacy 32-bit apps Catalina brought bad news, no more 32-bit. Me, personally, didn't find any problems with that. I like my software fresh and updated. Some noisy persons in The Net found this problematic.
Breaking hardware
For some, the installation simply bricked their hardware, see Limited reports of Catalina installation bricking some Macs via EFI firmware for more details. This is bad. When UEFI upgrade does this kind of damage, that's obviously bad. The broken macs can be salvaged, but it's very tricky as they won't boot.
Installer size
For that past many years, I've had my OS X / macOS USB-stick. I own couple of macs, so you'll never know when OS installer will be needed. For catalina:
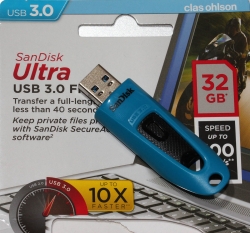
8 GiB wasn't enough! Whaaaaat? How big the installer has gone. So, I had to get a new one. Maybe it was about time. At the USB-stick shop I realized, that minimum size of a stick is 32 GiB. You can go to 128 or 256, but for example 8 isn't an option anymore.
Stupid alerts
The worst part in Catalina is the increased level of nagging:
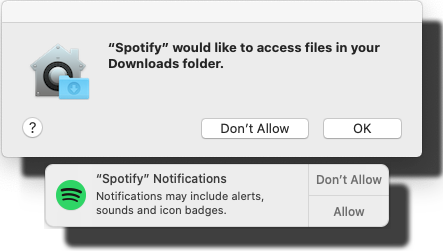
Every single app is asking me permission to do something. As usual, the questions are obscure at best. This same phenomenon is happening in Windows and Android. You're presented a question as a response to your action and the question has almost no relevance to anything you're trying to do. Yet the people designing these operating systems think it will vastly improve security to present user a Yes/No question without proper basis.
An example: For the above Spotify-question I chose to respond No. I have no idea why or for what reson Spotify needs to access any of the files in my Downloads-folder. That's so weird. Playing music doesn't mean you get to access my stuff. ![]()
Get macOS Catalina installer
The process has not changed. Go to App Store of your mac and choose macOS Catalina. It will take a while to download all of 8 GiB of it.
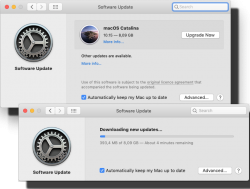
When the installer has downloaded and automatically starts, you need to quit the installer.
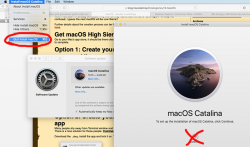
If you'd continue, the installer would upgrade your mac and at the final phase of upgrade, it would delete the precious macOS files. You need to create the USB-stick before upgrading. This is how couple past macOS versions save your disc space.
Create your USB-stick from command line
For reason I don't fully understand, DiskMaker X version 9 failed to create the stick for me. It did process the files and seemed to do something, but ultimately my USB-stick was empty, so I chose to do this the old fashioned way. Maybe there is a bug in the DiskMaker X and a new version has thata one fixed. Check it yourself @ https://diskmakerx.com.
Insert the USB-stick into the mac and from a command prompt, see what the physical USB-drive is:
diskutil list
My mac has the USB-stick as:
/dev/disk3 (external, physical)
The other drives are flagged either 'internal, physical', 'synthesized' or 'disk image'. None of them are suitable targets for creating Catalina installer stick.
Note:
Most of the commands below need root-access. So, either su - to a root-shell or prefix the commands with sudo.
Format the USB-stick. The obvious word of caution is: This will erase any data on the stick. Formatting doesn't wipe the sectors, but given a completely empty filesystem, your bits are quite lost there alone. Command is:
# diskutil partitionDisk /dev/disk3 1 GPT jhfs+ "macOS Catalina" 0b
The output is as follows:
Started partitioning on disk3

Unmounting disk

Creating the partition map

Waiting for partitions to activate

Formatting disk3s2 as Mac OS Extended (Journaled) with name macOS Catalina

Initialized /dev/rdisk3s2 as a 28 GB case-insensitive HFS Plus volume with a 8192k journal

Mounting disk

Finished partitioning on disk3

/dev/disk3 (external, physical):

   #:                    TYPE NAME                 SIZE       IDENTIFIER

   0:   GUID_partition_scheme                     *30.8 GB    disk3

   1:                     EFI EFI                  209.7 MB   disk3s1

   2:               Apple_HFS macOS Catalina       30.4 GB    disk3s2
Now your stick is ready, go transfer the macOS installer files to the stick. The newly formatted stick is already mounted (run command mount):
/dev/disk3s2 on /Volumes/macOS Catalina (hfs, local, nodev, nosuid, journaled, noowners)
Installer files are located at /Applications/Install\ macOS\ Catalina.app/Contents/Resources/:
cd /Applications/Install\ macOS\ Catalina.app/Contents/Resources/

./createinstallmedia \

  --volume /Volumes/macOS\ Catalina/ \

  --nointeraction
Output is as follows:
Erasing disk: 0%... 10%... 20%... 30%... 100%

Copying to disk: 0%... 10%... 20%... 30%... 40%... 50%... 60%... 70%... 80%... 90%... 100%

Making disk bootable...

Copying boot files...

Install media now available at "/Volumes/Install macOS Catalina"
Now your bootable USB-media is ready!
Upgrade
Boot your mac, press and hold your option-key pressed to access the boot-menu:
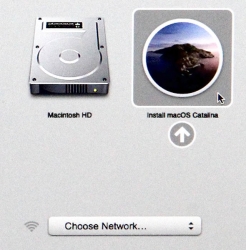
A menu will appear, select Install macOS to upgrade:
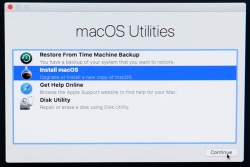
Only after those yes, I agree -clicks your upgrade kicks in. This is the part you can go grab a large cup of coffee, no user interaction is required for 30 to 60 minutes:
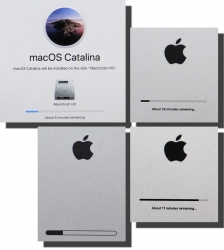
During the upgrade, there will be couple of reboots. My thinking is, that first the upgrade will do any hardware upgrades, then the actual macOS upgrade.
When you see the login-screen, your upgrade is done:
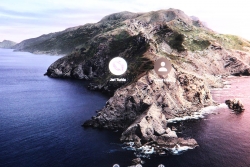
That's it! You're done. Enjoy your upgraded mac operating system.
