OS X El Capitan upgrade from USB-stick
Monday, October 12. 2015
Now that OS X El Capitan or version 11 is out, I'll do a refresh for the USB installation instructions.
The thing is ... the upgrade free, but it's big. The amount of downloading needed is easily 6+ GiB. I have 3 Macs to update and I don't want to download the huge package on all of them. So, let's figure out something smarter.
Step 0: Prerequisites
You'll need a bootable USB-stick with capacity of 8 GiB or more. All sticks should boot, but I have encountered some that didn't manage that.
USB-booting a Mac is trickier than a PC. The knowledge base article HT1948 states:
Intel-based Macs support starting from an external USB storage device's volume that:
- Has been formatted with a GUID partition type
- Contains an installation of Mac OS X 10.4.5 or later, or Mac OS X 10.5 or later, which is compatible with (or shipped with) the Mac that the USB device is connected to. Note: You should not use a version of Mac OS X that is earlier ("older") than the version your Mac shipped with.
So, if you just bought an USB-stick, the chances are, that it is MBR-partitioned FAT32. That's my experience of getting new ones. They are incompatible at their current state for USB-booting a Mac. Not to worry, that can be fixed!
If you happen to have a ready-made stick for any previous OS X version, that obviously can be loaded with new installer. You can even skip couple of things during the process as you don't have to reformat the stick.
Step 1: Go download
In your Apple menu (the top left apple-shaped thing at every program's menu), go for Software Update. An alternate is to click the App Store link:

Both options land you on the App Store main screen showing you something like this:

Click the image saying Free Upgrade (free as in beer):

Your Apple ID credentials are required for this free package. They'll keep track of who downloaded and what.
This is the part you'll wait for the download to complete:
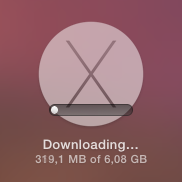
When it's all on your machine, the installer will automatically kick in.
Step 2: Go USB
Now that you have the thing in your drive, don't proceed with the upgrade.
When you reach this screen:
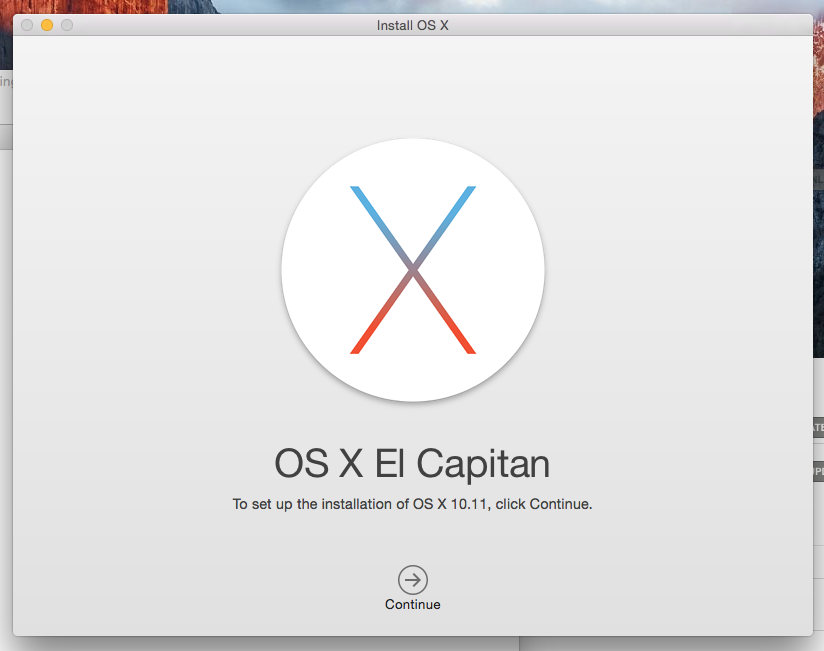
do not proceed! You can quit the installer, if you want:
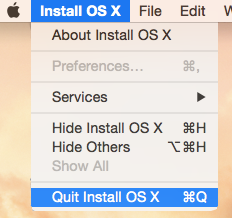
It won't delete the files from your drive. It is also possible to continue installing on that Mac, but don't do it yet. Take a copy of the files first.
Take at least a 8 GiB USB-storage. 4 won't do it, but any larger will. In my case, the USB-stick appeared as /dev/disk3. That may vary on your system. Also it is possible to use some GUI-tools on OS X to format your drives, but as a Linux-nerd I don't know about them.
It is very likely, that the disk is mounted and will display an icon on your desktop, and will appear on your Finder. The diskutil will unmount it automatically on partition, but I wanted to make sure and did:
# sudo diskutil umount /Volumes/MyUSBdrive
Next step is to make sure, the stick is in a Mac-format (this needs to be run as root, that's what the sudo is for). This will partition and format the entire stick into Mac-use:
# sudo /bin/bash

root# diskutil partitionDisk /dev/disk3 1 GPT jhfs+ "OS X El Capitan" 0b
It will say something like this as a result:
Started partitioning on disk3

Unmounting disk

Creating the partition map

Waiting for the disks to reappear

Formatting disk3s2 as Mac OS Extended (Journaled) with name OS X El Capitan

Initialized /dev/rdisk3s2 as a 7 GB case-insensitive HFS Plus volume with a 8192k journal

Mounting disk

Finished partitioning on disk3

/dev/disk3

#: TYPE NAME SIZE IDENTIFIER

0: GUID_partition_scheme *8.0 GB disk3

1: EFI EFI 209.7 MB disk3s1

2: Apple_HFS OS X El Capitan 7.7 GB disk3s2
Next thing is to confirm, that the volume with given name will be mounted:
root# ls -l /Volumes/

total 40

lrwxr-xr-x 1 root admin 1 Aug 29 12:24 Macintosh HD -> /

drwxrwxr-x 7 root wheel 306 Oct 10 12:41 OS X El Capitan
If it does, you're ready to go. Copy the thing into it:
root# cd /Applications/Install\ OS\ X\ El\ Capitan.app/Contents/Resources/

root# ./createinstallmedia --volume /Volumes/OS\ X\ El\ Capitan/ \

--applicationpath /Applications/Install\ OS\ X\ El\ Capitan.app/ \

--nointeraction
It will result in a lengthy process saying:
Erasing Disk: 0%... 10%... 20%... 30%...100%...

Copying installer files to disk...

Copy complete.

Making disk bootable...

Copying boot files...

Copy complete.

Done.
Step 3: Go update
Your stick is ready. This is the part you will be replicating to any of your Macs you want to upgrade.
Reboot the Mac and make sure to boot from the USB. This can be achieved by pressing down option-key during boot:


The official Apple instruction at knowlegebase article HT1948 states:
To start from a USB storage device that meets the above requirements:
- connect the device
- restart
- immediately press and hold the Option key to access Startup Manager
If you successfully followed the steps, you will end up in Mac boot manager:
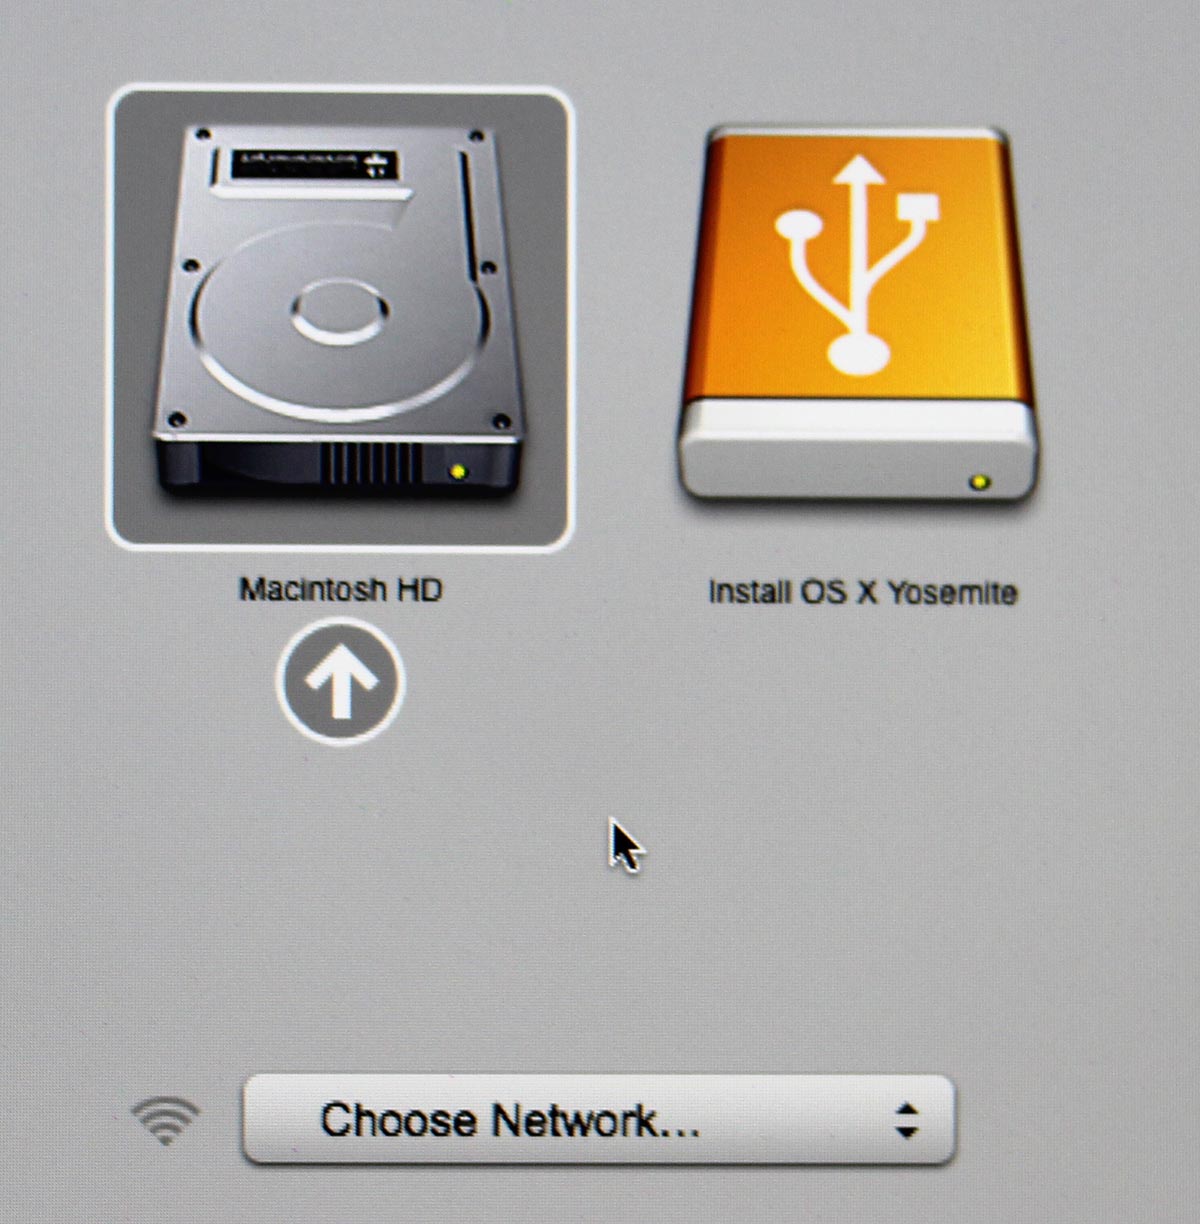
In that, you pretty much select the drive you want to boot from. In this particular case, making a choice for the recently prepared USB-stick will be a good one. Click the orange "Install OS X El Capitan". Both the gray HD and the network selection are there to confuse you. Ignore them and double click the USB-drive.
Most steps in this upgrade will include lot of waiting. Make sure that you have reserved couple of hours for the upgrade. Screens like this will become familiar to you:

Most time estimates are wild guesses. A 9 minute wait in reality is something like 45 minutes. Eventually the USB-stick finishes booting, and you will end up in a screen saying "To set up the installation of OS X, click Continue". Most screens will refer your upgrade as an install. It is nerve-wrecking thing, because you don't know if it is going to wipe your settings and data, or do a nice upgrade what you'd be expecting. My experience is, that it will upgrade nicely, but it won't say it properly.
Then there is a license screen which you must agree to continue. Then land on OS X Utilities. One thing you can do with a bootable stick is to upgrade or install an OS X:

When you select to go for upgrade or install, there is a welcome to OS X El Capitan screen. Click Continue. Yet another license screen appears. Click Agree and for the confirmation dialog: I have read and agree to the terms of the software license agreement, Agree. Select the install/upgrade destination as the one having a hard drive icon Macintosh HD (typical installations have that), then click Install. As the first thing, the installer/upgrader will prepare for the operation and then go for the real thing:
This is the most time-consuming part. After a minute or so, there will be an not-so-accurate estimate of time remaining for the preparation. When it has run its course, the actual installer will start. So if the screen says 1 minute left, do not believe it for a second. In my iMac, one cup of coffee doesn't do it. You can easily cook and eat a meal and then have the coffee while the installer/upgrader runs. Especially the final phase saying "About a second remaining" will take ages. My hardware isn't especially old or slow, but ... the process is.
Step 4: Finishing touches
After you've done your waiting. A reboot will result. At this point you'll need to login into your precious upgraded Mac with your local user account.
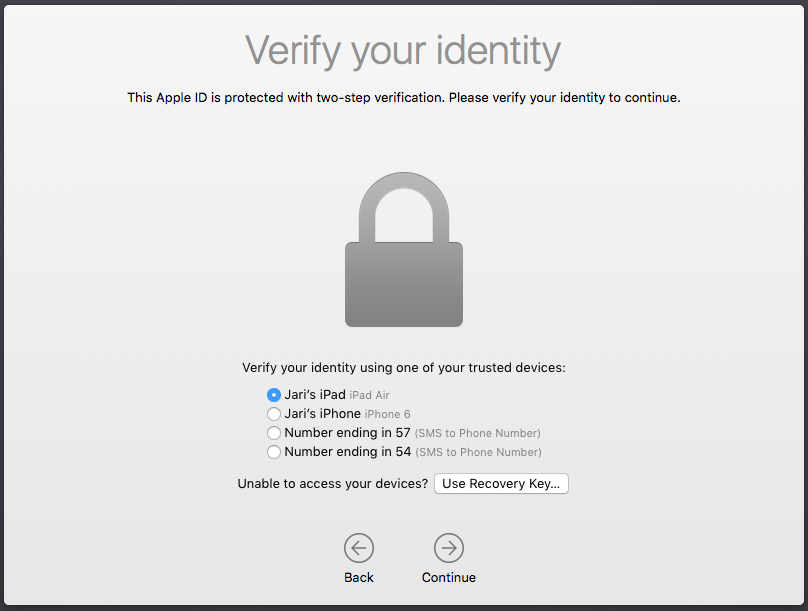
On successful login, you will end up in the OOBE (or out-of-box experience). Apple makes an effort to not allow stolen hardware to be used and they pretty much require you to login to Apple ID during install:
Since I have a 2-factor authentication enabled for my Apple ID, a 2FA-screen will appear during the process:
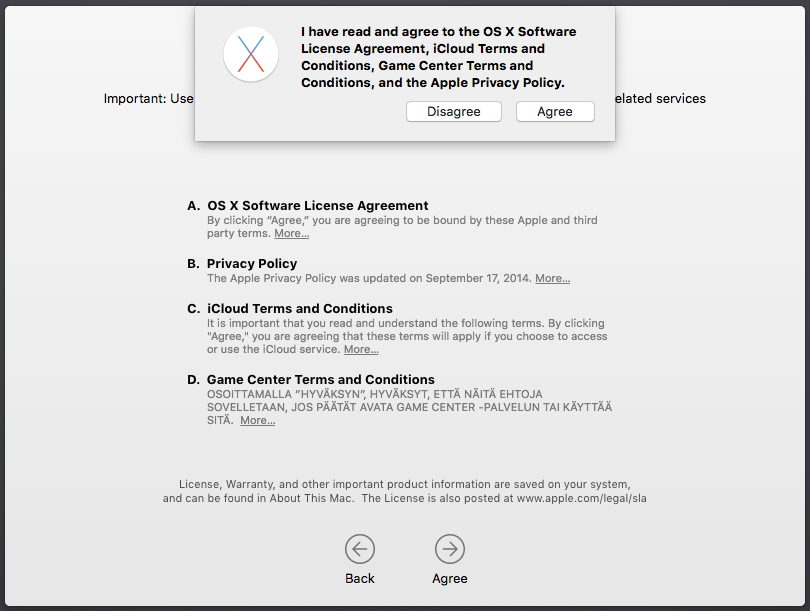
There are steps about sending your usage data to Apple. Then yet another license screen which you have to agree twice. First on the bottom screen and then on the pop-up that will appear. So if you want to complain later, they'll just say "but you did agree to our terms and conditions". It will look like this:
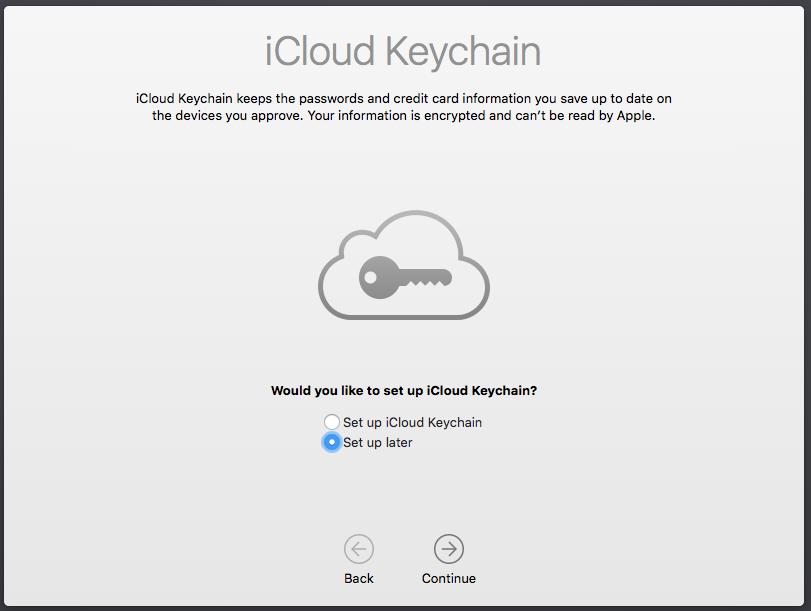
The last question you'll need to answer is about setting up iCloud Keychain. I choose not to share my passwords into any cloud services, but at this point you'll have the option to enable Keychain:
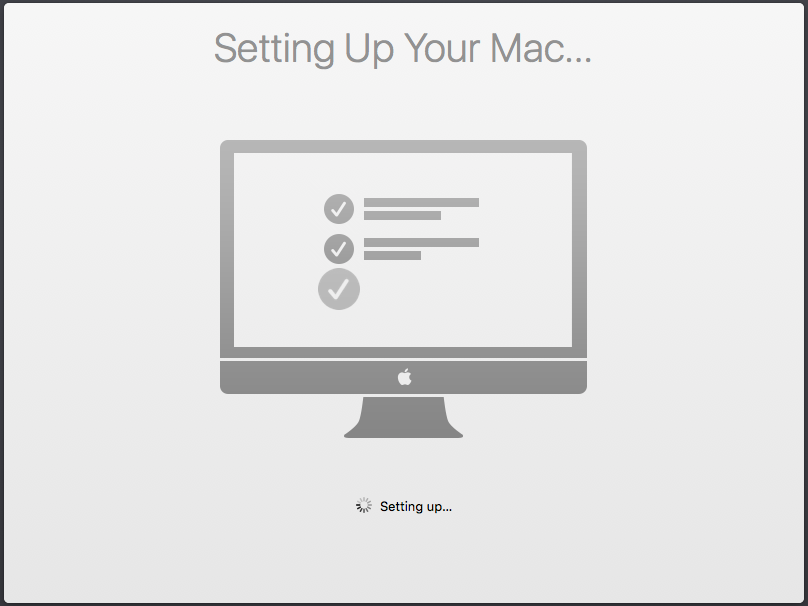
Little bit of setting up ... this one won't take long. And then you're pretty much done. Finally your upgrade is ready!
Step 5: Done!
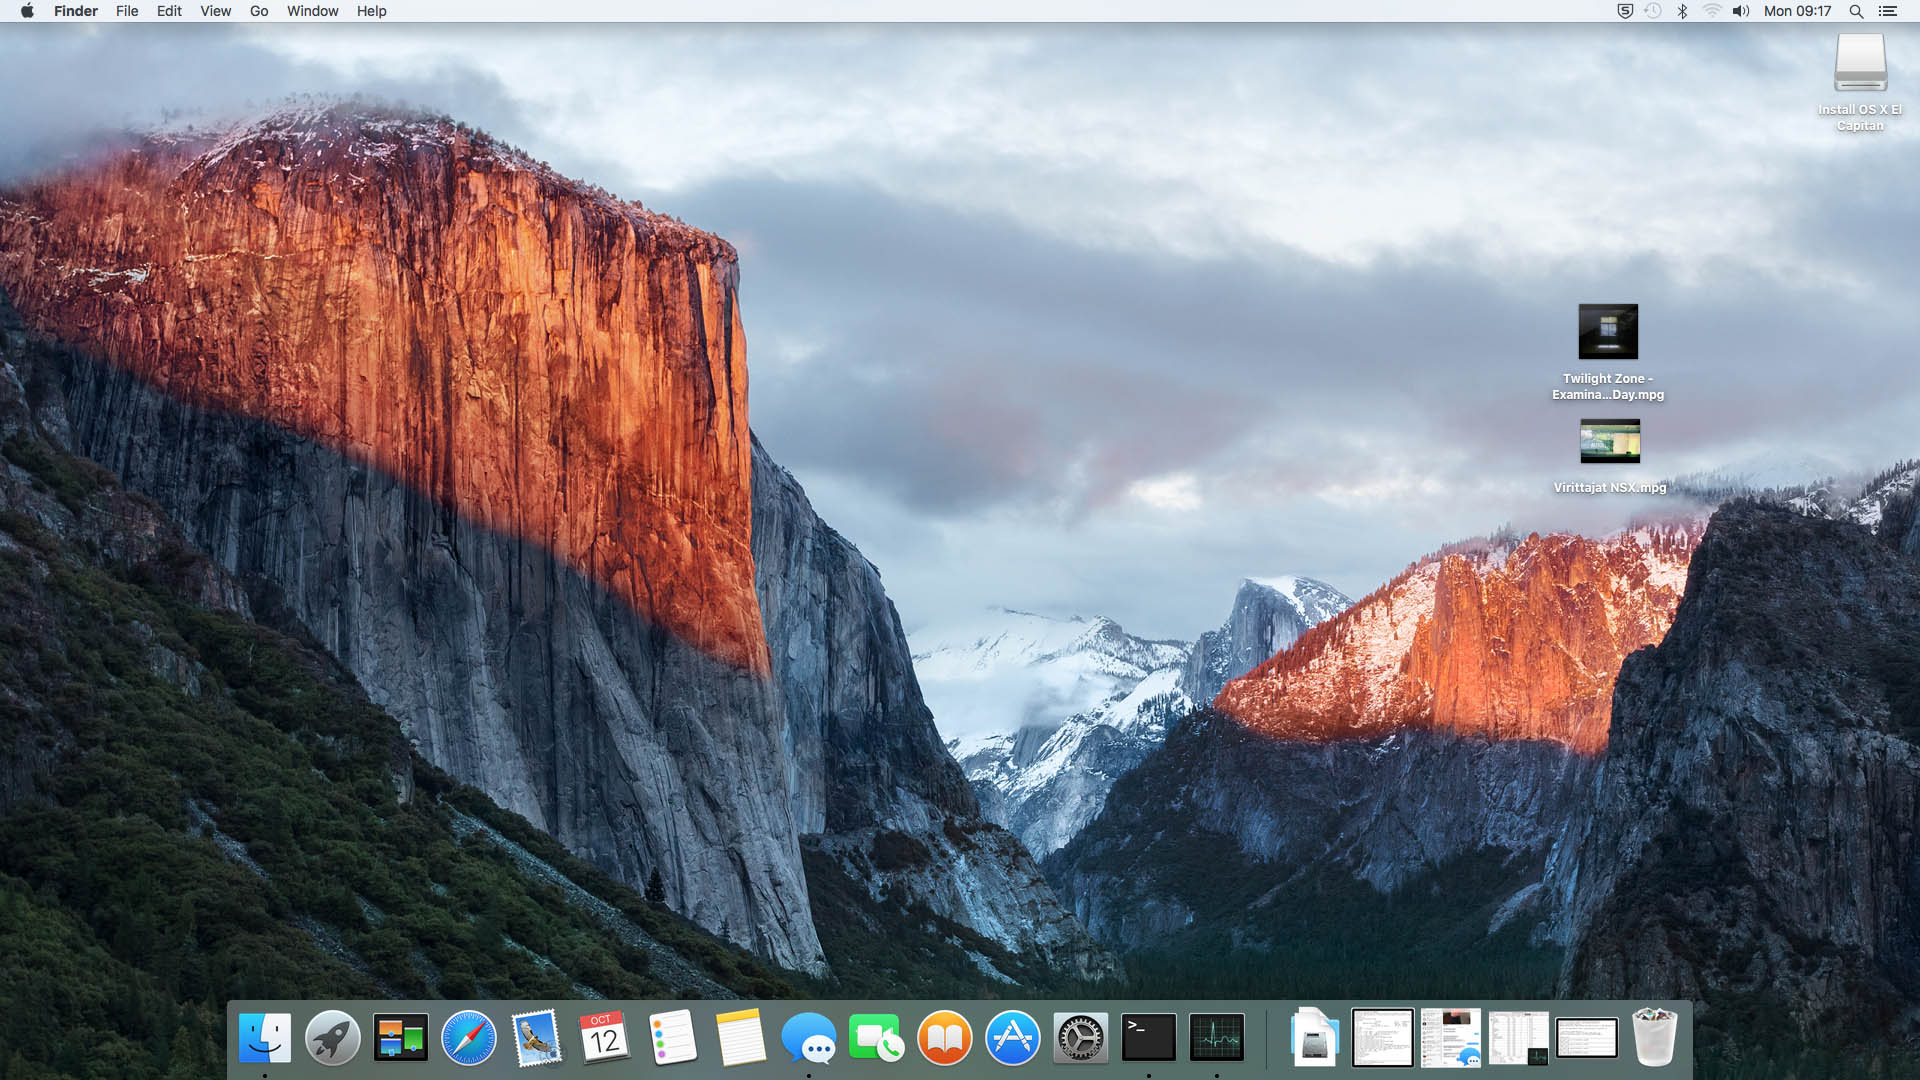
One of the first things I did, was eject my USB-stick (there were couple other Macs to be updated, too):
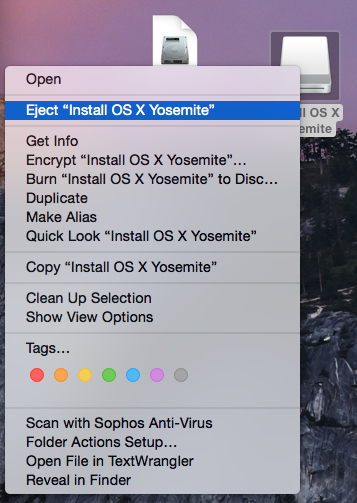
At this point, you can continue using your precious Mac.
Aftermath
I updated anyway, as a nerd I like the latest stuff running on my computers. I should yield less problems and there needs to be some progress. I find myself stating the same thing in couple of my blog posts, "it wasn't worth it, but I did it anyway". With computers, it never will result any good to stand still and ignore future.
HighPoint RocketRAID 620 Linux driver
Wednesday, May 27. 2015
I've had my run of bad things with Intel soft-RAID earlier. The constant RAID-verify -runs made me want stop using it. As its my Windows-box, I just wanted something that is hardware-based, reasonably fast and affordable. My choice is HighPoint RocketRAID 620.
For a switch-over -project I had a simple plan:
- Clonezilla the existing RAID into an another drive which I could plug into a motherboard for the duration of the move
- Un-configure the Intel soft-RAID at the motherboard
- Plug in the RocketRAID-card
- Change the hard-drive cables from motherboard RAID-connectors into RocketRAID-card
- Configure a new RAID-1 mirror wit RocketRAID
- Clonezilla the data back to the newly created RAID-1 volume
- Be happy and continue computing
Guess what. Things fell trough at point #6. I was using an USB-bootable Clonezilla live on my first data move and obviously was planning to use it for the second one too. Whichever Linux-distro they use as the base for Clonezilla, they don't have the driver for the RAID-card. Darn!
The next best thing is a commercial distro for Clonezilla, Parted Magic. They used to be free (as in beer and speech), but they went commercial. The price is $9 USD for a single download, so I got it. And guess what again! They don't support Highpoint RocketRAID either. 
I did ask about it in their support forums (closed to registered users only, sorry). And they replied:
We do not do "random" out-of-tree drivers because commonly these are supported by their vendors in a haphazard way. E.g. in the HighPoint case the latest driver is 3 versions behind our kernel version.
Luckily the vendor is providing the partial source code for the driver. There is a binary-part of in it and it is kind-of open-source. The biggest problem seems to be, that it doesn't build on any reasonably modern Linux.
By googling, I found that somebody else had the same process of thought and there was a Github project for the upgraded driver. Unfortunately that too was 3 years old and wouldn't build. Also it was for the vendor driver 1.1, and they already had 1.2 out.
In this imperfect world everything that you need to be done properly, you need to do by yourself. So, here it is: https://github.com/HQJaTu/rr62x
You can help yourselves with that one.
This is how it looks on my dmesg:
[ 85.518732] rr62x: module license 'Proprietary' taints kernel.

[ 85.518737] Disabling lock debugging due to kernel taint

[ 85.519709] rr62x:RocketRAID 62x SATA controller driver v1.2 (Jul 1 2012)
[ 85.735773] rr62x:adapter at PCI 3:0:0, IRQ 16

[ 85.950487] rr62x:[0 0 ] start port.

[ 85.950488] rr62x:[0 0 ] start port hard reset (probe 1).

[ 86.150712] rr62x:[0 1 ] start port.

[ 86.150712] rr62x:[0 1 ] start port hard reset (probe 1).

[ 89.093649] rr62x:[0 0 ] start port soft reset (probe 1).

[ 89.841048] rr62x:[0 1 ] start port soft reset (probe 1).

[ 90.501075] rr62x:[0 0 ] port started successfully.

[ 90.501078] rr62x:[0 0 0] device probed successfully.

[ 90.791364] rr62x:[0 1 ] port started successfully.

[ 90.791369] rr62x:[0 1 0] device probed successfully.

[ 90.806570] scsi host13: rr62x

[ 90.806870] scsi 13:0:0:0: Direct-Access HPT DISK_13_0 4.00 PQ: 0 ANSI: 5

[ 90.809711] sd 13:0:0:0: [sdd] 2930114560 512-byte logical blocks: (1.50 TB/1.36 TiB) [ 90.809847] sd 13:0:0:0: [sdd] Write Protect is off

[ 90.809852] sd 13:0:0:0: [sdd] Mode Sense: 2f 00 00 00

[ 90.809909] sd 13:0:0:0: [sdd] Write cache: disabled, read cache: enabled, doesn't support DPO or FUA

[ 90.832339] sdd: unknown partition table

[ 90.832903] sd 13:0:0:0: [sdd] Attached SCSI disk
I've tested that with Linux 4.0.4 and 3.19.3. It builds and works on both. Any comments, Github forks, pull requests, etc. are welcome. I will get back to the actual disk cloning project later, the driver won't help unless it is used properly in an operating system.
Windows 10 preview - My experiences
Wednesday, November 26. 2014
Windows 10 Technical Preview has been out for two months now on Windows Insider Program. I installed it pretty much when it was released into a virtual machine and has been running a number of different software, that I'd use anyway on it.
The install process is pretty much the same than it has been since Windows 7. I created a virtual 20 GiB drive (which later turned out to be not enough) and chose to install on the non-initialized drive. No surprises there. This is what runs as out-of-box-experience:
It looks very much like Windows 8.1. Notice how the window border is quite thin. This is something Microsoft hasn't done in their operating systems ever before. Internet Explorer is still version 11 as in Windows 8.1 and the reported user-agent string is: Mozilla/5.0 (Windows NT 6.4; WOW64; Trident/7.0; rv:11.0) like Gecko.
It sees the virtual CPU incorrectly as a Xeon, however the physical CPU is of Sandy Bridge microarchitecture: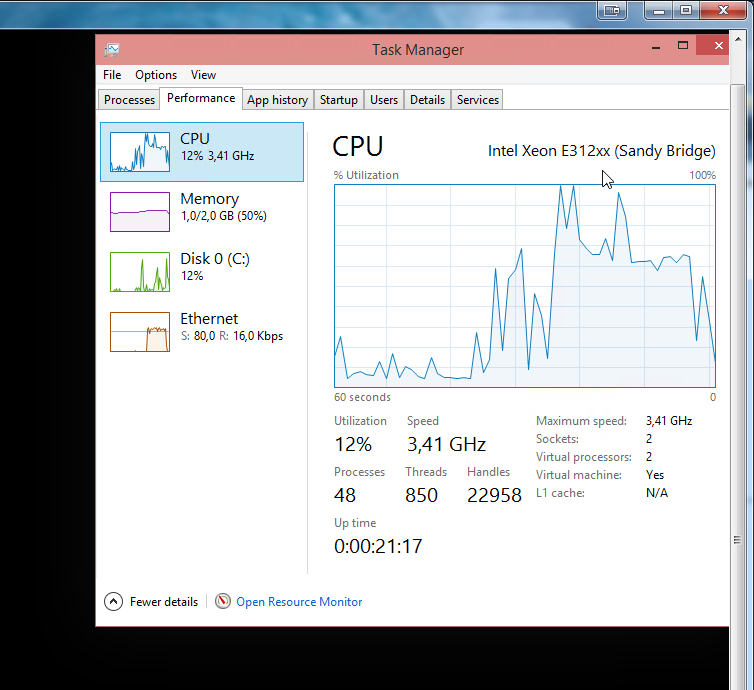
![]()
Finally the start menu is something, that I would like to use. Microsoft had a decent start menu on Windows 7, they dropped it for Windows 8 and restored a crappy version for Windows 8.1. This time it works and the stupid full-screen-apps -mode is gone. The start menu will contain both the classic and tile-based apps at the same time:
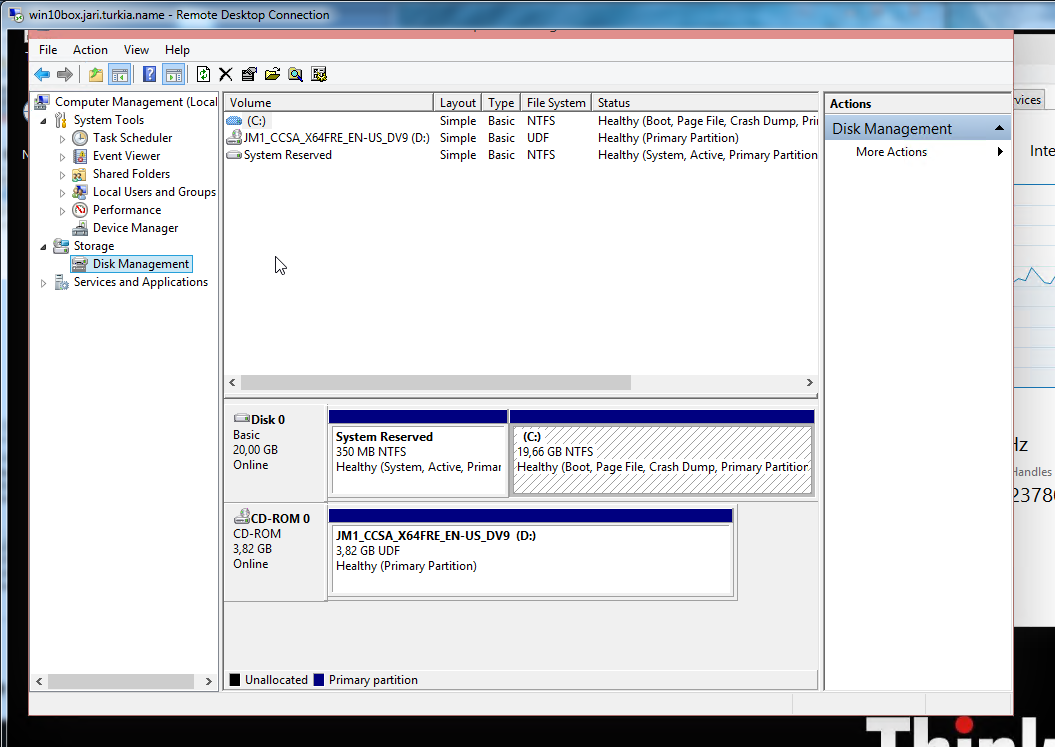
This is what computer properties and disc management look like. Pretty much the same than in Windows 7:
Also control panel is unchanged: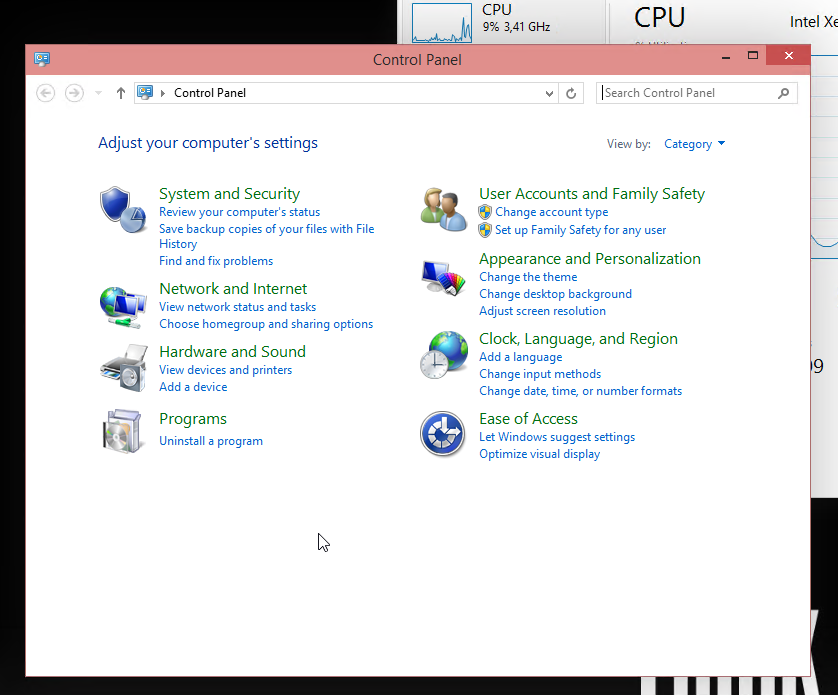
The version is displayed as Windows NT 6.4, but apparently it is going to change and the version number will be 10. Also IPv6 works as expected: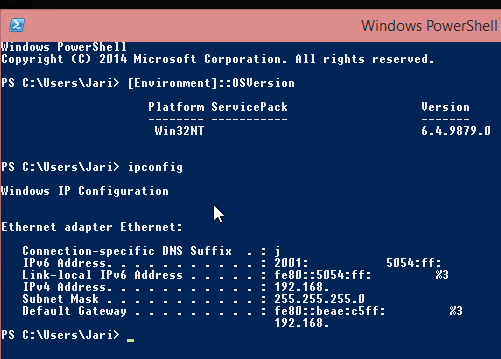
I don't know what the idea with forcing automatic updates on, but luckily there is a way to change that. The GUI won't let you touch it, but a direct registry hack to change it: How to disable Automatic Updates in windows 10 Tech Preview. I changed the HKEY_LOCAL_MACHINE\SOFTWARE\Microsoft\Windows\CurrentVersion\WindowsUpdate\Auto Update value AUOptions into 3 (Automatically download and notify of installation). This is a change for previous Windowses, which are using a different registry key. See Article ID 328010 - How to configure automatic updates by using Group Policy or registry settings about it. Anyway, this is how it looks like: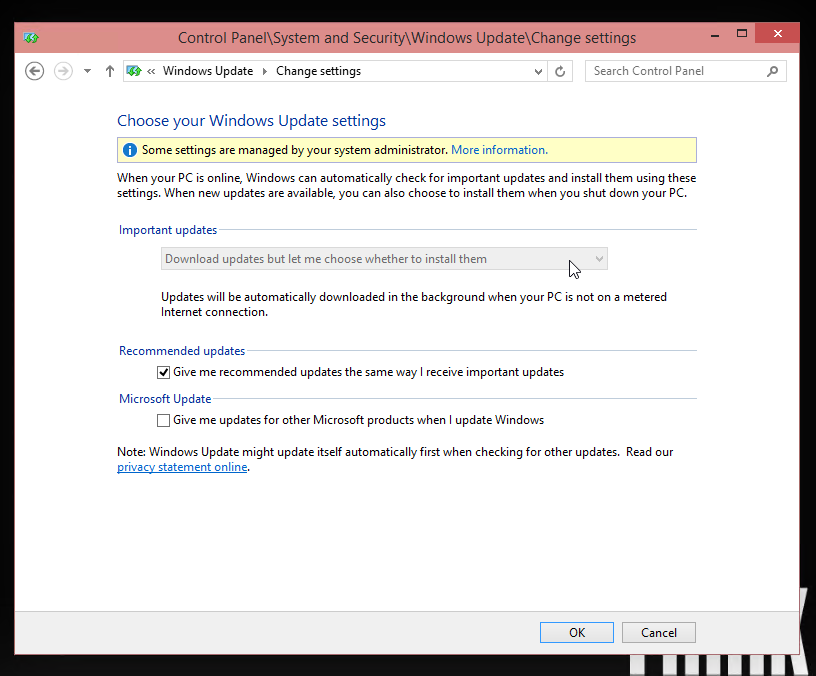
One other thing I also changed, was to speed up the preview image process. As a default, new installations are on a slow track, but I wanted to get the new versions a bit faster. This is a bit funny thing, the only way to change it is to go for a new-style full-screen settings (luckily this runs in a window). There doesn't seem to be a control panel -setting for this. For details see: How to Stay Up to Date and Get the Latest Windows 10 Technical Preview Builds. This is how I changed the setting:![]()
To upgrade into a newer build (9860 in this case) it goes something like this. I found the process quite amusing:

When the slow process completes, the bottom right corner will state the new version:![]()
During the testing I haven't had many issues, but here is one:![]()
For some reason system interrupts started hogging lot of CPU-resources. That is something I've never seen on any Windows. After a nice reboot, the problem disappeared. That's what you get from running beta operating system.
Also, my original 20 GiB of disc space ran out after couple of new build upgrades. This is what happened:![]()
There wasn't much else to do, except to shut down the Windows 10 instance. Go to virtualization host (Linux) and add 10 GiB of space into the virtual drive:
qemu-img resize Windows\ 10.qcow2 +10G
As no Windows version is capable of actually expanding the partition and file system on a grown drive, I mounted an ISO-image of GParted and booted the virtual machine from that. It could expand the system partition in a couple of seconds (it is a really good partition manager software). After having 30 GiB of space, the latest build upgraded without problems.
My thanks goes to F-Secure. I've been running their new FS Protection (still on beta) on my Windows 10 and it works really well.
Microsoft Windows GPT support or "Excuse me! Which partition?"
Sunday, November 9. 2014
During a regular day I run a number of different computers. One day I wanted to take a copy of my Wall-E DVD and transfer it to iPad for later viewing. Since I sync that iPad to a particular Mac, I had to transfer the H.264 file of the movie there. As this was a one time thing and I happened to have a suitable USB-stick at my desk, I chose to go the old fashioned way. Copy the file to the stick and walk with the stick to the other machine. Except ... I couldn't copy the file to the USB stick. The stick was initialized with Mac OS X and contained a GUID partition table (or GPT). It completely refused to work with my Windows 7. What! Really?
The official word from Windows and GPT FAQ is:
Q: Can Windows 7, Windows Vista, and Windows Server 2008 read, write, and boot from GPT disks?
A: Yes, all versions can use GPT partitioned disks for data. Booting is only supported for 64-bit editions on UEFI-based systems.
Sorry, but I beg to differ. There seems to be some level of support, but ... not to the full extent. We're talking about Linux or OS X -level support here.
The stick looks like this during entire process:
# parted /dev/sde print
Model: JetFlash Transcend 8GB (scsi)
Disk /dev/sde: 8032MB
Sector size (logical/physical): 512B/512B
Partition Table: gpt
Disk Flags:Number Start End Size File system Name Flags
1 20.5kB 210MB 210MB fat32 EFI System Partition boot
2 210MB 8031MB 7821MB fat32 Video
And this is how my Mac saw the situation:
$ mount
/dev/disk2s2 on /Volumes/VIDEO (msdos, local, nodev, nosuid, noowners)
This is what the Disk Manager of my Windows 7 said:
All looks good, except the OS failed to automatically assign a drive letter to the partition. No biggie, I can manually add one: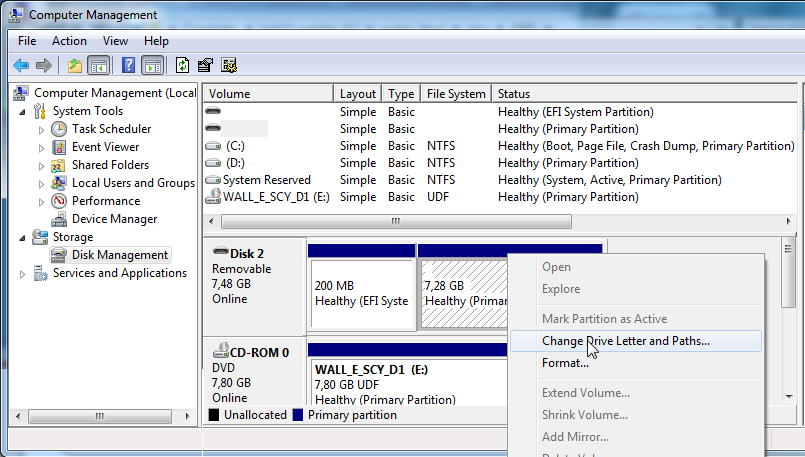
... except, I couldn't: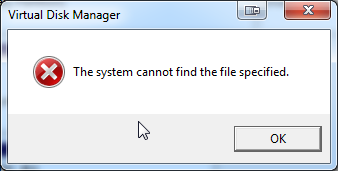
The error message of The system cannot find the file specified gave me an impression, that things aren't rolling my way.
At this point it wasn't about copying the file, but finding out what was going on. I had a Windows 8.1 right next to my Windows 7, so I plugged the USB into that one. This is what it saw: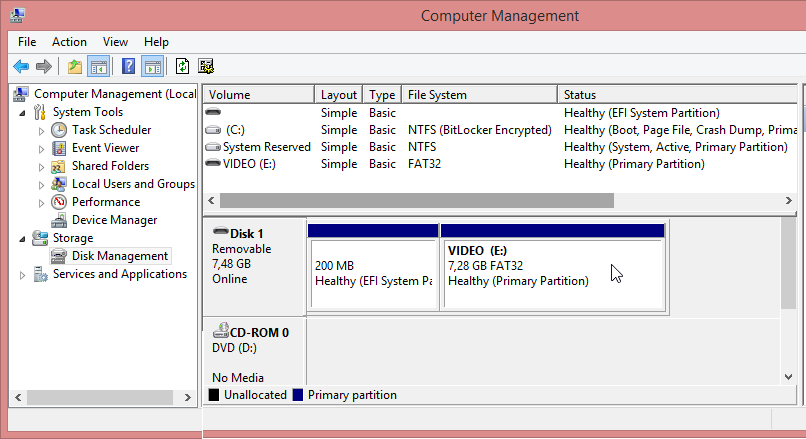
But wait! There was something fishy about it. The drive capacity didn't match. To test it, I copied a file to the drive:![]()
... and confirmed the Windows 8.1 error on a Linux:
# mount /dev/sde1 /mnt/usb/
# ls -l /mnt/usb/
total 1
-rwxr-xr-x. 1 root root 0 Oct 30 11:57 juttuhomma.txt
drwxr-xr-x. 2 root root 512 Oct 30 11:56 System Volume Information
Yep. The drive should be sde2, not 1!  On a mac it was disk2s2, which would be equivalent. But a Windows 8.1 assigned the drive E: to 2nd partition! Nice. Apparently the support for GPT isn't that great.
And for those screaming "Piracy!" here's the pic:
According to Directive 2001/29/EC only "communication to the public" or "making available to the public" are limited. As I own a copy and am not publishing anything, ripping the encrypted MPEG-2 stream, converting it into H.264 and viewing it from my iPad is fully within my rights.
Fedora 20: Services failing to start on boot
Thursday, October 23. 2014
Something funny happened to my Fedora 20 installation. Stuff that used to work stopped doing so. I understand, that I'm dealing with "bleeding edge" Linux-distro, but it kind of starts to annoy me, when things don't get back like they were.
Here is one:
# systemctl status iscsi.service --all
iscsi.service - Login and scanning of iSCSI devices
Loaded: loaded (/usr/lib/systemd/system/iscsi.service; enabled)
Active: inactive (dead)
start condition failed at Thu 2014-07-17 12:23:18 EEST; 1min 24s ago
none of the trigger conditions were met
Docs: man:iscsid(8)
man:iscsiadm(8)
Jul 17 12:23:17 box systemd[1]: Started Login and scanning of iSCSI devices.
Jul 17 12:23:18 box systemd[1]: Started Login and scanning of iSCSI devices.
Aow come on! "none of the trigger conditions were met"!! I don't know what changed with the precious trigger conditions. Basic checks didn't reveal anything noteworthy:
# systemctl is-active iscsi.service
active
# systemctl list-dependencies iscsi.service
iscsi.service
There are some other people suffering from the same issue. Fedora 20 ypbind won’t start at boot. NIS logins unavailable immediately after boot (ypbind service NOT started). and Bug 1027114 - nfs mount fails during boot because network is not ready point me to the direction of service trying to start too early. There is a document explaining how to run services only after network is up (Running Services After the Network is up), but the point is: somebody goofed! This used to work.
I tried a classic off/on -trick:
# systemctl disable iscsi.service
# systemctl enable iscsi.service
... no avail. Still after a boot I have a list of failing services:
# systemctl --failed
UNIT LOAD ACTIVE SUB DESCRIPTION
arpwatch.service loaded failed failed Arpwatch daemon which keeps track of ether
dhcpd.service loaded failed failed DHCPv4 Server Daemon
iscsi.service loaded failed failed Login and scanning of iSCSI devices
LOAD = Reflects whether the unit definition was properly loaded.
ACTIVE = The high-level unit activation state, i.e. generalization of SUB.
SUB = The low-level unit activation state, values depend on unit type.
3 loaded units listed. Pass --all to see loaded but inactive units, too.
To show all installed unit files use 'systemctl list-unit-files'.
Finally I chose to add the After=network-online.target -line to my service description. First the service description needs to be copied from /usr/lib/systemd/system/ into /etc/systemd/system/. The rule is very simple: don't edit files under /usr/ and it applies also here. Systemd has a built in fall-back mechanism. If your own tailor made file doesn't exist in /etc/, it will take the default one. It is good to have that, but better if no such tinkering wasn't needed at all. What if there is an update to the service-description? I have to manually update my copied file.
So, I did a:
# cd /etc/systemd/system/
# cp /usr/lib/systemd/system/iscsi.service .
and edited the file. I added one line to Unit-description:
[Unit]
After=network-online.target
To be absolutely clear: I didn't touch the other lines.
Since systemd doesn't pick up the changes very easily, I did a:
# systemctl disable iscsi.service
# systemctl enable iscsi.service
after status informed, that my change was in place:
# systemctl status iscsi
iscsi.service - Login and scanning of iSCSI devices
Loaded: loaded (/etc/systemd/system/iscsi.service; enabled)
Notice how, the service description is now under /etc/.
Anyway, that did the trick for all of my failing services. Now they start nicely on bootup.
OS X Yosemite upgrade from USB-stick
Saturday, October 18. 2014
Latest OS X version Yosemite or 10 is out. Funny thing, the operating system 10 has a version 10 released.
The thing is ... it's free, but it's big. The amount of downloading needed is easily 5+ GiB. When I downloaded mine, it said 6 hours of load time. On my 250 Mbit/s fiber! Argh. It downloaded a hour or so and choked completely. Argh, argh! When I resumed, it picked a better server and I got rest of the file in 10 minutes or so. Anyway, I absolutely, positively don't want to do that on all of my Macs. So, let's figure out something smarter on that.
The sources of my information are:
- How to Burn OS X Yosemite to a USB Flash Drive
- DISKUTIL(8) - BSD System Manager's Manual
- Disk Management From the Command-Line, Part 2
- Starting from an external USB storage device (Intel-based Macs)
Step 0: Prerequisites
USB-booting a Mac is trickier than a PC. The knowledge base article HT1948 states:
Intel-based Macs support starting from an external USB storage device's volume that:
- Has been formatted with a GUID partition type
- Contains an installation of Mac OS X 10.4.5 or later, or Mac OS X 10.5 or later, which is compatible with (or shipped with) the Mac that the USB device is connected to. Note: You should not use a version of Mac OS X that is earlier ("older") than the version your Mac shipped with.
So, if you just bought an USB-stick, the chances are, that it is MBR-partitioned FAT32. That's my experience of getting new ones. They are incompatible at their current state for USB-booting a Mac. Not to worry, that can be fixed!
Step 1: Go download
In your Apple menu (the top left apple-shaped thing at every program's menu), go for Software Update. Yosemite should be there as a free download from App Store. Select it and wait ... wait forever!
In the classic Commodore 64 game Impossible Mission the phrase was "Another visitor! Stay a while; stay forever!". [Actually the mission was possible. As the game was pretty good, I completed it a number of times.]
Step 2: Go USB
Now that you have the thing in your drive, don't proceed with the upgrade.
When you reach this screen: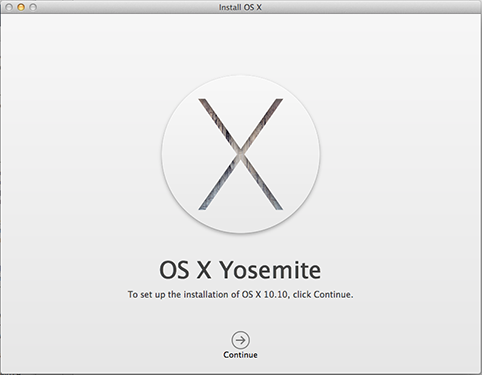
do not proceed! You can actually quit the installer, it won't delete the files from your drive.
Take at least a 8 GiB USB-storage. 4 won't do it, but any larger will. In my case, the USB-stick appeared as /dev/disk3. That may vary on your system. Also it is possible to use some GUI-tools on OS X to format your drives, but as a Linux-nerd I don't know about them.
To make sure, the stick is in a Mac-format (this needs to be run as root, that's what the sudo is for). This will partition and format the entire stick into Mac-use:
# sudo /bin/bash
root# diskutil partitionDisk /dev/disk3 1 GPT jhfs+ "OS X Yosemite" 0b
It will say something like this as a result:
Started partitioning on disk3
Unmounting disk
Creating the partition map
Waiting for the disks to reappear
Formatting disk3s2 as Mac OS Extended (Journaled) with name OS X Yosemite
Initialized /dev/rdisk3s2 as a 7 GB case-insensitive HFS Plus volume with a 8192k journal
Mounting disk
Finished partitioning on disk3
/dev/disk3
#: TYPE NAME SIZE IDENTIFIER
0: GUID_partition_scheme *8.0 GB disk3
1: EFI EFI 209.7 MB disk3s1
2: Apple_HFS OS X Yosemite 7.7 GB disk3s2
Next thing is to confirm, that the volume with given name will be mounted:
root# ls -l /Volumes/
total 40
lrwxr-xr-x 1 root admin 1 Oct 17 13:27 Macintosh HD -> /
drwxrwxr-x 7 root wheel 306 Oct 18 13:12 OS X Yosemite
If it does, you're ready to go. Copy the thing into it:
root# cd "/Applications/Install OS X Yosemite.app/Contents/Resources"
root# ./createinstallmedia --volume /Volumes/OS\ X\ Yosemite/ \
--applicationpath /Applications/Install\ OS\ X\ Yosemite.app \
--nointeraction
It will result in a lengthy process saying:
Erasing Disk: 0%... 10%... 20%... 30%...100%...
Copying installer files to disk...
Copy complete.
Making disk bootable...
Copying boot files...
Copy complete.
Done.
Step 3: Go update
Your stick is ready. This is the part you will be replicating to any of your Macs you want to upgrade.
Reboot the Mac and make sure to boot from the USB. This can be achieved by pressing down option-key during boot:
The official Apple instruction at knowlegebase article HT1948 states:
To start from a USB storage device that meets the above requirements:
- connect the device
- restart
- immediately press and hold the Option key to access Startup Manager
If you successfully followed the steps, you will end up in Mac boot manager:
In that, you pretty much select the drive you want to boot from. In this particular case, making a choice for the recently prepared USB-stick will be a good one. The network selection is there to confuse you. Ignore it and double click the USB-drive.
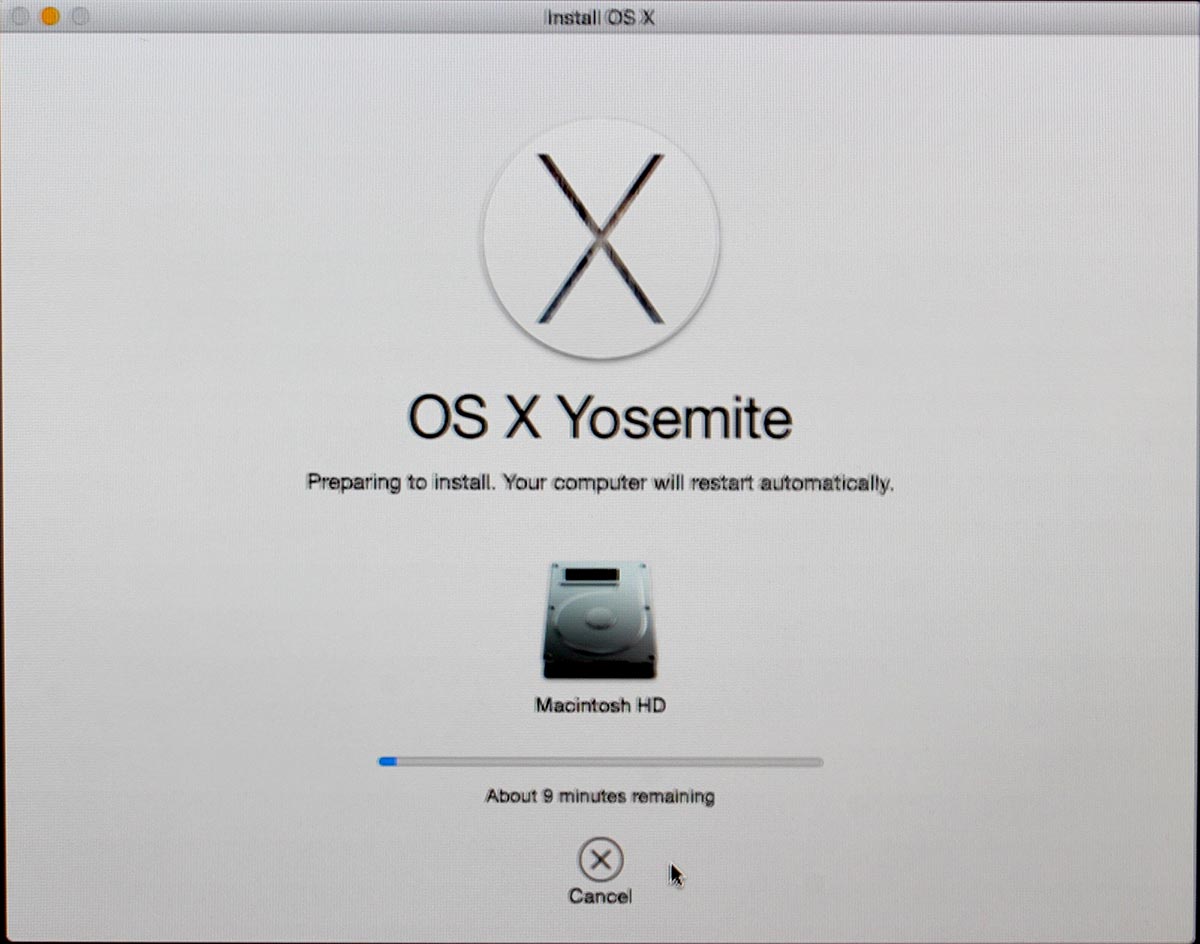
Most steps in this upgrade will include lot of waiting. Make sure that you have reserved couple of hours for the upgrade. Screens like this will become familiar to you:
Most time estimates are wild guesses. A 9 minute wait in reality is something like 45 minutes. Eventually the USB-stick finishes booting, and you will end up in a screen saying "To set up the installation of OS X, click Continue". Most screens will refer your upgrade as an install. It is nerve-wrecking thing, because you don't know if it is going to wipe your settings and data, or do a nice upgrade what you'd be expecting. My experience is, that it will upgrade nicely, but it won't say it properly.
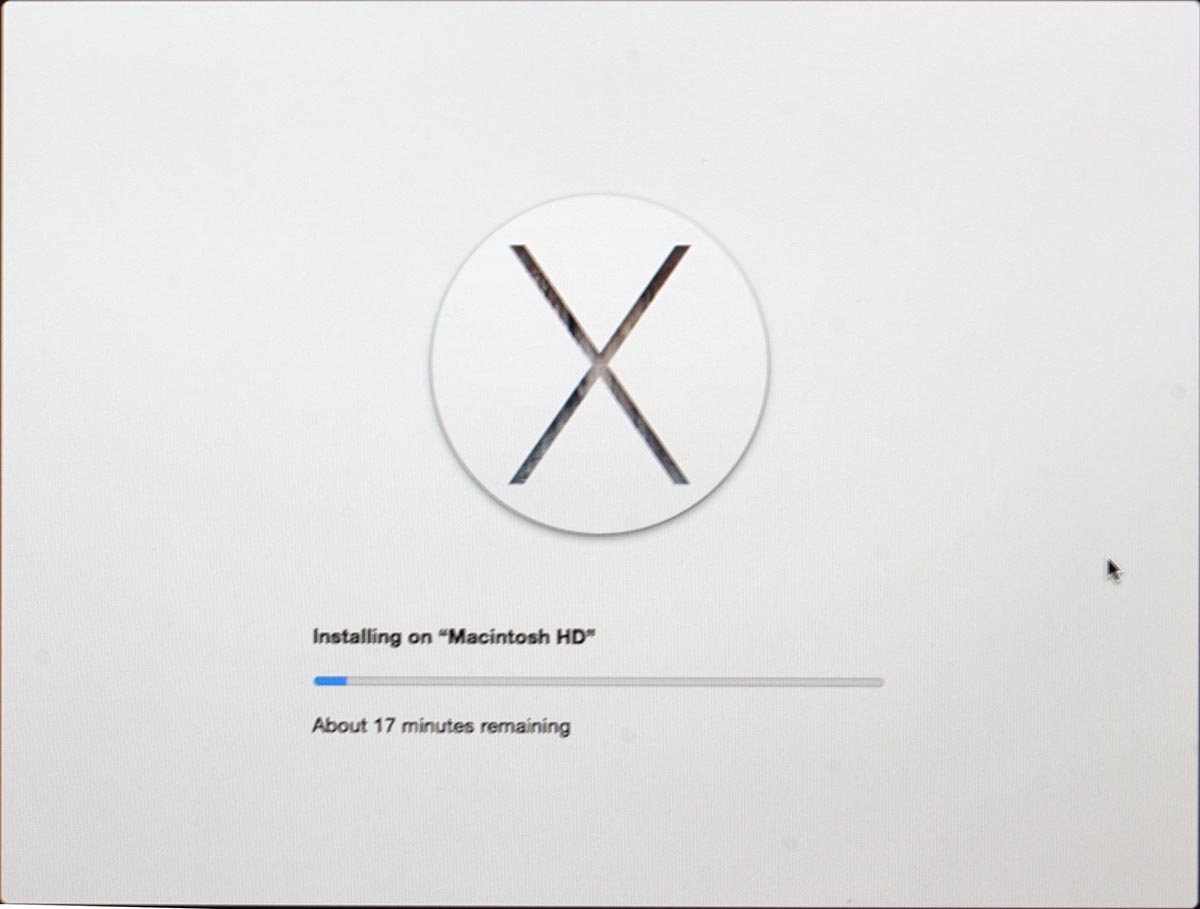
Then there is a license screen which you must agree to continue. Then land on OS X Utilities. One thing you can do with a bootable stick is to install/upgrade an OS X:
This is the most time-consuming part. A cup of coffee doesn't do it. You can easily cook and eat a meal with the coffee during this. My hardware isn't especially old or slow, but ... the upgrade is.
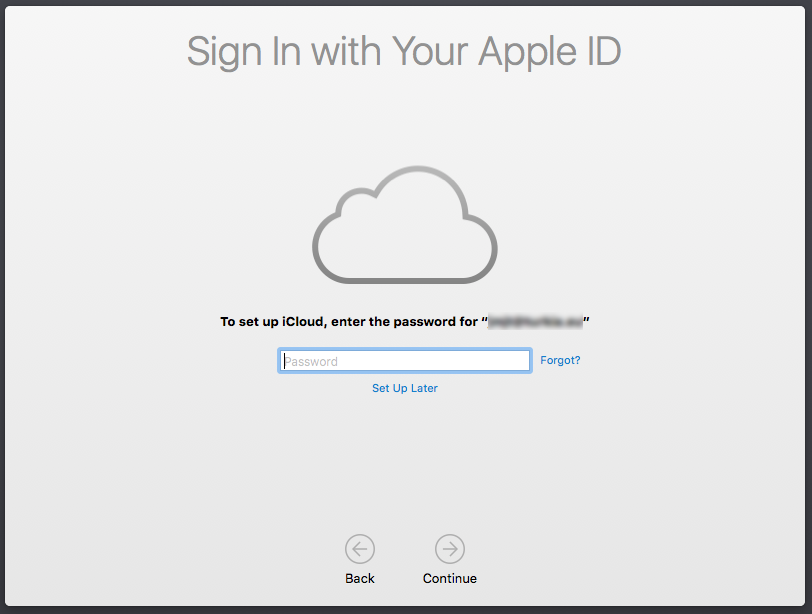
After a reboot, you will end up in the OOBE (or out-of-box experience). This will start with Apple ID login. Apple makes an effort to not allow stolen hardware to be used and they pretty much require you to login during install: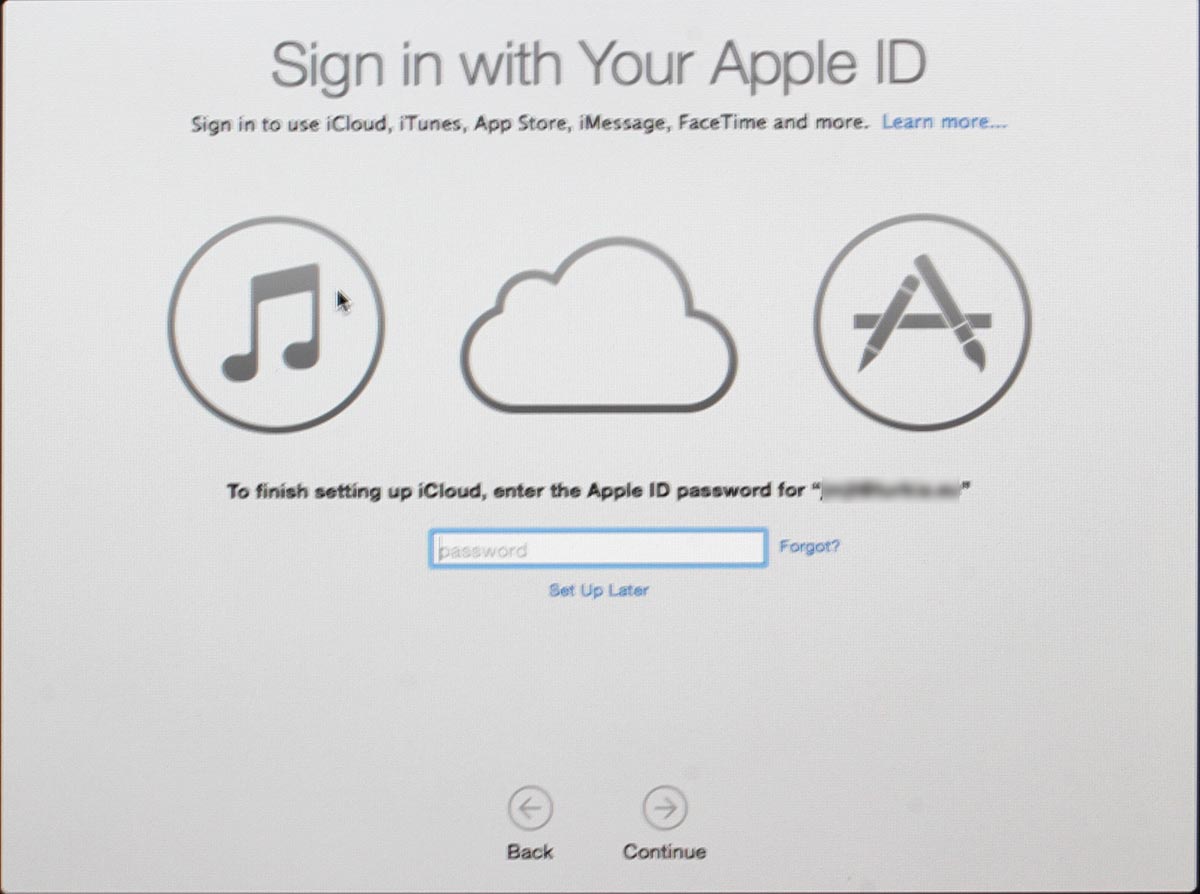
Since I have a 2-factor authentication enabled for my Apple ID, a 2FA-screen will appear during the process: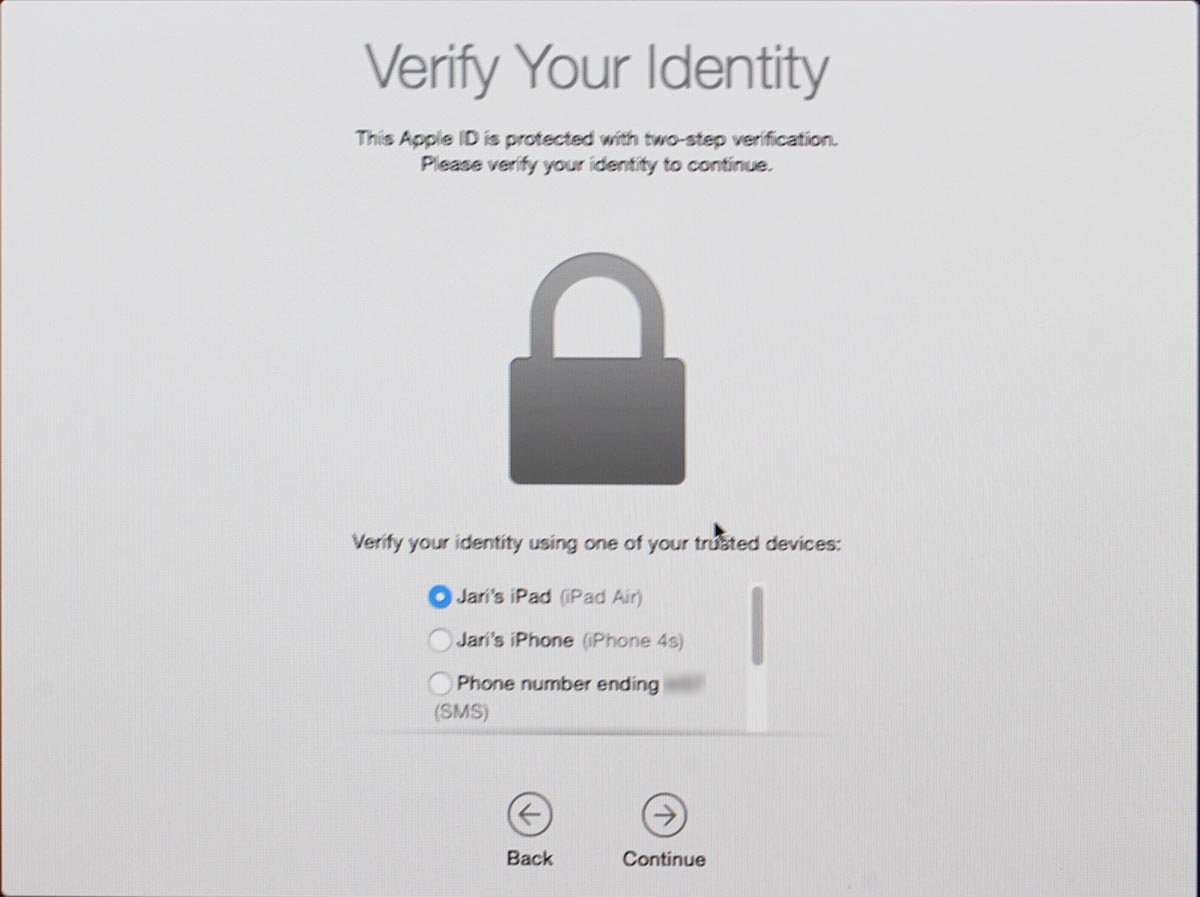
There are steps about sending your usage data to Apple, then yet another license screen: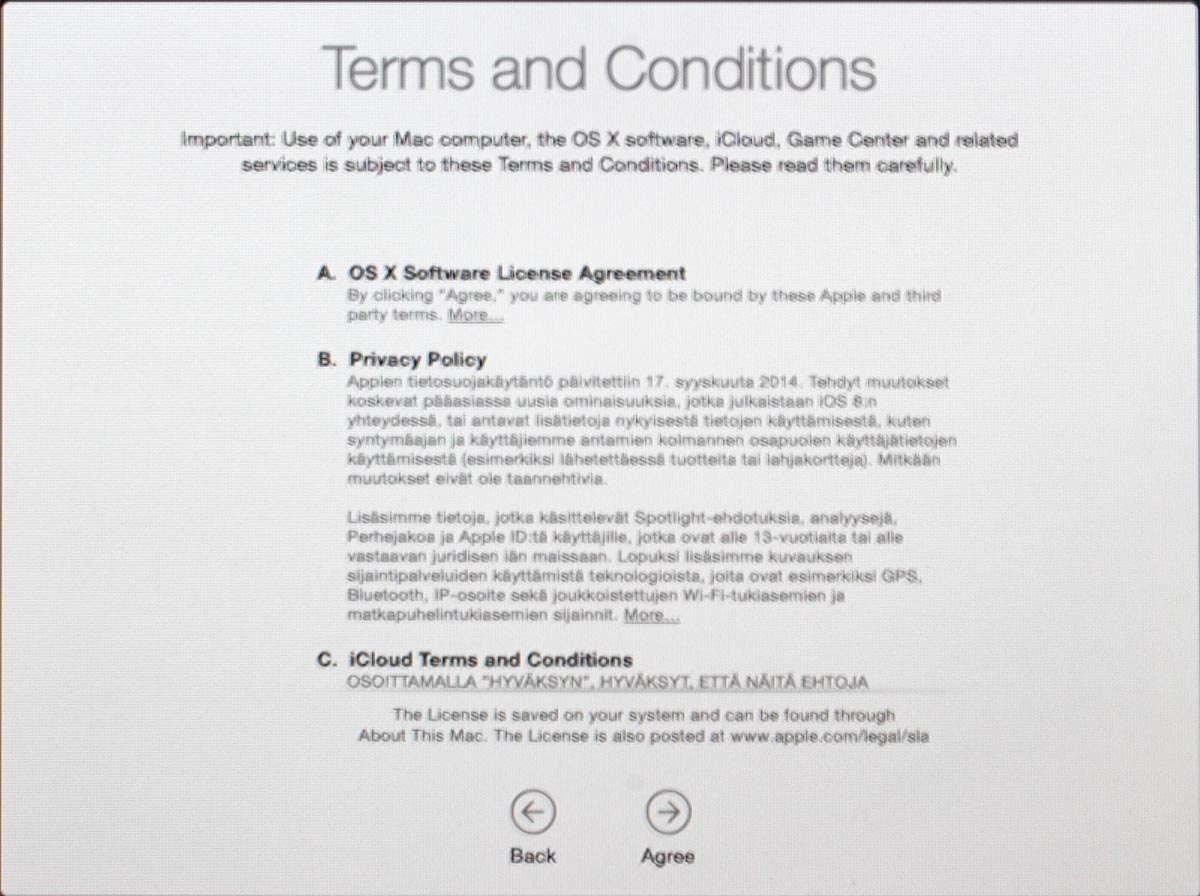
Then you need to make the choice of upgrading iCloud into iCloud Drive, the new thing that came with iOS 8 and OS X Yosemite: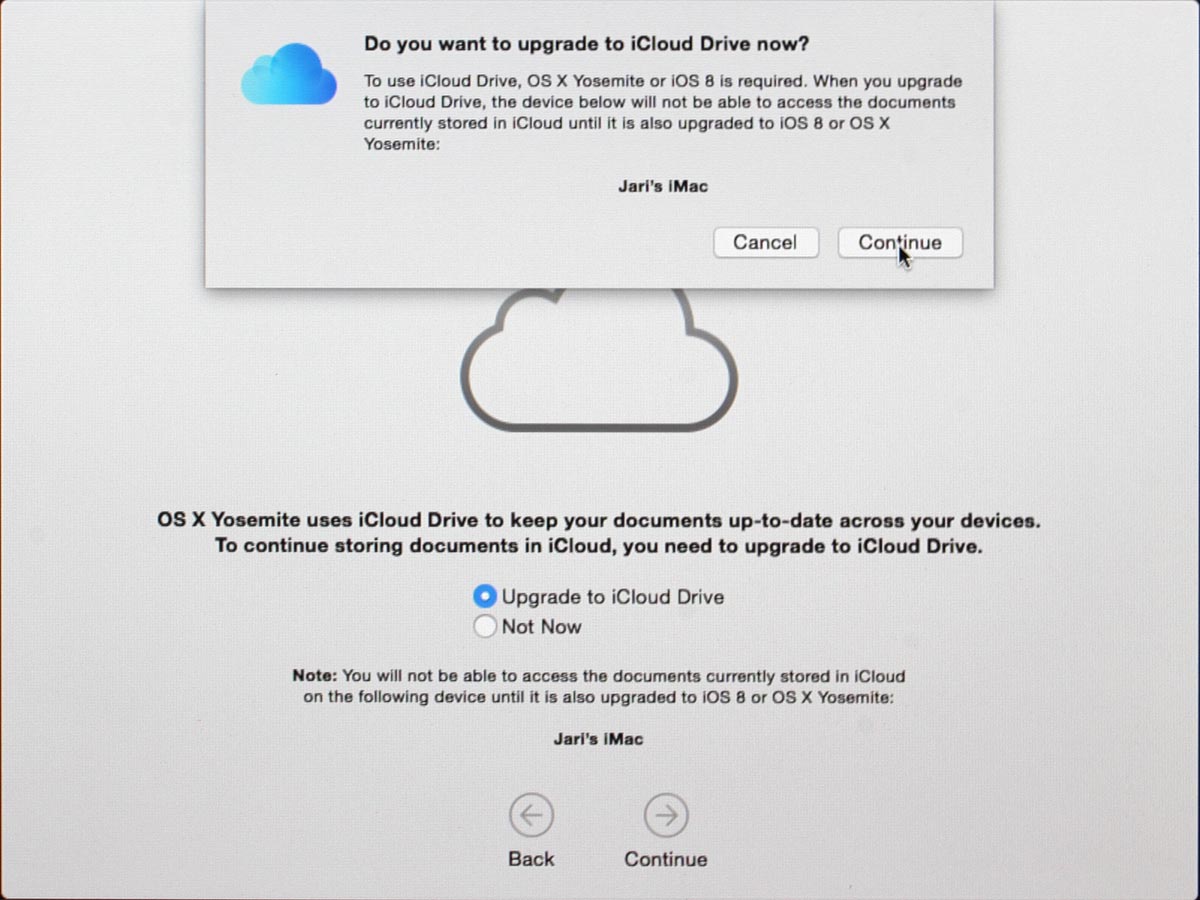
Then you're pretty much done. Finally your upgrade is ready!
Step 4: Done!
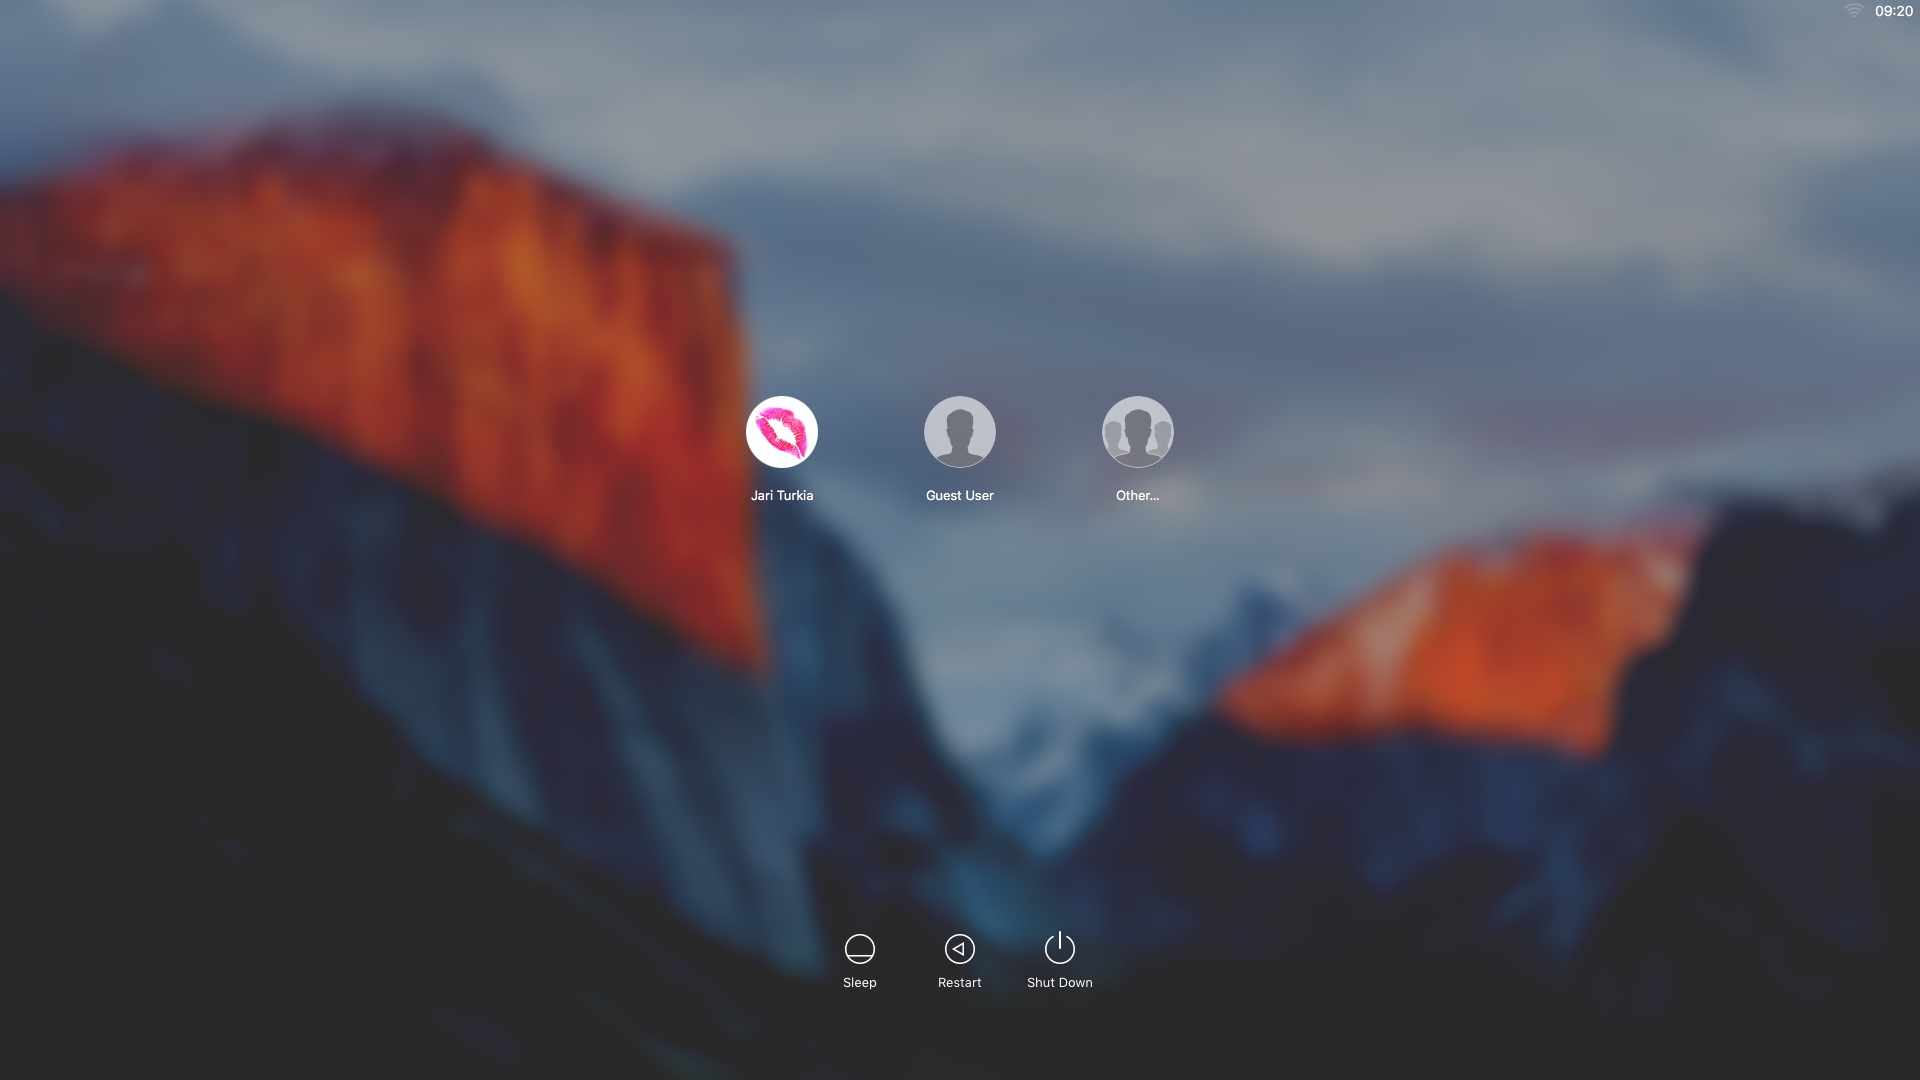
Login for the first time:
One of the first things I did, was eject my USB-stick (there were couple other Macs to be updated, too):
At this point, you can continue using your precious Mac.
Aftermath
Was it worth it? Not really, the change is mainly cosmetic. iCloud Drive isn't a reason for me to upgrade. Apple-menu doesn't have System Update anymore, they changed it into App Store. That's like running iOS.
I updated anyway, as a nerd I like the latest stuff running on my computers. I should yield less problems and there needs to be some progress. I find myself stating the same thing in couple of my blog posts, "it wasn't worth it, but I did it anyway". With computers, it never will result any good to stand still and ignore future.
Deactivating Arch Linux IPv6 Privacy Extensions
Thursday, July 24. 2014
Something funny happened to my Arch Linux, it changed the IPv6 address rather surprisingly. When I failed to SSH into it, I went to the console.
On none of my machines I have the RFC 4941 privacy extensions enabled. The first thing to do was to confirm, that the IP-address was not based on my Ethernet Address:
2: eth0: <BROADCAST,MULTICAST,UP,LOWER_UP> mtu 1500 qdisc pfifo_fast state UP group default qlen 1000
link/ether 52:54:00:cf:1c:36 brd ff:ff:ff:ff:ff:ff
inet6 2001::e2:349d:bcc6:c9fc/64 scope global noprefixroute dynamic
valid_lft 84267sec preferred_lft 12267sec
There is absolutely no reference to the MAC-address 52:54:00:cf:1c:36 of in the EUI-64 address 00e2:349d:bcc6:c9fc. Given the calculator result of 5054:00ff:fecf:1c36. Apparently something modifies the autoconfiguration address.
First culprit could be Linux kernel:
# cat /proc/sys/net/ipv6/conf/all/use_tempaddr
0
I even iterated all the configurations:
find /proc/sys/net/ipv6/conf/ -name use_tempaddr -print -exec cat {} \;
just to make sure, that privacy is off.
That was puzzling. What the heck is going on in the machine!! After all, it used to work ok before. What could be doing that?
Lot of googling around landed me on Arch Linux ArchWiki IPv6 page. It says: "dhcpcd includes in its default configuration file since version 6.4.0 the option slaac private, which enables "Stable Private IPv6 Addresses instead of hardware based ones", implementing RFC 7217". Hum? I've never heard of RFC 7217, nor "A Method for Generating Semantically Opaque Interface Identifiers with IPv6 Stateless Address Autoconfiguration (SLAAC)", but there it was.
I confirmed /etc/dhcpcd.conf and yes, it did contain a:
slaac private
in it. Why?! I didn't ask for it. I simply put a comment (#) in front of the line and did a:
systemctl restart dhcpcd@eth0.service
To refresh the situation. No change. A reboot. Yes change!
2: eth0: <BROADCAST,MULTICAST,UP,LOWER_UP> mtu 1500 qdisc pfifo_fast state UP group default qlen 1000
link/ether 52:54:00:cf:1c:36 brd ff:ff:ff:ff:ff:ff
inet6 2001::5054:ff:fecf:1c36/64 scope global noprefixroute dynamic
valid_lft 86399sec preferred_lft 14399sec
Now my IPv6-address was exactly what it used to be. Weird incident, though. There is a perfectly good mechanism for privatizing addressses, if wanted to. But now somebody had created another and some higher power made a choice for me to start using it. Really weird! Well, I'm hoping that my addresses won't change any more.
Lenovo WWAN (Gobi 2000) for Windows 8
Wednesday, June 18. 2014
This is a part 2 of my Lenovo on Windows 8 series. See the part about energy management.
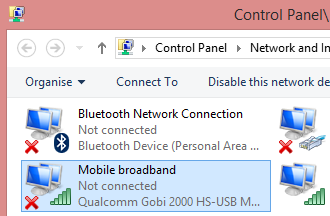
After installing Windows 8 there was a mobile broadband device, but funnily enough it was locked to Verizon Wireless. What Verizon? I live in Finland! There is no Verizon to the next 8000 km. On status the Verizon displays as unnamed. However, on my Windows 7 it did use it with a pre-paid SIM-card and it did work properly. See:

To fix this I went to check ThinkVantage Technologies downloads @ Lenovo, but for Windows 8 there is no Access Connections, or anything even remotely usable. Next I checked Windows 8 instructions Use mobile broadband to connect to the Internet @ Microsoft, but this information is relevant or usable only if the broadband modem is not locked to the goddam Verizon.
The exact modem make and model can be found out:
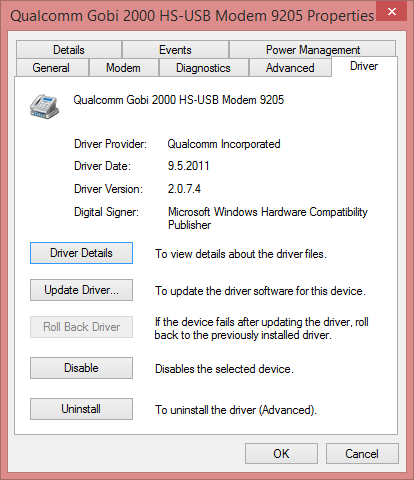
In Thinkpad L512 it is a Qualcomm Gobi 2000. Searching for information revealed Qualcomm Gobi 2000 page @ thinkwiki, a page dedicated to documenting Thinkpads running Linux. It has information in it about various firmwares for that modem. Searching for the firmware information turned out to be very successful, there is lot of good information at Gobi 2000 on Windows 8 (Thinkpad) and Gobi 2000 WAN Unlock Solution - tested & works new Z win7 64bit Pro.
The key to success is a Sony Vaio utility called OneClick Internet.
Update Feb 2021:
Given deprecation of Vaio models and Windows 7 and 8, the tool is not available anymore. I think https://www.sony.co.uk/electronics/support/downloads/Z0003894 might be it, but as I don't own suitable hardware anymore, I cannot verify.
Obsoleted setup instructions:
Download one from this link. Before running the Installer.exe, please change the config.ini as instructed. Out of the box the setting is:
[WebToGo-Project]
InstallSilent=1
Better:
InstallSilent=0
Now run the Installer.exe and install the app. Run it, and:

Click settings at the bottom, then:
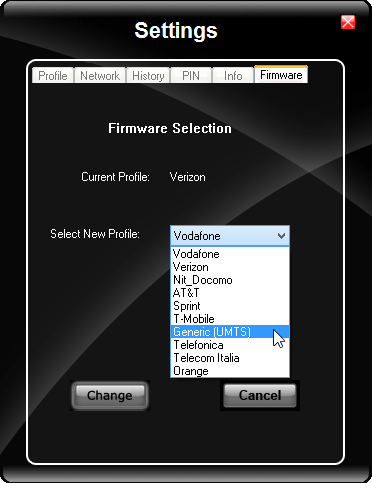
Hey presto! A drop-list of all firmwares available. Just select the one you want. My choice is obviously UMTS, which translates into the regular 2G/3G. What's even better is that this application has a SMS-utility in it. You can actually send and receive text messages with it. Something that is completely missing from Windows 8.1.
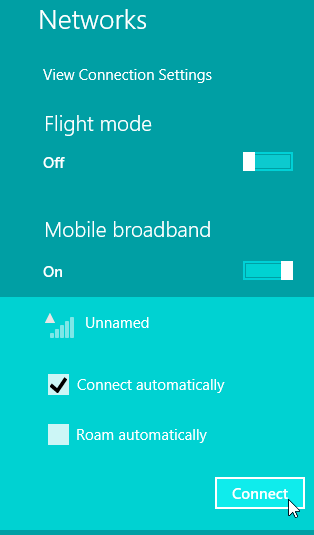
As a result, the Networks (click on the Internet connection on system tray to open the display to the right side of the screen) will look like this:
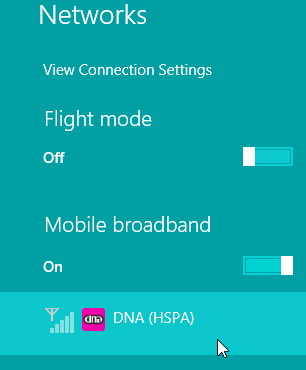
Nice! Exactly what I was looking for.
The bad thing about this is, that Thinkpad L512 has a really bad antenna. Any USB-stick will have a better one. The obvious good thing is, that Windows 8.1 gains one piece of much required functionality Lenovo chose to drop.
Lenovo Energy Management: Windows 8 shutting down sporadically
Tuesday, June 17. 2014
Arch Linux failing to start network interface
Monday, June 16. 2014
One of my boxes is running an Arch Linux. Out of the box it is really a slim one. The install runs only a blink and as a result the operating system won't have anything that is not absolutely necessary to boot the thing for the first time. Given any of the other distros who require gigabytes and gigabytes of storage for crap you won't ever need this is a refreshing change. Every Arch Linux user needs to "build their own excitement" (originally about Gentoo from obsoleted http://www.usenix.org.uk/pictures/despair-linux/gentoo.jpg).
Recently they maintainers have been fiddling around too much with network interface naming conventions. When I installed it was eth0, then it changed to ens3, and guess what happened when I last updated! Yuupp! Back to eth0, but with a twist. Now the eth0 won't come up on boot. Crap!
The Arch Linux discussion forum's section Networking, Server, and Protection has a discussion with topic [SOLVED] Update broke netctl (I guess?). It discusses the problem with a sys-subsystem-net-devices-ens3.device. However, in my box none of the repair instructions were accurate.
Later I realized that my dmesg has following lines in it:
systemd[1]: Expecting device sys-subsystem-net-devices-eth0.device...
systemd[1]: Expecting device sys-subsystem-net-devices-ens3.device...
Ok. On bootup it waits for two, as in not one, network interfaces to become alive. The problem is that my box only has one. A check for the ghost-interface:
systemctl status sys-subsystem-net-devices-ens3.device
* sys-subsystem-net-devices-ens3.device
Loaded: loaded
Active: inactive (dead)
Yields pretty much what I know. It is inactive and dead. A manual fix would be to start the DHCP-client manually with a:
systemctl start dhcpcd@eth0.service
... after which the network starts functioning again, but which does not fix the problem. On bootup the interface won't work!
What I did to fix this was to disable dhcpcd for both interfaces:
systemctl disable dhcpcd@ens3.service
systemctl disable dhcpcd@eth0.service
And enabled it to the proper one:
systemctl enable dhcpcd@eth0.service
This does seem to help, but on bootup it still complains "Dependency failed for dhcpcd on ens3". I don't know exactly where the old interface keeps popping up.
In the end, this does work, but it simply takes a bit longer to boot than it used to. Any suggestions to improve booting are welcome.
Windows 8.1 update failing to install
Sunday, June 15. 2014
I've been really busy with a new job and haven't had much time to blog. Now things are settling down a bit, so here goes ...
Windows 8.1 is my favorite subject. I'm an user and it does have a lot of issues. This time I'm discussing my attempts to install The Windows 8.1 Update. Ok. Is that the stupidest name in the whole world, or can somebody come up with something that could be more confusing, lame and non-descriptive at the same time. Don't answer, somebody at Microsoft eventually will.
The thing with this "update" is that you need to have it installed, or else <insert a threat here>. One of the ideas of this weirdly named update (aka. "update") is that it is kinda service pack, but it is not. It seems to pack all the updates in an "update". Nice and warm thought. The problem is, that it won't install. No matter what I do. Really. It WON'T INSTALL!
What I initially got is a "Windows Update error 0x80073712". The fix has been discussied in The Windows Club article Fix: Windows Update error 0x800F081F in Windows 8.1 and a help article your Windows 8.1 will give if clicking "more information" at the Windows Update failure dialog. It will say: "If you receive Windows Update error 0x80073712 or 80073712, it means that a file needed by Windows Update is damaged or missing." Everybody pretty much instructs you to run following as an admin:
DISM.exe /Online /Cleanup-image /Scanhealth
Deployment Image Servicing and Management tool
Version: 6.3.9600.16384
Image Version: 6.3.9600.16384
[==========================100.0%==========================]
The component store is repairable.
The operation completed successfully.
Notice how this scanner found a problem and says "is repairable". If there is nothing to do the message would be "No component store corruption detected". The actual fix run goes as follows:
DISM.exe /Online /Cleanup-image /Restorehealth
Deployment Image Servicing and Management tool
Version: 6.3.9600.16384
Image Version: 6.3.9600.16384
[==========================100.0%==========================]
The restore operation completed successfully. The component store corruption was repaired.
The operation completed successfully.
I did that. 7 times. Rebooted the computer a couple of times between runs. No avail.
The second thing to do is to get a Windows Update troubleshooter. It will chew your computer a while and spit out something like this: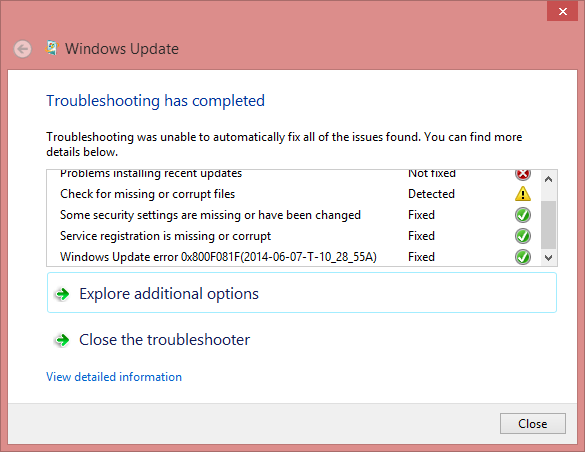
It basically does the same thing than the previous commands, but only has a nice GUI. No avail.
Then I thought that I'll download the update manually, it is available as KB2919355. There is a specific track to be followed when installing this, for example there are prerequisite updates that must exist on the machine for the "update" update to install. I did all that, but failed on the first prerequisite install. I tried a couple of times, but eventually gave up. No avail.
Since I had been attempting the install since April 2014 Microsoft updates came out. I was quite demotivated on this particular subject. My luck turned when June 2014 updates came out. There weren't many of those available, since the update I need called "update" wasn't updating. The total number of available updates on my computer was 3. My attempt of installing all of them at the same batch wasn't successful. Yet another 0x800blah error. Then I tried installing them individually. Same story. My luck turned when I did them in pairs. I got one of them to install! Amazing! Something wonderful happened and after a reboot the "update" was installed.
A reboot later my updated Windows 8.1 could see 22 new updates available. It worked!
Morale of the story:
Sometimes, even the stubborn idiot finds the kernel of corn. To this day I cannot comprehend what exactly happened and my Windows refused to do the good thing.
My message to Microsoft's Windows division is: Aow come on! Test these things once in a while. I'm pretty darn sure you know what the problem was, why not release a proper information how to get the darn update installed.
Transferring Windows 7 OEM license to a new hard drive
Friday, May 30. 2014
This is a follow-up post on my previous post about Replacing Compaq 615 hard drive with a SSD.
It is obvious, that when you remove the old hard drive from your PC and replace it with a new one, all your stuff won't be on the new drive. "All your stuff" includes Windows operating system, your user profile information, settings, background picture of your desktop, all your precious photos, ... the list goes on. So to succesfully replace the hard drive, some preliminary steps are needed. Even in the best case, where you're prepared to lose all of your files and information, the only thing that you need to transfer is your Windows 7 license. In Microsoft lingo it is called The Activation. This literally means, that your Windows will emulate E.T. and "call home" to verify, that you are allowed to run the installation.
In this particular case following circumstances exist:
- The laptop in question is manufactured by HP/Compaq
- HP/Compaq is a Microsoft OEM partner and they get their Windows 7 licenses with special pricing
- The hardware must has a suitable identification for the OEM partner in its BIOS called SLIC
- Actual Windows 7 license (activation) will be stored on the hard drive, the OEM product key of this installation is not known
- It is impossible to transfer the activation from old hard drive to the new one. It is possible to re-activate on the new drive when the existing OEM product key has been extracted from the old Windows 7 installation.
- There is nothing illegal in this procedure. You bought the hardware, you own the hardware. With hardware you paid for the Windows 7 license. This is NOT software piracy of any kind.
Abandoned options
There are three good possibilities of transferring an existing Windows installation to the new drive. I chose not to use either of those.
It is possible to create a recovery disc from existing installation. This has been covered in articles How do I create recovery discs on a Compaq 615 and Creating Recovery Discs or Saving a Recovery Image to a USB Flash Drive (Windows 7). There was a glitch, though. The HP Backup & Recovery manager was not installed to this Compaq laptop. I found an article Download hp backup & recovery manager which points to softpaq sp45602.exe containing the installer.
Another way would be to use the Windows 7 built-in backup. There is an option to create the system recovery image. Apparently HP/Compaq chooses to go with this on consumer models.
Other possibilities would include Clonezilla, Acronis True Image, or similar to transfer the entire drive with all the partitions.
The reason why I abandoned all of those was that I definitely wanted a fresh start without any old payload. The HP Backup & Recovery would provide the cleanest start, but still there are a number of weird software being installed, which nobody actually needs or wants. Another thing is that Windows 7 fresh install on SSD takes care of setting the TRIM-flag to the partition and aligns the partitions properly on 4096 byte boundaries. Both of those settings differ when installing to a hard drive. These are pretty much the only differences when installing to SSD instead of HD, but I definitely wanted to get all of my performance settings right from the beginning.
Prerequisites for license transfer
When talking about OEM Windows 7 licenses, following license types exist OEM Channel SLP, NONSLP and COA License Product Keys. The difference of those is explained in detail in this article. To put it briefly, in every OEM machine there must be a sticker somewhere. The sticker has the Certificate of Authentication (COA) key. This OEM COA key can be used to activate a Windows 7 installation only via phone. It is a possibility, but not my first choice as there are other options available.
Every OEM Windows 7 also has an OEM System Locked Pre-installation key. The key is not available anywhere. It is hidden intentionally, for the reason that nobody would ever try anything I'm about to describe in this post. To dig out the SLP-key, you will need a special piece of software. My choice is The Magical Jelly Bean Keyfinder. There is a free edition available for download and it just magically tells you your Windows installation key. The smart thing to do is to use the export-option to an USB stick. You can copy/paste your license key from a file later when it is needed.
If you are interested in your settings and data, backup your user profile(s) with Windows Easy Transfer (migwiz.exe). I chose to save the profile data onto an USB hard drive to be restored later.
You must have OEM certificates for this the license activation to work. Download a the certificate bundle from https://docs.google.com/open?id=0Bxj5NEo7I3z9dWx3VndfenZBWVE. Your hardware manufacturer should be in the archive, if it is not, you cannot proceed.
Optional prerequisite is SLIC ToolKit V3.2. You can download one from https://docs.google.com/open?id=0Bxj5NEo7I3z9WE1NS2dVVjc4VEE. Using this tool really helps you in the process, because you can actually see if it would work and you can verify the steps.
Warning!
If you don't know your SLP-key DO NOT remove the old hard drive.
Installing Windows 7 to the new drive
Warning!
If you don't know your SLP-key DO NOT start installing to the new drive. Put the old drive back and use a keyfinder to get your key.
Update 2nd Jan 2016: My recent findings about possibility of recovering the key with USB-dock. With suitable hardware it is possible to read the key from already removed hard drive.
Update 13th Mar 2015: Microsoft took down their Windows 7 downloads from Digital River. They are not available anymore!
All the Windows 7 SP1 installation images are generally available for download. See Official Windows 7 SP1 ISO from Digital River about details. Again: This is not software piracy! You own the license for your Windows 7, you are entitled to own the installation media for it.
Download the exact version of your installation image. Language may be different, but not all OEM licenses are allowed for both 32-bit and 64-bit installations. If you are changing x86 to x64 there will be also issues with Windows Easy Transfer, it documented that the transfer wizard works only on same arcitecture. To see if your OEM license works both on 32-bit and 64-bit you simply have to test it.
If you need the language files see Windows 7 SP1 Language Packs Direct Download Links and the utility needed to install them Vistalizator. The language packs are different for 32-bit and 64-bit installations, so choose carefully. Windows 7 Ultimate can change languages from control panel, no special tweaks are needed for it.
During installation, choose not to enter a license key. You will end up having a non-activated Windows installation. The technical term is that your activation is on a "grace period". This is what we want to do. Activate later.
Re-activating the license on the new drive
Third warning: You will need your SLP-key for the re-activation to work.
In your Computer properties, there is an option to "Change Product Key". None of your OEM-keys will work there, no matter how much you try. Any activation attempts will yield something like this:
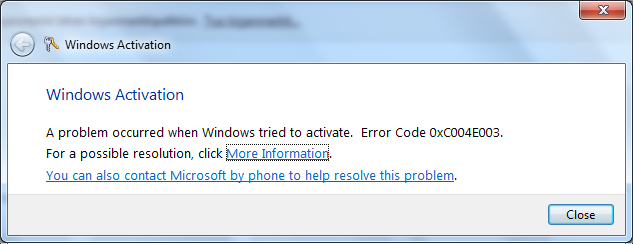
Activation Error code: 0XC004E003 (Product key already in use). There is a lengthy discussion of Clean OEM Windows 7 install returns 0xc004e003 @ Microsoft.
What you need to do is follow instructions from activating windows 7 OEM way. Open a Command Prompt (cmd.exe) and run it as Administrator.
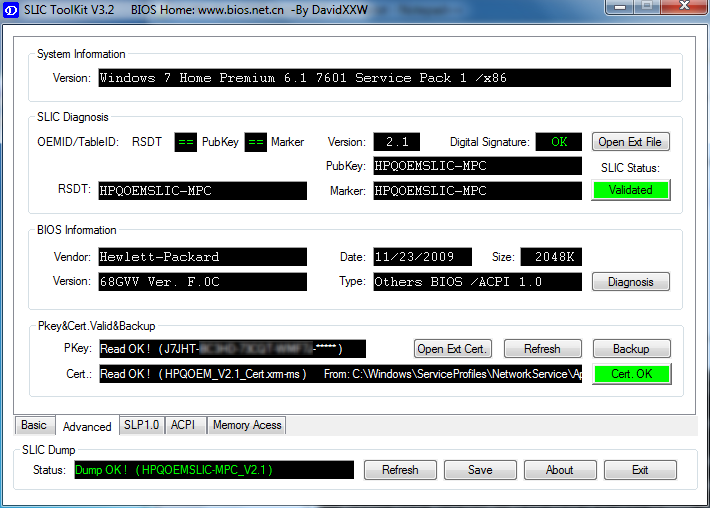
First we confirm that the BIOS has required information in it. It definitely should as the machine had a working Windows 7 in it, but still ... run the SLIC tool to confirm:
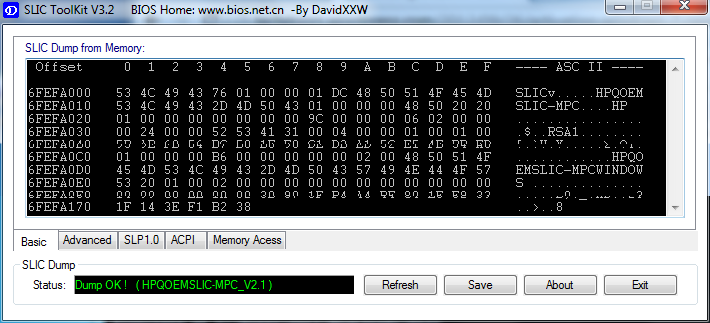
It should say "Dump OK!". On the Advanced-tab you can confirm, that there are issues with the activation:
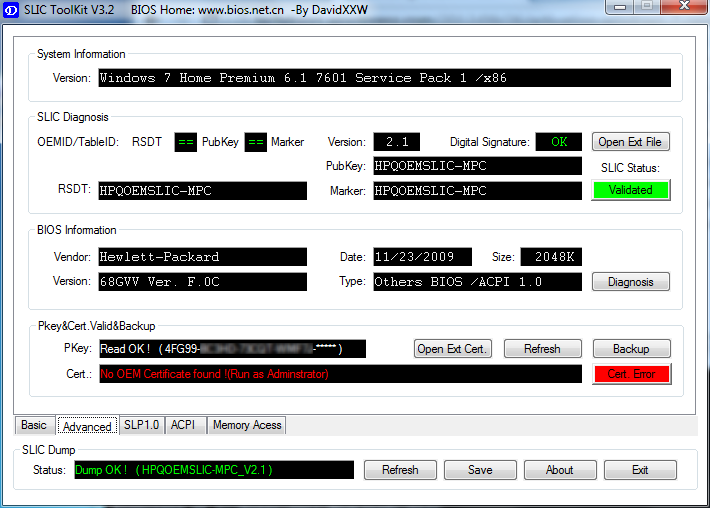
The SLIC status is on green and is valid, but private key and certificate have issues and display a red cert. error.
To fix this, my sequence differs a bit from the article. The first thing to do is to set your SLP-key, say something like this into your command prompt (no, that is not really my SLP-key):
slmgr.vbs -ipk J7JHT-BC3HD-73CQT-WMFJ-XXXXX
It should respond after a delay:

Next install your manufacaturer certificate, this will take a while:
slmgr.vbs -ilc HP-COMPAQ.xrm-ms
It should respond after a lengthy delay with something like this:

The last thing to do is to rebuild the certificate store, to start using all these changes:
slmgr.vbs -rilc
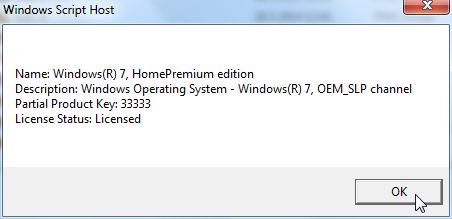
That should respond with a simple "Ok". Now you can confirm your activation status with a:
slmgr.vbs -dli
The response should be something like:
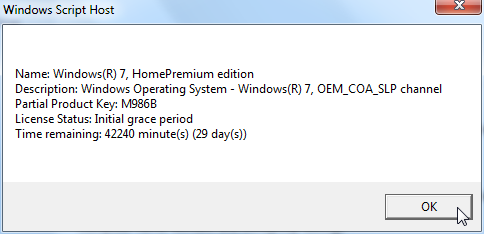
If you failed in this process, the response will look more like:
Upon success, the SLIC tool will also display the status as:
Slmgr.vbs is volume activation tool installed into all Windowses. See more details about it from Slmgr.vbs Options for Volume Activation @ Technet.
The successful activation can be confirmed also from Computer properties. At no part of this activation any network traffic to Microsoft or any other party is required.
Both Microsoft and your PC's manufacturer would like for you not to know anything about this. Both of their businesses rely on the fact, that hardware vendors and their partners will do all the maintenance for your PC while making money at it. Since hacking is about learning how computer stuff works, this is a prime example of hacking. With this information you can hack your own laptop.
Any comments are welcome!
Windows 8 desktop icon fail [Fixed]
Thursday, May 22. 2014
Windows 8 (or 8.1) is one of the not-so-popular operating systems. Even Microsoft employees admit Windows 8 is 'the new Vista'. Ok, they failed on that. Perhaps Windows 9 will be better.
Now that we have that out, there are a number of weird things in that OS. The one bugging me most is the fact that the full screen app icons that appear when you move the cursor to the top-left corner of your desktop are failing to display. This happens to me very often. It seems to have something to do with sleep/hibernate on my Win8 laptop. It should look like this:
But it looks like this instead:
Not cool.
There are some shadows from the icons, but nothing usable or nothing that I could use to identify which icon is for which app.
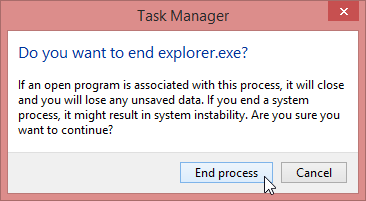
I don't know what's the problem, but I found a fix. The culprit is your classic explorer.exe. The fix is simple. Zap your Windows Explorer with a magic kill process -wand and create a new better one. The new explorer won't know anything about already running full-screen apps, but it will sure learn if you manage to get into one.
Here is the fix. First start the Task Manager. Since the idea is to kill explorer.exe, you'll need a tool to eradicate the old one and make sure you can start a new one. The sequence starts from Task Manager's Details tab-sheet: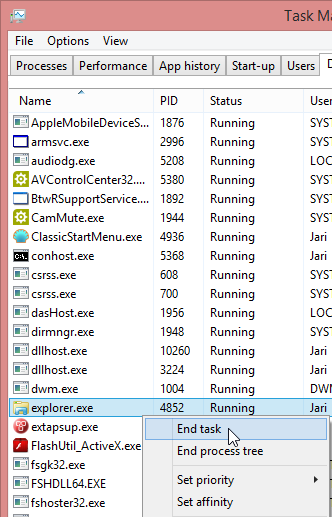
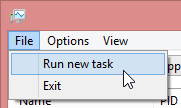

After that your explorer will be back and your icons will be back after you visit all of your apps.
Long live Windows XP: Building a Windows 7 desktop from scrap heap
Tuesday, April 8. 2014
Today, this tuesday, is the last time Windows XP gets security updates from Microsoft. Apparently Dutch and UK governments are willing to pay seven figure sums per year to keep their XPs running, but the rest of us, anything smaller than a government we don't get to have those. Last autumn I visited Windows 8.1 release in Helsinki and there a Microsoft MVP said "Microsoft is not that evil company, they just might release something really critical if it comes down to that". There was some chuckling in the crowd. Anyway, very interesting things will happen to XP, see the CVE-list for non-fixed flaws.
In Finnish media, the XP has gotten a lot of media coverage all year. I guess it got to the point of scaring regular users in the national TV. This I figured when my mother called me about her Windows 7. The another thing was at my neighbor's computer. She has an old XP-box with really poor specs. She asked for my help, but after initial assessment there was nothing I could do with her old computer. I happened to have an old Dell OptiPlex GX260 desktop computer with steroids, a SSD-drive in a ATA-to-SATA -adapter. I was about to do the decent thing and comply with EU 2002/96/EC directive, aka. throw the electronic junk where all electronic junk ends up at. The computer has only 512 MiB memory, but given the 2,0 GHz Pentium 4 CPU, it runs 2009 released Windows 7 in a reasonable acceptable manner. The best part for my neighbor was, that I promised to donate the hardware free of charge. It was only a matter of getting a license key for Windows 7.
My old OptiPlex booted from installation DVD without problems, I must say I was amazed about that. Any old low-quality CD/DVD-drive typically has issues with dust in the lens and the read head eventually deteriorates to the point, that the drive refuses to read anything. Anyway, the Windows 7 installer found the SATA-connected SSD-drive, the installer copied the files, booted for the initial Out-Of-the-Box-Experience. Everything seemed to be ok, I had network connectivity and even some sound.
What every legacy PC does after install is, that the display resolution is something unbelievable. This case I had a VGA 640x480. It sure looked nice on my 22" LCD-screen!
The thing is: no W7 drivers for my Dell. It seems to have a built-in Intel 82845G graphics adapter in it. The Dell support knows about my machine and the display driver in its Download Center, but the latest supported OS they have is Windows XP. WDDM driver model was introduced in Vista and XDDM drivers was the last one Intel ever did for 82845G. This was confirmed in Microsoft TechNet's Windows 7 IT Pro forums discussion How do I get Windows 7 Graphic driver for the Intel 82845G Graphics Controller?
Lucky for me, somebody had posted a link to another article For Older Hardware to Run on Windows 7 How to Install intel 82845G graphics driver on Window 7, and there was a solution for my exact problem. I didn't realize that it was possible to still use XDDM drivers, but it is possible. In device manager, there is a Add Legacy hardware:
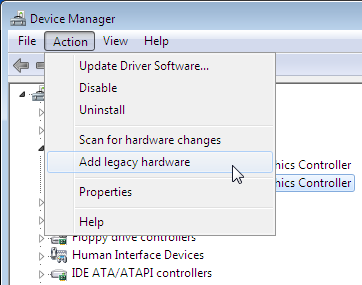
I took the 82845G driver package 14.10.3, unzipped it and Windows 2000 XDDM driver installed. After rebooting the Windows 7, everything was ok. The driver actually claims it can go up to 2048x1536, but given the analog VGA-connector I chose not to go that far.
Finally, I installed Microsoft Security Essentials into it and I was done. My neighbor had a nice "new" computer till year 2020. I'm wishing people would upgrade before that, but knowing that doing nothing is always the preferred action on non-hackers, so plenty of people will be taken by surprise when Windows 7 updates run out.

