MySQL Java JDBC connector TLSv1 deprecation in CentOS 8
Friday, November 12. 2021
Yeah, a mouthful. Running CentOS 8 Linux, in Java (JRE) a connection to MySQL / MariaDB there seems to be trouble. I think this is a transient issue and eventually it will resolve itself. Right now the issue is real.
Here is the long story.
I was tinkering with Databricks. The nodes for my bricks were on CentOS 8 and I was going to a MariaDB in AWS RDS. with MySQL Connector/J. As you've figured out, it didn't work! Following errors were in exception backtrace:
com.mysql.cj.jdbc.exceptions.CommunicationsException: Communications link failure


The last packet sent successfully to the server was 0 milliseconds ago. The driver has not received any packets from the server.

com.mysql.cj.jdbc.exceptions.CommunicationsException: Communications link failure


Caused by: com.mysql.cj.exceptions.CJCommunicationsException: Communications link failure


javax.net.ssl.SSLHandshakeException: No appropriate protocol (protocol is disabled or cipher suites are inappropriate)
Weird.
Going to the database with a simple CLI-command of (test run on OpenSUSE):
$ mysql -h db-instance-here.rds.amazonaws.com -P 3306 \
-u USER-HERE -p \
  --ssl-ca=/var/lib/ca-certificates/ca-bundle.pem \

  --ssl-verify-server-cert
... works ok.
Note: This RDS-instance enforces encrypted connection (see AWS docs for details).
Note 2: Term used by AWS is SSL. However, SSL was deprecated decades ago and the protocol used is TLS.
Taking a look on the wire:
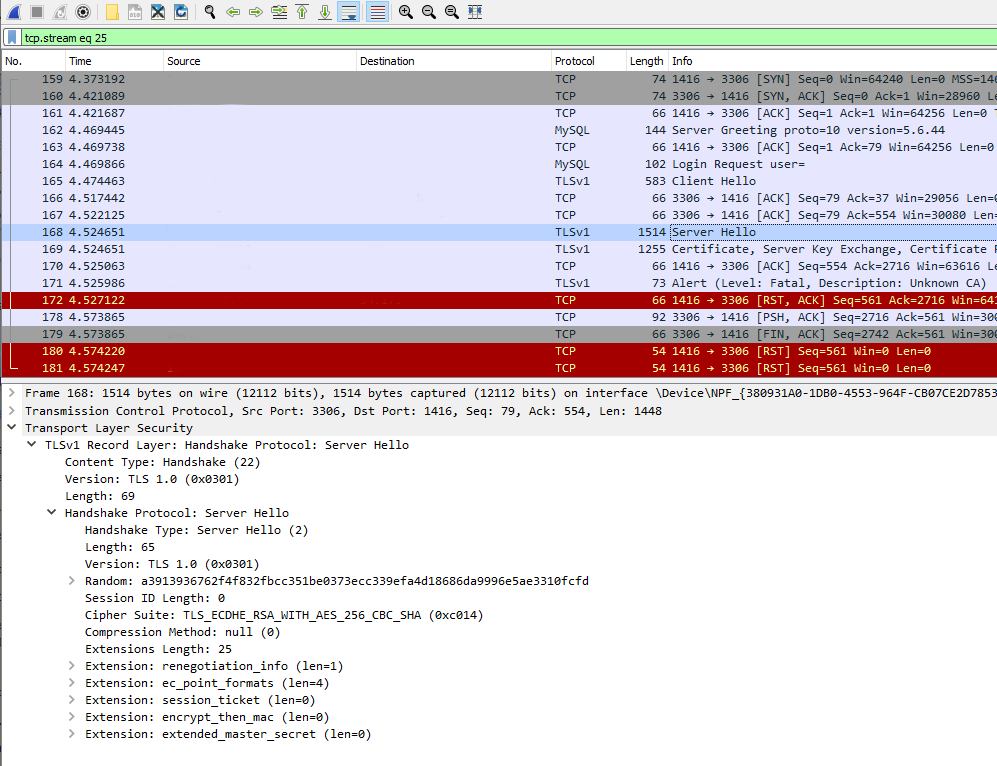
Two details popped out instantly: TLSv1 and TLS_ECDHE_RSA_WITH_AES_256_CBC_SHA cipher. Both deprecated. Both deemed highly insecure and potentially leaking your private information.
Why would anybody using those? Don't MySQL/MariaDB/AWS -people remove insecure stuff from their software? What! Why!
Troubleshooting started. First I found SSLHandShakeException No Appropriate Protocol on Stackoverflow. It contains a hint about JVM security settings. Then MySQL documentation 6.3.2 Encrypted Connection TLS Protocols and Ciphers, where they explicitly state "As of MySQL 5.7.35, the TLSv1 and TLSv1.1 connection protocols are deprecated and support for them is subject to removal in a future MySQL version." Well, fair enough, but the bad stuff was still there in AWS RDS. I even found Changes in MySQL 5.7.35 (2021-07-20, General Availability) which clearly states TLSv1 and TLSv1.1 removal to be quite soon.
No amount of tinkering with jdk.tls.disabledAlgorithms in file /etc/java/*/security/java.security helped. I even created a simple Java-tester to make my debugging easier:
import java.sql.*;


// Code from: https://www.javatpoint.com/example-to-connect-to-the-mysql-database

// 1) Compile: javac mysql-connect-test.java

// 2) Run: CLASSPATH=.:./mysql-connector-java-8.0.27.jar java MysqlCon

class MysqlCon {

  public static void main(String args[]) {

    try {

      Class.forName("com.mysql.cj.jdbc.Driver");

      Connection con = DriverManager.getConnection("jdbc:mysql://db.amazonaws.com:3306/db", "user", "password");

      Statement stmt = con.createStatement();

      ResultSet rs = stmt.executeQuery("select * from emp");

      while (rs.next())

        System.out.println(rs.getInt(1) + " " + rs.getString(2) + " " + rs.getString(3));

      con.close();

    } catch (Exception e) {

      System.out.println(e);

      e.printStackTrace(System.out);

    }

  }

}
Hours passed by, but no avail. Then I found command update-crypto-policies. RedHat documentation Chapter 8. Security, 8.1. Changes in core cryptographic components, 8.1.5. TLS 1.0 and TLS 1.1 are deprecated contains mention of command:
update-crypto-policies --set LEGACY
As it does the trick, I followed up on it. In CentOS / RedHat / Fedora there is /etc/crypto-policies/back-ends/java.config. A symlink pointing to file containing:
jdk.tls.ephemeralDHKeySize=2048

jdk.certpath.disabledAlgorithms=MD2, MD5, DSA, RSA keySize < 2048

jdk.tls.disabledAlgorithms=DH keySize < 2048, TLSv1.1, TLSv1, SSLv3, SSLv2, DHE_DSS, RSA_EXPORT, DHE_DSS_EXPORT, DHE_RSA_EXPORT, DH_DSS_EXPORT, DH_RSA_EXPORT, DH_anon, ECDH_anon, DH_RSA, DH_DSS, ECDH, 3DES_EDE_CBC, DES_CBC, RC4_40, RC4_128, DES40_CBC, RC2, HmacMD5

jdk.tls.legacyAlgorithms=
That's the culprit! It turns out any changes in java.security -file won't have any effect as the policy is loaded later. Running the policy change and set it into legacy-mode has the desired effect. However, running ENTIRE system with such a bad security policy is bad. I only want to connect to RDS, why cannot I lower the security on that only? Well, that's not how Java works.
Entire troubleshooting session was way too much work. People! Get the hint already, no insecure protocols!
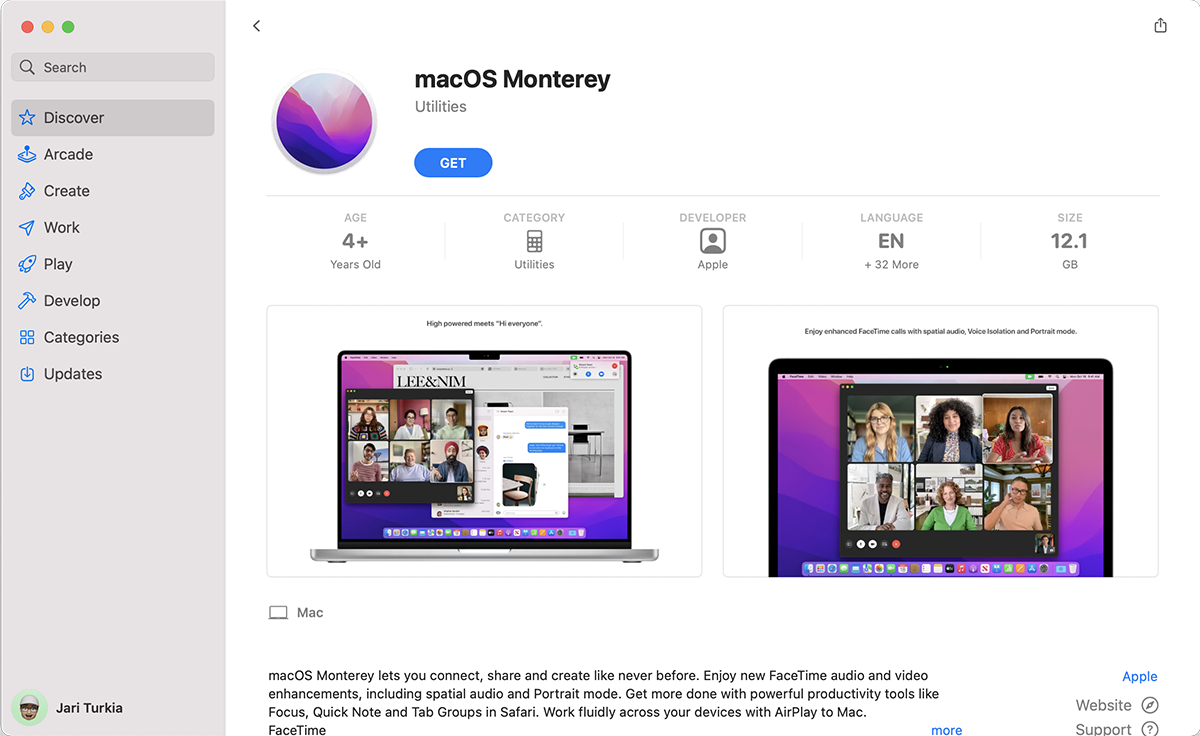
macOS Monterey upgrade
Monday, November 1. 2021
macOS 12, that one I had been waiting. Reason in my case was WebAuthN. More about that is in my article about iOS 15.
The process is as you can expect. Simple.
Download is big-ish, over 12 gigabytes:
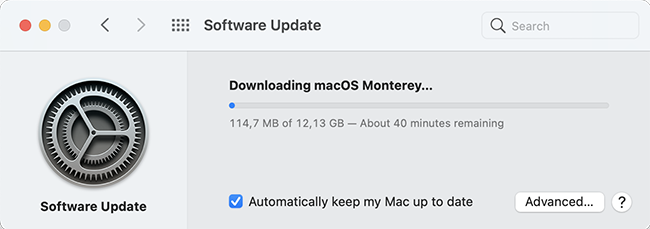
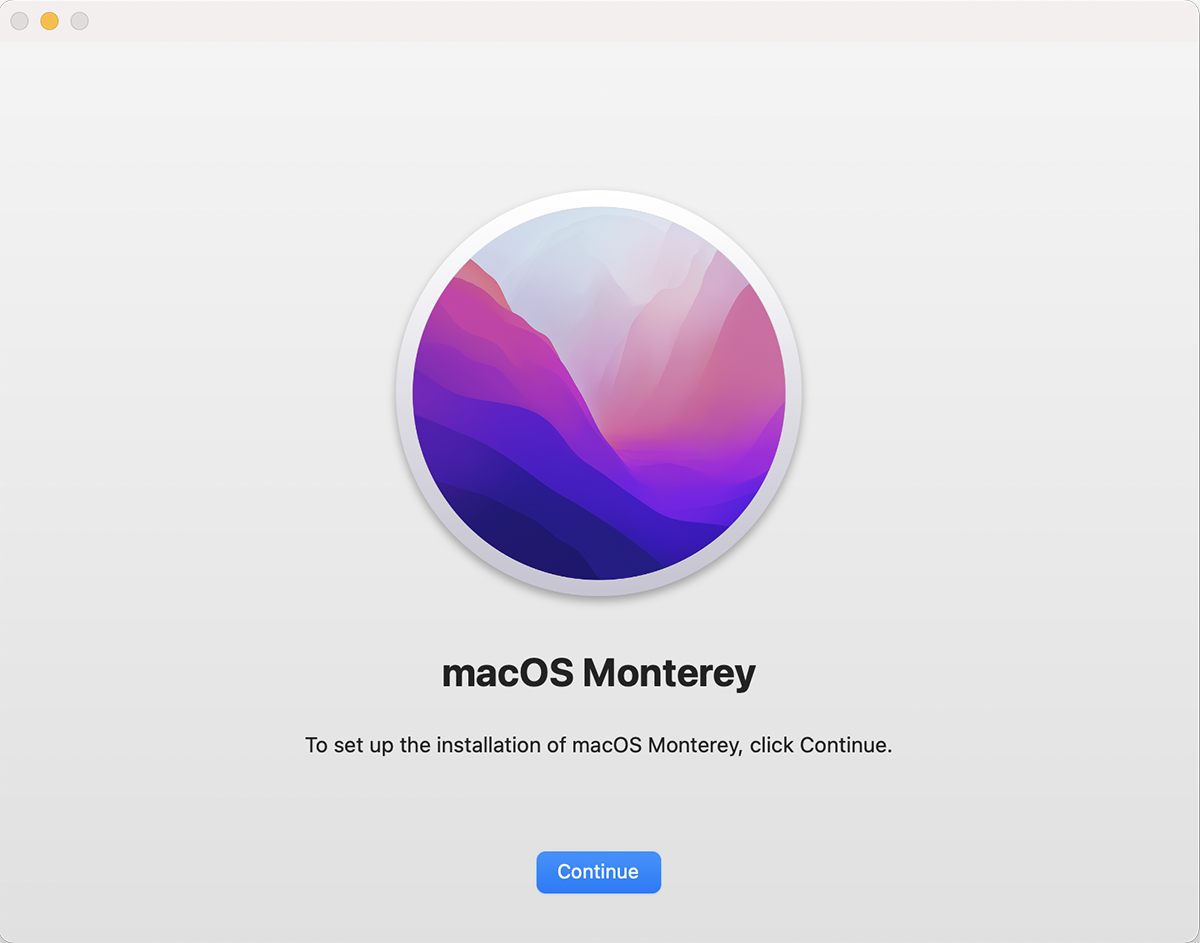
After the wait, an install will launch. At this point I'll typically quit to create the USB-stick. This way I'll avoid downloading the same thing into all of my Macs.
To create the installer, I'll erase an inserted stick with typical command of:
diskutil partitionDisk /dev/disk2 1 GPT jhfs+ "macOS Monterey" 0b
Then change into /Applications/Install macOS Monterey.app/Contents/Resources and run command:
./createinstallmedia \

  --volume /Volumes/macOS\ Monterey/ \

  --nointeraction
It will output the customary erasing, making bootable, copying and done as all other macOSes before this:
Erasing disk: 0%... 10%... 20%... 30%... 100%

Making disk bootable...

Copying to disk: 0%... 10%... 20%... 30%... 40%... 50%... 60%... 70%... 80%... 90%... 100%

Install media now available at "/Volumes/Install macOS Monterey"
Now stick is ready. Either boot from it, or re-run the Monterey installed from App Store.
When all the I's have been dotted and T's have been crossed, you'll be able to log into your newly upgraded macOS and verify the result:
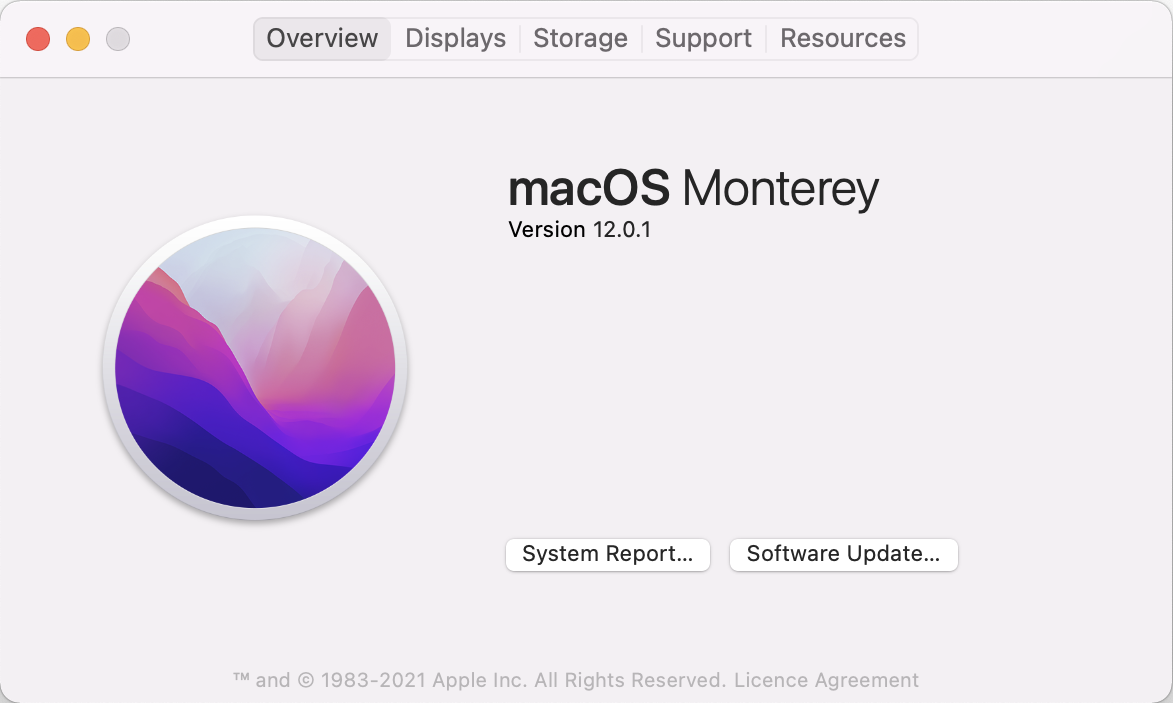
At this point disappointment hit me. The feature I was looking for, WebAuthN or Syncing Platform Authenticator as Apple calls it wasn't available in Safari. To get it working, follow instructions in Apple Developer article Supporting Passkeys. First enable Developer-menu for your Safari (if you haven't already) and secondly, in it:
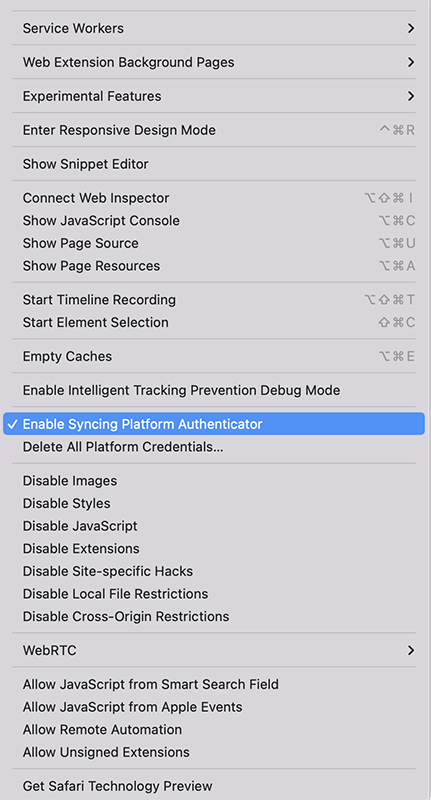
Tick the box on Enable Syncing Platform Authenticator. Done! Ready to go.
Now I went to https://webauthn.io/, registered and account with the Mac's Safari, logged in with WebAuthN to confirm it works on the Mac's Safari. Then I took my development iPhone with iOS 15.2 beta and with iOS Safari went to the same site and logged in using the same username. Not using a password! Nice. 
Maybe in near future WebAuthN will be enabled by default for all of us. Now unfortunate tinkering is required. Anyway, this is a really good demo how authentication should work, cross-platform, without using any of the insecure passwords.
Why Windows 11 won't be a huge success
Tuesday, October 12. 2021
Lot of controversy on Microsoft's surprise release of Windows 11. I'm not talking about when they declared Windows 10 to be the "last Windows" and then releasing 11. Also changes in GUI have lots of discussion points. Neither the forced requirement of TPM2.0 which can be lowered to TPM1.2 with a registry change is not the deal-breaker. Is somebody whispering "Vista" back there?
What really makes all the dominoes fall is the lack of CPU-support.
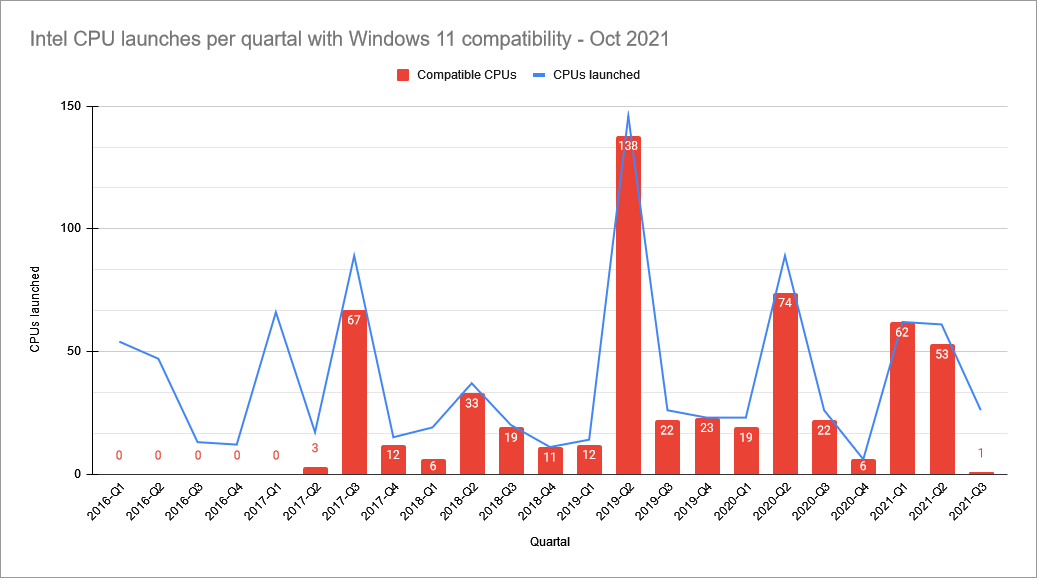
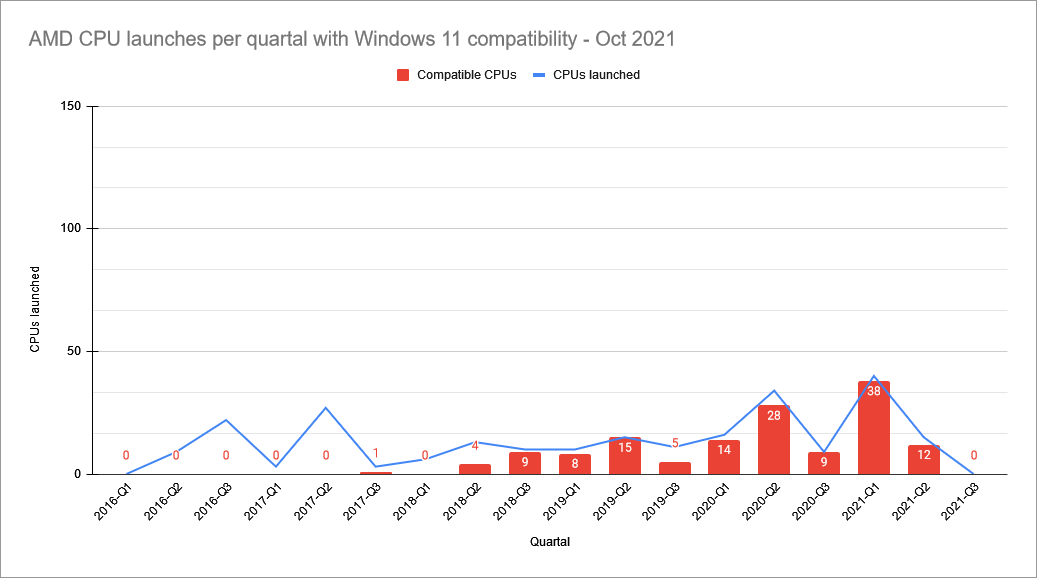
In above graphs is visualization of three pieces of informatinon I scraped. First I took the list of Windows 11 supported CPUs from Windows Hardware Developer - Windows Processor Requirements. Then I went for https://ark.intel.com/ to collect Intel CPU data. Also did the same for https://www.amd.com/en/products/specifications/. As for some reason AMD releases only information from 2016 onwards, for visualization I cut the Intel to match the same.
Ultimate conclusion is, Microsoft won't support all Intel CPUs released after Q2 2017. With AMD stats are even worse, threshold is somewhere around Q2 2018 and not all CPUs are supported. Percentages for AMD are better, but also their volume is smaller.
If you want to do the same, I published my source code into https://github.com/HQJaTu/Windows-CPU-support-scraper. When run, it will produce a Google Spreadsheet like this:

... which can bevisualized further to produce above graphs.
One of my laptops is a Lenovo T570 from 2017. It ticks all the Windows 11 installer boxes, except CPU-support. Obviously, CPU-support situation is likely to change on progression of time, so I may need to keep running the scripts every quarter to see if there will be better support in the later releases of Windows 11.
macOS Big Sur 11.1 update fail
Monday, August 30. 2021
Big Sur was riddled with problems from getgo. It bricked some models, started installing when there was not enough disc space available and all kinds of weirness. Quite few of the minor versions had issues.
I was stuck with version 11.0.1 for over half a year. Of course my mac was hit by one of the problems, I tried navigating around the problem, contacted Apple Care (yay! finally got something ouf of that extra money) and they said a full install will be required. When doing the full install didn't work I lost motivation and just ignored any updates for months.
Going for the typical path, macOS of receving a notification about update or via App Store, they are pretty much the same thing, difference being if I actively seeked for updates or was reminded about it. Result:
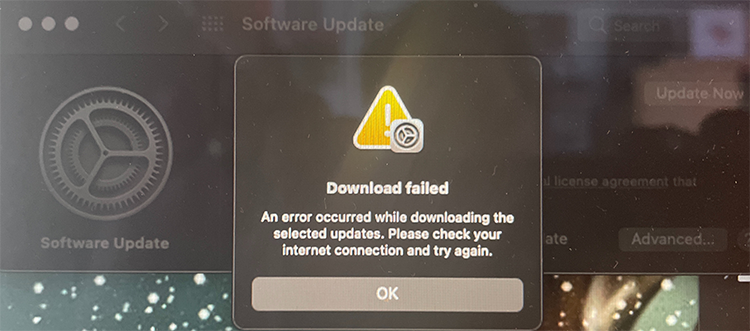
Ok. Doesn't seem to work. I triied downloading on Wi-Fi, on Ethernet with couple of adapters, then I gave up and went for my favorite way of doing updates, USB-stick. Preparing the stick, booting from it, quite soon I was informed about "A software update is required to use this startup disk".
Clicking Update resulted an instant error:
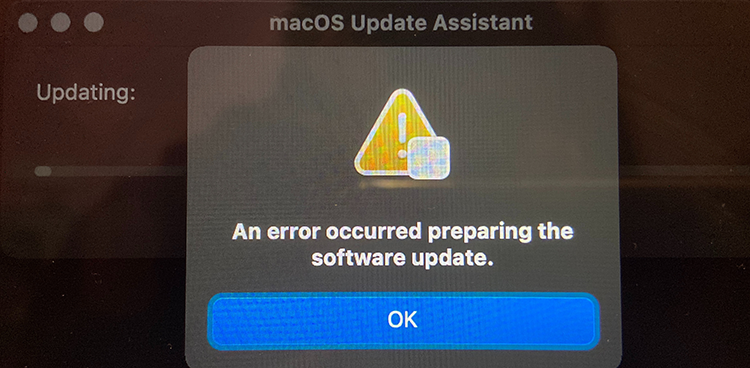
Preparing something to do something didn't go as planned. Error message of "An error occurred preparing the software update" was emitted. Trying again wouldn't help. Booting into Internet recovery wasn't helpful either, error -2003F indicating failure to access resources over Internet. All avenues were explored, everything I knew was done. I totally lost motivation to attempt anything. All that time the Apple Care chat message "just do a clean reinstall" demotivated me more. I WAS TRYING TO DO A CLEAN REINSTALL!! It just didn't work.
I wasn't alone. Many many many users had exactly the same symptoms.
Months passed.
Macs are funny that way. Apple does "support" their old macOSes for security, but old hardware has a cap on what macOS will be the the last one for that particular hardware. At the same time you absolutely positively need to fall forward into latest macOS versions to have support for all nice software. My Mac wasn't capped by obsoleted hardware, it was capped by Apple's own QA failing and allowing a deploy on an OS version that wouldn't work properly. In this case, I needed to update Xcode, the must-have Mac / iOS developer tool. The version I had runing worked, but didn't support the new and shiny things I needed. I wasn't allowed to upgrade as my Big Sur version was too old.
You Maniacs! You blew it up! Ah, damn you! God damn you all to hell!
(For movie-ignorant readers, that quote is from -68 Planet of the Apes)
Need for a recent Xcode sparked my motivation. I went back to the grinding stone and trying to force my thing to update. I re-did everything I had already done before. No avail. Nothing works. Every single thing I attempted resulted in a miserable failure. To expand my understanding about the problem I read everything I could find about the subject and got hints what to try next. Apparently the problem was with the T2-chip.
For the umphteenth time I did a recovery boot and realized something I didn't recall anybody else mentioning:
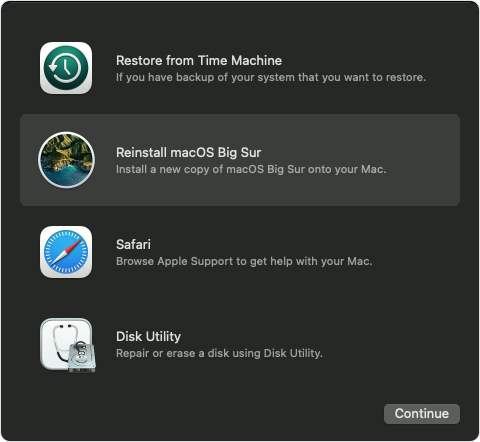
Among numerous options to install or upgrade macOS I knew about, there is one additional approach in the recovery menu. And IT WORKED!
To possibly help out others still suffering from this, I left my mark into StackExchange https://apple.stackexchange.com/a/426520/251842.
Now I'm banging my head to a brick wall. Why didn't I realize that sooner!
Anyway, the Mac is updated, newer software is running. Until similar thing happens for the next time, that is.
Wi-Fi 6 - Part 2 of 2: Practical wireless LAN with Linksys E8450
Sunday, August 15. 2021
There is a previous post in this series about wireless technology.
Wi-Fi 6 hardware is available, but uncommon. Since its introduction three years ago, finally it is gaining popularity. A practial example of sometimes-difficult-to-obtain part is an USB-dongle. Those have existed at least 15 years now. There simply is none with Wi-Fi 6 capability.
Additional twist is thrown at me, a person living in EU-reagion. For some weird (to me) reason, manufacturers aren't getting their radio transmitters licensed in EU. Only in US/UK. This makes Wi-Fi 6 appliance even less common here.
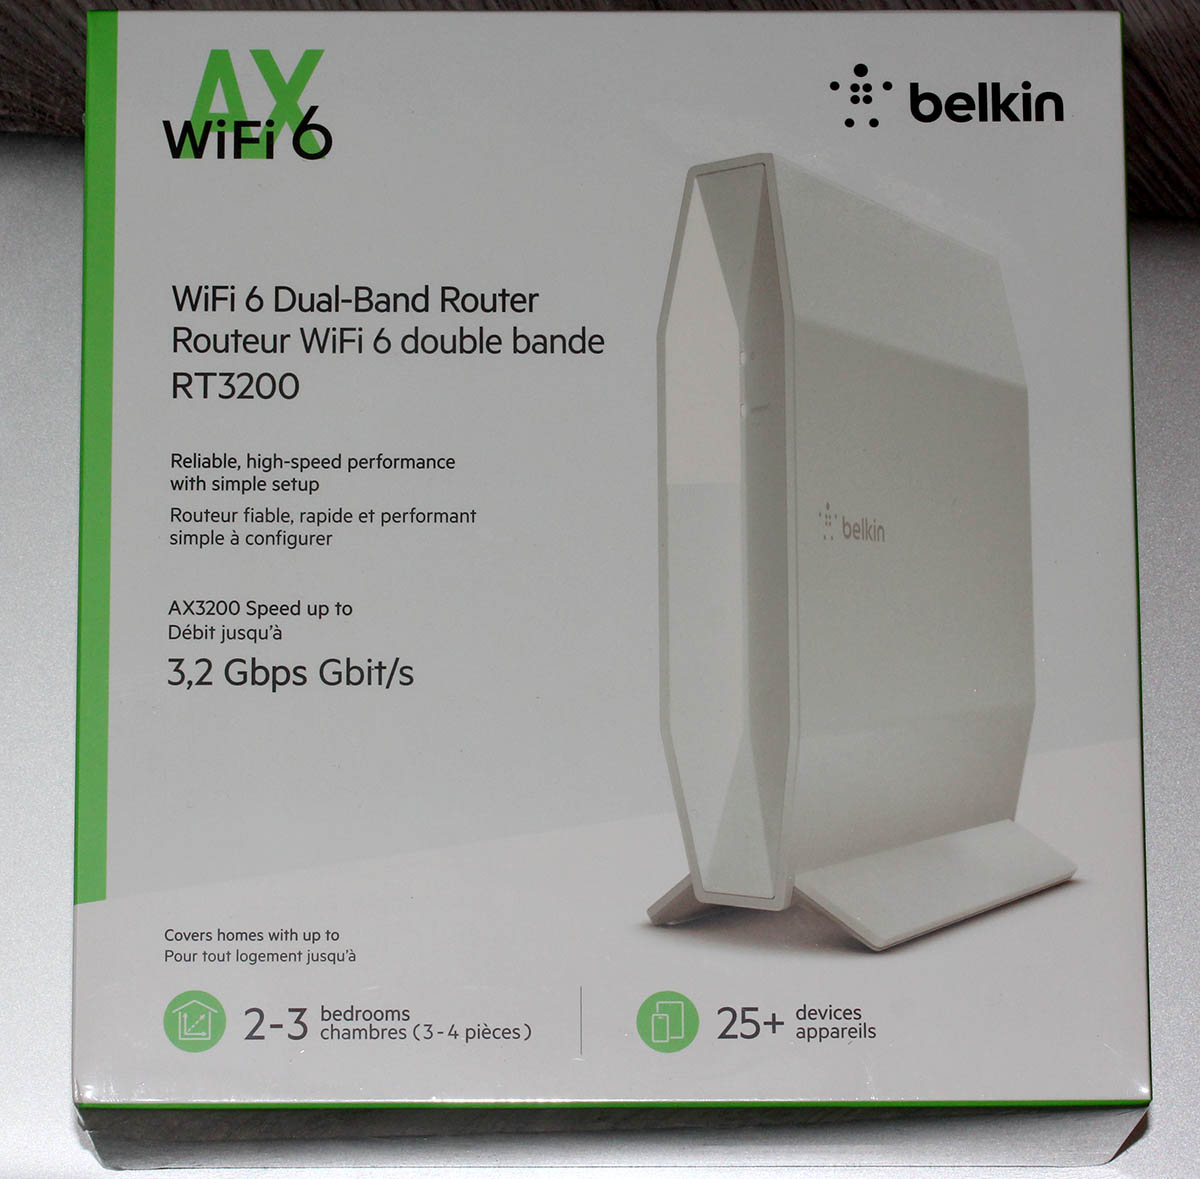
When I throw in my absolute non-negotiable requirement of running a reasonable firmware in my access point, I'll limit my options to almost nil. Almost! I found this in OpenWRT Table-of-Hardware: Linksys E8450 (aka. Belkin RT3200) It is an early build considered as beta, but hey! All of my requirements align there, so I went for it in Amazon UK:

Wi-Fi 6 Access Point: Belkin RT3200
Couple of days waiting for UPS delivery, and here goes:
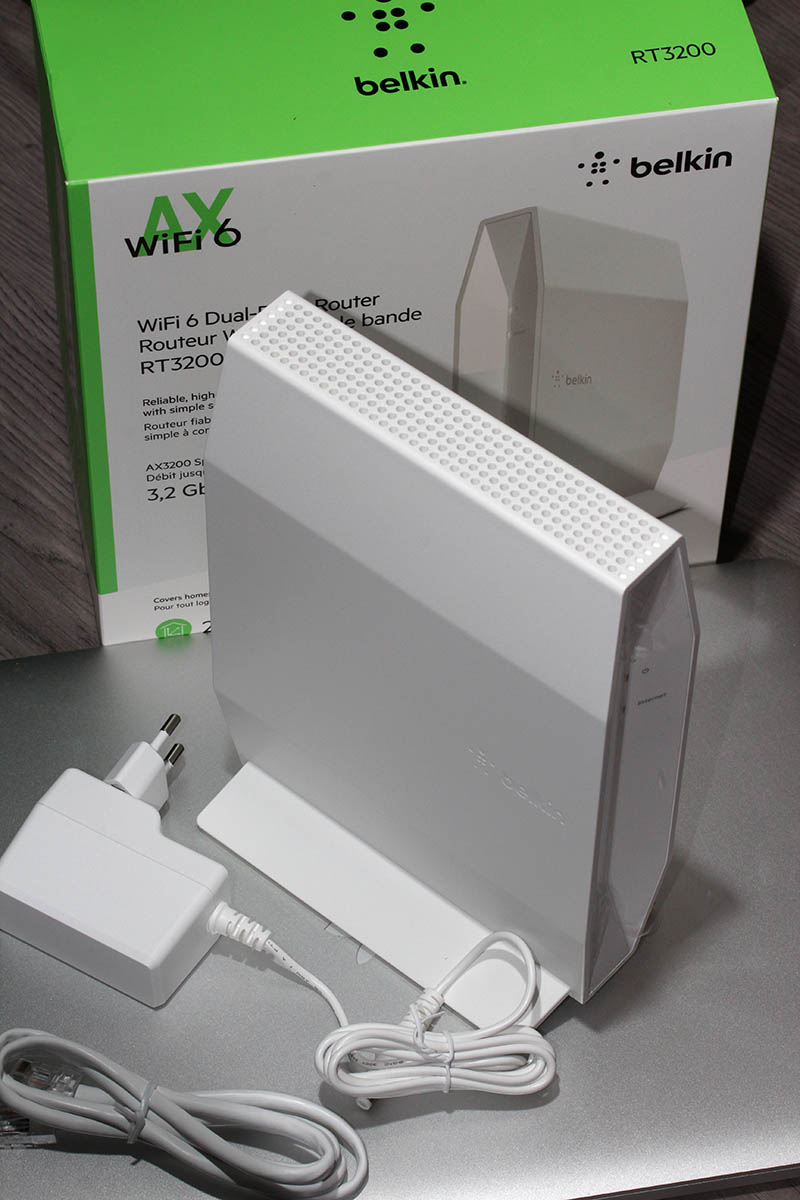
![]()
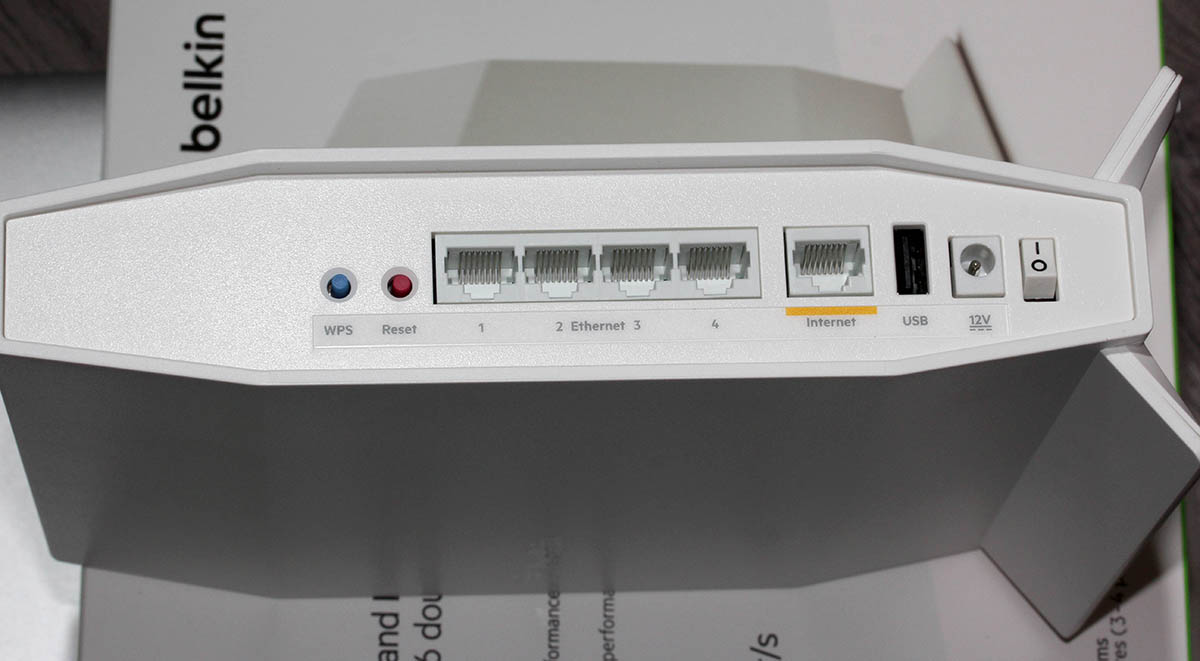
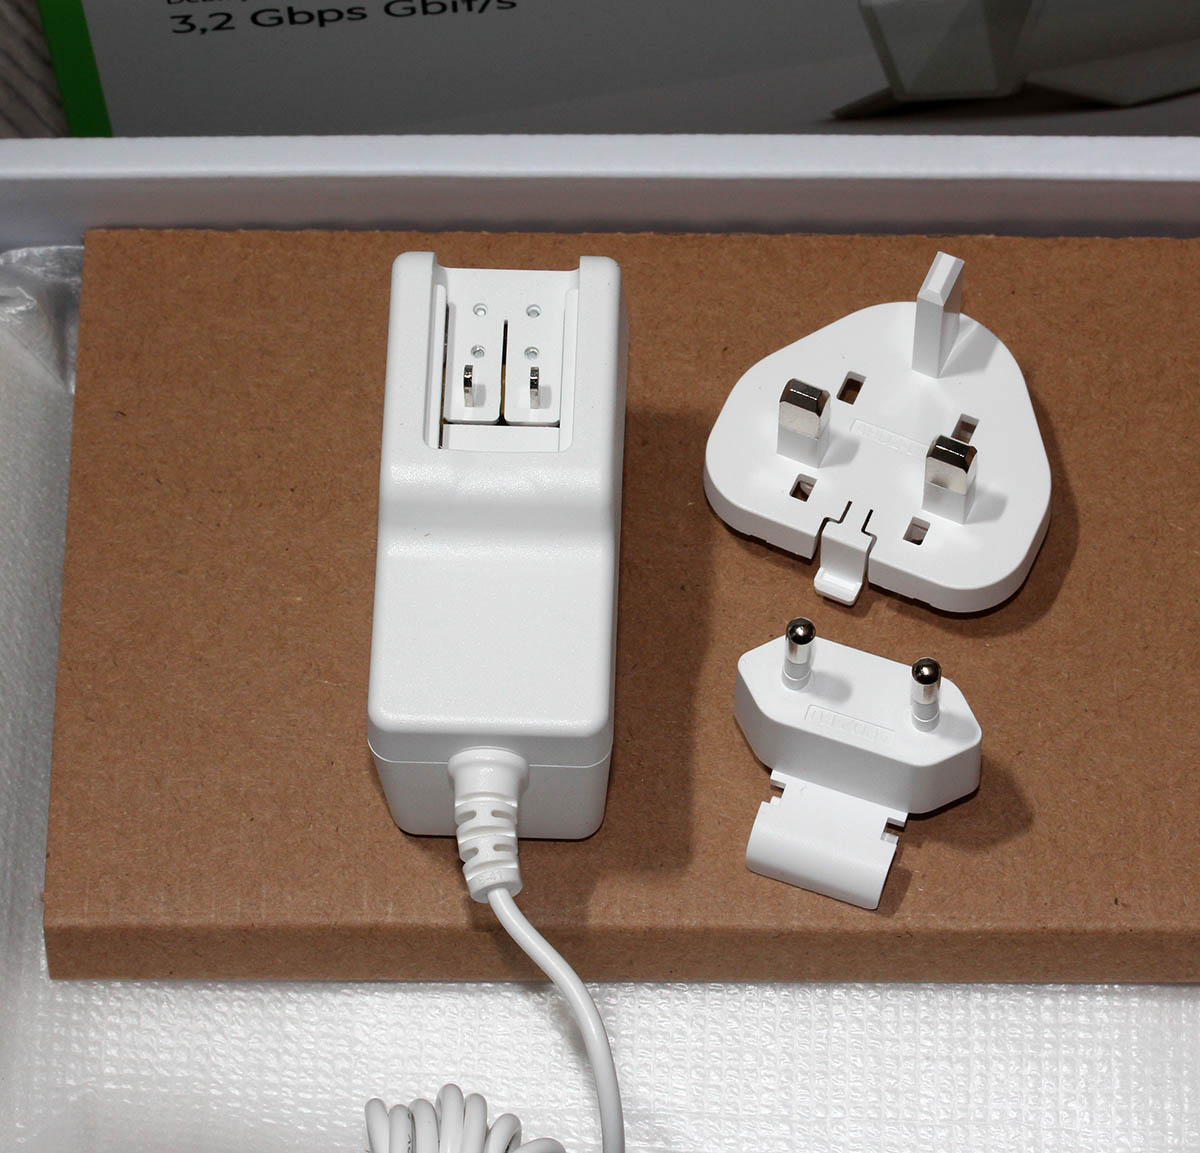
This is exactly what I wanted and needed! A four-port gigabit switch for wired LAN, incoming Internet gigabit connector. 12 VDC / 2 A barrel connector for transformer. Given UK power plugs are from 1870s they're widely incompatible with EU-ones. Luckily manufacturers are aware of this and this box contains both UK and EU plugs in an easily interchangeable form. Thanks for that!
Notice how this is a Belkin "manufactured" unit. In reality it is a relabled Linksys RT3200. Even the OpenWRT-firmware is exactly same. Me personally, I don't care what the cardobard box says as long as my Wi-Fi is 6, is fast and is secure.
Illustrated OpenWRT Installation Guide
The thing with moving away from vendor firmware to OpenWRT is that it can be tricky. It's almost never easy, so this procedure is not for everyone.
To achieve this, there are a few steps needed. Actual documentation is at https://openwrt.org/toh/linksys/e8450, but be warned: amount of handholding there is low, for newbie there is not much details. To elaborate the process of installation, I'm walking trough what I did to get me OpenWRT running in the box.
Step 0: Preparation
You will need:
- Linksys/Belkin RT3200 access point
- Wallsocket to power the thing
- A computer with Ethernet port
- Any Windows / Mac / Linux will do, no software needs to be installed, all that is required is a working web browser
- Ethernet cable with RJ-45 connectors to access the access point's admin panel via LAN
- OpenWRT firmware from https://github.com/dangowrt/linksys-e8450-openwrt-installer
- Download files into a laptop you'll be doing your setup from
- Linksys-compatible firmware is at at:https://github.com/dangowrt/linksys-e8450-openwrt-installer/releases, get
openwrt-mediatek-mt7622-linksys_e8450-ubi-initramfs-recovery-installer.itb - Also download optimized firmware
openwrt-mediatek-mt7622-linksys_e8450-ubi-squashfs-sysupgrade.itb
- Skills and rights to administer your workstation to have its Ethernet port a fixed IPv4-address from net 192.168.1.1/24
- Any other IPv4 address on that net will do, I used 192.168.1.10
- No DNS nor gateway will be needed for this temporary setup
Make sure not to connect the WAN / Internet into anything. The Big Net is scary and don't rush into that yet. You can do that later when all installing and setupping is done.
Mandatory caution:
If you just want to try OpenWrt and still plan to go back to the vendor firmware, use the non-UBI version of the firmware which can be flashed using the vendor's web interface.
Process described here is the UBI-version which does not allow falling back to vendor firmware.
Step 1: Un-box and replace Belkin firmware
After plugging the Access Point to a wall socket, flicking the I/O-switch on, attaching an Ethernet cable to one of the LAN-switch ports and other end directly to a laptop, going to http://192.168.1.1 with your browser will display you something like this:
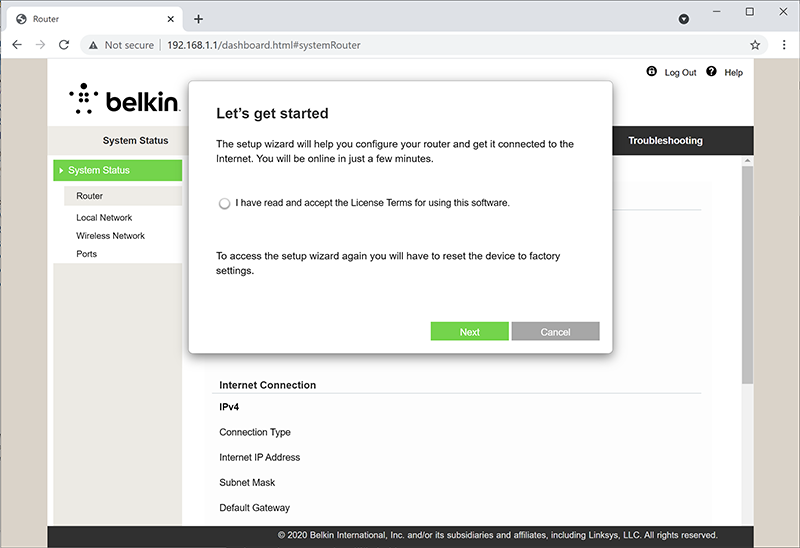
What you need to do is try to exit the out-of-box-experience setup wizard:


For the "Ethernet cable is not connected" you need to click Exit. When you think of the error message bit harder, if you get the message, your Ethernet IS connected. Ok, ok. It is for the WAN Ethernet, not LAN.
Notice how setup "did not complete succesfully". That is fully intentional. Click "Do not set up". Doing that will land you on a login:
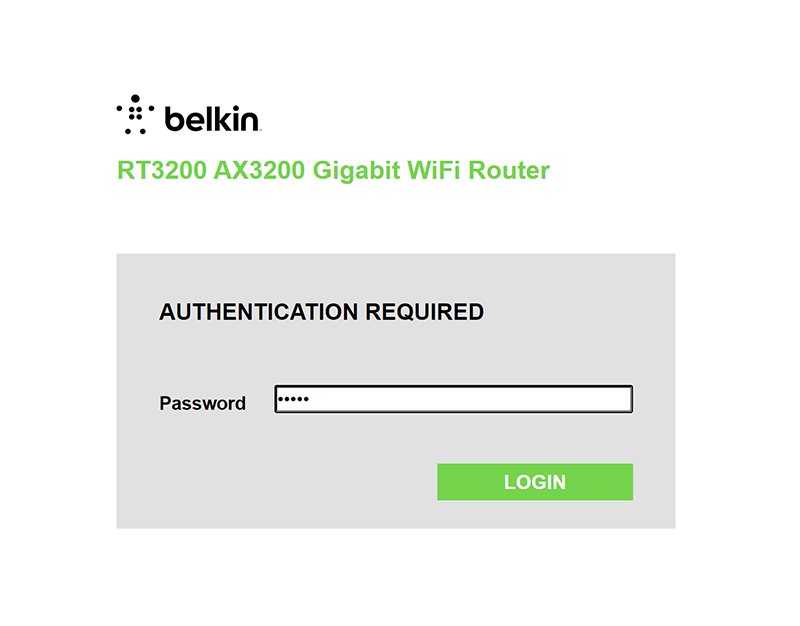
This is your unconfigured admin / admin -scenario. Log into your Linksys ... erhm. Belkin.
Select Configuration / Administration / Firmware Upgrade. Choose File. Out of the two binaries you downloaded while preparing, go for the ubi-initramfs-recovery-installer.itb. That OpenWRT firmware file isn't from manufacturer, but the file is packaged in a way which makes it compatible to allow easy installation:
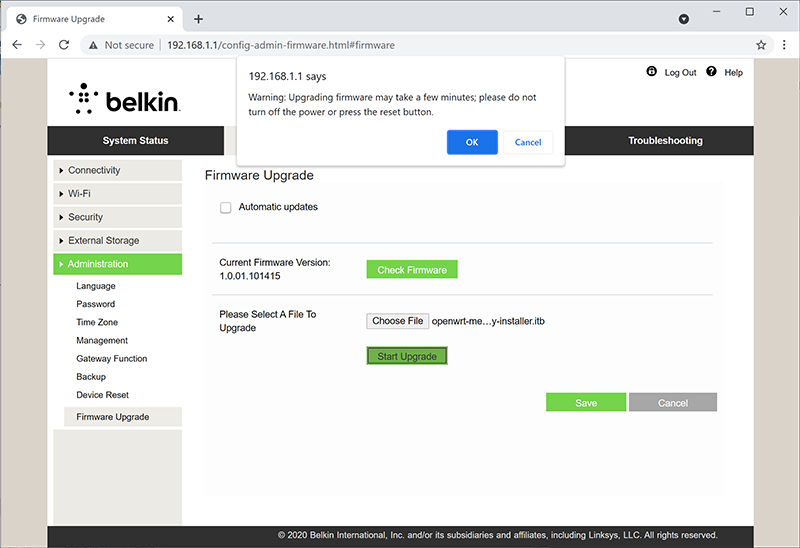
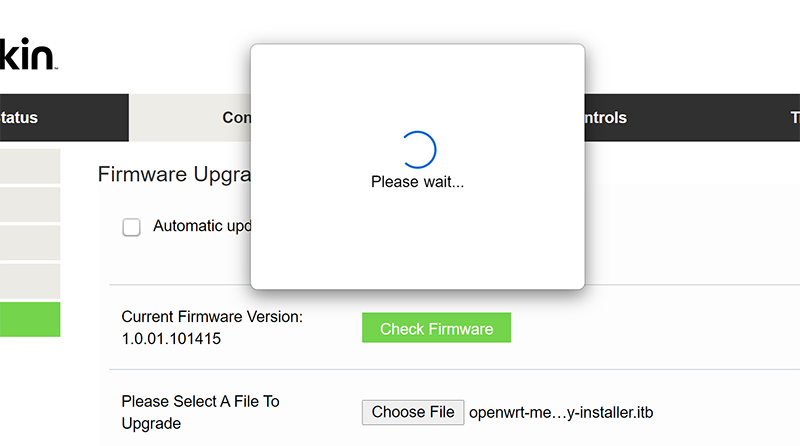
On "Start Upgrade" there will be a warning. Click "Ok" and wait patiently for couple minutes.
Step 2: Upgrade your OpenWRT recovery into a real OpenWRT
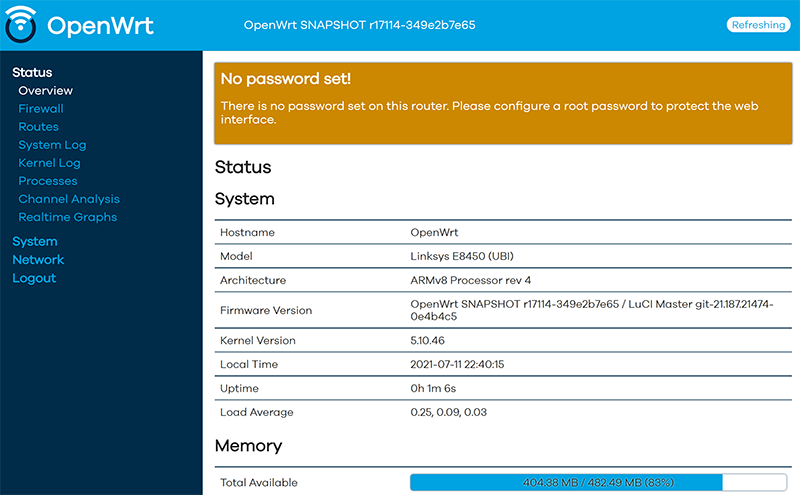
When all the firmware flashing is done, your factory firmware is gone:
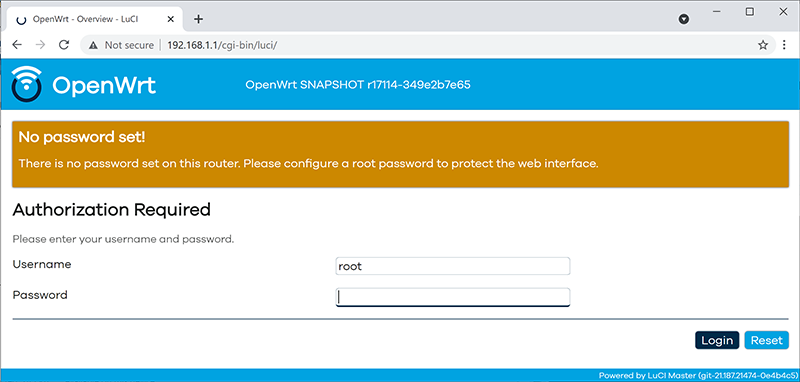
There is no password. Just "Login". An OpenWRT welcome screen will be shown:
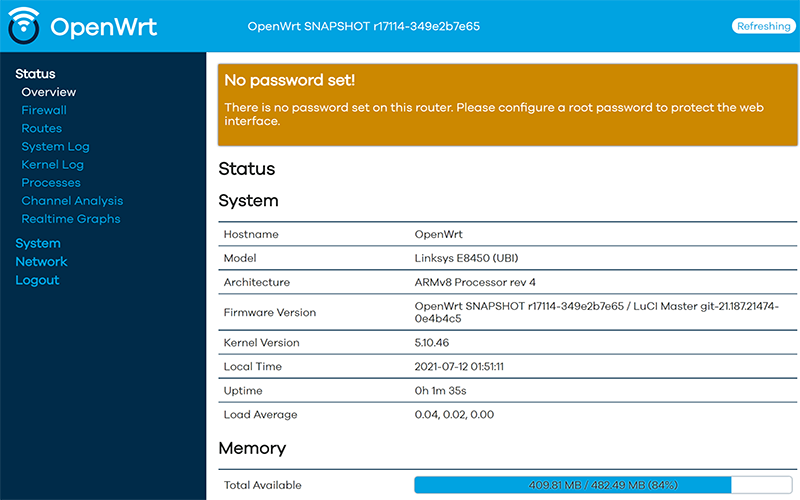
Now that you're running OpenWRT, your next task is to go from recovery to real thing. I'm not sure if I'll ever want to go back, but as recommended by OpenWRT instructions, I did take backups of all four mtdblocks: bl2, fip, factory and ubi. This step is optinal:
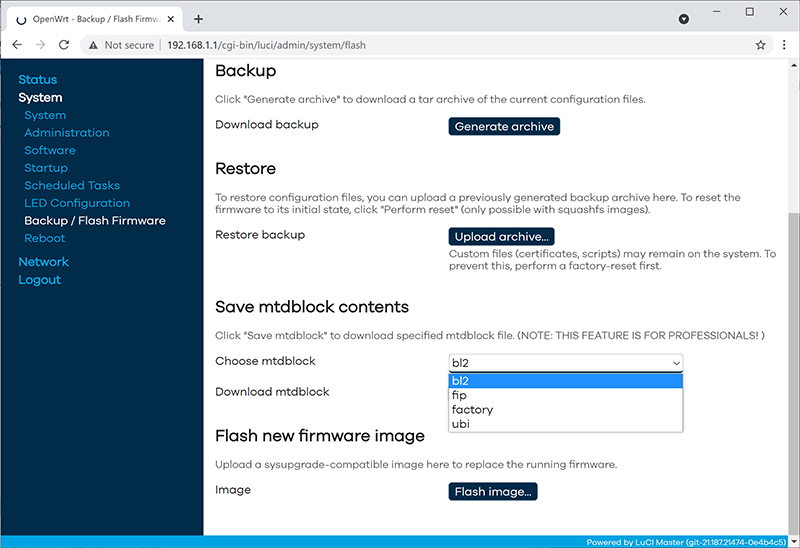
When you're ready, go for the firmware upgrade. This time select openwrt-mediatek-mt7622-linksys_e8450-ubi-squashfs-sysupgrade.itb:

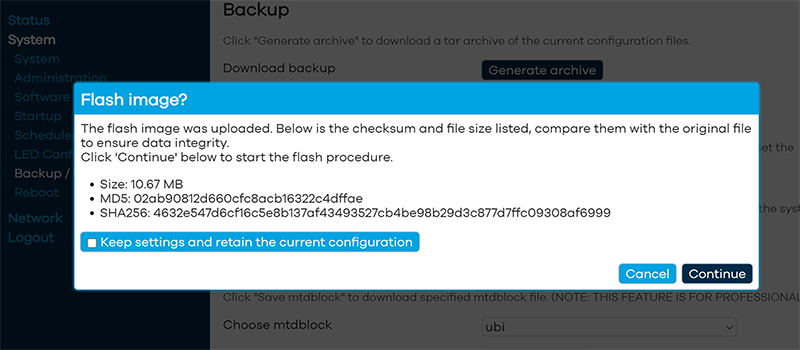
To repeat the UBI / non-UBI firmware: This is the UBI-version. It is recommended as it has better optimization for layout and management of SPI flash, but it does not allow fallbacking to vendor firmware.
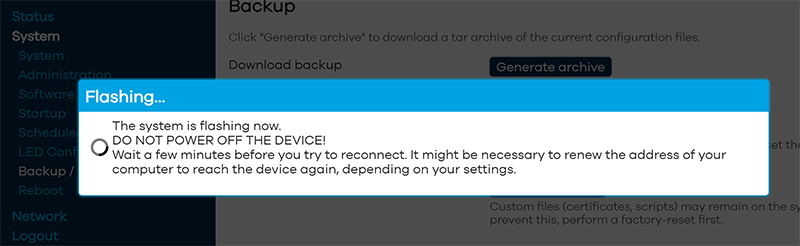
I unchecked the "Keep settings and retain the current configuration" to make sure I got a fresh start with OpenWRT. On "Continue", yet another round of waiting will occur:
Step 3: Setup your wireless AP
Déjà vu!
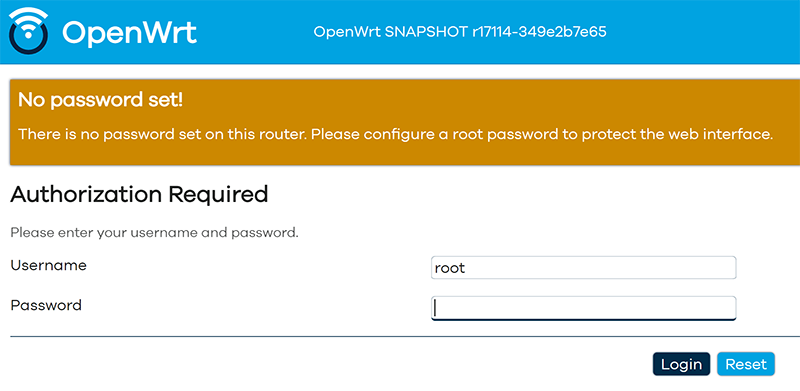
You have seen this exact screen before. Login (there is no password yet):
Second time, same screen but with this time there is a proper firmware in the AP. Go set the admin account properly to get rid of the "There is no password set on this router" -nag. Among all settings, go to wireless configuration to verify both 2.4 and 5 GHz radios are off:
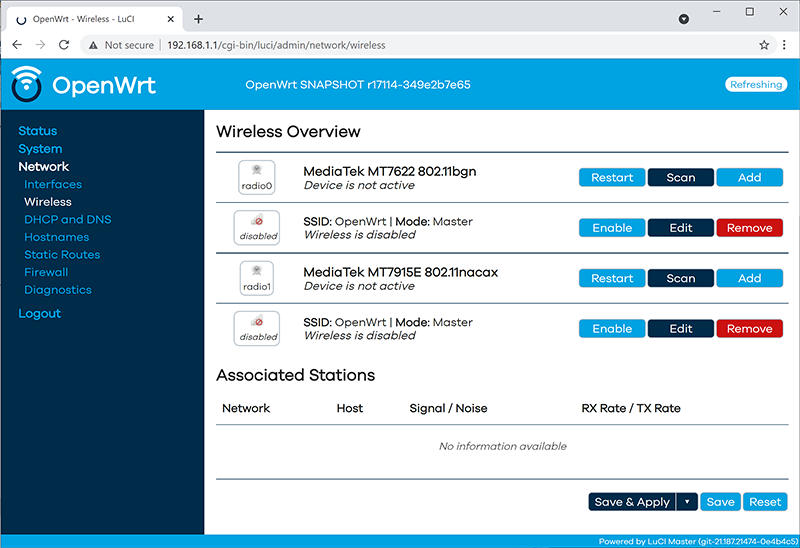
Go fix that. Select "Edit" for the 5 GHz radio and you'll be greeted by a regular wireless access point configuration dialog. It will include section about wireless security:
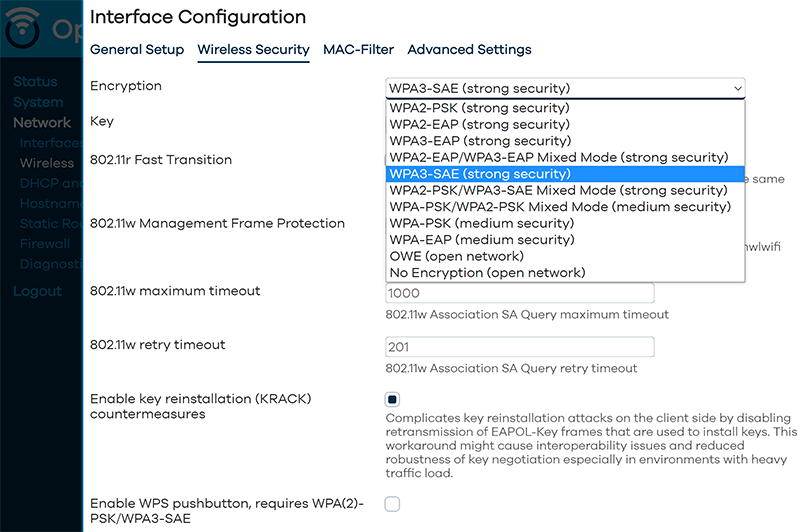
As I wanted to improve my WLAN security, I steer away from WPA2 and went for a WPA3-SAE security. Supporting both at the same time is possible, but securitywise it isn't wise. If your system allows wireless clients to associate with a weaker solution, they will.
Also for security, check KRACK attack countermeasures. For more details on KRACK, see: https://www.krackattacks.com/
When you've done, you should see radio enabled on a dialog like this:

Step 4: Done! Test.
That's it! Now you're running a proper firmware on our precious Wi-Fi 6 AP. But how fast it is?
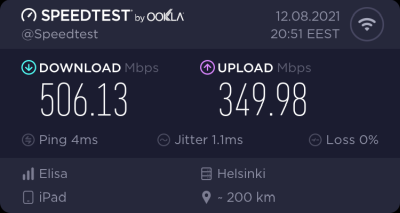
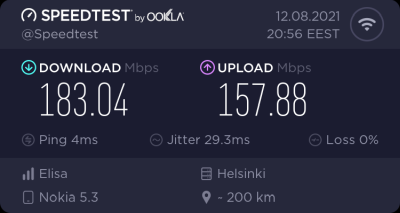
As I said, I don't have many Wi-Fi 6 clients to test with. On my 1 gig fiber, iPad seems to be pretty fast. Also my Android phone speed is ... well ... acceptable.
For that speed test I didn't even go for the "one foot distance" which manufacturers love to do. As nobody uses their mobile devices right next to their AP, I tested this on a real life -scenario where both AP and I were located the way I would use Internet in my living room.
Final words
After three year wait Wi-Fi 6 is here! Improved security, improved speed, improved everything!
DynDNS updates to your Cloud DNS - Updated
Monday, July 12. 2021
Python 3.9 in RedHat Enterprise Linux 8.4
Tuesday, May 25. 2021
Behind the scenes: Reality of running a blog - Story of a failure
Monday, March 22. 2021
... or any (un)social media activity.
IMHO the mentioned "social" media isn't. There are statistics and research to establish the un-social aspect of it. Dopamin-loop in your brain keeps feeding regular doses to make person's behaviour addicted to an activity and keep the person leeching for more material. This very effectively disconnects people from the real world and makes the dive deeper into the rabbit hole of (un)social media.
What most of the dopamin-dosed viewer of any published material keep ignoring is the peak-of-an-iceberg -phenomenon. What I mean is a random visitor gets to see something amazingly cool. A video or picture depicting something that's very impressive and assume that person's life consists of a series of such events. Also humans tend to compare. What that random visitor does next is compares the amazing thing to his/hers own "dull" personal life, which does not consist of a such imaginary sequence of wonderful events. Imaginary, because reality is always harsh. As most of the time we don't know the real story, it is possible for 15 seconds of video footage to take months or preparation, numerous failures, reasonable amounts of money and a lot of effort to happen.
An example of harsh reality, the story of me trying to get a wonderful piece of tech-blogging published.
I started tinkering with a Raspberry Pi 4B. That's something I've planned for a while, ordered some parts and most probably will publish the actual story of the success later. Current status of the project is, well planned, underway, but nowhere near finished.
What happened was for the console output of the Linux to look like this:

That's "interesting" at best. Broken to say the least.
For debugging of this, I rebooted the Raspi into previous Linux kernel of 5.8 and ta-daa! Everything was working again. Most of you are running Raspian, which has Linux 5.4. As I have the energy to burn into hating all of those crappy debians and ubuntus, my obvious choice is a Fedora Linux Workstation AArch64-build.
To clarify the naming: ARM build of Fedora Linux is a community driven effort, it is not run by Red Hat, Inc. nor The Fedora Project.
Ok, enough name/org -talk, back to Raspi.
When in a Linux graphics go that wrong, I always disable the graphical boot in Plymouth splash-screen. Running plymouth-set-default-theme details --rebuild-initrd will do the trick of displaying all-text at the boot. However, it did not fix the problem on my display. Next I had a string of attempts doing all kinds of Kernel parameter tinkering, especially with deactivating Frame Buffer, learning all I could from KMS or Kernel Mode Setting, attempting to build Raspberry Pi's userland utilities to gain insight of EDID-information just to realize they'll never build on a 64-bit Linux, failing with nomodeset and vga=0 as Kernel Parameters to solve the problem. No matter what I told the kernel, display would fail. Every. Single. Time.
It hit me quite late in troubleshooting. While observing the sequence of boot-process, during early stages of boot everything worked and display was un-garbled. Then later when Feodra was starting system services everything fell. Obviously something funny happened with GPU-driver of Broadcom BCM2711 -chip of VideoCore 4, aka. vc4 in that particular Linux-build when the driver was loaded. Creating file /etc/modprobe.d/vc4-blacklist.conf with contents of blacklist vc4 to prevent VideoCore4 driver from ever loading did solve the issue! Yay! Finally found the problem.
All of this took several hours, I'd say 4-5 hours straight work. What happened next was surprising. Now that I had the problem isolated into GPU-driver, on IRC's #fedora-arm -channel, people said vc4 HDMI-output was a known problem and was already fixed in Linux 5.11. Dumbfounded by this answer, I insisted version 5.10 of being the latest and 5.11 lacking availability. They insisted back. Couple hours before me asking, 5.11 was deployed into mirrors sites for everybody to receive. This happened while I was investigating failing and investigating more.
dnf update, reboot and pooof. Problem was gone!
There is no real story here. In pursuit of getting the thing fixed, it fixed itself by time. All I had to do is wait (which obviously I did not do). Failure after failure, but no juicy story on how to fix the HDMI-output. On a typical scenario, this type of story would not get published. No sane person would shine any light on a failure and time wasted.
However, this is what most of us do with computers. Fail, retry and attempt to get results. No glory, just hard work.
Windows 10 Aero: shaker minimize all windows - disable
Friday, February 26. 2021
podman - Running containers in Fedora 31+
Tuesday, November 10. 2020
Getting rid of Flash from Windows - For good
Wednesday, October 28. 2020
Today, Microsoft released KB4577586, Update for the removal of Adobe Flash Player. This is wonderful news! I've been waiting for this moment to happen for many many years. Many organizations will cease to support Adobe Flash end of this year and this release is an anticipated step on that path. Goodbye Flash!
Updates need to be manually downloaded from Microsoft Update Catalog, link: https://www.catalog.update.microsoft.com/search.aspx?q=kb4577586. The reason for this is the earliness. If you're not as impatient as I, the update will go its natural flow and eventually be automatically offered by your Windows.
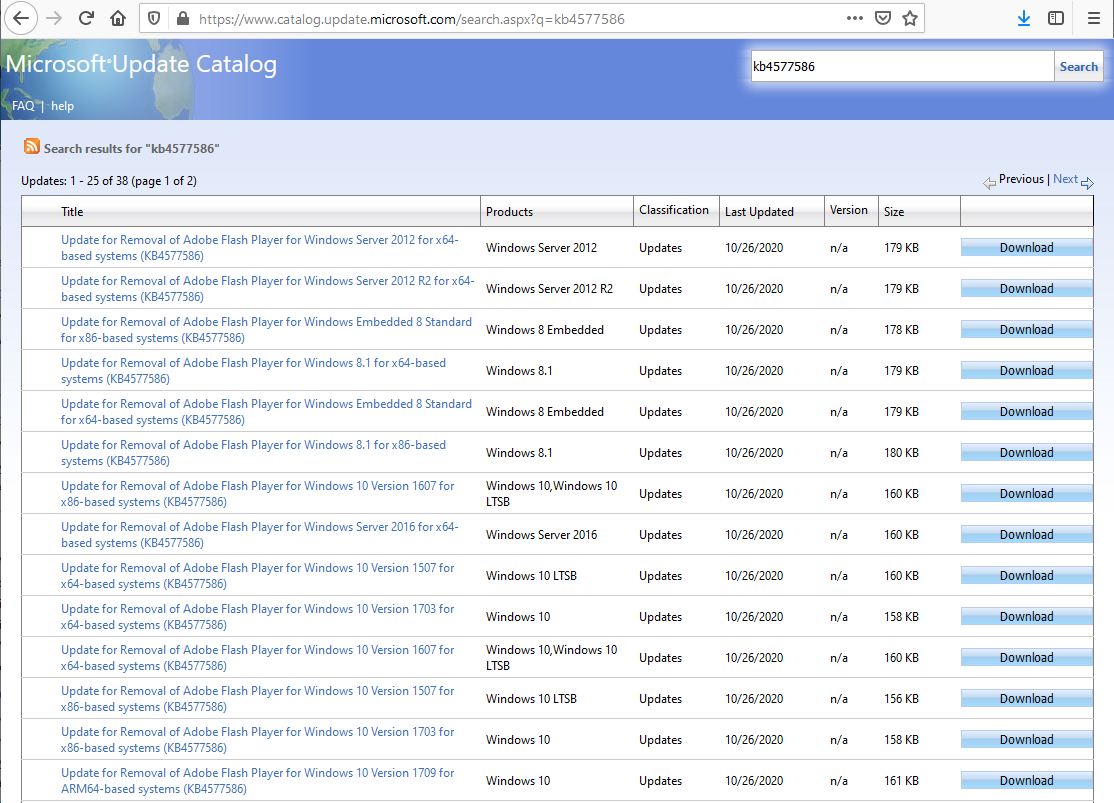
As you can see from the listing, you need to be super-careful when picking the correct file to download. Also, to make things worse, there are some discrepancies in the descriptions:

To get the exact version of your Windows, run winver. It will output something like this:
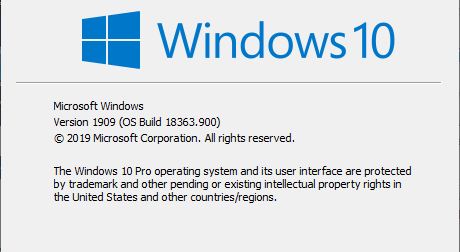
In that example, the package required is for Windows 10 release 1909. To download the correct package, you also need to know the processor architecture. Whether it's AMD-64, Intel-32 or ARM-64 cannot be determined from above information. If you have no idea, just go with x64 for processor architecture, that's a very likely match. Those not running x64 will know the answer without querying.
As a software engineer, I obviously wanted to extract all the required information programmatically. I automated the process of getting to know the exact version your particular Windows is running by writing and publishing a helper-script for PowerShell Core. If you are able to run PowerShell Core, the script is available at: https://gist.github.com/HQJaTu/640d0bb0b96215a9c5ce9807eccf3c19. Result will look something like this:

Result will differ on your machine, but that's the output on my Windows 10 Pro release 1909 (x64) build 18363. Couple of other examples are:
Windows 10 Pro release 2004 (x64) build 20241 on my Windows Insider preview
Windows 8.1 Pro with Media Center (x64) build 9600 on my Windows 8.1
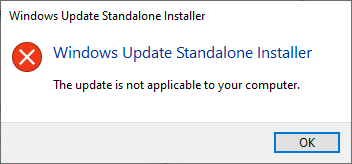
If you managed to pick out the correct .msu-file, on running it, output will query if you want to proceed with installation:
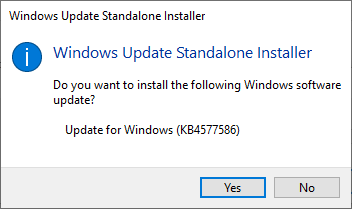
In case of a mismatch, error will say something about that particular update not being applicable to your computer:
After installation, go verify the results of Flash being removed. Running your regular Chrome (or Firefox) won't do the trick. They won't support Flash anyways. What you just did was removed Flash from Windows, aka. Internet Explorer. Go to https://www.whatismybrowser.com/detect/is-flash-installed and observe results:

On a Windows, where KB4577586 hasn't been successfully applied, message will indicate existence of Adobe Flash player:

That's it. Flash-b-gone!
Custom X.509 certificate in Windows 10 Remote Desktop Service
Wednesday, October 21. 2020
On a non-AD environment, this is what your average Windows 10 Remote Desktop client will emit on a connection:
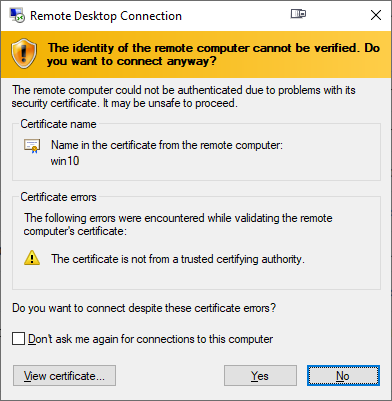
For those who are AD-domain admins, they may have seen this rarely. If an AD has Certification Authority installed, it is easy and typical to deploy certs from it to workstations and never see the above message. The Net is full of instructions like Replace RDP Default Self Sign Certificate.
Problem that needs to be solved
For anybody like me, not running an AD-domain, simply having couple of Windows 10 -boxes with occasional need to RDP into them, that popup becomes familiar.
Note: I'll NEVER EVER click on Don't ask me again -prompts. I need to know. I want to know. Suppressing such information is harmful. Getting to know and working on the problem is The WayⓇ.
Gathering information about solution
If this was easy, somebody had created simple instructions for updating RDP-certificates years ago. Decades even. But no. No proper and reasonable easy solution exists. Searching The Net far & wide results only in bits and pieces, but no real tangible turn-key(ish) solution.
While in quest for information, given existence of The Net, I find other people asking the same question. A good example is: How to provide a verified server certificate for Remote Desktop (RDP) connections to Windows 10.
As presented in the above StackExchange answer, the solution is a simple one (I think not!!). These five steps need to be done to complete the update:
- Purchase a genuine verified SSL-certificate
- Note: It's a TLS-certificate! The mentioned protocol has been deprecated for many years. Even TLS 1 and TLS 1.1 have been deprecated. So it's a X.509 TLS-certificate.
- Note 2: Ever heard of Let's Encrypt? ZeroSSL? Buypass? (and many others) They're giving away perfectly valid and trusted TLS-certificates for anybody who shows up and can prove they have control over a domain. No need to spend money on that.
- Wrap the precious certificate you obtained in step 1) into a PKCS#12-file. A
.pfxas Windows imports it.- Note: Oh, that's easy! I think PKCS#12 is the favorite file format of every Regular Joe computer user.
 Not!
Not!
- Note: Oh, that's easy! I think PKCS#12 is the favorite file format of every Regular Joe computer user.
- Install the PKCS#12 from step 2) into Windows computer account and make sure user NETWORK SERVICE has access to it.
- Note: Aow come on! Steps 1) and 2) were tedious and complex, but this is wayyyyyy too hard to even begin to comprehend! Actually doing it is beyond most users.
- Open a Registry Editor and add the SHA-1 fingerprint of the certificate into
HKEY_LOCAL_MACHINE\SYSTEM\CurrentControlSet\Control\Terminal Server\WinStations\RDP-Tcp\into a binary value calledSSLCertificateSHA1Hash.- Note: Oh really! Nobody knows what's a SHA-1 fingerprint nor how to extract that from a certificate in a format suitable to a registry binary value!
- Reboot the Windows!
- Note: As all Windows-operations, this requires a reboot.
- Note: As all Windows-operations, this requires a reboot.
Mission accomplished! Now the annoying message is gone. Do you want to guess what'll happen after 90 days passes? That's the allotted lifespan of a Let's Encrypt -certificate. Yup. You'll be doing the all of the above again. Every. Single. Painstaking. Step.
Problems needing to be solved
Let's break this down. As the phrase goes, an elephant is a mighty big creature and eating one is a big task. It needs to be done one bit at a time.
0: Which cert is being used currently?
If you simply want to get the SHA-1 hash of the currently installed RDP-certificate, a simple (or maybe not?) command of:
wmic /namespace:"\\root\cimv2\TerminalServices" PATH "Win32_TSGeneralSetting" get "SSLCertificateSHA1Hash"
... will do the trick. No admin-permissions needed or anything fancy.
To state the obvious problem: you'll be presented a hex-string but you have zero idea to where it points to and what to do with this information.
Hint:
You can to browse Windows Certificate Mchine Store. System certificates are not stored in your personal Certificate Store, so carefully point to a correct container. By default certificates are listed by subject, not SHA-1 hash. Luckily the self-signed RDP-cert is located in a folder "Remote Desktop" narrowing down the set.
To state the second obvious problem: WMI is a tricky beast. Poking around it from CLI isn't easy.
1: The certificate
Ok. With that you're on your own. If you cannot figure how Let's Encrypt works, doing this may not be your thing.
2: PKCS#12 wrapping
In most scenarios, a certificate is typically delivered in a PEM-formatted file or set of two files (one for public and second for private keys). PEM-format is native in *nix environment and all of tooling there can handle the data with ease. Converting the PEM-data into an interim (Microsoft created) format for Microsoft-world can be done, but is bit tricky in a *nix. Usage for this PKCS#12-formatted data is ephemeral, the certificate will stay in the file for only short while before being imported to Windows and there is no need for it anymore. A cert can be re-packaged if needed as long as the original PEM-formatted files exist. Also, the certificate data can be exported from Windows back to a file, if needed.
As PEM-format is native in *nix for certs, it is completely unsupported in Windows. A simple operation of "here is the PEM-file, import it to Windows" is literally impossible to accomplish! There is a reason why instructions have a rather complex spell with openssl-command to get the job done.
2.1: What others have done
When talking about PowerShell-scripting and PEM-format, I'll definitely have to credit people of PKISolutions. They publish a very nice library of PSPKI (source code is at https://github.com/PKISolutions/PSPKI) with PEM-import capability. As Windows Certificate Store is a complex beast, that code doesn't directly work as I'd need it to be for importing into Machine Store. Given existence of source code, the logic they wrote can be lifted, modified and re-used to do what is needed for RDP-cert installation process.
Among PKISolutions' excellent work is blog post by Accessing and using certificate private keys in .NET Framework/.NET Core. There he explains in detail dark/bright/weird ages about how Microsoft's libraries have approached the subject of PKI and how thing have evolved from undefined to well-behaving to current situation where everything is... well... weird.
Why I mention this is imperative for practical approach. PSPKI-library works perfectly in PowerShell 5.x, which is built on Microsoft .NET Framework 4.5. That particular framework version is bit old, and given its age, it falls into bright bracket of doing things.
However, not living in past, the relevant version of PowerShell is PowerShell Core. At the time of writing the LTS (or Long-Term-Support) version is 7.0. A version of 7.1 is in preview and version 6 is still actively used. Those versions run obviously on modern .Net Core, an open-source version of DotNet running in Windows, Linux and macOS. In transition of Microsoft .Net into open-source .Net Core, most operating system -dependant details have changed while bumping things from closed-source-Windows-only thingie. This most definitely include implementation and interface details of Public Key Infrastructure.
In short: PSPKI doesn't work anymore! It did in "bright ages" but not anymore in current "weird ages".
2.2: What I need to get done
Sticking with an obsoleted PowerShell-version is a no-go. I need to get stuff working with something I actually want to run.
In detail, this involves figuring out how .Net Core's System.Security.Cryptography.CngKey can import an existing key into Machine Store as an exportable one. That was bit tricky even in .Net Framework's System.Security.Cryptography.RSACryptoServiceProvider. Also note, that when I talk about PKI, I most definitely mean RSA and other practical algorithms like ECDSA, which is fully supported in Cryptography Next Generation (CNG). The biggest problem with CNG is, there is lack of usable documentation and practical examples.
Having elliptic curve support is important. RSA is absolutely not obsoleted and I don't see it being so in near future. It's the classic: having options. This is something I already addressed in a blog post this spring.
Most people are using only RSA and can get their job done using old libraries. I ran out of luck as I needed to do something complex. Using new libraries was the only way of getting forward. That meant lots of trial and error. Something R&D is about.
3: Import the PKCS#12-packaged certificate into a proper certificate store of a Windows-machine
When the very difficult part is done and a PKCS#12-file exists and contains a valid certificate and the private key of it, importing the information is surprisingly easy to accomplish with code.
On the other hand, this one is surprisingly complex to accomplish manually. Good thing I wasn't aiming for that.
4: Inform RDP-services which certificate to use
Getting a SHA-1 hash of a X.509 certificate is trivial. Stamping a well-known value into registry is easy. Having correct permissions set was nearly impossible, but ultimately it was doable.
5: Make sure RDP-services will use the certificate
For this, there are number of ways to do. Many of them will involve reboot or restarting the service with a PowerShell-spell of:
Restart-Service -DisplayName "Remote Desktop Services" -Force
Surprisingly, on a closer look there is a way to accomplish this steop without rebooting anything. It's just not well known nor well documented, but Windows Management Instrumentation (or wmic) can do that too! Assuming the SHA-1 thumbprint of the certificate was in variable $certThumbprint, running this single-line command will do the trick:
wmic /namespace:"\\root\cimv2\TerminalServices" PATH "Win32_TSGeneralSetting" Set "SSLCertificateSHA1Hash=$certThumbprint"
It will update registry to contain appropriate SHA-1 hash, confirm the access permissions and inform RDP-service about the change. All of which won't require a reboot nor an actual restart of the service. Imagine doing the cert update via RDP-session and restarting the service. Yup. You will get disconnected. Running this WMI-command won't kick you out. Nice!
Solution
Set of tools I wrote is published in GitHub: https://github.com/HQJaTu/RDP-cert-tools
As usual, this is something I'm using for my own systems, so I'll maintain the code and make sure it keeps working in this rapidly evolving world of ours.
Example run
On the target Windows 10 machine, this is how updating my cert would work (as an user with Administrator permissions):
PS C:\> .\update-RDP-cert.ps1 `

  -certPath 'wildcard.example.com.cer' `

  -keyPath 'wildcard.example.com.key'
Output will be:
Loaded certificate with thumbprint 1234567890833251DCCF992ACBD4E63929ABCDEF

Installing certificate 'CN=*.example.com' to Windows Certificate Store

All ok. RDP setup done.
That's it. You're done!
Example run with SSH
As I mentioned earlier, I'm using Let's Encrypt. There is a blog post about how I approach getting the certificates in my Linux wth Acme.sh. There is an obvious gap with getting certs from LE with a Linux and using the cert in Windows 10. Files in question need to be first transferred and then they can be used.
Realistic example command I'd run to first transfer the newly issued LE-cert from my Linux box to be used as RDP-cert would be:
PS C:\> .\get-RDP-cert.ps1 `
  -serverHost server.example.com `
  -serverUser joetheuser `
  -serverAuthPrivateKeyPath id_ecdsa-sha2-nistp521 `
  -remotePrivateKeyPath 'certs/*.example.com/*.example.com.key' `
  -remoteCertificatePath 'certs/*.example.com/*.example.com.cer'
The obvious benefit is a simple single command to get and install an RDP-certificate from Linux to Windows. All of the complexity will be taken out. My script will even clean the temporary files to not leave any private key files floating around.
Finally
Enjoy!
Admins/users: If you enjoy this tool, let me know. Drop me a comment.
Developers: If you love my CNG-import code, feel free to use it in your application. The more people know how it works, the better.
openSUSE Leap 15.2 in-place upgrade
Sunday, July 12. 2020
HyperDrive PRO 8-in-2 firmware upgrade
Tuesday, May 26. 2020
As mentioned in my USB-C article, I'm describing how I managed to upgrade my 8-in-2 firmware WITHOUT installing Boot Camp into my macOS.
Hyper has a support article Screen flickering with Pro? Please check this out. What they ultimately suggest, and what I instantly rejected is:
- Install Boot Camp
- Boot the Mac into Windows 10
- Run the app to do the Hyper 8-in-2 firmware upgrade
- Enjoy flicker-free life!
My mind was targeted to jump directly into step 3 and 4. I attempted a number of things and kept failing. So, I dug out my humility-hat and went to step 2. That one was a great success! For step 1 I would have never gone. That's for sure. I'm not going to taint this precious Mac with a dual-boot.
Constraints
This is the list of restrictions I painfully figured out:
- HyperDrive 8-in-2 has dual USB-C -connector, making it impossible to physically attach to anything else than a MacBook Pro.
- USB-C extension cords do exist. Purchase one (you don't need two) and lift the physical connectivity limitation.
- Provided application,
VmmUpdater.exeis a 32-bit Windows PE executable, more information can be found @ Hybrid Analysis - Firmware upgrade won't work on a random PC having USB-C -port.
VmmUpdater.exewon't detect the Synaptics chip without Apple AMD-drivers.- The driver won't install if your hardware doesn't have a suitable GPU.
- A Mac won't boot from an USB, unless allowed to do so
- A Mac will boot only to a 64-bit operating system, a 32-bit Windows 10 won't work
- A 64-bit Windows 10 installer doesn't have WoW64 in it to emulate a 32-bit Windows
- To actually upgrade the Synaptics chip's firmware, it needs to be in use
- Windows needs to understand the existence of the video-chip
- Windows needs to actually use the video-chip via HDMI to produce output. Any output will do. No picture --> no upgrade.
- Apple keyboard and touchpad will not work in a default Windows 10 installation
- Some of the Windows drivers used by a MBP can be downloaded from Internet automatically, IF you manage to get an internet connection into a Windows 10 running on a Mac.
- Some of the Windows drivers are not available
- macOS cannot write to a NTFS-partition, it can read the data ok
Requirements
- Hardware:
- A HyperDrive 8-in-2 (to state the obvious)
- A MacBook Pro (to state the nearly obvious), I used 2019 model
- A Windows 10 running in a PC (to state the not-so-obvious)
- USB-stick with at least 8 GiB of storage, capable of booting (I think all of them can)
- USB-keyboard, during tinkering your Mac's keyboard won't work at all times. Any USB-keyboard will do.
- HDMI-cable connected to an external monitor.
- Software:
- Synaptics tool and EEPROM-file provided by Hyper.
- Rufus
- Ability to:
- Download files from The Internet
- Execute Rufus on a platform of your choice to write into the USB-stick. I did this on a Windows 10 PC.
- Run Boot Camp Assistant on a macOS, I used macOS 10.15 Catalina.
- Write files into NTFS-formatted USB-stick. Any Windows 10 can do this.
Steps
1. Save a Windows 10 ISO-image into USB-stick as Windows to Go
Option: You can do this as a second thing.
Windows to Go, that's something not many have used nor ever heard. It's already obsoleted by Microsoft, but seems to work ok. The general idea is to create an USB-bootable Windows you can run at any computer.
That's definitely something I'd love to use for this kind of upgrade!
The easiest way of injecting a Windows 10 ISO-image into USB in a suitable format is Rufus. Go to https://rufus.ie/ and get it. It's free (as speech)!
GPT-partition table is a critical one make sure to choose it. These are the options I had:
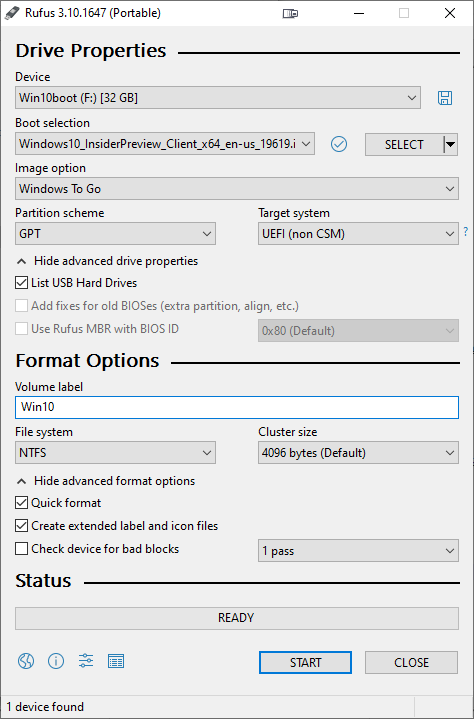
Warning: The process is slow. Writing image with Rufus will take a long time. Much longer than simply copying the bytes to USB.
2. Download Boot Camp support files
Option: You can do this first.
Recent macOS have limited Boot Camp Assistant features. Older ones could do much more, but modern versions can only Download Windows Support Software (it's in the Action-menu). Wait for the 1+ GiB download to complete.
3. Transfer files to USB-stick
Warning: The stick is formatted as NTFS. A Mac won't write into it. You need to first transfer the files into a Windows, and use the Windows to write the files into the USB.
Transfer the WindowsSupport\ folder downloaded by Boot Camp Assistant to the USB-stick prepared earlier. Subdirectory or not doesn't make a difference, I simply copied the directory into root of the USB-drive.
Also transfer the files from Hyper support article https://hypershop.zendesk.com/hc/en-us/articles/360038378871-Screen-flickering-with-Pro-Please-check-this-out-.
Note: Only the .exe and .eeprom are needed, I skipped the .docx as they're not needed during the upgrade.
After successful transfer, you won't need a Windows PC anymore. All the next steps are on a Mac.
4. Enable Mac USB-booting
Study Apple support article HT208198 About Startup Security Utility.
You need to shutdown your Mac. Then plant your fingers onto Command and r keys, put the power on and then wait. Apple logo will appear, then a white progress bar will appear. You can release the Command-r at that point. If you'll be using an encrypted hard drive like I, you'll need to know a valid user on that Mac and enter that user's password to be allowed into Startup Security Utility.
The choices you need to have are:
- Secure boot: No security
- External boot: Allow booting from external or removable media is enabled
This is how Parallels would depict the settings in their KB-article 124579 How to allow Mac to boot from external media:
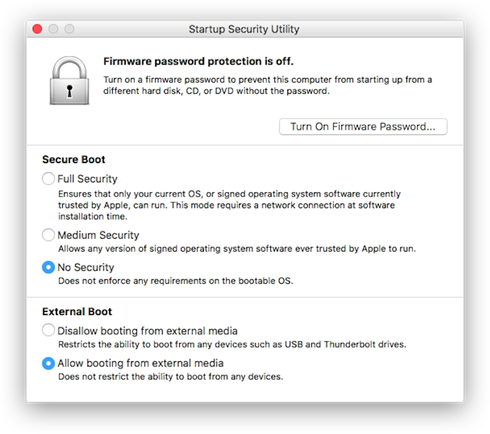
(Thanks Parallels for the pic!)
Note:
After you're done upgrading Synaptics firmware, you can go back to recovery, Startup Security Utility and put the settings back to higher security. For the one-shot upgrade the settings need to be at max. insecure settings.
5. Boot Windows 10 from USB
When you reboot a Mac, plant your finger on Option (some keyboards state Alt) key and wait. Pretty soon a boot menu will appear.
If you had the USB-stick already inserted, it will be displayed. If you didn't, this is your que to insert your Hyper 8-in-2. The Windows 10 USB can be inserted into the HyperDrive, your Mac will boot from there ok.
Your choice is to go for EFI Boot and wait for Windows 10 logo to appear.
Congrats! Now you're heading towards a Windows that won't respond to your keyboard nor touchpad.
6. Establish Windows to Go functionality
Make sure you have an USB keyboard available. This entire process can be done without Mac's own keyboard, it's just your own preference how you want to approach this. Getting the keyboard to work requires a keyboard, success is measured only on results. Make smart choices there!
If you can get the Windows 10 to connect to internet, that will solve some problems with missing drivers as they can be downloaded from a Microsoft driver repository. For Internet access, I used an USB-dongle to establish a Wi-Fi connection. Doing that requires selecting the correct Access Point and entering its password. On a machine without keyboard or mouse that WILL be difficult! Ultimately both the Apple keyboard and touchpad should start working and external keyboard won't be needed.
Note: The drivers for both are in WindowsSupport downloaded by Boot Camp Assistant. If you can point Windows Device Manager to load driver upgrades from there.
Warning!
Your Windows to Go will create a massive hiberfil.sys to enable hibernation. This can be a problem as typically the hibernate-file will be sized 75% of your RAM. This particular Mac has lots of RAM and the USB-stick would never be able to store such a file. So, eventually you're likely to run out of storage space. That is harmful, but can be easily remediated.
To fix, run command:
powercfg /hibernate off
Now the massive file is gone. Next, establish proper video. Your Windows Device Manager will look something like this:
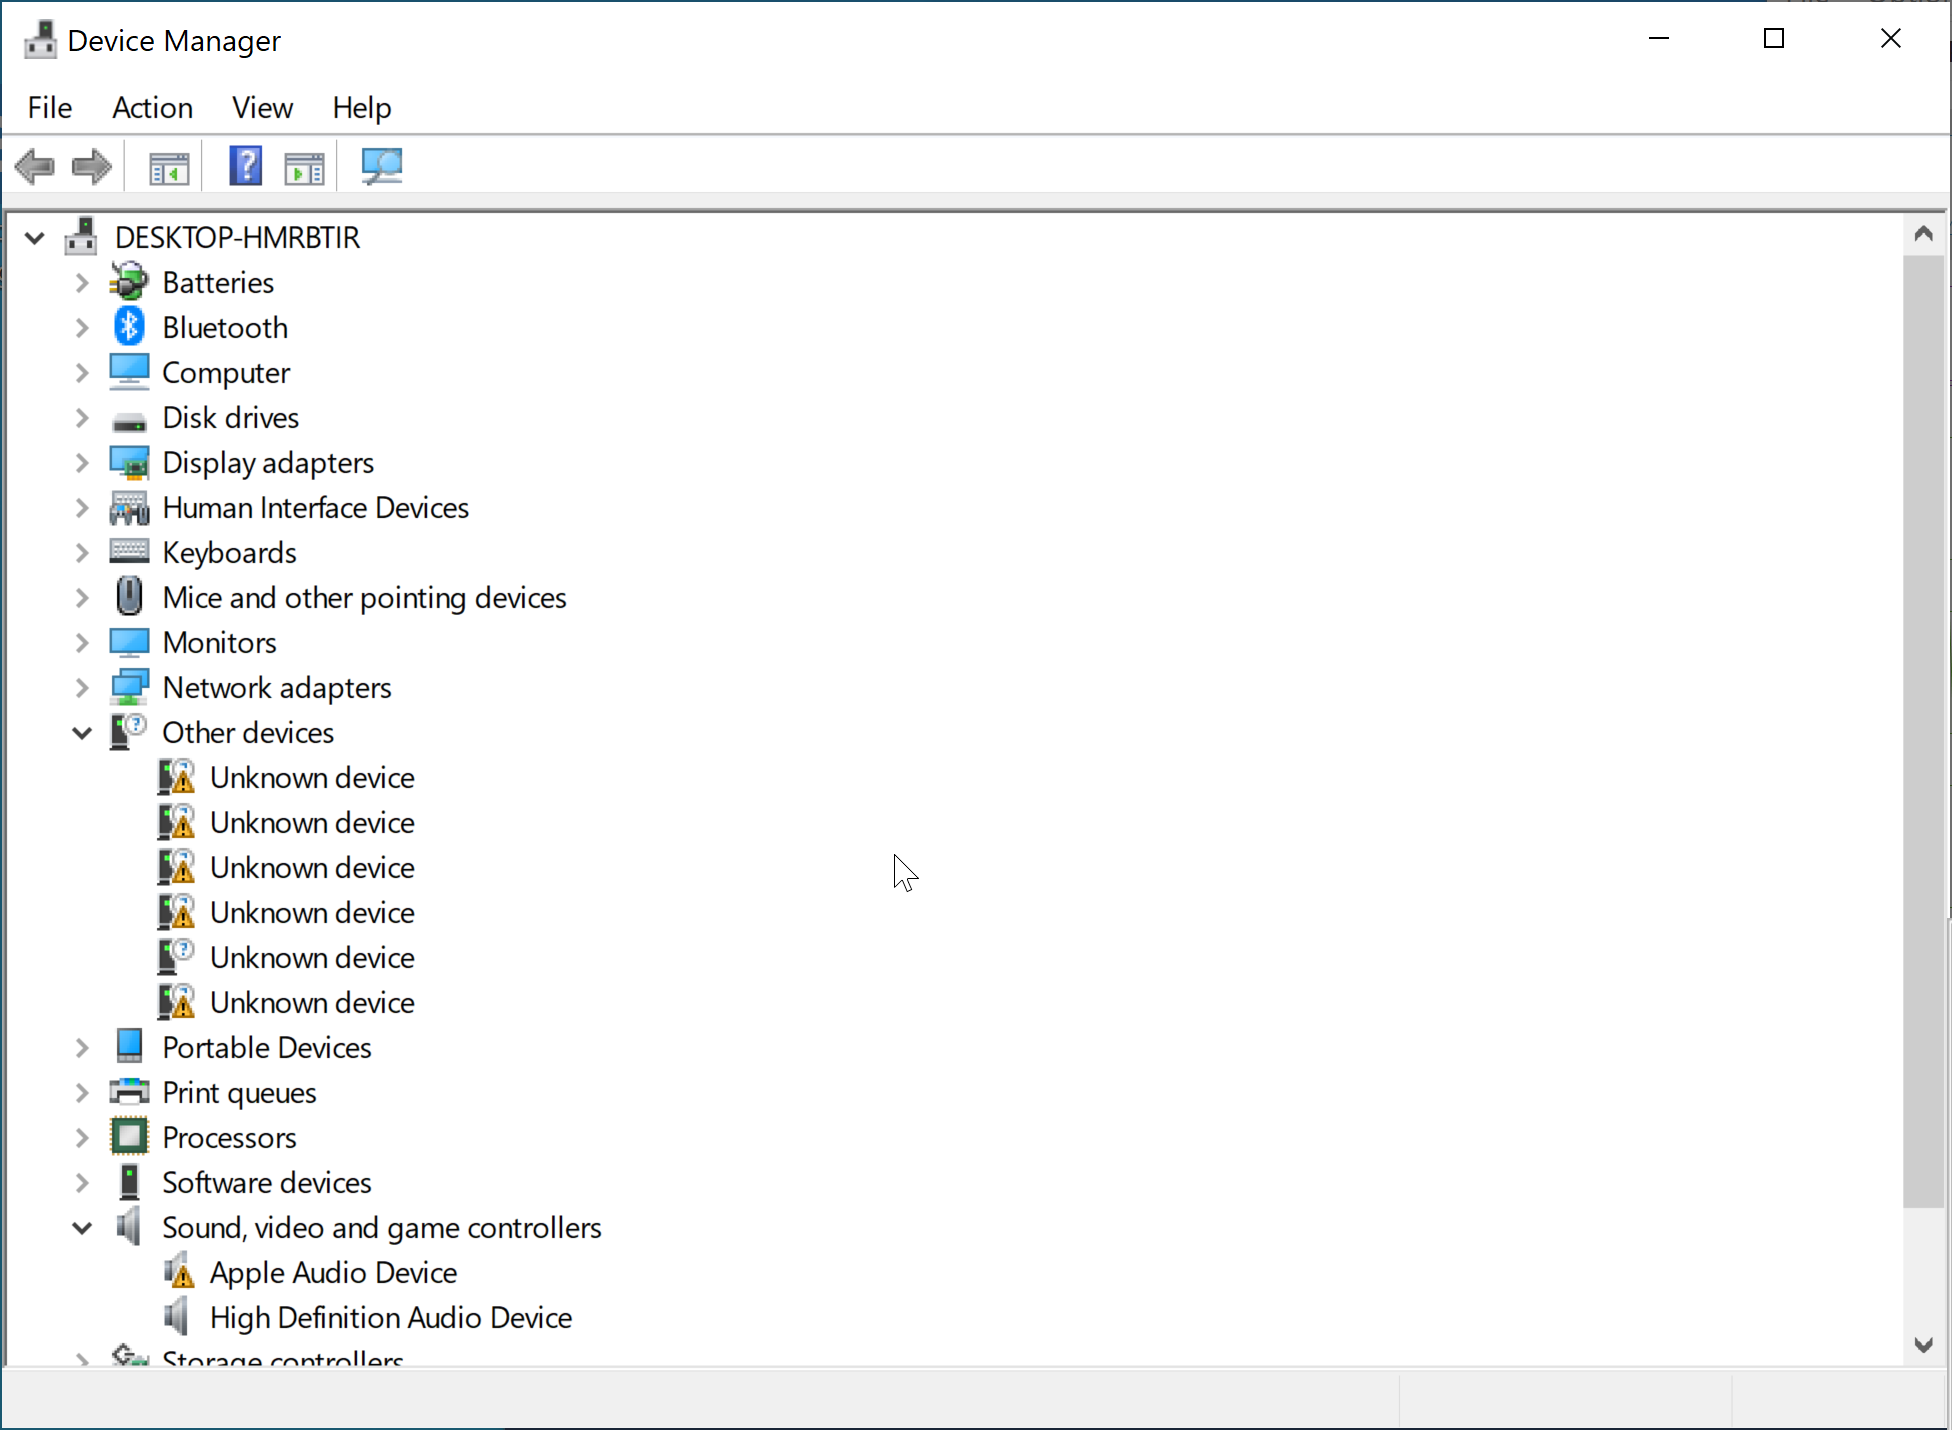
There are bunch of device drivers missing. The most critical one is for GPU. I tried running WindowsSupport\setup.exe, but it never progressed and I simply didn't do that at all. Instead, I executed WindowsSupport\BootCamp\Drivers\AMD\AMDGraphics\setup.exe which enabled proper video to be displayed.
7. Go upgrade Synaptics firmware
All the hard work only for this! Make sure your Hyper 8-in-2 has HDMI-cable connected and monitor will display Windows 10 in it. If you don't have that, when executing the VmmUpdater.exe an error will display:
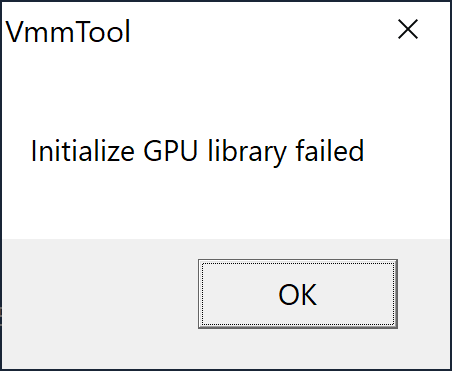
VmmTool: Initialize GPU library failed.
Also different VmmTool error variants can occur. If your Windows will detect the monitor and display video, then you're set!
When VmmTool will display current firmware information, you're golden!

Initially my 8-in-2 had firmware version 3.12.105.
Select the .eeprom file and a progress bar will indicate:
![]()
Running the upgrade won't take long. Something like 30 seconds or so. When upgrade is done, it will be indicated:
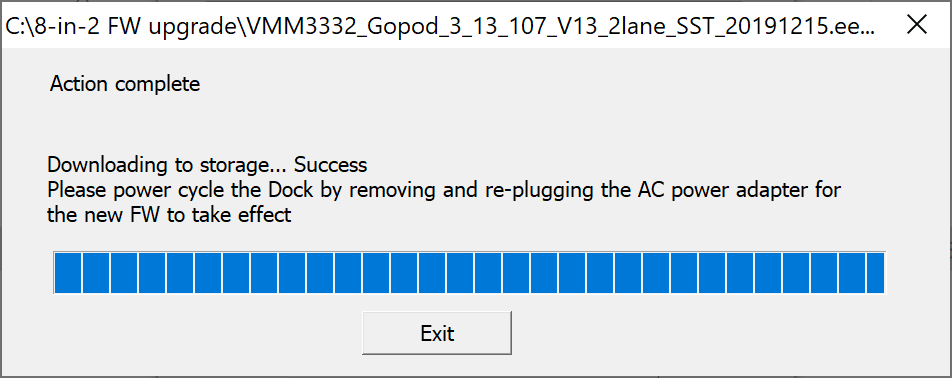
At this point, yank the 8-in-2 out of Mac and make sure you don't have USB-C power connected to it. The general idea is to power-cycle the recently updated Synaptics chip. When done, put everything back and run VmmUpdater.exe again.
This time it will indicate the new firmware version:
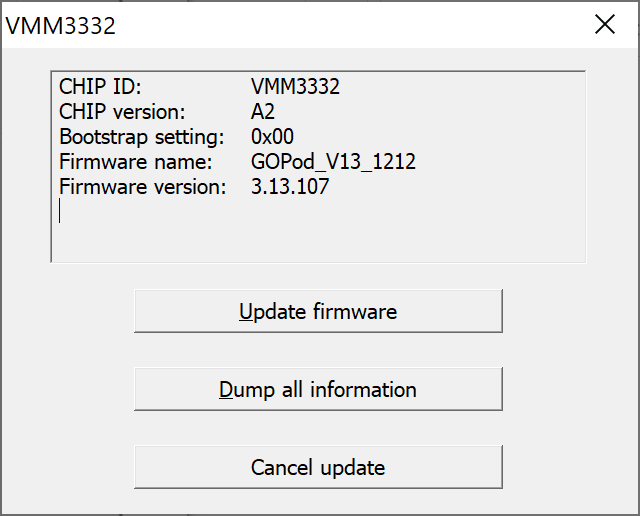
The version 3.12.105 got bumped into 3.13.107. Nice! Hopefully it will do the trick.
8. Boot into macOS and test
This is it. Will it work?
In my case it did. When my Mac wakes up, a single blink will happen in the external display, but no flickering or other types of annoyances.
Done! Mission accomplished!
(phew. that was a lot of work for a simple upgrade)
USB-C Video adapters for MacBook Pro
Monday, May 25. 2020
In professional life, I stopped being a Windows-guy and went back being a Mac-man. The tool-of-trade provided by me is a MacBook Pro 2019. Those new Macs are notorius for having not-so-many ports. My Mac has two (2). Both are USB-C. In my previous MBP (that was a 2014 model), there were ports all over the left side and a bonus USB on right side.
The problem remains: How to hook up my external monitor to increase my productivity by the macigal 30%? Actually, I believe any developer will benefit even more by having a lot of display real estate on his/hers desk.
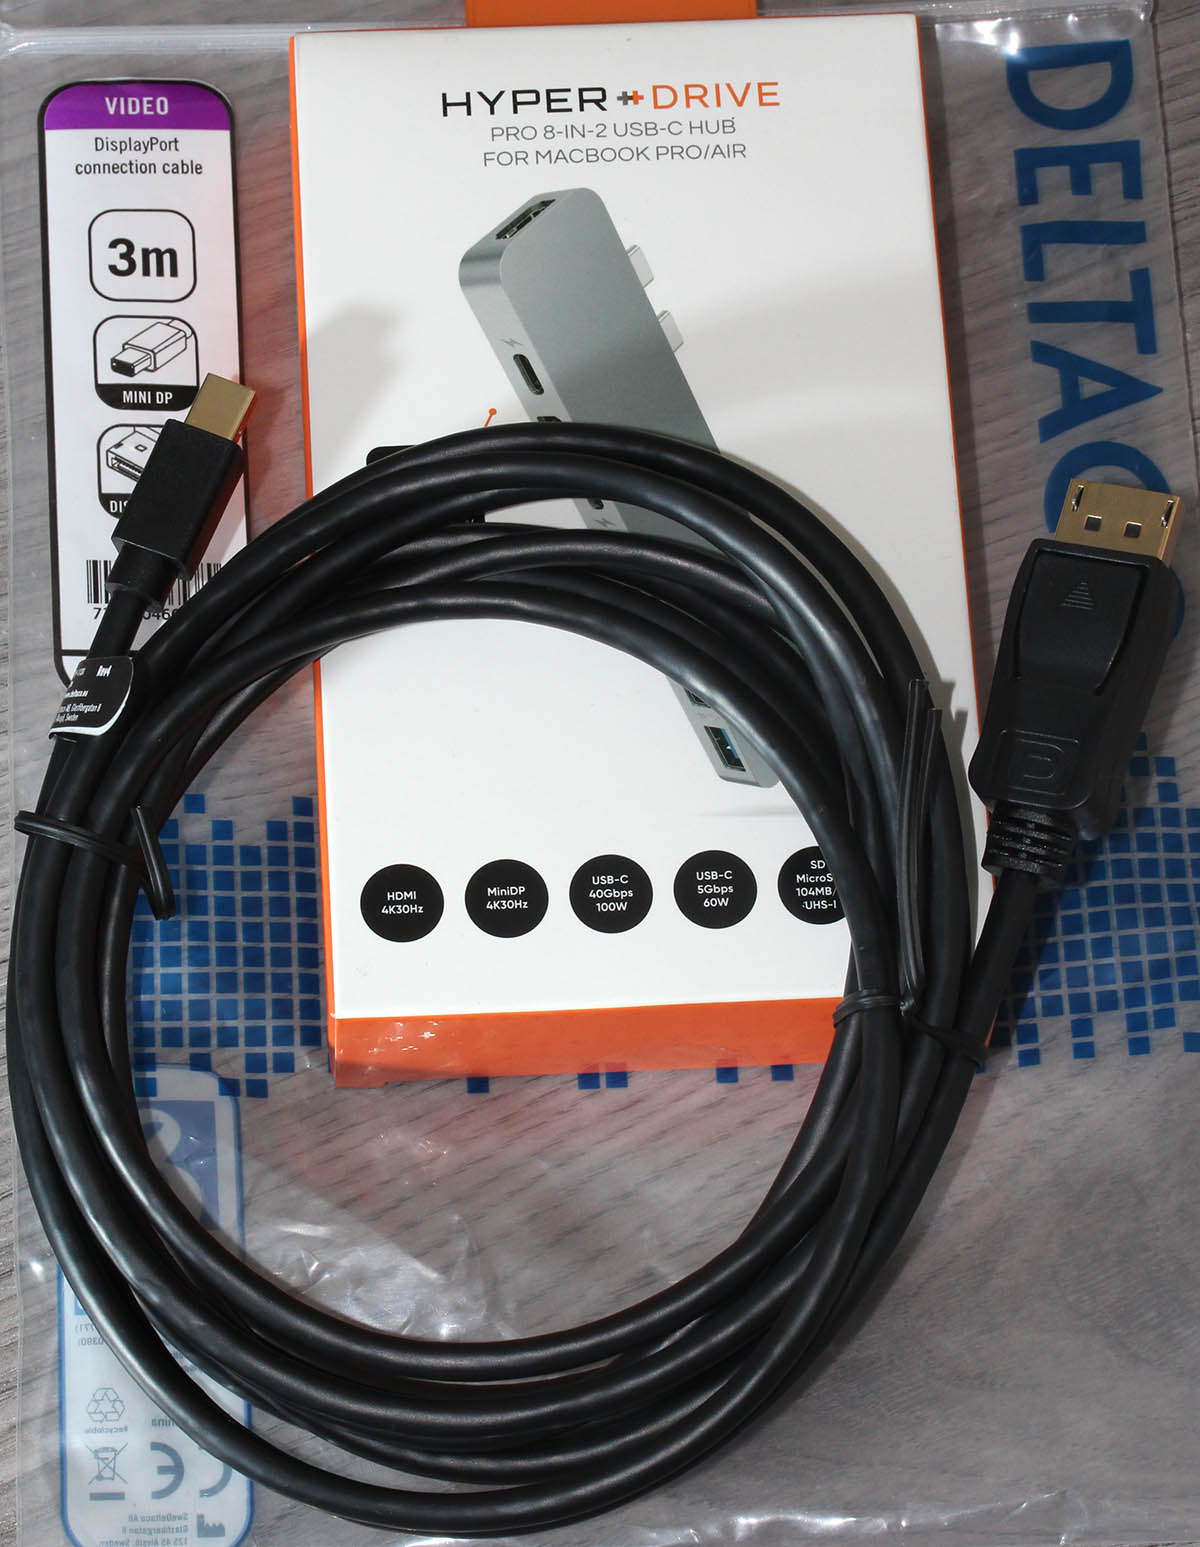
So, new Mac, new toys needed for it. I had one USB-C to DVI -converter before, but for this Mac, I went on-line shopping to get the good stuff:
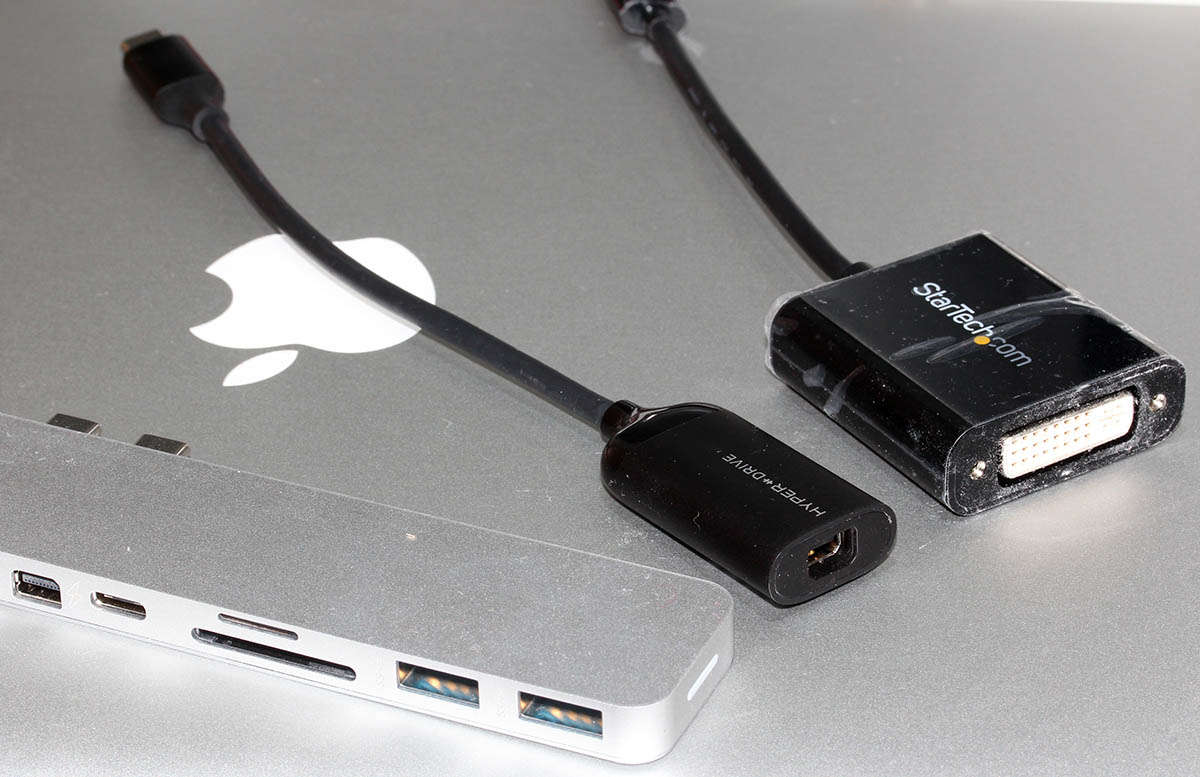
From left to right:
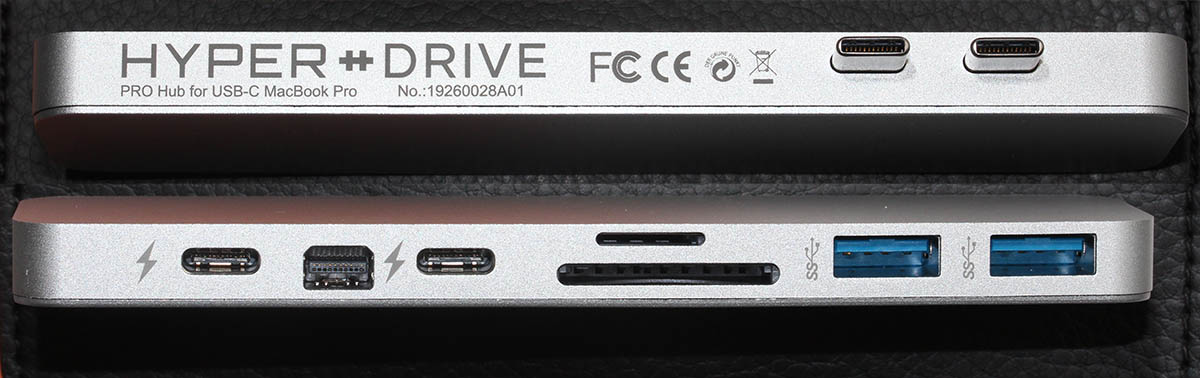
- HyperDrive PRO 8-in-2: A pricey alternative offering a lot of connectivity, disappointing initial quality.
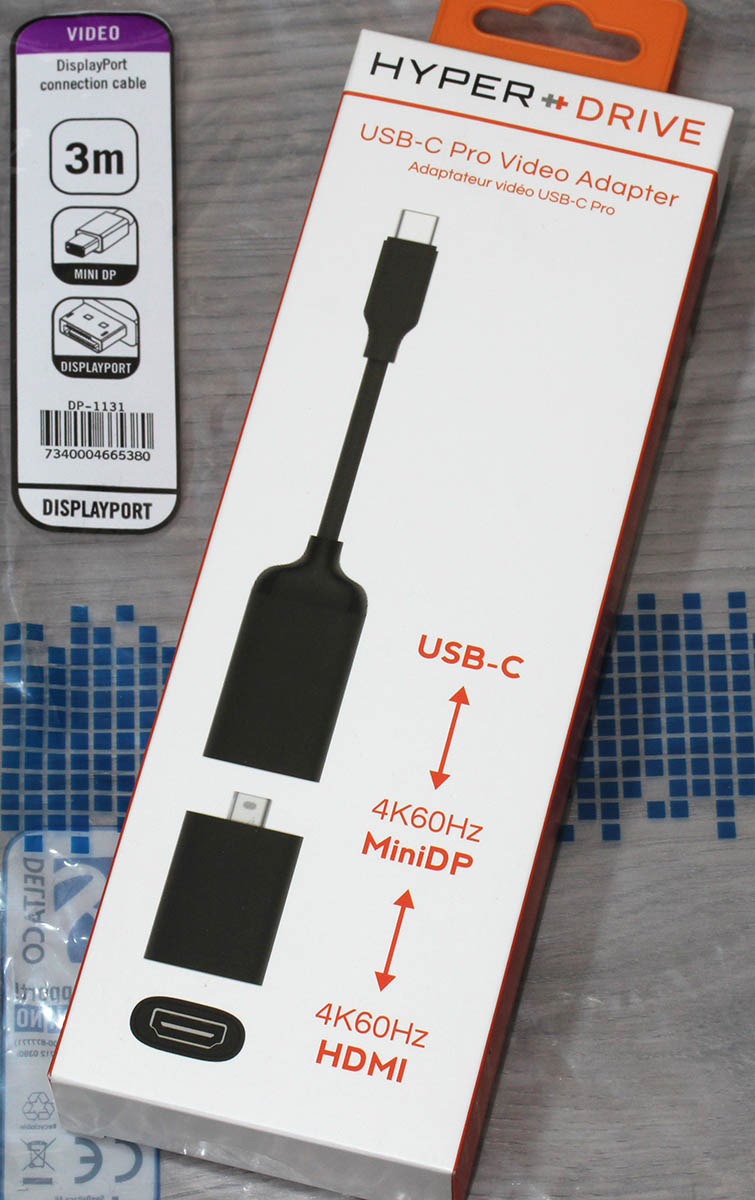
- HyperDrive USB-C Pro Video: An already obsoleted product. Small and does the job. This is my recommendation!
- No-name StarTech.Com CDP2DVI: Cheap thing working perfectly on a Lenovo PC. Unusable with a Mac!
HyperDrives:
Obsoleted HyperDrive shop screenshot:

The pricey alternative looks like this (on top of a complimentary leather pouch):
Cheap no-name one won't even blink in a MBP. The simple HyperDrive works like a charm! Mac sees it and monitor auto-detects the signal. The expensive one blinks when connected to a Mac. It blinks a lot. All the other ports work perfectly, but HDMI and mini-DP not-so-much. Hyper has a support article about 8-in-2- flickering. Lots of discussion in StackExchange about Apple being picky about cables and converters, examples: Dual monitor flickering: the secondary monitor does the flicker and External monitor flicker / signal loss. With the HyperDrive fix, I'll write an another post about the suggested firmware upgrade, it's complicated enough to deserve an own topic.
For me, the expensive HyperDrive works as a tiny docking-station. I have the USB-C charger connected to it among monitor cable. When I want to roam free of cables, all I have to do is detach the dual-USB-C dongle and that's it! Done. Mobility solved.
Final words:
With a Mac, do a lot of research beforehand and choose carefully, or alternatively make sure you'll get a full refund for your doesn't-work-in-my-Mac adapter.

